key battery CHEVROLET EPICA 2005 1.G Owners Manual
[x] Cancel search | Manufacturer: CHEVROLET, Model Year: 2005, Model line: EPICA, Model: CHEVROLET EPICA 2005 1.GPages: 340, PDF Size: 2.19 MB
Page 68 of 340
A thick layer of additional material such as a blanket, or
aftermarket equipment such as seat covers, seat
heaters and seat massagers can affect how well the
passenger sensing system operates. Remove any
additional material from the seat cushion before
reinstalling or securing the child restraint or small
occupant. You may want to consider not using seat
covers or other aftermarket equipment if your vehicle
has the passenger sensing system. SeeAdding
Equipment to Your Airbag-Equipped Vehicle on
page 1-63for more information about modifications that
can affect how the system operates.Servicing Your Airbag-Equipped
Vehicle
Airbags affect how your vehicle should be serviced.
There are parts of the airbag system in several places
around your vehicle. Your dealer and the service manual
have information about servicing your vehicle and the
airbag system. To purchase a service manual, see
Service Publications Ordering Information on page 7-11.
{CAUTION:
For up to 10 seconds after the ignition key is
turned off and the battery is disconnected, an
airbag can still in�ate during improper service.
You can be injured if you are close to an
airbag when it in�ates. Avoid yellow
connectors. They are probably part of the
airbag system. Be sure to follow proper
service procedures, and make sure the person
performing work for you is quali�ed to do so.
The airbag system does not need regular maintenance.
1-62
Page 74 of 340
Remote Keyless Entry System
The keyless entry system operates on a radio frequency
subject to Federal Communications Commission (FCC)
Rules and with Industry Canada.
This device complies with Part 15 of the FCC Rules.
Operation is subject to the following two conditions:
1. This device may not cause interference.
2. This device must accept any interference received,
including interference that may cause undesired
operation of the device.
This device complies with RSS-210 of Industry Canada.
Operation is subject to the following two conditions:
1. This device may not cause interference.
2. This device must accept any interference received,
including interference that may cause undesired
operation of the device.
Changes or modifications to this system by other than
an authorized service facility could void authorization to
use this equipment.At times you may notice a decrease in range. This is
normal for any remote keyless entry system. If the
transmitter does not work or if you have to stand closer
to your vehicle for the transmitter to work, try this:
•Check the distance. You may be too far from your
vehicle. You may need to stand closer during
rainy or snowy weather.
•Check the location. Other vehicles or objects may
be blocking the signal. Take a few steps to the
left or right, hold the transmitter higher, and
try again.
•Check to determine if battery replacement is
necessary. See “Battery Replacement” under
Remote Keyless Entry System Operation on
page 2-5.
•If you are still having trouble, see your dealer or a
qualified technician for service.
2-4
Page 76 of 340
Battery Replacement
Under normal use, the battery in your remote keyless
entry transmitter should last about two years.
You can tell the battery is weak if the LED light fails to
light or if the transmitter will not work at the normal
range in any location. If you have to get close to your
vehicle before the transmitter works, it is probably
time to change the battery.
Notice:When replacing the battery, use care not to
touch any of the circuitry. Static from your body
transferred to these surfaces may damage the
transmitter.To replace the battery in the remote keyless entry
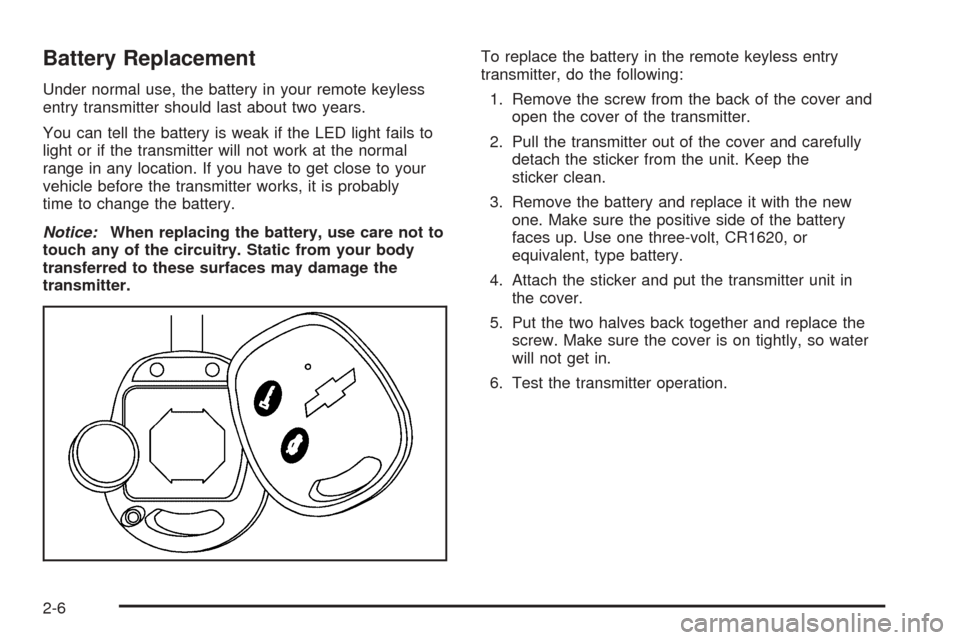
transmitter, do the following:
1. Remove the screw from the back of the cover and
open the cover of the transmitter.
2. Pull the transmitter out of the cover and carefully
detach the sticker from the unit. Keep the
sticker clean.
3. Remove the battery and replace it with the new
one. Make sure the positive side of the battery
faces up. Use one three-volt, CR1620, or
equivalent, type battery.
4. Attach the sticker and put the transmitter unit in
the cover.
5. Put the two halves back together and replace the
screw. Make sure the cover is on tightly, so water
will not get in.
6. Test the transmitter operation.
2-6
Page 88 of 340
ON:This is the position to which the switch returns
after you start your engine and release the key.
The switch stays in ON when the engine is running. But
even when the engine is not running, you can use
ON to operate your electrical accessories, and to display
some instrument panel warning lights.
START:This position starts the engine. When the
engine starts, release the key. The switch will return to
ON for normal driving. Do not turn the key to START
if the engine is running.
Even if the engine is not running, ACC and ON allow
you to operate electrical accessories, such as the radio.
Starting Your Engine
Move your shift lever to PARK (P) or NEUTRAL (N).
The engine will not start in any other position — that is
a safety feature. To restart when you are already
moving, use NEUTRAL (N) only.
Notice:Shifting into PARK (P) with the vehicle
moving could damage the transaxle. Shift into
PARK (P) only when your vehicle is stopped.
1. With your foot off the accelerator pedal, turn the
ignition key to START. When the engine starts,
let go of the key. The idle speed will go down as the
engine gets warm.Notice:Holding your key in START for longer than
15 seconds at a time will cause your battery to
be drained much sooner. And the excessive heat
can damage your starter motor. Wait about
15 seconds between each try to help avoid draining
your battery or damaging your starter.
2. If the engine does not start within 10 seconds, hold
your key in START for about 10 seconds at a time
until the engine starts. Wait about 15 seconds
between each try.
When your engine has run for about 10 seconds to
warm up, your vehicle is ready to be driven. Do
not race your engine when it is cold.
If the weather is below freezing (32°F or 0°C), let
the engine run for a few minutes to warm up.
3. If your engine still will not start, or starts but then
stops, it could be flooded with too much gasoline.
Try pushing your accelerator pedal all the way to the
floor and holding it there as you hold the key in
START for about three seconds. If the vehicle starts
briefly but then stops again, do the same thing.
This time keep the pedal down for five or
six seconds to clear the extra gasoline from the
engine. After waiting about 15 seconds, repeat the
normal starting procedure.
2-18
Page 117 of 340
Exterior Lamps
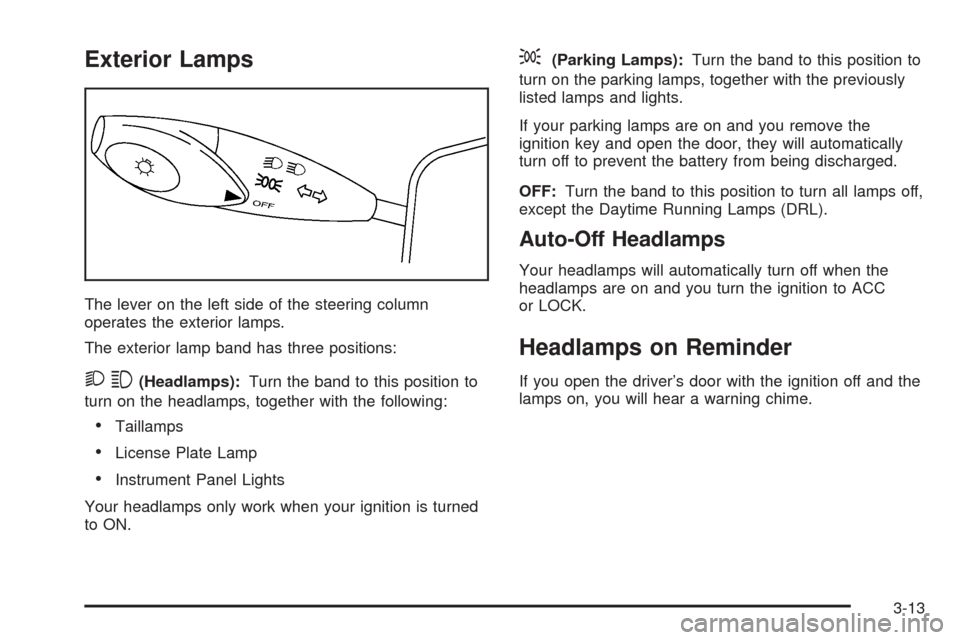
The lever on the left side of the steering column
operates the exterior lamps.
The exterior lamp band has three positions:
23(Headlamps):Turn the band to this position to
turn on the headlamps, together with the following:
•Taillamps
•License Plate Lamp
•Instrument Panel Lights
Your headlamps only work when your ignition is turned
to ON.
;(Parking Lamps):Turn the band to this position to
turn on the parking lamps, together with the previously
listed lamps and lights.
If your parking lamps are on and you remove the
ignition key and open the door, they will automatically
turn off to prevent the battery from being discharged.
OFF:Turn the band to this position to turn all lamps off,
except the Daytime Running Lamps (DRL).
Auto-Off Headlamps
Your headlamps will automatically turn off when the
headlamps are on and you turn the ignition to ACC
or LOCK.
Headlamps on Reminder
If you open the driver’s door with the ignition off and the
lamps on, you will hear a warning chime.
3-13
Page 119 of 340
Fog Lamps
If your vehicle has this feature, use your fog lamps for
better visibility in foggy or misty conditions.
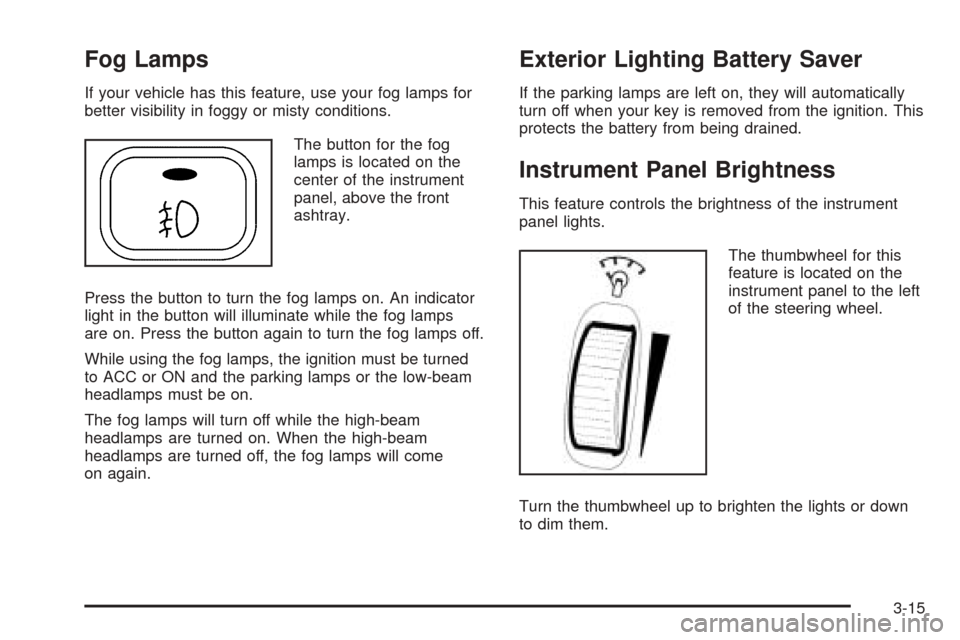
The button for the fog
lamps is located on the
center of the instrument
panel, above the front
ashtray.
Press the button to turn the fog lamps on. An indicator
light in the button will illuminate while the fog lamps
are on. Press the button again to turn the fog lamps off.
While using the fog lamps, the ignition must be turned
to ACC or ON and the parking lamps or the low-beam
headlamps must be on.
The fog lamps will turn off while the high-beam
headlamps are turned on. When the high-beam
headlamps are turned off, the fog lamps will come
on again.
Exterior Lighting Battery Saver
If the parking lamps are left on, they will automatically
turn off when your key is removed from the ignition. This
protects the battery from being drained.
Instrument Panel Brightness
This feature controls the brightness of the instrument
panel lights.
The thumbwheel for this
feature is located on the
instrument panel to the left
of the steering wheel.
Turn the thumbwheel up to brighten the lights or down
to dim them.
3-15
Page 281 of 340
Fuses Usage
CLSTR
AUTO A/CInstrument Panel Cluster, Automatic
Temperature Control, Daytime
Running Lamps (DRL)
LTR Cigarette Lighter, Glove Box Lamp
RADIO Radio
CLKClock, Dome Lamp, Key
Interlock Unit
WSWA Windshield Washer
WPR Windshield Wiper
HTD/MIROutside Rearview Mirror (OSRVM),
Rear Glass Defogger Switch
RADIO
CRUISERadio Battery Positive Voltage,
Cruise
HTD/SEATHeating Mat, Accessory Power
Outlet
AUTO A/C
CLSTRAutomatic Temperature Control,
Cluster
DLC Data Link Connector (DLC)Engine Compartment Fuse Block
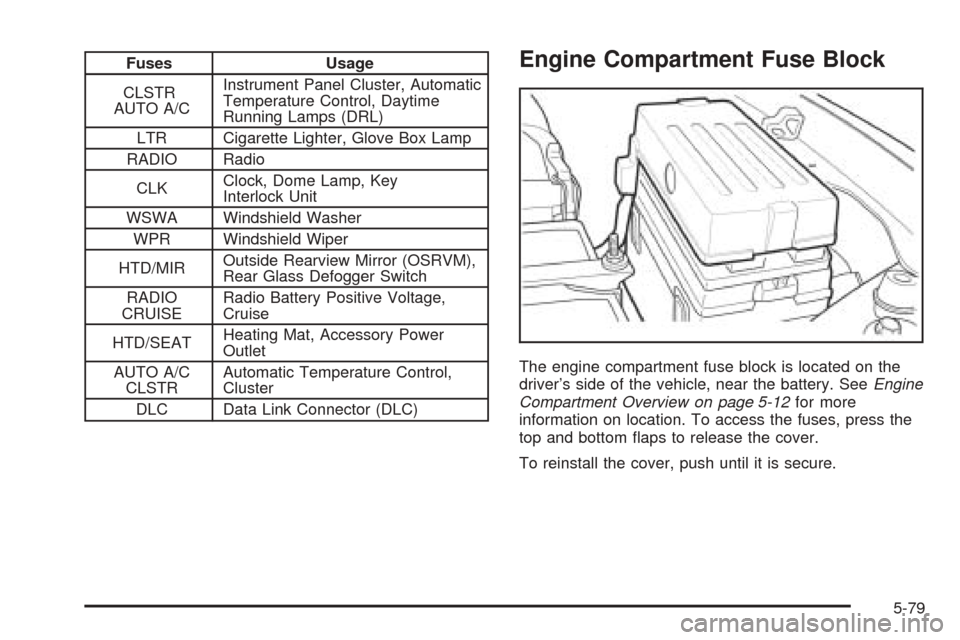
The engine compartment fuse block is located on the
driver’s side of the vehicle, near the battery. SeeEngine
Compartment Overview on page 5-12for more
information on location. To access the fuses, press the
top and bottom flaps to release the cover.
To reinstall the cover, push until it is secure.
5-79
Page 334 of 340
Heater...................................................3-19, 3-22
Highbeam On Light.........................................3-45
Highway Hypnosis...........................................4-22
Hill and Mountain Roads..................................4-22
Hold Mode Light.............................................3-39
Hood
Checking Things Under................................5-11
Release.....................................................5-11
Horn............................................................... 3-6
How to Use This Manual...................................... ii
How to Wear Safety Belts Properly...................1-15
I
Ignition Positions.............................................2-17
Immobilizer....................................................2-15
Immobilizer Operation......................................2-16
Infants and Young Children, Restraints...............1-30
Inflation -- Tire Pressure..................................5-52
Inspection
Brake System.............................................6-24
Engine Cooling System................................6-23
Exhaust System..........................................6-23
Fuel System...............................................6-23
Part C - Periodic Maintenance.......................6-23
Steering, Suspension and Front Drive
Axle Boot and Seal..................................6-23
Throttle System...........................................6-24
Instrument PanelInstrument Panel (cont.)
Brightness..................................................3-15
Cluster.......................................................3-30
Overview..................................................... 3-4
J
Jump Starting.................................................5-35
K
Keyless Entry System....................................... 2-4
Keys............................................................... 2-2
L
Labelling, Tire Sidewall....................................5-47
Lamps
Dome........................................................3-16
Exterior......................................................3-13
Exterior Lighting Battery Saver......................3-15
Fog ...........................................................3-15
Map ..........................................................3-16
LATCH System
Child Restraints...........................................1-39
Securing a Child Restraint Designed for
the LATCH System...................................1-42
6