mirror CHEVROLET EQUINOX 2006 1.G Owners Manual
[x] Cancel search | Manufacturer: CHEVROLET, Model Year: 2006, Model line: EQUINOX, Model: CHEVROLET EQUINOX 2006 1.GPages: 382, PDF Size: 2.32 MB
Page 1 of 382
Seats and Restraint Systems........................... 1-1
Front Seats
............................................... 1-2
Rear Seats
..............................................1-10
Safety Belts
.............................................1-12
Child Restraints
.......................................1-30
Airbag System
.........................................1-55
Restraint System Check
............................1-66
Features and Controls..................................... 2-1
Keys
........................................................ 2-2
Doors and Locks
....................................... 2-6
Windows
.................................................2-11
Theft-Deterrent Systems
............................2-13
Starting and Operating Your Vehicle
...........2-15
Mirrors
....................................................2-27
OnStar
®System
......................................2-32
Storage Areas
.........................................2-34
Sunroof
..................................................2-41
Instrument Panel............................................. 3-1
Instrument Panel Overview
.......................... 3-4
Climate Controls
......................................3-18
Warning Lights, Gages, and Indicators
........3-23
Audio System(s)
.......................................3-38Driving Your Vehicle....................................... 4-1
Your Driving, the Road, and Your Vehicle
..... 4-2
Towing
...................................................4-36
Service and Appearance Care.......................... 5-1
Service
..................................................... 5-3
Fuel
......................................................... 5-5
Checking Things Under the Hood
...............5-10
All-Wheel Drive
........................................5-39
Bulb Replacement
....................................5-41
Windshield Wiper Blade Replacement
.........5-45
Tires
......................................................5-47
Appearance Care
.....................................5-74
Vehicle Identi�cation
.................................5-83
Electrical System
......................................5-84
Capacities and Speci�cations
.....................5-89
Maintenance Schedule..................................... 6-1
Maintenance Schedule
................................ 6-2
Customer Assistance and Information.............. 7-1
Customer Assistance and Information
........... 7-2
Reporting Safety Defects
...........................7-13
Index................................................................ 1
2006 Chevrolet Equinox Owner ManualM
Page 75 of 382
Keys...............................................................2-2
Remote Keyless Entry System.........................2-3
Remote Keyless Entry System Operation...........2-4
Doors and Locks.............................................2-6
Door Locks....................................................2-6
Power Door Locks..........................................2-7
Delayed Locking.............................................2-7
Automatic Door Lock.......................................2-8
Programmable Automatic Door Unlock...............2-8
Rear Door Security Locks................................2-8
Lockout Protection..........................................2-9
Liftgate........................................................2-10
Windows........................................................2-11
Power Windows............................................2-12
Sun Visors...................................................2-12
Theft-Deterrent Systems..................................2-13
Content Theft-Deterrent.................................2-13
Passlock
®....................................................2-15
Starting and Operating Your Vehicle................2-15
New Vehicle Break-In....................................2-15
Ignition Positions..........................................2-16
Retained Accessory Power (RAP)...................2-16
Starting the Engine.......................................2-17
Engine Coolant Heater..................................2-18
Automatic Transaxle Operation.......................2-19
Parking Brake..............................................2-22Shifting Into Park (P).....................................2-23
Shifting Out of Park (P).................................2-24
Parking Over Things That Burn.......................2-25
Engine Exhaust............................................2-25
Running the Engine While Parked...................2-26
Mirrors...........................................................2-27
Manual Rearview Mirror.................................2-27
Automatic Dimming Rearview Mirror with
OnStar
®, Compass and Temperature
Display....................................................2-27
Automatic Dimming Rearview Mirror with
Compass and Temperature Display..............2-29
Outside Power Mirrors...................................2-31
Outside Convex Mirrors.................................2-32
OnStar
®System.............................................2-32
Storage Areas................................................2-34
Glove Box...................................................2-34
Cupholder(s)................................................2-34
Coinholder(s)................................................2-35
Center Console Storage Area.........................2-35
Garment Hooks............................................2-35
Luggage Carrier...........................................2-35
Rear Compartment Storage Panel/Cover..........2-38
Table..........................................................2-40
Convenience Net..........................................2-41
Sunroof.........................................................2-41
Section 2 Features and Controls
2-1
Page 86 of 382
Power Windows
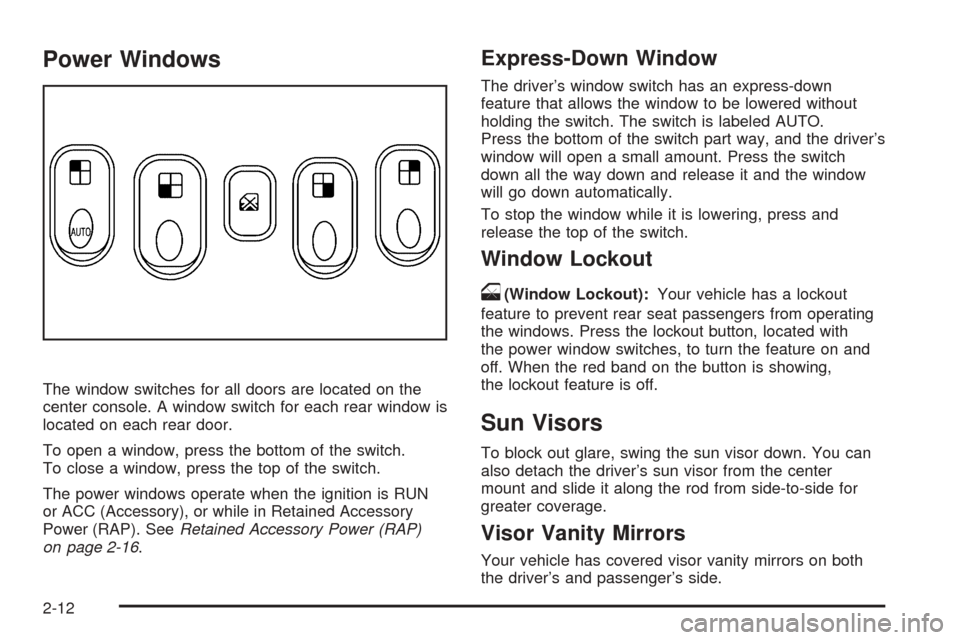
The window switches for all doors are located on the
center console. A window switch for each rear window is
located on each rear door.
To open a window, press the bottom of the switch.
To close a window, press the top of the switch.
The power windows operate when the ignition is RUN
or ACC (Accessory), or while in Retained Accessory
Power (RAP). SeeRetained Accessory Power (RAP)
on page 2-16.
Express-Down Window
The driver’s window switch has an express-down
feature that allows the window to be lowered without
holding the switch. The switch is labeled AUTO.
Press the bottom of the switch part way, and the driver’s
window will open a small amount. Press the switch
down all the way down and release it and the window
will go down automatically.
To stop the window while it is lowering, press and
release the top of the switch.
Window Lockout
o
(Window Lockout):Your vehicle has a lockout
feature to prevent rear seat passengers from operating
the windows. Press the lockout button, located with
the power window switches, to turn the feature on and
off. When the red band on the button is showing,
the lockout feature is off.
Sun Visors
To block out glare, swing the sun visor down. You can
also detach the driver’s sun visor from the center
mount and slide it along the rod from side-to-side for
greater coverage.
Visor Vanity Mirrors
Your vehicle has covered visor vanity mirrors on both
the driver’s and passenger’s side.
2-12
Page 101 of 382
Mirrors
Manual Rearview Mirror
To adjust the angle of the mirror, move the mirror to a
position that allows you see to out of the back window.
To adjust the height of the mirror, adjust the arm
that connects the mirror to the windshield.
To reduce glare from lights behind you, move the lever
toward you to the night position.
Automatic Dimming Rearview Mirror
with OnStar
®, Compass and
Temperature Display
If the vehicle has this feature, an automatic dimming
mirror automatically dims to the proper level to minimize
glare at night from lights behind your vehicle. For more
information about OnStar
®, seeOnStar®System on
page 2-32.
The mirror also includes a dual display in the upper right
corner of the mirror face. The compass reading and the
outside temperature will both appear in the display at the
same time.
Y(On/Off):This is the on/off button.
Automatic Dimming Mirror Operation
The automatic dimming mirror function is turned
on each time the ignition is started. A light near the
on/off button will come on to indicate the automatic
dimming is on.
Press the on/off button for about four seconds to
manually turn the automatic dimming function on or off.
Temperature and Compass Display
Press the on/off button, located to the far left, to cycle
between °F, °C and off.
If the display reads CAL, the compass needs to be
calibrated. For more information, see “Compass
Calibration” later in this section.
If an abnormal temperature reading is displayed for an
extended period of time, please consult your dealer.
Under certain circumstances, especially in idle, an
increase and delay in updating the temperature is
normal.
2-27
Page 102 of 382
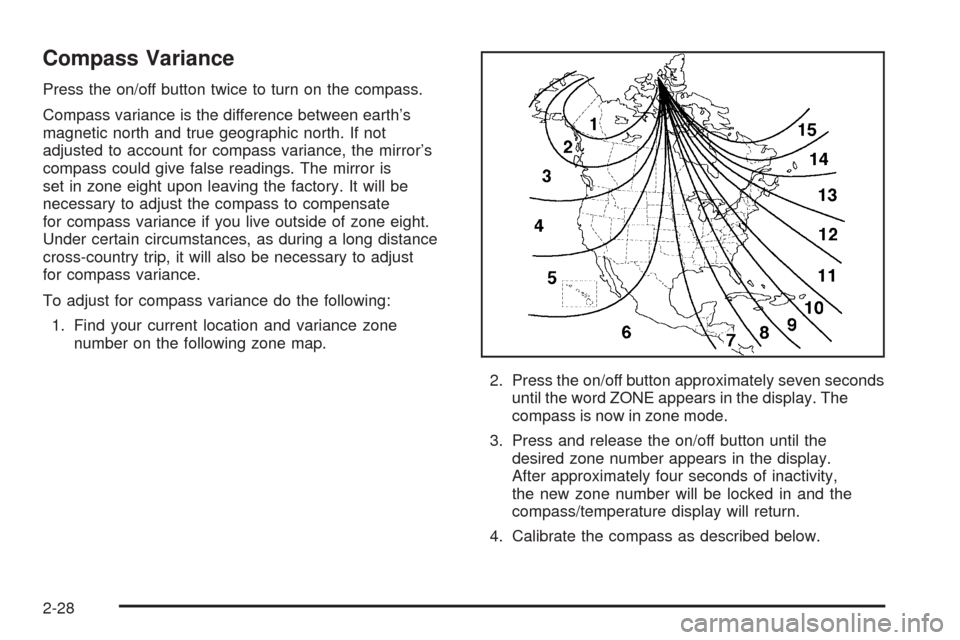
Compass Variance
Press the on/off button twice to turn on the compass.
Compass variance is the difference between earth’s
magnetic north and true geographic north. If not
adjusted to account for compass variance, the mirror’s
compass could give false readings. The mirror is
set in zone eight upon leaving the factory. It will be
necessary to adjust the compass to compensate
for compass variance if you live outside of zone eight.
Under certain circumstances, as during a long distance
cross-country trip, it will also be necessary to adjust
for compass variance.
To adjust for compass variance do the following:
1. Find your current location and variance zone
number on the following zone map.
2. Press the on/off button approximately seven seconds
until the word ZONE appears in the display. The
compass is now in zone mode.
3. Press and release the on/off button until the
desired zone number appears in the display.
After approximately four seconds of inactivity,
the new zone number will be locked in and the
compass/temperature display will return.
4. Calibrate the compass as described below.
2-28
Page 103 of 382
Compass Calibration
The compass may need calibration if one of the
following occurs:
After approximately �ve seconds, the display does
not show a compass heading (N for North, for
example), there may be a strong magnetic �eld
interfering with the compass. Such interference may
be caused by a magnetic antenna mount, magnetic
note pad holder, or a similar magnetic item.
The compass does not display the correct heading
and the compass zone variance is set correctly.
In order to calibrate, CAL must be displayed in the
mirror compass windows. If CAL is not displayed, push
the on/off button for approximately 12 seconds or
until CAL is displayed.
The compass can be calibrated by driving the vehicle
in circles at 5 mph (8 km/h) or less until the display
reads a direction.
Cleaning the Mirror
When cleaning the mirror, use a paper towel or similar
material dampened with glass cleaner. Do not spray
glass cleaner directly on the mirror as that may cause
the liquid cleaner to enter the mirror housing.
Automatic Dimming Rearview Mirror
with Compass and Temperature
Display
If the vehicle has this feature, the automatic dimming
mirror automatically dims to the proper level to minimize
glare at night from lights behind your vehicle.
The mirror also has a dual display in the upper right
corner of the mirror that shows the compass reading and
the outside temperature.
YOn/Off:Press this button to operate the automatic
dimming, compass and temperature features.
Automatic Dimming Mirror Operation
The automatic dimming mirror function is turned on
each time the ignition is started. A light near the on/off
button will come on to indicate the automatic dimming
is on.
If the automatic dimming function is off, press and hold
the on/off button for four seconds to manually turn
the system back on.
2-29
Page 104 of 382
Temperature and Compass Display
Press the on/off button, located in the center, to cycle
between °F, °C and off. If the display reads CAL,
the compass needs to be calibrated. For more
information, see “Compass Calibration” later in this
section.
If an abnormal temperature reading is displayed for an
extended period of time, please consult your dealer.
Under certain circumstances, a delay in updating
the temperature is normal.
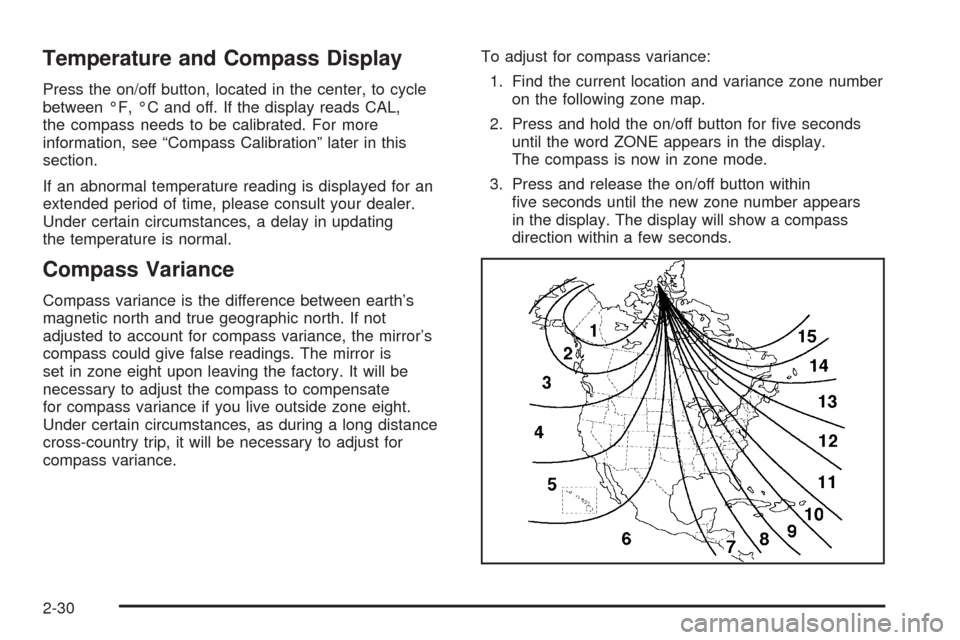
Compass Variance
Compass variance is the difference between earth’s
magnetic north and true geographic north. If not
adjusted to account for compass variance, the mirror’s
compass could give false readings. The mirror is
set in zone eight upon leaving the factory. It will be
necessary to adjust the compass to compensate
for compass variance if you live outside zone eight.
Under certain circumstances, as during a long distance
cross-country trip, it will be necessary to adjust for
compass variance.To adjust for compass variance:
1. Find the current location and variance zone number
on the following zone map.
2. Press and hold the on/off button for �ve seconds
until the word ZONE appears in the display.
The compass is now in zone mode.
3. Press and release the on/off button within
�ve seconds until the new zone number appears
in the display. The display will show a compass
direction within a few seconds.
2-30
Page 105 of 382
Compass Calibration
The compass may need calibration if one of the
following occurs:
If CAL is displayed while driving in the vehicle.
After approximately �ve seconds, the display does
not show a compass heading (N for North, for
example), there may be a strong magnetic �eld
interfering with the compass. Such interference may
be caused by a magnetic antenna mount, magnetic
note pad holder, or a similar magnetic item.
The compass does not display the correct heading
and the compass zone variance is set correctly.
In order to calibrate, CAL must be displayed in the
mirror compass windows. If CAL is not displayed, push
in the on/off button for approximately eight seconds
or until CAL is displayed.
The compass can be calibrated by driving the vehicle
in circles at 5 mph (8 km/h) or less until the display
reads a direction.
Cleaning the Mirror
When cleaning the mirror, use a paper towel or similar
material dampened with glass cleaner. Do not spray
glass cleaner directly on the mirror as that may cause
the liquid cleaner to enter the mirror housing.
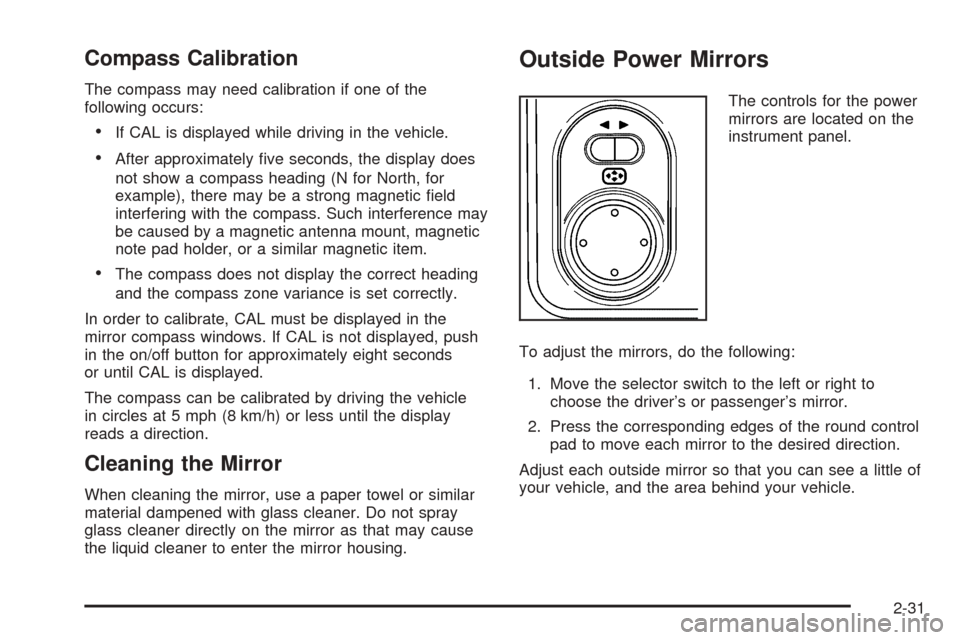
Outside Power Mirrors
The controls for the power
mirrors are located on the
instrument panel.
To adjust the mirrors, do the following:
1. Move the selector switch to the left or right to
choose the driver’s or passenger’s mirror.
2. Press the corresponding edges of the round control
pad to move each mirror to the desired direction.
Adjust each outside mirror so that you can see a little of
your vehicle, and the area behind your vehicle.
2-31
Page 106 of 382
Outside Convex Mirrors
The passenger’s side mirror is convex. A convex
mirror’s surface is curved, creating a wider area of vision
for the driver.
{CAUTION:
A convex mirror can make things (like other
vehicles) look farther away than they really are.
If you cut too sharply into the right lane, you
could hit a vehicle on your right. Check your
inside mirror or glance over your shoulder
before changing lanes.
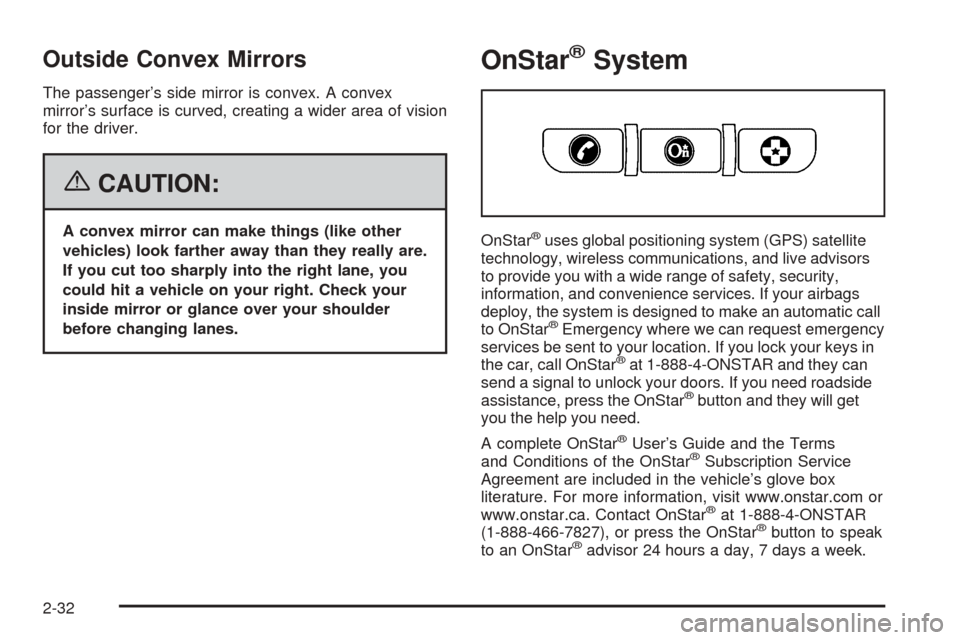
OnStar®System
OnStar®uses global positioning system (GPS) satellite
technology, wireless communications, and live advisors
to provide you with a wide range of safety, security,
information, and convenience services. If your airbags
deploy, the system is designed to make an automatic call
to OnStar
®Emergency where we can request emergency
services be sent to your location. If you lock your keys in
the car, call OnStar
®at 1-888-4-ONSTAR and they can
send a signal to unlock your doors. If you need roadside
assistance, press the OnStar
®button and they will get
you the help you need.
A complete OnStar
®User’s Guide and the Terms
and Conditions of the OnStar®Subscription Service
Agreement are included in the vehicle’s glove box
literature. For more information, visit www.onstar.com or
www.onstar.ca. Contact OnStar
®at 1-888-4-ONSTAR
(1-888-466-7827), or press the OnStar®button to speak
to an OnStar®advisor 24 hours a day, 7 days a week.
2-32
Page 115 of 382
Convenience Net
Your vehicle may have a rear compartment net to
prevent items from rolling under the rear seat.
Your vehicle is also equipped with four tie-down
anchors. Two anchors are located on the side trim,
just behind the rear seat, and the other two are located
on the �oor at the rear of the cargo area.
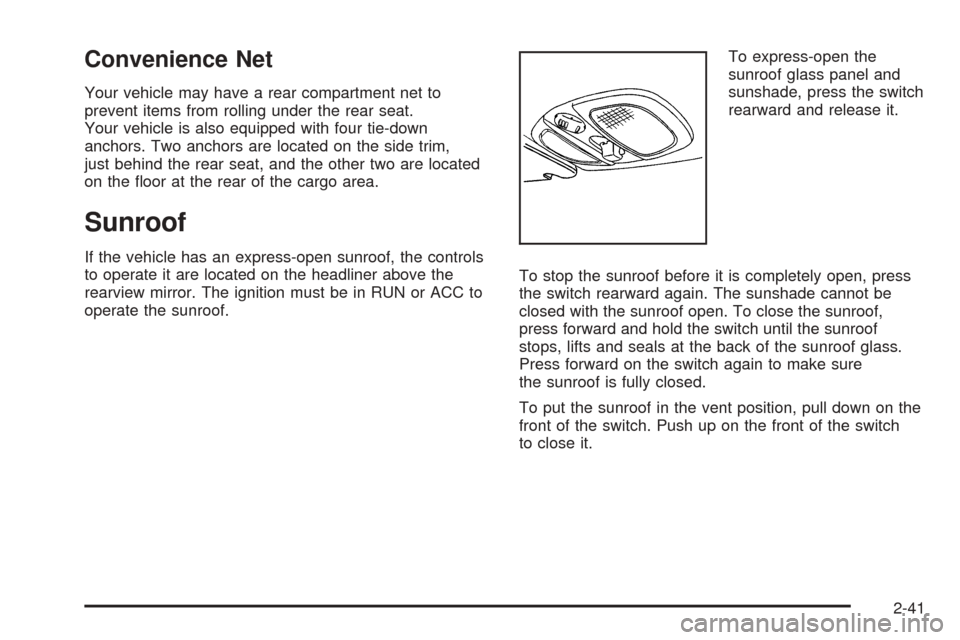
Sunroof
If the vehicle has an express-open sunroof, the controls
to operate it are located on the headliner above the
rearview mirror. The ignition must be in RUN or ACC to
operate the sunroof.To express-open the
sunroof glass panel and
sunshade, press the switch
rearward and release it.
To stop the sunroof before it is completely open, press
the switch rearward again. The sunshade cannot be
closed with the sunroof open. To close the sunroof,
press forward and hold the switch until the sunroof
stops, lifts and seals at the back of the sunroof glass.
Press forward on the switch again to make sure
the sunroof is fully closed.
To put the sunroof in the vent position, pull down on the
front of the switch. Push up on the front of the switch
to close it.
2-41