steering CHEVROLET EQUINOX 2008 1.G User Guide
[x] Cancel search | Manufacturer: CHEVROLET, Model Year: 2008, Model line: EQUINOX, Model: CHEVROLET EQUINOX 2008 1.GPages: 436, PDF Size: 2.42 MB
Page 137 of 436

Windshield Wipers
Be sure to clear ice and snow from the wiper blades
before using them. If the wiper blades are frozen to the
windshield, gently loosen or thaw them. If the blades do
become damaged, install new blades or blade inserts.
SeeWindshield Wiper Blade Replacement on page 5-50.
Heavy snow or ice can overload the wiper motor. A
circuit breaker will stop the motor until it cools down.
Clear away snow or ice to prevent an overload.
Use the lever on the right side of the steering column to
operate the windshield wipers.
1(High Speed):Move the lever to this position for
steady wiping at high speed.
6(Low Speed):Move the lever to this position for
steady wiping at low speed.
&(Delay):Move the lever to this position to set
a delay between wipes.
6(Delay Adjustment):Move the lever to the
delay position to choose a delayed wiping cycle.
Turn the intermittent adjust band down for a longer
delay or up for a shorter delay.
9(Off):Move the lever to this position to turn off
the windshield wipers.
8(Mist):Move the lever all the way down to mist
and release for a single wiping cycle. The windshield
wipers will stop after one wipe and the lever returns
to its parked position. If more wipes are needed,
hold the lever on mist longer.
3-9
Page 139 of 436
{CAUTION:
Cruise control can be dangerous where you
cannot drive safely at a steady speed. So, do
not use your cruise control on winding roads
or in heavy traffic.
Cruise control can be dangerous on slippery
roads. On such roads, fast changes in tire
traction can cause excessive wheel slip, and
you could lose control. Do not use cruise
control on slippery roads.
{CAUTION:
If you leave your cruise control on when you
are not using cruise, you might hit a button
and go into cruise when you do not want to.
You could be startled and even lose control.
Keep the cruise control switch off until you
want to use cruise control.The cruise control
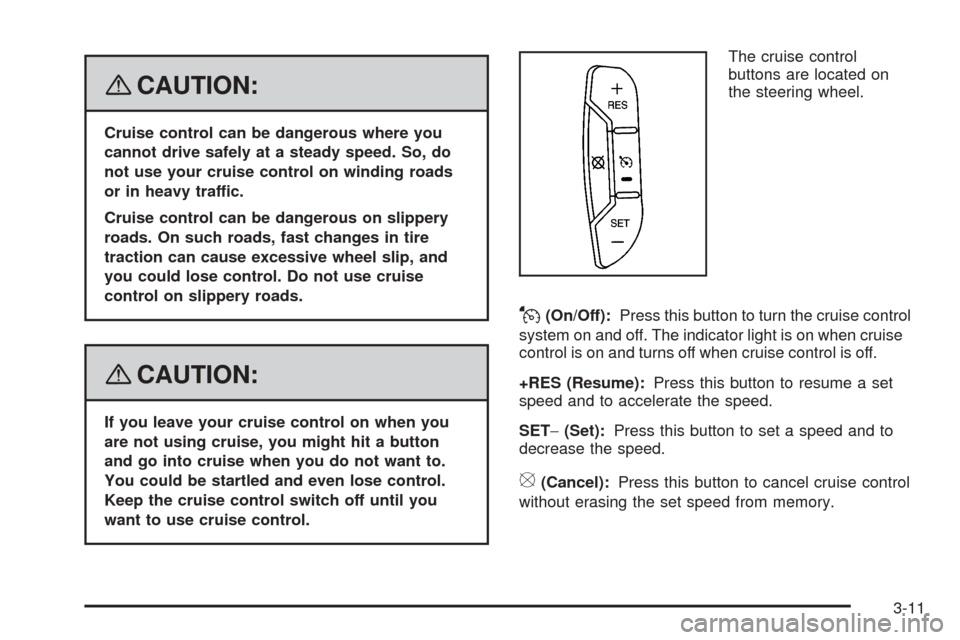
buttons are located on
the steering wheel.
J(On/Off):Press this button to turn the cruise control
system on and off. The indicator light is on when cruise
control is on and turns off when cruise control is off.
+RES (Resume):Press this button to resume a set
speed and to accelerate the speed.
SET−(Set):Press this button to set a speed and to
decrease the speed.
[(Cancel):Press this button to cancel cruise control
without erasing the set speed from memory.
3-11
Page 140 of 436
Setting Cruise Control
The cruise control light on the instrument panel cluster
comes on after the cruise control has been set to
the desired speed.
1. Press the on/off button to turn cruise control on.
2. Get up to the desired speed.
3. Press the SET−button and release it.
4. Take your foot off the accelerator pedal.
When the brakes are applied, the cruise control shuts off.
If the vehicle is in cruise control and the Traction
Control System (TCS) begins to limit wheel spin, the
cruise control automatically disengages. SeeTraction
Control System (TCS) on page 4-6. When road
conditions allow, the cruise control can be used again.
Resuming a Set Speed
If the cruise control is at the set speed desired and the
brakes are applied, the cruise control shuts off. The
cruise symbol in the instrument panel cluster also goes
off indicating cruise is no longer engaged. To return
to your previously set speed, you do not need to
go through the set process again.
Once you are driving about 25 mph (40 km/h) or
more, press the +RES button on your steering wheel.
The vehicle goes back to the previous set speed
and stays there.
Increasing Speed While Using
Cruise Control
There are two ways to go to a higher speed.
Press and hold the +RES button on the steering
wheel until the desired speed is reached,
then release it.
To increase vehicle speed in small amounts,
press the +RES button. Each time this is done,
the vehicle goes about 1 mph (1.6 km/h) faster.
Reducing Speed While Using
Cruise Control
To reduce your speed while using cruise control:
Press and hold the SET– button on the steering
wheel until the desired lower speed is reached,
then release it.
To slow down in very small amounts, push
the SET−button on the steering wheel briey.
Each time this is done, the vehicle goes about
1 mph (1.6 km/h) slower.
Passing Another Vehicle While Using
Cruise Control
Use the accelerator pedal to increase the vehicle’s
speed. When you take your foot off the pedal, the
vehicle slows down to the cruise control speed
that was set earlier.
3-12
Page 141 of 436
Using Cruise Control on Hills
How well your cruise control works on hills depends upon
the vehicle’s speed, load, and the steepness of the hills.
While going up steep hills, you might have to step on the
accelerator pedal to maintain the vehicle’s speed. While
going downhill, you might have to brake or shift to a lower
gear to keep the vehicle at a lower speed. However,
when the brakes are applied the cruise control turns off.
Many drivers nd this to be too much trouble and do not
use cruise control on steep hills.
Ending Cruise Control
There are three ways to end cruise control:
Step lightly on the brake pedal.
Press the[button on the steering wheel.
Press theJbutton on the steering wheel.
Erasing Speed Memory
The cruise control set speed memory is erased when
the cruise control or the ignition is turned off.
Headlamps
The exterior lamp control is located on the turn
signal/multifunction lever.
O(Exterior Lamp Control):Turn the control with
this symbol on it to operate the exterior lamps.The exterior lamp control has the following positions:
AUTO (Off/Automatic Headlamps):Turn the control
to this position to put the headlamps in automatic mode.
Automatic mode will turn the exterior lamps on and
off depending upon how much light is available outside
of the vehicle.
;(Parking Lamps):Turn the control to this position to
turn on the parking lamps together with the following:
Sidemarker Lamps
Taillamps
License Plate Lamps
Instrument Panel Lights
53(Headlamps):Turning the control to this
position turns on the headlamps, together with the
previously listed lamps and lights.
Headlamps on Reminder
If you open the driver’s door with the ignition off and
the lamps on, you will hear a warning chime.
3-13
Page 143 of 436
Fog Lamps
If your vehicle has this feature, use the fog lamps for
better visibility in foggy or misty conditions.
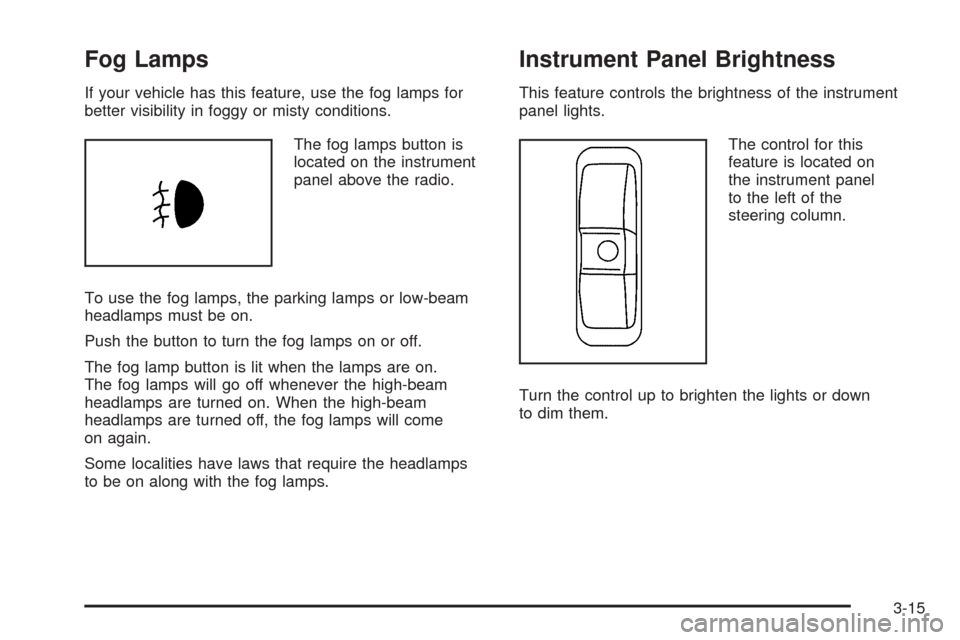
The fog lamps button is
located on the instrument
panel above the radio.
To use the fog lamps, the parking lamps or low-beam
headlamps must be on.
Push the button to turn the fog lamps on or off.
The fog lamp button is lit when the lamps are on.
The fog lamps will go off whenever the high-beam
headlamps are turned on. When the high-beam
headlamps are turned off, the fog lamps will come
on again.
Some localities have laws that require the headlamps
to be on along with the fog lamps.
Instrument Panel Brightness
This feature controls the brightness of the instrument
panel lights.
The control for this
feature is located on
the instrument panel
to the left of the
steering column.
Turn the control up to brighten the lights or down
to dim them.
3-15
Page 182 of 436
SERVICE ALL WHEEL DRIVE
If your vehicle has the All-Wheel Drive (AWD) system,
this message displays along with the service all-wheel
drive light if a problem occurs with this system. See
Service All-Wheel Drive Light on page 3-39. If this
message appears, stop as soon as possible and turn
off the vehicle. Restart the vehicle and check for
the message on the DIC display. If the message is still
displayed or appears again when you begin driving,
the AWD system needs service. See your dealer/retailer.
SERVICE BATTERY CHARGING
SYSTEM
This message displays when there is a problem with the
generator and battery charging systems. Driving with
this problem could drain the vehicle’s battery. Turn off all
unnecessary accessories. Stop and turn off the vehicle
as soon as it is safe to do so. Have the electrical
system checked by your dealer/retailer immediately.Connecting a battery charger to your vehicle while the
ignition is in any position other than LOCK/OFF may
cause this message to appear. If you need to charge
your vehicle, make sure that the key is in LOCK/OFF or
out of the ignition during charging.
SERVICE BRAKE SYSTEM
This message displays and a chime sounds when the
brake uid level is low. The brake system warning
light also appears on the instrument panel cluster when
this message appears on the DIC. SeeBrake System
Warning Light on page 3-31. Have the brake system
serviced by your dealer/retailer as soon as possible.
SERVICE POWER STEERING
On some vehicles, this message displays when a
problem is detected with the power steering system.
When this message is displayed, you may notice
that the effort required to steer the vehicle increases
or feels heavier, but you will still be able to steer
the vehicle. Have your vehicle serviced by your
dealer/retailer immediately.
3-54
Page 193 of 436
While your vehicle is parked:
Familiarize yourself with all of its controls.
Familiarize yourself with its operation.
Set up your audio system by presetting your
favorite radio stations, setting the tone, and
adjusting the speakers. Then, when driving
conditions permit, you can tune to your favorite
radio stations using the presets and steering
wheel controls if the vehicle has them.
Notice:Before adding any sound equipment to
your vehicle, such as an audio system, CD player,
CB radio, mobile telephone, or two-way radio, make
sure that it can be added by checking with your
dealer/retailer. Also, check federal rules covering
mobile radio and telephone units. If sound equipment
can be added, it is very important to do it properly.
Added sound equipment may interfere with the
operation of your vehicle’s engine, radio, or other
systems, and even damage them. Your vehicle’s
systems may interfere with the operation of sound
equipment that has been added.
Your vehicle has a feature called Retained Accessory
Power (RAP). With RAP, the audio system can
be played even after the ignition is turned off.
SeeRetained Accessory Power (RAP) on page 2-21
for more information.
Setting the Time
Without Date Display
AM/FM Base Radio with a Single CD Player
This type of radio has aH(clock) button for setting
the time. Set the time by following these steps:
1. Turn the radio on.
2. Press the
Hbutton until the hour begins ashing
on the display. Press the
Hbutton a second time
and the minutes begin ashing on the display.
3. While either the hour or the minutes are ashing,
turn the
f(tune) knob, located on the upper right
side of the radio, clockwise or counterclockwise
to increase or decrease the time. Instead of
using the
fknob, you can also press the SEEK
arrows,
\FWD (forward), orsREV (reverse)
buttons to adjust the time.
4. Press the
Hbutton again until the clock display
stops ashing to set the currently displayed time;
otherwise, the ashing stops after ve seconds and
the current time displayed is automatically set.
3-65
Page 199 of 436
Storing a Radio Station as a Favorite
Drivers are encouraged to set up their radio station
favorites while the vehicle is parked. Tune to your
favorite stations using the presets, favorites button,
and steering wheel controls, if your vehicle has them.
SeeDefensive Driving on page 4-2.
If your radio has XM, a maximum of 36 stations can be
programmed as favorites using the six pushbuttons
positioned below the radio station frequency labels and
by using the radio favorites page button (FAV button).
FAV (Favorites):Press the FAV button to go through
up to six pages of favorites, each having six favorite
stations available per page. Each page of favorites
can contain any combination of AM, FM, or XM
(if equipped) stations. To store a station as a
favorite, perform the following steps:
1. Tune to the desired radio station.
2. Press the FAV button to display the page where
the station is to be stored.
3. Press and hold one of the six pushbuttons until a
beep sounds. When that pushbutton is pressed
and released, the station that was set, returns.
4. Repeat the steps for each pushbutton radio station
to be stored as a favorite.The number of favorites pages can be setup using
the MENU button. To setup the number of favorites
pages, perform the following steps:
1. Press the MENU button to display the radio
setup menu.
2. Press the pushbutton located below the
FAV 1-6 label.
3. Select the desired number of favorites pages
by pressing the pushbutton located below the
displayed page numbers.
4. Press the FAV button, or let the menu time out,
to return to the original main radio screen showing
the radio station frequency labels and to begin
the process of programming your favorites for
the chosen amount of numbered pages.
Setting the Tone (Bass/Treble)
(Base Radio with CD)
EQ (Equalization):To adjust the bass or treble,
press the
fknob or EQ button until the desired tone
control label displays. Turn the
fknob clockwise
or counterclockwise to increase or decrease the setting.
The display shows the current bass or treble level.
If a station’s frequency is weak, or if there is static,
decrease the treble.
3-71
Page 236 of 436
Cleaning the RSE Overhead Console
When cleaning the RSE overhead console surface,
use only a clean cloth dampened with clean water.
Cleaning the Video Screen
When cleaning the video screen, use only a clean cloth
dampened with clean water. Use care when directly
touching or cleaning the screen, as damage can result.
Theft-Deterrent Feature
THEFTLOCK®is designed to discourage theft of your
vehicle’s radio. It works by using a secret code to
disable all radio functions when battery power is
removed and the radio is placed in a different vehicle.
This feature requires no user input to be activated.
The radio is automatically armed when it is put into
the vehicle for the rst time.
If THEFTLOCK is activated, the radio does not operate
if stolen. The radio displays LOCKED. If this occurs,
the radio needs to be returned to your dealer/retailer.
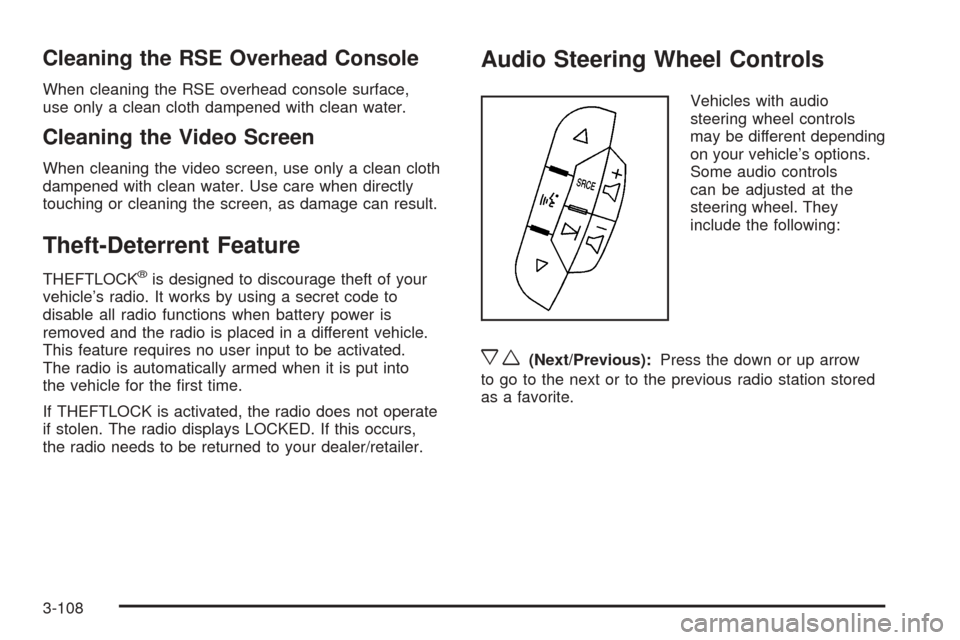
Audio Steering Wheel Controls
Vehicles with audio
steering wheel controls
may be different depending
on your vehicle’s options.
Some audio controls
can be adjusted at the
steering wheel. They
include the following:
xw(Next/Previous):Press the down or up arrow
to go to the next or to the previous radio station stored
as a favorite.
3-108
Page 237 of 436
When a CD is playing, press the down or up arrow to
go to the next or to the previous track.
If your vehicle has OnStar
®, press the down arrow
button to end an OnStar Hands-Free Call or the
Advisor Playback. It also cancels or hangs-up an
incoming Hands-Free Call.
g(Mute/Voice Recognition):Press and release
this button to silence the system. Press and release
this button again, to turn the sound on.
If your vehicle has the navigation system, press and
hold this button for longer than one second to initiate
voice recognition. See “Voice Recognition” in the
Navigation System manual for more information.
If your vehicle has OnStar, press and hold this
button for longer than one second to interact with
the OnStar system. If your vehicle also has theNavigation System, press this button to initiate voice
recognition and say “OnStar” to enter OnStar mode.
See theOnStar
®System on page 2-39in this manual
for more information.
SRCE (Source):Press this button to switch between
AM, FM, XM™ (if equipped), CD, and auxiliary
input jack.
+
e−e(Volume):Press the plus or minus volume
button to increase or to decrease the radio volume.
¨(Seek):Press the seek arrow to go to the next
radio station and stay there.
If you have the navigation system, some of the audio
steering wheel controls work when a CD is playing
in the navigation radio. See the Navigation System
manual for more information.
3-109