flat tire CHEVROLET EQUINOX 2010 2.G Owners Manual
[x] Cancel search | Manufacturer: CHEVROLET, Model Year: 2010, Model line: EQUINOX, Model: CHEVROLET EQUINOX 2010 2.GPages: 394, PDF Size: 5.7 MB
Page 107 of 394
Instruments and Controls 4-21
SeeTraction Control System (TCS)on page 8‑41andStabiliTrak
Systemon page 8‑43for more
information.
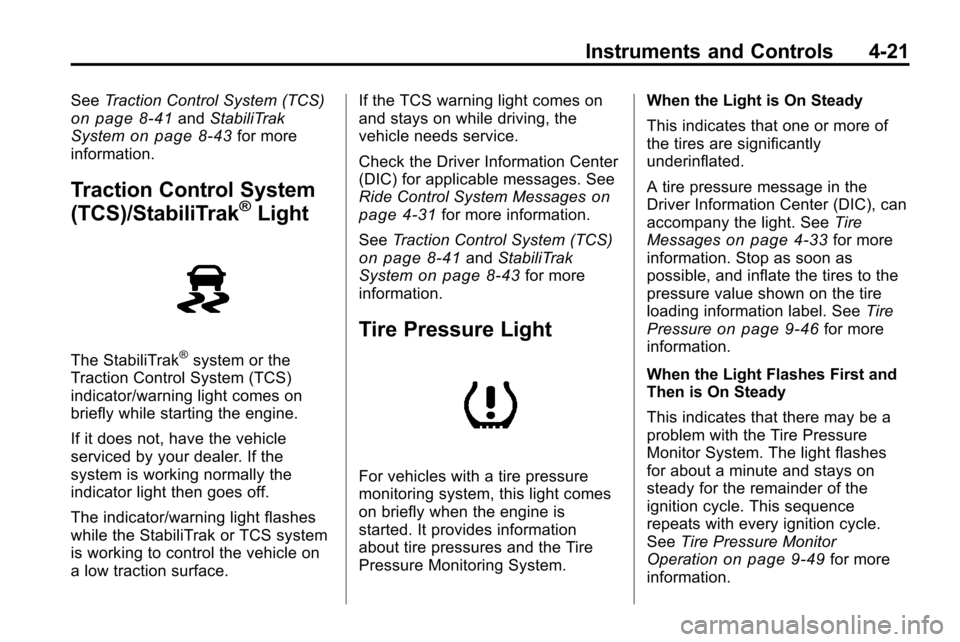
Traction Control System
(TCS)/StabiliTrak®Light
The StabiliTrak®system or the
Traction Control System (TCS)
indicator/warning light comes on
briefly while starting the engine.
If it does not, have the vehicle
serviced by your dealer. If the
system is working normally the
indicator light then goes off.
The indicator/warning light flashes
while the StabiliTrak or TCS system
is working to control the vehicle on
a low traction surface. If the TCS warning light comes on
and stays on while driving, the
vehicle needs service.
Check the Driver Information Center
(DIC) for applicable messages. See
Ride Control System Messages
on
page 4‑31for more information.
See Traction Control System (TCS)
on page 8‑41andStabiliTrak
Systemon page 8‑43for more
information.
Tire Pressure Light
For vehicles with a tire pressure
monitoring system, this light comes
on briefly when the engine is
started. It provides information
about tire pressures and the Tire
Pressure Monitoring System. When the Light is On Steady
This indicates that one or more of
the tires are significantly
underinflated.
A tire pressure message in the
Driver Information Center (DIC), can
accompany the light. See
Tire
Messages
on page 4‑33for more
information. Stop as soon as
possible, and inflate the tires to the
pressure value shown on the tire
loading information label. See Tire
Pressure
on page 9‑46for more
information.
When the Light Flashes First and
Then is On Steady
This indicates that there may be a
problem with the Tire Pressure
Monitor System. The light flashes
for about a minute and stays on
steady for the remainder of the
ignition cycle. This sequence
repeats with every ignition cycle.
See Tire Pressure Monitor
Operation
on page 9‑49for more
information.
Page 119 of 394
Instruments and Controls 4-33
Tire Messages
Service Tire Monitor System
This message displays if there is a
problem with the Tire Pressure
Monitor System (TPMS). SeeTire
Pressure Monitor Operation
on
page 9‑49for more information.
Tire Learning Active
This message displays when the
system is learning new tires. See
Tire Pressure Monitor Operation
on
page 9‑49for more information.
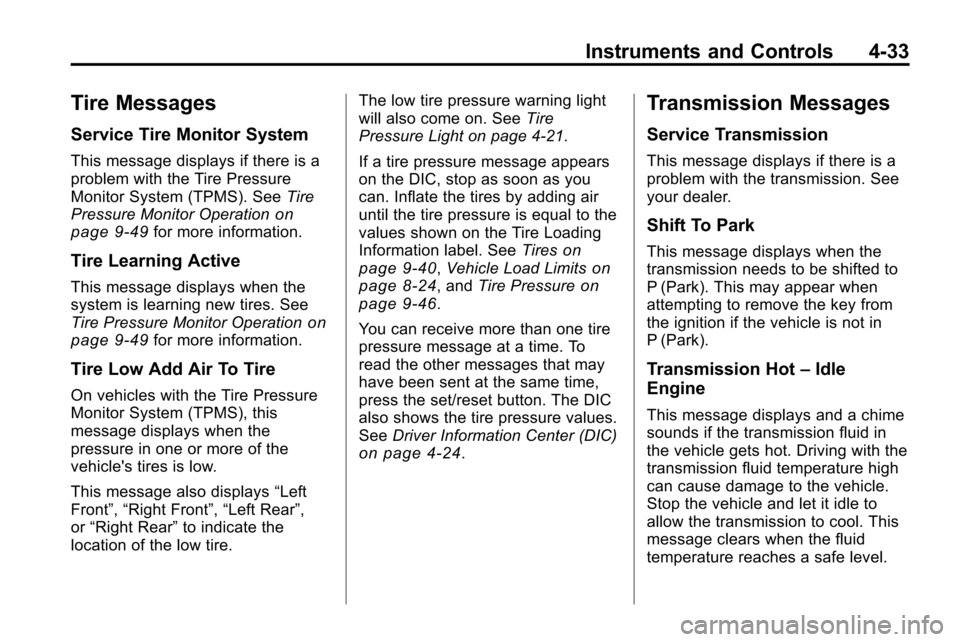
Tire Low Add Air To Tire
On vehicles with the Tire Pressure
Monitor System (TPMS), this
message displays when the
pressure in one or more of the
vehicle's tires is low.
This message also displays “Left
Front”, “Right Front”, “Left Rear”,
or “Right Rear” to indicate the
location of the low tire. The low tire pressure warning light
will also come on. See
Tire
Pressure Light on page 4‑21.
If a tire pressure message appears
on the DIC, stop as soon as you
can. Inflate the tires by adding air
until the tire pressure is equal to the
values shown on the Tire Loading
Information label. See Tires
on
page 9‑40, Vehicle Load Limitson
page 8‑24, and Tire Pressureon
page 9‑46.
You can receive more than one tire
pressure message at a time. To
read the other messages that may
have been sent at the same time,
press the set/reset button. The DIC
also shows the tire pressure values.
See Driver Information Center (DIC)
on page 4‑24.
Transmission Messages
Service Transmission
This message displays if there is a
problem with the transmission. See
your dealer.
Shift To Park
This message displays when the
transmission needs to be shifted to
P (Park). This may appear when
attempting to remove the key from
the ignition if the vehicle is not in
P (Park).
Transmission Hot –Idle
Engine
This message displays and a chime
sounds if the transmission fluid in
the vehicle gets hot. Driving with the
transmission fluid temperature high
can cause damage to the vehicle.
Stop the vehicle and let it idle to
allow the transmission to cool. This
message clears when the fluid
temperature reaches a safe level.
Page 206 of 394
8-2 Driving and Operating
California FuelRequirements . . . . . . . . . . . . . . 8-54
Fuels in Foreign Countries . . . 8-54
Fuel Additives . . . . . . . . . . . . . . . 8-55
Filling the Tank . . . . . . . . . . . . . . 8-56
Filling a Portable Fuel Container . . . . . . . . . . . . . . . . . . . 8-57
Towing
General TowingInformation . . . . . . . . . . . . . . . . . 8-57
Driving Characteristics and Towing Tips . . . . . . . . . . . . . . . . 8-58
Trailer Towing . . . . . . . . . . . . . . . . 8-61
Towing Equipment . . . . . . . . . . . 8-63
Trailer Sway Control (TSC) . . . . . . . . . . . . . . 8-64
Conversions and Add-Ons
Add-On Electrical
Equipment . . . . . . . . . . . . . . . . . 8-64
Driving Information
Driving for Better Fuel
Economy
Driving habits can affect fuel
mileage. Here are some driving tips
to get the best fuel economy
possible.
.Avoid fast starts and accelerate
smoothly.
.Brake gradually and avoid
abrupt stops.
.Avoid idling the engine for long
periods of time.
.When road and weather
conditions are appropriate, use
cruise control, if equipped.
.Always follow posted speed
limits or drive more slowly when
conditions require.
.Keep vehicle tires properly
inflated.
.Combine several trips into a
single trip.
.Replace the vehicle's tires with
the same TPC Spec number
molded into the tire's sidewall
near the size.
.Follow recommended scheduled
maintenance.
Page 212 of 394
8-8 Driving and Operating
Off-Road Driving
Vehicles with all‐wheel drive can be
used for off‐road driving. Vehicles
without all‐wheel drive should not be
driven off-road except on a level,
solid surface.
Many of the vehicle design features
that help make the vehicle more
responsive on paved roads during
poor weather conditions also help
make it better suited for off‐road use
than conventional passenger
vehicles. The vehicle does not have
features usually thought to be
necessary for extended or severe
off‐road use such as special
underbody shielding and transfer
case low gear range.
The airbag system is designed to
work properly under a wide range of
conditions, including off‐road usage.
Always wear your safety belt and
observe safe driving speeds,
especially on rough terrain.
Drinking and driving can be very
dangerous on any road and this is
certainly true for off-road driving.At the very time you need special
alertness and driving skills, your
reflexes, perceptions, and judgment
can be affected by even a small
amount of alcohol. You could have a
serious
—or even fatal —accident
if you drink and drive or ride with a
driver who has been drinking.
Off-roading can be great fun but has
some definite hazards. The greatest
of these is the terrain itself. When
off-road driving, traffic lanes are not
marked, curves are not banked, and
there are no road signs. Surfaces
can be slippery, rough, uphill,
or downhill.
Avoid sharp turns and abrupt
maneuvers. Failure to operate the
vehicle correctly off‐road could
result in loss of vehicle control or
vehicle rollover.
Off-roading involves some new
skills. That is why it is very
important that you read these
driving tips and suggestions to help
make off-road driving safer and
more enjoyable.
Before You Go Off-Roading
.Have all necessary maintenance
and service work done.
.Make sure there is enough fuel,
that fluid levels are where they
should be, and that the spare
tire is fully inflated.
.Be sure to read all the
information about all-wheel-drive
vehicles in this manual.
.Make sure all underbody
shields, if the vehicle has them,
are properly attached.
.Know the local laws that apply to
off-roading where you will be
driving or check with law
enforcement people in the area.
.Be sure to get the necessary
permission if you will be on
private land.
Page 224 of 394
8-20 Driving and Operating
Other Rainy Weather Tips
Besides slowing down, other wet
weather driving tips include:
.Allow extra following distance.
.Pass with caution.
.Keep windshield wiping
equipment in good shape.
.Keep the windshield washer fluid
reservoir filled.
.Have good tires with proper
tread depth. SeeTireson
page 9‑40.
.Turn off cruise control.
Highway Hypnosis
Always be alert and pay attention to
your surroundings while driving.
If you become tired or sleepy, find a
safe place to park your vehicle
and rest.
Other driving tips include:
.Keep the vehicle well ventilated.
.Keep interior temperature cool.
.Keep your eyes moving —scan
the road ahead and to the sides.
.Check the rearview mirror and
vehicle instruments often.
Hill and Mountain Roads
Driving on steep hills or through
mountains is different than driving
on flat or rolling terrain. Tips for
driving in these conditions include:
.Keep the vehicle serviced and in
good shape.
.Check all fluid levels and brakes,
tires, cooling system, and
transmission.
.Going down steep or long hills,
shift to a lower gear.
{WARNING
If you do not shift down, the
brakes could get so hot that they
would not work well. You would
then have poor braking or even
none going down a hill. You could
crash. Shift down to let the engine
assist the brakes on a steep
downhill slope.
Page 228 of 394
8-24 Driving and Operating
Vehicle Load Limits
It is very important to know how
much weight the vehicle can
carry. This weight is called the
vehicle capacity weight and
includes the weight of all
occupants, cargo and all
nonfactory‐installed options.
Two labels on the vehicle
show how much weight it may
properly carry, the Tire and
Loading Information label and
the Certification label.
{WARNING
Do not load the vehicle any
heavier than the Gross
Vehicle Weight Rating
(GVWR), or either the
maximum front or rear Gross
Axle Weight Rating (GAWR).
If you do, parts on the vehicle
can break, and it can change
(Continued)
WARNING (Continued)
the way the vehicle handles.
These could cause you to lose
control and crash. Also,
overloading can shorten the
life of the vehicle.
Tire and Loading Information
Label
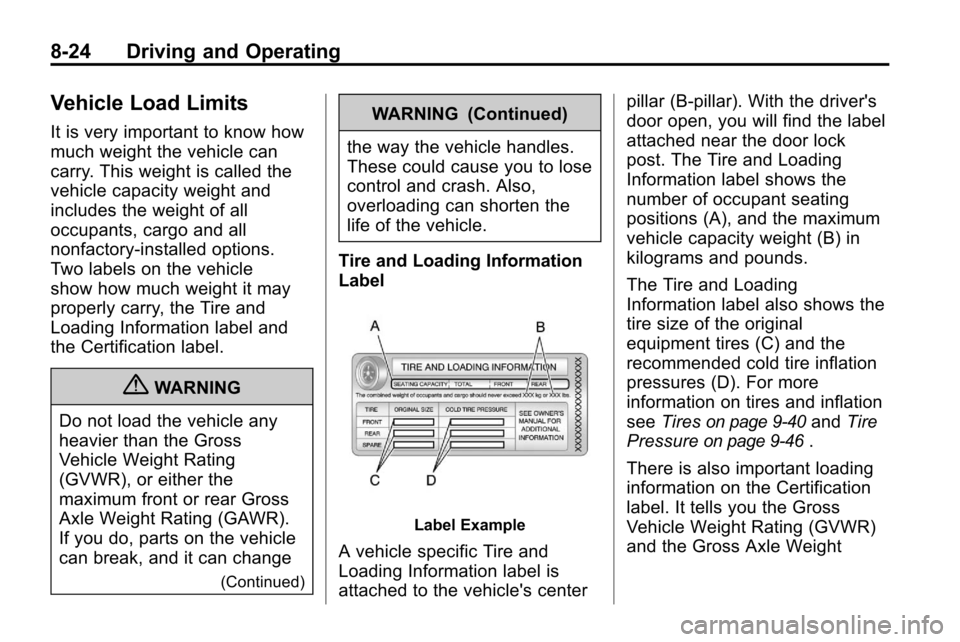
Label Example
A vehicle specific Tire and
Loading Information label is
attached to the vehicle's center pillar (B-pillar). With the driver's
door open, you will find the label
attached near the door lock
post. The Tire and Loading
Information label shows the
number of occupant seating
positions (A), and the maximum
vehicle capacity weight (B) in
kilograms and pounds.
The Tire and Loading
Information label also shows the
tire size of the original
equipment tires (C) and the
recommended cold tire inflation
pressures (D). For more
information on tires and inflation
see
Tires
on page 9‑40and Tire
Pressure
on page 9‑46.
There is also important loading
information on the Certification
label. It tells you the Gross
Vehicle Weight Rating (GVWR)
and the Gross Axle Weight
Page 267 of 394
Driving and Operating 8-63
After loading the trailer, weigh the
trailer and then the tongue,
separately, to see if the weights are
proper. If they are not, adjustments
might be made by moving some
items around in the trailer.
Trailering may be limited by the
vehicle's ability to carry tongue
weight. Tongue weight cannot cause
the vehicle to exceed the GVWR
(Gross Vehicle Weight Rating) or
the RGAWR (Rear Gross Axle
Weight Rating). The effect of
additional weight may reduce the
trailering capacity more than the
total of the additional weight.
It is important that the vehicle
does not exceed any of its
ratings—GCWR, GVWR, RGAWR,
Maximum Trailer Rating or Tongue
Weight. The only way to be sure it is
not exceeding any of these ratings
is to weigh the vehicle and trailer.Total Weight on the Vehicle's
Tires
Inflate the vehicle's tires to the
upper limit for cold tires. These
numbers can be found on the
Certification label or see Vehicle
Load Limits
on page 8‑24for more
information. Do not go over the
GVW limit for the vehicle, or the
GAWR, including the weight of the
trailer tongue. If using a weight
distributing hitch, do not go over the
rear axle limit before applying the
weight distribution spring bars.
Towing Equipment
Hitches
Use the correct hitch equipment.
See your dealer or a hitch dealer for
assistance.
.The rear bumper on the vehicle
is not intended for hitches. Do
not attach rental hitches or other
bumper-type hitches to it. Use
only a frame-mounted hitch that
does not attach to the bumper.
.Will any holes be made in the
body of the vehicle when the
trailer hitch is installed? If there
are, seal the holes when the
hitch is removed. If the holes are
not sealed, dirt, water, and
deadly carbon monoxide (CO)
from the exhaust can get into the
vehicle. See Engine Exhaust
on
page 8‑34.
Page 270 of 394
9-2 Vehicle Care
Wheels and Tires
Tires . . . . . . . . . . . . . . . . . . . . . . . . . 9-40
Tire Sidewall Labeling . . . . . . . 9-40
Tire Designations . . . . . . . . . . . . 9-42
Tire Terminology andDefinitions . . . . . . . . . . . . . . . . . . 9-43
Tire Pressure . . . . . . . . . . . . . . . . 9-46
Tire Pressure Monitor System . . . . . . . . . . . . . . . . . . . . . 9-47
Tire Pressure Monitor Operation . . . . . . . . . . . . . . . . . . 9-49
Tire Inspection . . . . . . . . . . . . . . . 9-52
Tire Rotation . . . . . . . . . . . . . . . . . 9-52
When It Is Time for New Tires . . . . . . . . . . . . . . . . . . . . . . . 9-53 Buying New Tires . . . . . . . . . . . . 9-54
Different Size Tires and
Wheels . . . . . . . . . . . . . . . . . . . . . 9-55
Uniform Tire Quality Grading . . . . . . . . . . . . . . . . . . . . 9-56
Wheel Alignment and Tire Balance . . . . . . . . . . . . . . . . . . . . 9-57
Wheel Replacement . . . . . . . . . 9-57
Tire Chains . . . . . . . . . . . . . . . . . . 9-58
If a Tire Goes Flat . . . . . . . . . . . 9-59
Tire Changing . . . . . . . . . . . . . . . 9-61
Compact Spare Tire . . . . . . . . . 9-68
Jump Starting
Jump Starting . . . . . . . . . . . . . . . . 9-69
Towing
Towing the Vehicle . . . . . . . . . . . 9-72
Recreational Vehicle Towing . . . . . . . . . . . . . . . . . . . . . 9-72
Appearance Care
Exterior Care . . . . . . . . . . . . . . . . 9-75
Interior Care . . . . . . . . . . . . . . . . . 9-79
Page 295 of 394
Vehicle Care 9-27
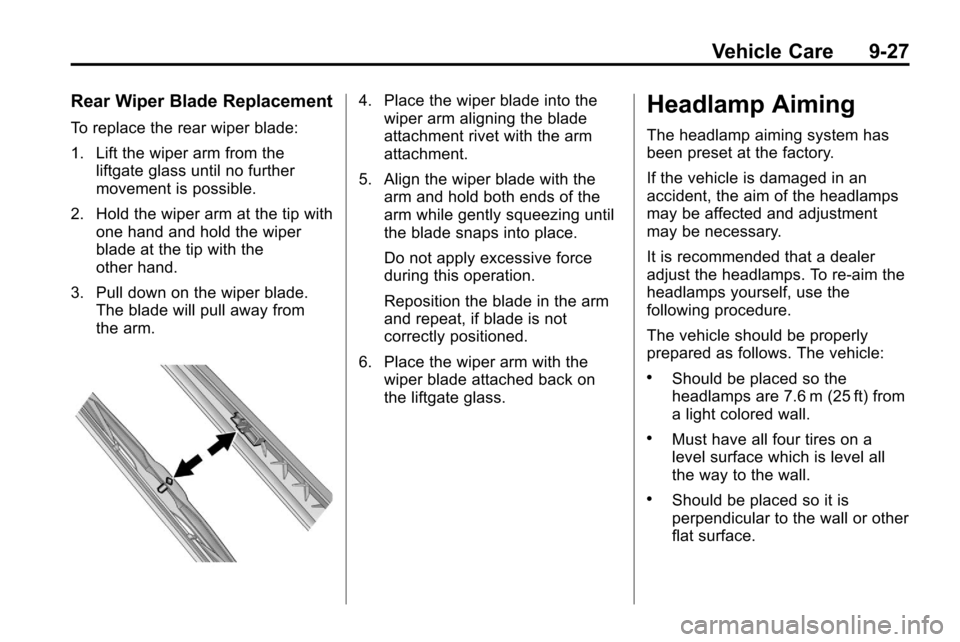
Rear Wiper Blade Replacement
To replace the rear wiper blade:
1. Lift the wiper arm from theliftgate glass until no further
movement is possible.
2. Hold the wiper arm at the tip with one hand and hold the wiper
blade at the tip with the
other hand.
3. Pull down on the wiper blade. The blade will pull away from
the arm.
4. Place the wiper blade into thewiper arm aligning the blade
attachment rivet with the arm
attachment.
5. Align the wiper blade with the arm and hold both ends of the
arm while gently squeezing until
the blade snaps into place.
Do not apply excessive force
during this operation.
Reposition the blade in the arm
and repeat, if blade is not
correctly positioned.
6. Place the wiper arm with the wiper blade attached back on
the liftgate glass.Headlamp Aiming
The headlamp aiming system has
been preset at the factory.
If the vehicle is damaged in an
accident, the aim of the headlamps
may be affected and adjustment
may be necessary.
It is recommended that a dealer
adjust the headlamps. To re-aim the
headlamps yourself, use the
following procedure.
The vehicle should be properly
prepared as follows. The vehicle:
.Should be placed so the
headlamps are 7.6 m (25 ft) from
a light colored wall.
.Must have all four tires on a
level surface which is level all
the way to the wall.
.Should be placed so it is
perpendicular to the wall or other
flat surface.
Page 296 of 394
9-28 Vehicle Care
.Should not have any snow, ice,
or mud on it.
.Should be fully assembled and
all other work stopped while
headlamp aiming is being
performed.
.Should be normally loaded with
a full tank of fuel and one person
or 75 kg (160 lbs) sitting on the
driver's seat.
.Tires should be properly inflated.
Headlamp aiming is done with the
vehicle's low-beam headlamps. The
high-beam headlamps will be
correctly aimed if the low-beam
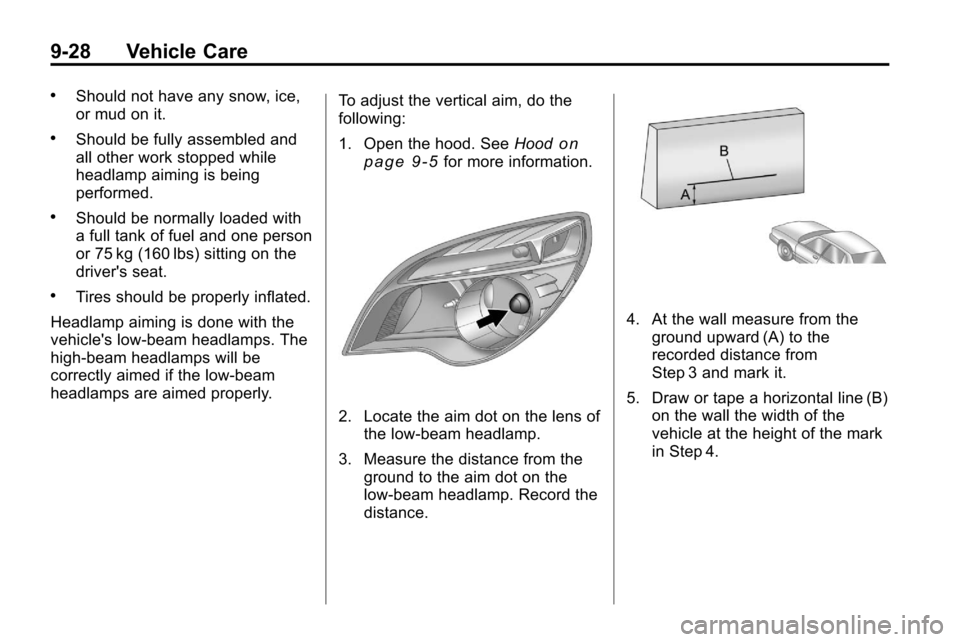
headlamps are aimed properly. To adjust the vertical aim, do the
following:
1. Open the hood. See
Hood
on
page 9‑5for more information.
2. Locate the aim dot on the lens of the low‐beam headlamp.
3. Measure the distance from the ground to the aim dot on the
low‐beam headlamp. Record the
distance.
4. At the wall measure from the
ground upward (A) to the
recorded distance from
Step 3 and mark it.
5. Draw or tape a horizontal line (B) on the wall the width of the
vehicle at the height of the mark
in Step 4.