headlamp CHEVROLET EQUINOX 2010 2.G Owners Manual
[x] Cancel search | Manufacturer: CHEVROLET, Model Year: 2010, Model line: EQUINOX, Model: CHEVROLET EQUINOX 2010 2.GPages: 394, PDF Size: 5.7 MB
Page 2 of 394

2010 Chevrolet Equinox Owner ManualM
Driving and Operating. . . . . . . . 8-1
Driving Information . . . . . . . . . . . . . 8-2
Starting and Operating . . . . . . . 8-28
Engine Exhaust . . . . . . . . . . . . . . 8-34
Automatic Transmission . . . . . . 8-35
Drive Systems . . . . . . . . . . . . . . . . 8-38
Brakes . . . . . . . . . . . . . . . . . . . . . . . 8-38
Ride Control Systems . . . . . . . . 8-41
Cruise Control . . . . . . . . . . . . . . . . 8-44
Object Detection Systems . . . . 8-46
Fuel . . . . . . . . . . . . . . . . . . . . . . . . . . 8-53
Towing . . . . . . . . . . . . . . . . . . . . . . . 8-57
Conversions and Add-Ons . . . 8-64 Vehicle Care
. . . . . . . . . . . . . . . . . . 9-1
General Information . . . . . . . . . . . . 9-3
Vehicle Checks . . . . . . . . . . . . . . . . 9-4
Headlamp Aiming . . . . . . . . . . . . 9-27
Bulb Replacement . . . . . . . . . . . . 9-30
Electrical System . . . . . . . . . . . . . 9-34
Wheels and Tires . . . . . . . . . . . . . 9-40
Jump Starting . . . . . . . . . . . . . . . . 9-69
Towing . . . . . . . . . . . . . . . . . . . . . . . 9-72
Appearance Care . . . . . . . . . . . . . 9-75
Service and Maintenance . . . 10-1
General Information . . . . . . . . . . 10-1
Scheduled Maintenance . . . . . . 10-2
Recommended Fluids,
Lubricants, and Parts . . . . . . . 10-7
Maintenance Records . . . . . . . 10-10 Technical Data
. . . . . . . . . . . . . . . 11-1
Vehicle Identification . . . . . . . . . . 11-1
Vehicle Data . . . . . . . . . . . . . . . . . . 11-2
Customer Information . . . . . . . 12-1
Customer Information . . . . . . . . 12-1
Reporting Safety Defects . . . . 12-13
Vehicle Data Recording and
Privacy . . . . . . . . . . . . . . . . . . . . 12-14
Index . . . . . . . . . . . . . . . . . . . . . i-1
Page 5 of 394
Introduction v
Notice:This means there is
something that could result in
property or vehicle damage. This
would not be covered by the
vehicle's warranty.
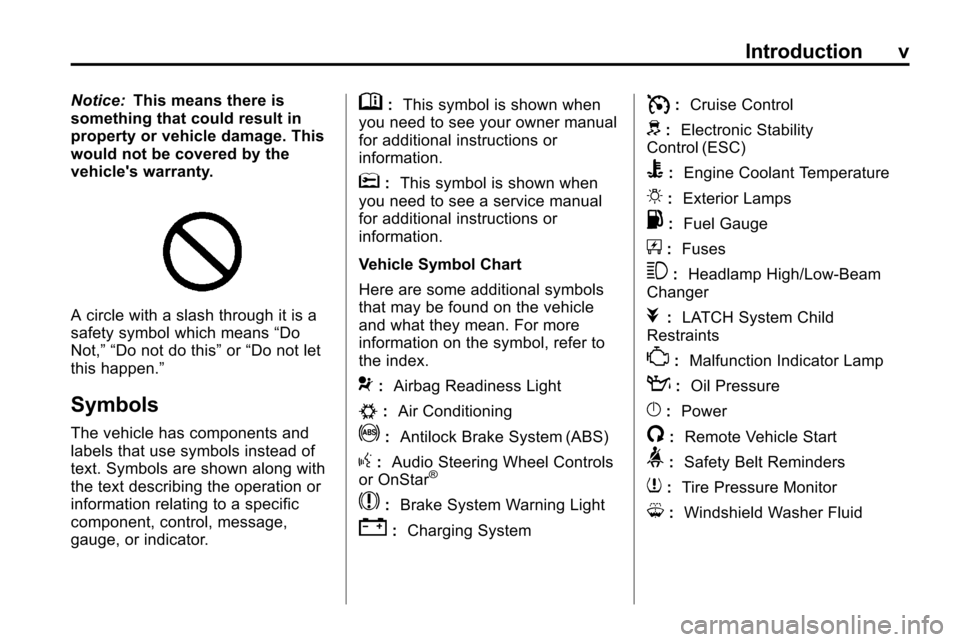
A circle with a slash through it is a
safety symbol which means “Do
Not,” “Do not do this” or“Do not let
this happen.”
Symbols
The vehicle has components and
labels that use symbols instead of
text. Symbols are shown along with
the text describing the operation or
information relating to a specific
component, control, message,
gauge, or indicator.
M: This symbol is shown when
you need to see your owner manual
for additional instructions or
information.
*: This symbol is shown when
you need to see a service manual
for additional instructions or
information.
Vehicle Symbol Chart
Here are some additional symbols
that may be found on the vehicle
and what they mean. For more
information on the symbol, refer to
the index.
9: Airbag Readiness Light
#:Air Conditioning
!:Antilock Brake System (ABS)
g:Audio Steering Wheel Controls
or OnStar®
$: Brake System Warning Light
":Charging System
I:Cruise Control
d:Electronic Stability
Control (ESC)
B: Engine Coolant Temperature
O:Exterior Lamps
.:Fuel Gauge
+:Fuses
3: Headlamp High/Low-Beam
Changer
j: LATCH System Child
Restraints
*: Malfunction Indicator Lamp
::Oil Pressure
}:Power
/:Remote Vehicle Start
>:Safety Belt Reminders
7:Tire Pressure Monitor
M:Windshield Washer Fluid
Page 21 of 394
Keys, Doors and Windows 1-15
Park Tilt Mirrors
If the vehicle has the memory
package, the outside mirrors have
a park tilt feature. This feature
autiomatically tilts the outside
mirrors to a preselected position
when the vehicle is in R (Reverse).
This allows the driver to view the
curb for parallel parking.
The passenger and driver mirrors
return to their original position
when the vehicle is shifted out of
R (Reverse), or the ignition is turned
off or to OFF/LOCK.
This feature can be turned on or
off through the Driver Information
Center (DIC). SeeVehicle
Personalization
on page 4‑34for
more information.
Interior Mirrors
Manual Rearview Mirror
Hold the inside rearview mirror in
the center to move it for a clearer
view of behind your vehicle. Adjust
the mirror to avoid glare from the
headlamps behind you. Push the
tab forward for daytime use and pull
it for nighttime use.
Vehicles with OnStar
®have three
additional control buttons located at
the bottom of the mirror. See your
dealer for more information on the
system and how to subscribe to
OnStar. See the OnStar owner's
guide for more information about the
services OnStar provides.
Automatic Dimming
Rearview Mirror
The vehicle may have an automatic
dimming inside rearview mirror.
Vehicles with OnStar
®have three
additional control buttons located at
the bottom of the mirror. See your
dealer for more information on the
system and how to subscribe to
OnStar. See the OnStar owner's
guide for more information about the
services OnStar provides.
O: Press to turn automatic
dimming on or off.
If the vehicle has a rear vision
camera (RVC) the
Obutton for
turning the automatic dimming
feature on or off will not be
available. See Rear Vision Camera
(RVC)
on page 8‑49for more
information.
Page 22 of 394
1-16 Keys, Doors and Windows
Automatic Dimming Mirror
Operation
Automatic dimming reduces the
glare from the headlamps of the
vehicle behind you. The dimming
feature comes on and the indicator
light comes on each time the vehicle
is started.
Cleaning the Mirror
Do not spray glass cleaner directly
on the mirror. Use a soft towel
dampened with water.
Windows
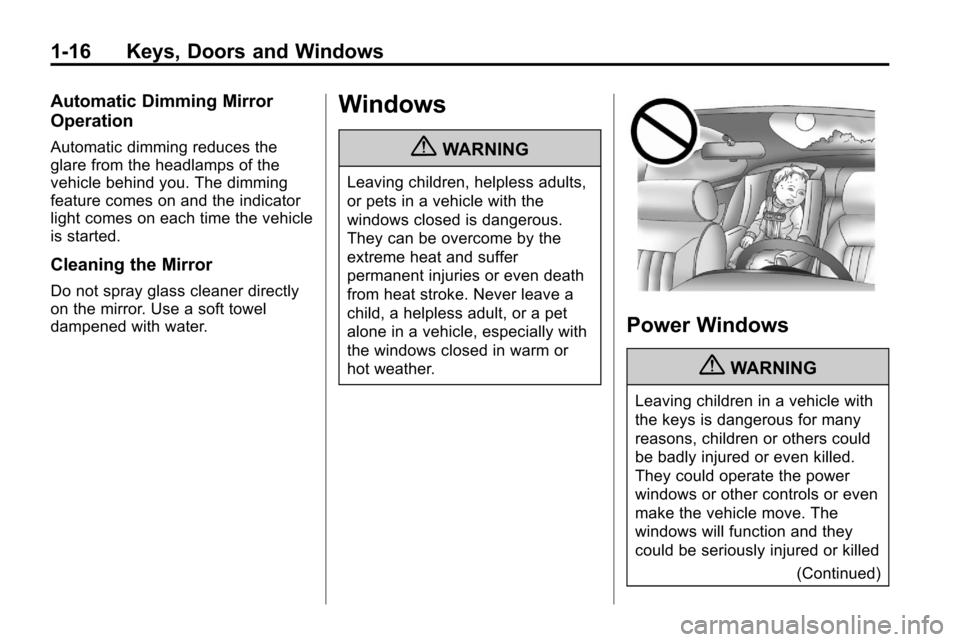
{WARNING
Leaving children, helpless adults,
or pets in a vehicle with the
windows closed is dangerous.
They can be overcome by the
extreme heat and suffer
permanent injuries or even death
from heat stroke. Never leave a
child, a helpless adult, or a pet
alone in a vehicle, especially with
the windows closed in warm or
hot weather.
Power Windows
{WARNING
Leaving children in a vehicle with
the keys is dangerous for many
reasons, children or others could
be badly injured or even killed.
They could operate the power
windows or other controls or even
make the vehicle move. The
windows will function and they
could be seriously injured or killed(Continued)
Page 109 of 394
Instruments and Controls 4-23
periodically when the vehicle is low
on fuel. The light goes off when fuel
is added to the fuel tank.
For vehicles with a Driver
Information Center (DIC), seeFuel
System Messages
on page 4‑30for more information.
Security Light
This light comes on if there is a
problem with the security system,
or if the vehicle has been
tampered with.
For more information, see Vehicle
Security on page 1‑12.
High-Beam on Light
The high-beam on light comes on
when the high-beam headlamps are
in use.
See Headlamp High/Low-Beam
Changer
on page 5‑1for more
information.
Fog Lamp Light
The fog lamp light comes on when
the fog lamps are in use. The light goes out when the fog
lamps are turned off. See
Fog
Lamps
on page 5‑3for more
information.
Lamps on Reminder
For vehicles with the lamps on
reminder light, it comes on when the
lights are in use.
Page 127 of 394
Lighting 5-1
Lighting
Exterior Lighting
Exterior Lamp Controls . . . . . . . . 5-1
Headlamp High/Low-BeamChanger . . . . . . . . . . . . . . . . . . . . . 5-1
Flash-to-Pass . . . . . . . . . . . . . . . . . 5-2
Daytime Running Lamps (DRL) . . . . . . . . . . . . . . . . 5-2
Hazard Warning Flashers . . . . . 5-2
Turn and Lane-Change Signals . . . . . . . . . . . . . . . . . . . . . . 5-3
Fog Lamps . . . . . . . . . . . . . . . . . . . . 5-3
Interior Lighting
Instrument Panel Illumination Control . . . . . . . . . . . . . . . . . . . . . . 5-4
Dome Lamps . . . . . . . . . . . . . . . . . 5-4
Reading Lamps . . . . . . . . . . . . . . . 5-4
Lighting Features
Entry Lighting . . . . . . . . . . . . . . . . . 5-4
Exterior Lighting
Exterior Lamp Controls
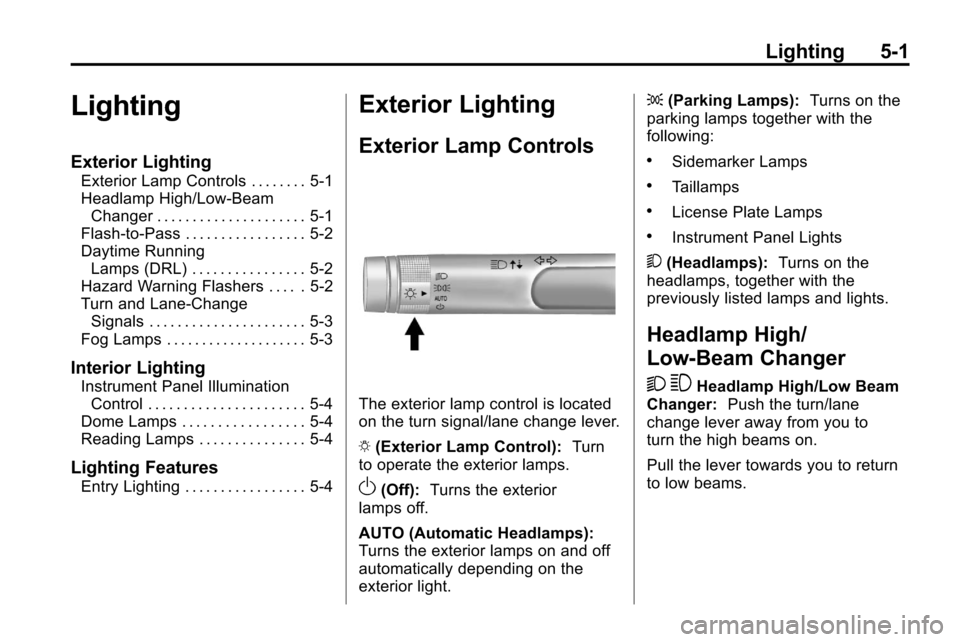
The exterior lamp control is located
on the turn signal/lane change lever.
O (Exterior Lamp Control): Turn
to operate the exterior lamps.
O(Off): Turns the exterior
lamps off.
AUTO (Automatic Headlamps):
Turns the exterior lamps on and off
automatically depending on the
exterior light. ;
(Parking Lamps): Turns on the
parking lamps together with the
following:
.Sidemarker Lamps
.Taillamps
.License Plate Lamps
.Instrument Panel Lights
5 (Headlamps): Turns on the
headlamps, together with the
previously listed lamps and lights.
Headlamp High/
Low-Beam Changer
2 3
Headlamp High/Low Beam
Changer: Push the turn/lane
change lever away from you to
turn the high beams on.
Pull the lever towards you to return
to low beams.
Page 128 of 394
5-2 Lighting
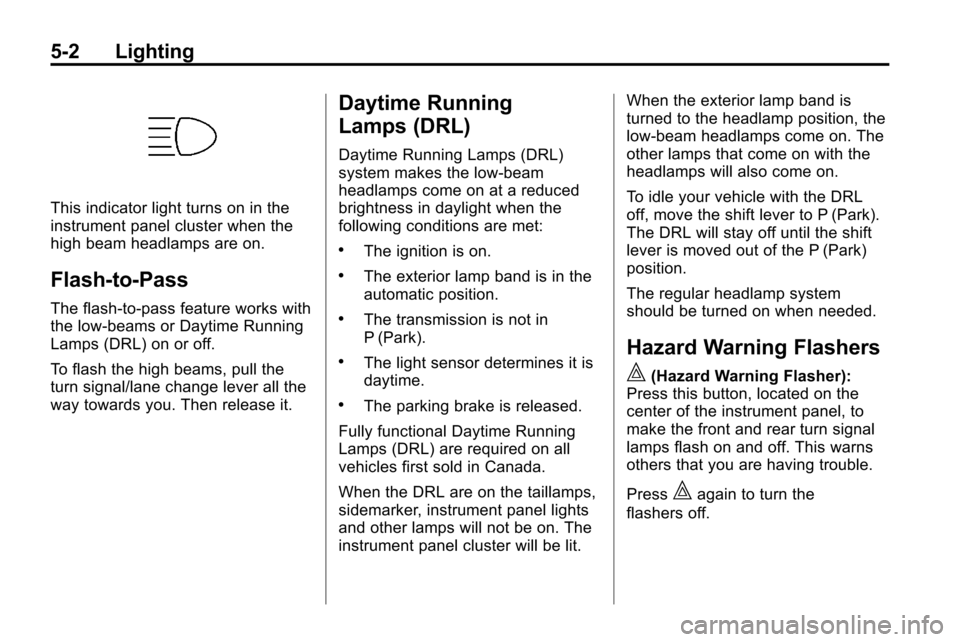
This indicator light turns on in the
instrument panel cluster when the
high beam headlamps are on.
Flash-to-Pass
The flash‐to‐pass feature works with
the low‐beams or Daytime Running
Lamps (DRL) on or off.
To flash the high beams, pull the
turn signal/lane change lever all the
way towards you. Then release it.
Daytime Running
Lamps (DRL)
Daytime Running Lamps (DRL)
system makes the low-beam
headlamps come on at a reduced
brightness in daylight when the
following conditions are met:
.The ignition is on.
.The exterior lamp band is in the
automatic position.
.The transmission is not in
P (Park).
.The light sensor determines it is
daytime.
.The parking brake is released.
Fully functional Daytime Running
Lamps (DRL) are required on all
vehicles first sold in Canada.
When the DRL are on the taillamps,
sidemarker, instrument panel lights
and other lamps will not be on. The
instrument panel cluster will be lit. When the exterior lamp band is
turned to the headlamp position, the
low-beam headlamps come on. The
other lamps that come on with the
headlamps will also come on.
To idle your vehicle with the DRL
off, move the shift lever to P (Park).
The DRL will stay off until the shift
lever is moved out of the P (Park)
position.
The regular headlamp system
should be turned on when needed.
Hazard Warning Flashers
|
(Hazard Warning Flasher):
Press this button, located on the
center of the instrument panel, to
make the front and rear turn signal
lamps flash on and off. This warns
others that you are having trouble.
Press
|again to turn the
flashers off.
Page 129 of 394
Lighting 5-3
Turn and Lane-Change
Signals
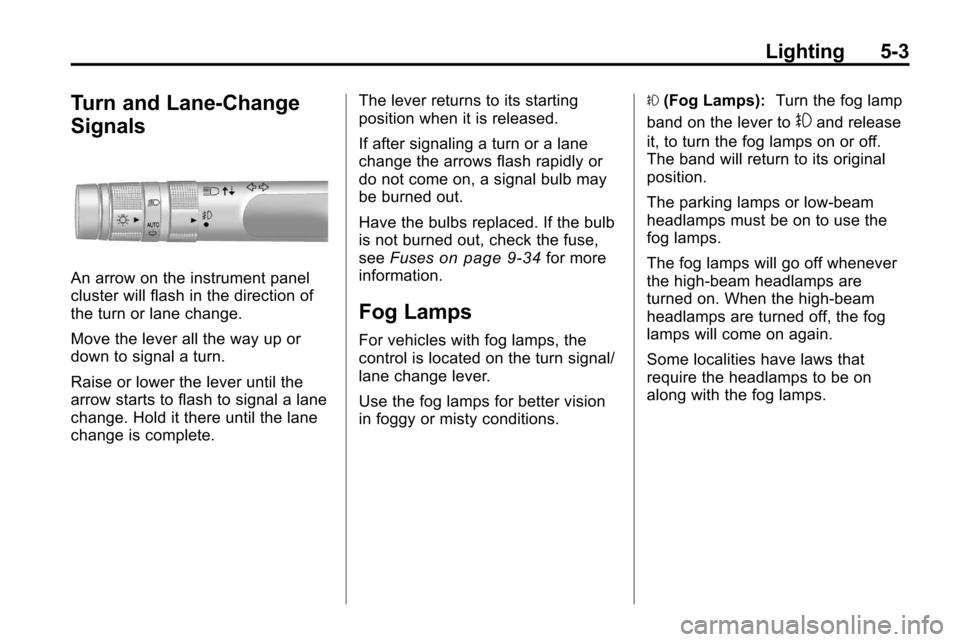
An arrow on the instrument panel
cluster will flash in the direction of
the turn or lane change.
Move the lever all the way up or
down to signal a turn.
Raise or lower the lever until the
arrow starts to flash to signal a lane
change. Hold it there until the lane
change is complete.The lever returns to its starting
position when it is released.
If after signaling a turn or a lane
change the arrows flash rapidly or
do not come on, a signal bulb may
be burned out.
Have the bulbs replaced. If the bulb
is not burned out, check the fuse,
see
Fuses
on page 9‑34for more
information.
Fog Lamps
For vehicles with fog lamps, the
control is located on the turn signal/
lane change lever.
Use the fog lamps for better vision
in foggy or misty conditions. #
(Fog Lamps): Turn the fog lamp
band on the lever to
#and release
it, to turn the fog lamps on or off.
The band will return to its original
position.
The parking lamps or low‐beam
headlamps must be on to use the
fog lamps.
The fog lamps will go off whenever
the high-beam headlamps are
turned on. When the high‐beam
headlamps are turned off, the fog
lamps will come on again.
Some localities have laws that
require the headlamps to be on
along with the fog lamps.
Page 217 of 394
Driving and Operating 8-13
Consider this as you approach a hill:
.Is there a constant incline,
or does the hill get sharply
steeper in places?
.Is there good traction on the
hillside, or will the surface cause
tire slipping?
.Is there a straight path up or
down the hill so you will not
have to make turning
maneuvers?
.Are there obstructions on the hill
that can block your path, such
as boulders, trees, logs, or ruts?
.What is beyond the hill? Is there
a cliff, an embankment, a
drop-off, a fence? Get out and
walk the hill if you do not know.
It is the smart way to find out.
.Is the hill simply too rough?
Steep hills often have ruts,
gullies, troughs, and exposed
rocks because they are more
susceptible to the effects of
erosion.
Driving Uphill
Once you decide it is safe to drive
up the hill:
.Use a low gear and get a firm
grip on the steering wheel.
.Get a smooth start up the hill
and try to maintain speed. Not
using more power than needed
can avoid spinning the wheels or
sliding.
{WARNING
Turning or driving across steep
hills can be dangerous. You could
lose traction, slide sideways, and
possibly roll over. You could be
seriously injured or killed. When
driving up hills, always try to go
straight up.
.Try to drive straight up the hill if
at all possible. If the path twists
and turns, you might want to find
another route.
.Ease up on the speed as you
approach the top of the hill.
.Attach a flag to the vehicle to be
more visible to approaching
traffic on trails or hills.
.Sound the horn as you approach
the top of the hill to let opposing
traffic know you are there.
.Use headlamps even during the
day to make the vehicle more
visible to oncoming traffic.
{WARNING
Driving to the top (crest) of a
hill at full speed can cause an
accident. There could be a
drop-off, embankment, cliff,
or even another vehicle. You
could be seriously injured or
killed. As you near the top of a
hill, slow down and stay alert.
Page 227 of 394
Driving and Operating 8-23
To save fuel, run the engine for only
short periods as needed to warm
the vehicle and then shut the engine
off and close the window most of
the way to save heat. Repeat this
until help arrives but only when you
feel really uncomfortable from the
cold. Moving about to keep warm
also helps.
If it takes some time for help to
arrive, now and then when you run
the engine, push the accelerator
pedal slightly so the engine runs
faster than the idle speed. This
keeps the battery charged to restart
the vehicle and to signal for help
with the headlamps. Do this as little
as possible to save fuel.If the Vehicle is Stuck
Slowly and cautiously spin the
wheels to free the vehicle when
stuck in sand, mud, ice, or snow.
If stuck too severely for the traction
system to free the vehicle, turn the
traction system off and use the
rocking method.
{WARNING
If the vehicle's tires spin at high
speed, they can explode, and you
or others could be injured. The
vehicle can overheat, causing an
engine compartment fire or other
damage. Spin the wheels as little
as possible and avoid going
above 55 km/h (35 mph) as
shown on the speedometer.
For information about using tire
chains on the vehicle, see Tire
Chains on page 9‑58.
Rocking the Vehicle to Get
it Out
Turn the steering wheel left and
right to clear the area around the
front wheels. Turn off any traction
system. Shift back and forth
between R (Reverse) and a forward
gear, spinning the wheels as little as
possible. To prevent transmission
wear, wait until the wheels stop
spinning before shifting gears.
Release the accelerator pedal while
shifting, and press lightly on the
accelerator pedal when the
transmission is in gear. Slowly
spinning the wheels in the forward
and reverse directions causes a
rocking motion that could free the
vehicle. If that does not get the
vehicle out after a few tries, it might
need to be towed out. If the vehicle
does need to be towed out, see
Towing the Vehicle on page 9‑72.