change time CHEVROLET EQUINOX 2018 Owner's Manual
[x] Cancel search | Manufacturer: CHEVROLET, Model Year: 2018, Model line: EQUINOX, Model: CHEVROLET EQUINOX 2018Pages: 428, PDF Size: 6.05 MB
Page 29 of 428
Chevrolet Equinox Owner Manual (GMNA-Localizing-U.S./Canada/Mexico-
10446639) - 2018 - CRC - 8/18/17
28 In Brief
Fuel (LTG - 2.0L L4 Turbo
Engine)
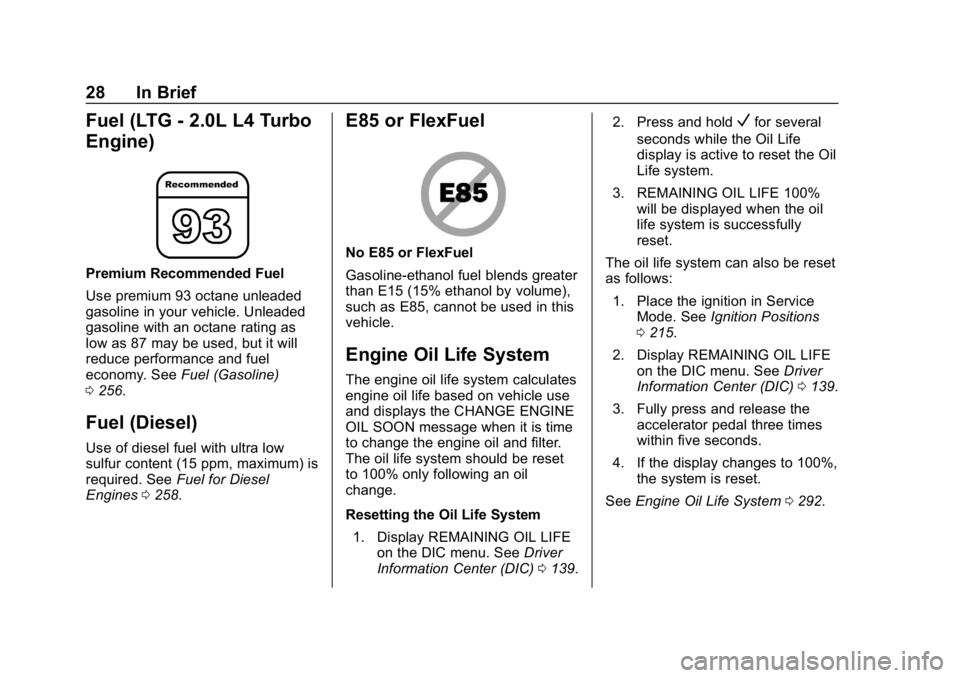
Premium Recommended Fuel
Use premium 93 octane unleaded
gasoline in your vehicle. Unleaded
gasoline with an octane rating as
low as 87 may be used, but it will
reduce performance and fuel
economy. SeeFuel (Gasoline)
0 256.
Fuel (Diesel)
Use of diesel fuel with ultra low
sulfur content (15 ppm, maximum) is
required. See Fuel for Diesel
Engines 0258.
E85 or FlexFuel
No E85 or FlexFuel
Gasoline-ethanol fuel blends greater
than E15 (15% ethanol by volume),
such as E85, cannot be used in this
vehicle.
Engine Oil Life System
The engine oil life system calculates
engine oil life based on vehicle use
and displays the CHANGE ENGINE
OIL SOON message when it is time
to change the engine oil and filter.
The oil life system should be reset
to 100% only following an oil
change.
Resetting the Oil Life System
1. Display REMAINING OIL LIFE on the DIC menu. See Driver
Information Center (DIC) 0139. 2. Press and hold
Vfor several
seconds while the Oil Life
display is active to reset the Oil
Life system.
3. REMAINING OIL LIFE 100% will be displayed when the oil
life system is successfully
reset.
The oil life system can also be reset
as follows: 1. Place the ignition in Service Mode. See Ignition Positions
0 215.
2. Display REMAINING OIL LIFE on the DIC menu. See Driver
Information Center (DIC) 0139.
3. Fully press and release the accelerator pedal three times
within five seconds.
4. If the display changes to 100%, the system is reset.
See Engine Oil Life System 0292.
Page 51 of 428
Chevrolet Equinox Owner Manual (GMNA-Localizing-U.S./Canada/Mexico-
10446639) - 2018 - CRC - 8/18/17
50 Keys, Doors, and Windows
To avoid setting off the alarm by
accident:
.Lock the vehicle after all
occupants have left the vehicle
and all doors are closed.
. Always unlock a door with the
RKE transmitter.
Unlocking the driver door with the
key will not disarm the system or
turn off the alarm.
How to Detect a Tamper
Condition
IfKis pressed on the RKE
transmitter and the horn chirps and
the lights flash three times, an alarm
occurred previously while the alarm
system was armed.
If the alarm has been activated, a
message will appear on the DIC.
Immobilizer
See Radio Frequency Statement
0 399.
Immobilizer Operation
This vehicle has a passive
theft-deterrent system.
The system does not have to be
manually armed or disarmed.
The vehicle is automatically
immobilized when the vehicle is
turned off.
The immobilization system is
disarmed when the vehicle is
started or the ignition is in ACC/
ACCESSORY and a valid
transmitter is present in the vehicle.
The security light, in the instrument
cluster, comes on if there is a
problem with arming or disarming
the theft-deterrent system.
The system has one or more RKE
transmitters matched to an
immobilizer control unit in your vehicle. Only a correctly matched
RKE transmitter will start the
vehicle. If the transmitter is ever
damaged, you may not be able to
start your vehicle.
When trying to start the vehicle, the
security light may come on briefly
when the ignition is turned on.
If the engine does not start and the
security light stays on, there is a
problem with the system. Turn the
ignition off and try again.
If the vehicle will not change ignition
modes, and the RKE transmitter
appears to be undamaged, try
another transmitter. Refer to
“Starting the Vehicle with a Low
Transmitter Battery”
inRemote
Keyless Entry (RKE) System
Operation 032. Or, you may try
placing the transmitter in the
cupholder. A NO REMOTE
DETECTED message may display.
If the ignition mode will not change
with the other transmitter or in the
cupholder, your vehicle needs
service. If the ignition does change
modes, the first transmitter may be
Page 53 of 428
Chevrolet Equinox Owner Manual (GMNA-Localizing-U.S./Canada/Mexico-
10446639) - 2018 - CRC - 8/18/17
52 Keys, Doors, and Windows
automatic car wash. Push the mirror
outward to return it to the original
position.
Memory Mirrors
The vehicle may have memory
mirrors. SeeMemory Seats 063.
Lane Change Alert (LCA)
The vehicle may have LCA. See
Lane Change Alert (LCA) 0252.
Side Blind Zone Alert
The vehicle may have Side Blind
Zone Alert. See Side Blind Zone
Alert (SBZA) 0252.
Heated Mirrors
If equipped, the heated outside
mirrors turn on when the rear
window defogger is on and help to
clear fog or frost from the surface of
the mirrors.
K:This button is on the climate
control panel.
See “Rear Window Defogger” under
Dual Automatic Climate Control
System 0192.
Automatic Dimming
Mirror
The vehicle has an automatic
dimming outside mirror on the driver
side. The mirror will adjust for the
glare of headlamps behind you.
Reverse Tilt Mirrors
If equipped with memory seats, the
passenger and/or driver mirror tilts
to a preselected position when the
vehicle is in R (Reverse). This
allows the curb to be seen when
parallel parking.
The mirror(s) return to the original
position when:
.
The vehicle is shifted out of
R (Reverse), or remains in
R (Reverse) for about
30 seconds.
. The ignition is turned off.
. The vehicle is driven in
R (Reverse) above a set speed.
To turn this feature on or off, see
Vehicle Personalization 0145.
Interior Mirrors
Interior Rearview Mirrors
Adjust the rearview mirror for a clear
view of the area behind the vehicle.
Do not spray glass cleaner directly
on the mirror. Use a soft towel
dampened with water.
Manual Rearview Mirror
If equipped, push the tab forward for
daytime use and pull it rearward for
nighttime use to avoid glare of the
headlamps from behind.
Automatic Dimming
Rearview Mirror
If equipped, automatic dimming
reduces the glare of headlamps
from behind. The dimming feature
comes on when the vehicle is
started.
Page 67 of 428
Chevrolet Equinox Owner Manual (GMNA-Localizing-U.S./Canada/Mexico-
10446639) - 2018 - CRC - 8/18/17
66 Seats and Restraints
saved to. Try storing the position to
the other memory button or try the
other RKE transmitter.
Easy Exit Recall
Easy Exit Recall is not linked to an
RKE transmitter. The position stored
to
Bis used for all drivers. To turn
Easy Exit Recall on or off, see
"Vehicle Personalization Settings"
previously in this section and
Vehicle Personalization 0145.
If turned on, the positions saved to
Bare automatically recalled when
one of the following occurs:
. The vehicle is turned off and the
driver door is opened within a
short time.
. The vehicle is turned off with the
driver door open.
To stop Easy Exit Recall movement,
press any of the following memory
controls:
. Power seat
. Memory SET, 1, 2, or
B
.Power mirror, with the driver or
passenger side mirror selected
. Power steering wheel,
if equipped
Obstructions
If something has blocked the driver
seat and/or power steering wheel
while recalling a memory position,
the recall may stop. Remove the
obstruction and try the recall again.
If the memory position still does not
recall, see your dealer for service.
Heated and Ventilated
Front Seats
{Warning
If temperature change or pain to
the skin cannot be felt, the seat
heater may cause burns. To
reduce the risk of burns, use care
when using the seat heater,
especially for long periods of
time. Do not place anything on
the seat that insulates against (Continued)
Warning (Continued)
heat, such as a blanket, cushion,
cover, or similar item. This may
cause the seat heater to
overheat. An overheated seat
heater may cause a burn or may
damage the seat.
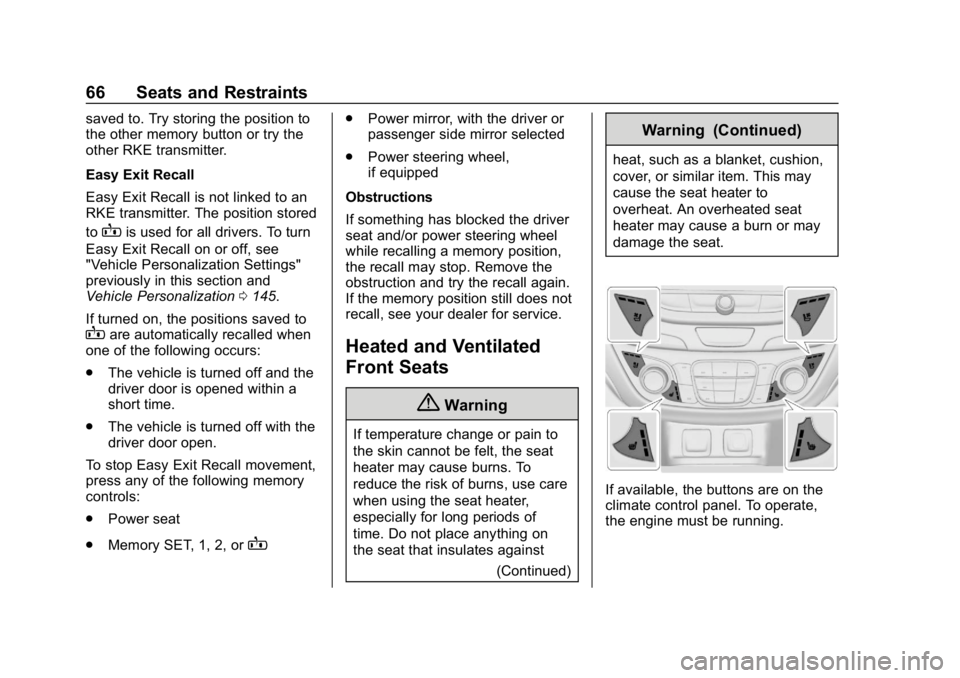
If available, the buttons are on the
climate control panel. To operate,
the engine must be running.
Page 68 of 428
Chevrolet Equinox Owner Manual (GMNA-Localizing-U.S./Canada/Mexico-
10446639) - 2018 - CRC - 8/18/17
Seats and Restraints 67
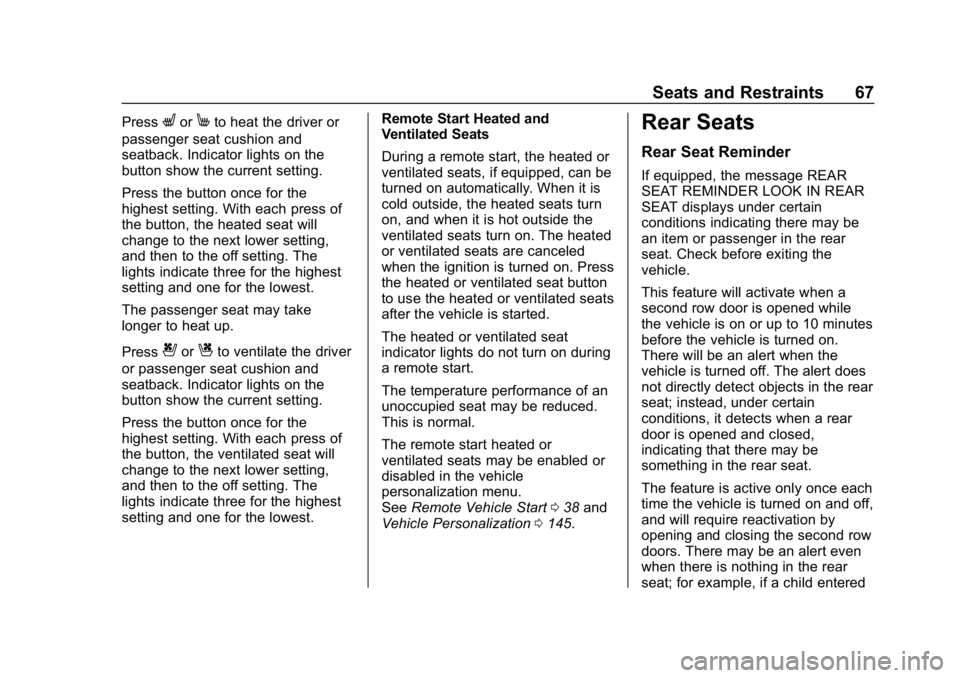
PressLorMto heat the driver or
passenger seat cushion and
seatback. Indicator lights on the
button show the current setting.
Press the button once for the
highest setting. With each press of
the button, the heated seat will
change to the next lower setting,
and then to the off setting. The
lights indicate three for the highest
setting and one for the lowest.
The passenger seat may take
longer to heat up.
Press
{orCto ventilate the driver
or passenger seat cushion and
seatback. Indicator lights on the
button show the current setting.
Press the button once for the
highest setting. With each press of
the button, the ventilated seat will
change to the next lower setting,
and then to the off setting. The
lights indicate three for the highest
setting and one for the lowest. Remote Start Heated and
Ventilated Seats
During a remote start, the heated or
ventilated seats, if equipped, can be
turned on automatically. When it is
cold outside, the heated seats turn
on, and when it is hot outside the
ventilated seats turn on. The heated
or ventilated seats are canceled
when the ignition is turned on. Press
the heated or ventilated seat button
to use the heated or ventilated seats
after the vehicle is started.
The heated or ventilated seat
indicator lights do not turn on during
a remote start.
The temperature performance of an
unoccupied seat may be reduced.
This is normal.
The remote start heated or
ventilated seats may be enabled or
disabled in the vehicle
personalization menu.
See
Remote Vehicle Start 038 and
Vehicle Personalization 0145.
Rear Seats
Rear Seat Reminder
If equipped, the message REAR
SEAT REMINDER LOOK IN REAR
SEAT displays under certain
conditions indicating there may be
an item or passenger in the rear
seat. Check before exiting the
vehicle.
This feature will activate when a
second row door is opened while
the vehicle is on or up to 10 minutes
before the vehicle is turned on.
There will be an alert when the
vehicle is turned off. The alert does
not directly detect objects in the rear
seat; instead, under certain
conditions, it detects when a rear
door is opened and closed,
indicating that there may be
something in the rear seat.
The feature is active only once each
time the vehicle is turned on and off,
and will require reactivation by
opening and closing the second row
doors. There may be an alert even
when there is nothing in the rear
seat; for example, if a child entered
Page 71 of 428
Chevrolet Equinox Owner Manual (GMNA-Localizing-U.S./Canada/Mexico-
10446639) - 2018 - CRC - 8/18/17
70 Seats and Restraints
1. Ensure the seat belt is in thebelt stowage clip.
2. Lift the seatback up and push it rearward to lock it in place.
A tab near the seatback lever
retracts when the seatback is
locked in place.
3. Return the head restraint to the upright position. See Head
Restraints 059.
4. Push and pull the top of the seatback to be sure it is locked
into position.
5. Repeat the steps to raise the other seatback, if necessary.
When the seat is not in use, it
should be kept in the upright, locked
position.Heated Rear Seats
{Warning
If temperature change or pain to
the skin cannot be felt, the seat
heater may cause burns. To
reduce the risk of burns, use care
when using the seat heater,
especially for long periods of
time. Do not place anything on
the seat that insulates against
heat, such as a blanket, cushion,
cover, or similar item. This may
cause the seat heater to
overheat. An overheated seat
heater may cause a burn or may
damage the seat.
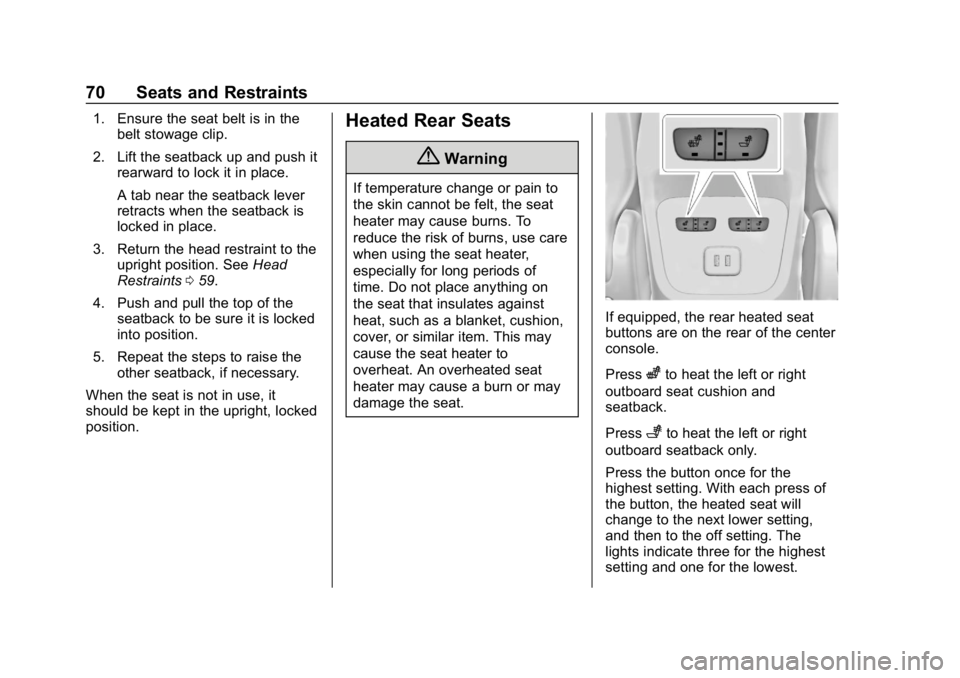
If equipped, the rear heated seat
buttons are on the rear of the center
console.
Press
zto heat the left or right
outboard seat cushion and
seatback.
Press
+to heat the left or right
outboard seatback only.
Press the button once for the
highest setting. With each press of
the button, the heated seat will
change to the next lower setting,
and then to the off setting. The
lights indicate three for the highest
setting and one for the lowest.
Page 93 of 428
Chevrolet Equinox Owner Manual (GMNA-Localizing-U.S./Canada/Mexico-
10446639) - 2018 - CRC - 8/18/17
92 Seats and Restraints
Infants and Young
Children
Everyone in a vehicle needs
protection! This includes infants and
all other children. Neither the
distance traveled nor the age and
size of the traveler changes the
need, for everyone, to use safety
restraints. In fact, the law in every
state in the United States and in
every Canadian province says
children up to some age must be
restrained while in a vehicle.
{Warning
Children can be seriously injured
or strangled if a shoulder belt is
wrapped around their neck. The
shoulder belt can tighten but
cannot be loosened if it is locked.
The shoulder belt locks when it is
pulled all the way out of the
retractor. It unlocks when the
shoulder belt is allowed to go all
the way back into the retractor,
but it cannot do this if it is
wrapped around a child’s neck.
If the shoulder belt is locked and
tightened around a child’s neck,
the only way to loosen the belt is
to cut it.
Never leave children unattended
in a vehicle and never allow
children to play with the seat
belts.
Every time infants and young
children ride in vehicles, they should
have the protection provided by appropriate child restraints. Neither
the vehicle's seat belt system nor its
airbag system is designed for them.
Children who are not restrained
properly can strike other people,
or can be thrown out of the vehicle.
{Warning
Never hold an infant or a child
while riding in a vehicle. Due to
crash forces, an infant or a child
will become so heavy it is not
possible to hold it during a crash.
For example, in a crash at only
40 km/h (25 mph), a 5.5 kg (12 lb)
infant will suddenly become a
110 kg (240 lb) force on a person's
arms. An infant or child should be
secured in an appropriate
restraint.
Page 118 of 428
Chevrolet Equinox Owner Manual (GMNA-Localizing-U.S./Canada/Mexico-
10446639) - 2018 - CRC - 8/18/17
Instruments and Controls 117
4. TouchRorQto adjust AM or
PM for 12 hour format.
5. Touch
3.
Using Auto Set
1. Press{, then touch
SETTINGS.
2. Touch Time and Date, then Auto Set.
3. Select from the available selections.
4. Touch
3.
Setting the 12/24 Hour Format
1. Press{, then touch
SETTINGS.
2. Touch Time and Date, then select 12h or 24h format.
3. Touch
3.
Setting the Month and Day
Format
1. Press{, then touch
SETTINGS. 2. Touch Time and Date, then Set
Date Format.
3. Select DD/MM/YYYY (day/ month/year), MM/DD/YYYY
(month/day/year), or YYYY/
MM/DD (year/month/day)
format.
4. Touch
3.
Uplevel Radio Using Faceplate
Controls
To set the time or date: 1. Select Home Page, then select SETTINGS.
2. Select Time and Date, then the desired function.
3. Turn the MENU knob to increase or decrease the value.
4. Press the MENU knob to go to the next value. After the last
value is selected, the system
will update and return to the
Settings menu. Press
oBACK
to go to the last menu and
save the changes. Auto Set requires an OnStar
service plan.
If auto timing is set, the time
displayed on the clock may not
update immediately when driving
into a new time zone.
To set the clock display:
1. Select SETTINGS from the Home Page, then select Time
and Date.
2. Select Clock Display.
3. Turn the MENU knob to Off or On.
4. Press the MENU knob to select.
Press
oBACK to go to the last
menu and save the changes.
Uplevel Radio Using
Infotainment Display Controls
The infotainment system controls
are used to access the time and
date settings through the menu
system. See “Using the System”
under “Introduction” in the
infotainment manual.
Page 141 of 428
Chevrolet Equinox Owner Manual (GMNA-Localizing-U.S./Canada/Mexico-
10446639) - 2018 - CRC - 8/18/17
140 Instruments and Controls
(mpg). This number is based on the
number of L/100 km (mpg) recorded
since the last time this menu item
was reset. This number reflects only
the approximate average fuel
economy that the vehicle has right
now, and will change as driving
conditions change. Reset the
average consumption by pressing
V
when it is displayed.
Fuel Range :Displays the
approximate distance the vehicle
can be driven without refueling. The
fuel range estimate is based on an
average of the vehicle's fuel
economy over recent driving history
and the amount of fuel remaining in
the fuel tank. Fuel range cannot be
reset.
Average Vehicle Speed : Displays
the average vehicle speed of the
vehicle in kilometers per hour (km/h)
or miles per hour (mph). This
average is based on the various
vehicle speeds recorded since the
last reset. Reset the average speed
by pressing
Vwhen it is displayed. Timer :
To start the timer, press
V
while Timer is displayed. The
display will show the amount of time
that has passed since the timer was
last reset, not including time the
ignition is off. Time will continue to
be counted as long as the ignition is
on, even if another display is being
shown on the DIC. The timer will
record up to 99 hours, 59 minutes,
and 59 seconds (99:59:59) after
which the display will return to zero.
To stop the timer, press
Vbriefly
while Timer is displayed. To reset
the timer to zero, press and hold
V.
Navigation : Used for the OnStar
Turn-by-Turn guidance.
Blank Display : Displays no
information.
Vehicle Information Menu
(VEHICLE) Items
Units : Choose between Metric or
US when Units is active. Press
Vto
confirm the setting. This will change
the displays on the DIC to the type
of measurements you select. Speed Warning :
This display is
used to set the vehicle speed at
which the speed warning chime
sounds and the alert is displayed.
The speed can be set by pressing
Vwhile the speed warning display
is showing.
Remaining Oil Life : Displays an
estimate of the oil's remaining useful
life. If REMAINING OIL LIFE 99% is
displayed, that means 99% of the
current oil life remains.
When the remaining oil life is low,
the CHANGE ENGINE OIL SOON
message will appear on the display.
The oil should be changed as soon
as possible. See Engine Oil0288.
In addition to the engine oil life
system monitoring the oil life,
additional maintenance is
recommended in the Maintenance
Schedule in this manual. See
Maintenance Schedule 0373.
The Oil Life display must be reset
after each oil change. Do not reset
the Oil Life display accidentally at
any time other than when the oil has
just been changed. It cannot be
reset accurately until the next oil
Page 143 of 428
Chevrolet Equinox Owner Manual (GMNA-Localizing-U.S./Canada/Mexico-
10446639) - 2018 - CRC - 8/18/17
142 Instruments and Controls
Uplevel DIC
DIC Info Page Options
The info pages on the DIC can be
turned on or off through the
Options menu.1. Press
oto access the cluster
applications.
2. Press
worxto scroll to the
Options application.
3. Press
Vto enter the
Options menu.
4. Scroll to Info Pages and press
p.
5. Press
worxto move
through the list of possible
information displays.
6. Press
Vwhile an item is
highlighted to select or
deselect that item. When an
item is selected, a checkmark
will appear next to it. DIC Info Pages
The following is the list of all
possible DIC info page displays.
Some may not be available for your
particular vehicle. Some items may
not be turned on by default but can
be turned on through the Options
app. See
“DIC Info Page Options”
earlier in this section.
Speed : Shows the vehicle speed in
either kilometers per hour (km/h) or
miles per hour (mph).
Trip A or Trip B : Shows the
current distance traveled, in either
kilometers (km) or miles (mi), since
the trip odometer was last reset.
This also shows the approximate
average liters per 100 kilometers (L/100 km) or miles per
gallon (mpg). This number is
calculated based on the number of
L/100 km (mpg) recorded since the
last time this menu item was reset.
This number reflects only the
approximate average fuel economy
that the vehicle has right now, and
will change as driving conditions
change. Press and hold
Vwhile this display
is active to reset the trip odometer
and the average fuel economy. Trip
A and Trip B can also be reset by
pressing
pand choosing reset.
Fuel Information : Fuel Range:
Shows the approximate distance the
vehicle can be driven without
refueling. LOW will be displayed
when the vehicle is low on fuel. The
fuel range estimate is based on an
average of the vehicle's fuel
economy over recent driving history
and the amount of fuel remaining in
the fuel tank.
Oil Life : Shows an estimate of the
oil's remaining useful life.
If REMAINING OIL LIFE 99% is
displayed, that means 99% of the
current oil life remains.
When the remaining oil life is low,
the CHANGE ENGINE OIL SOON
message will appear on the display.
The oil should be changed as soon
as possible. See Engine Oil0288.
In addition to the engine oil life
system monitoring the oil life,
additional maintenance is