spare tire CHEVROLET EQUINOX 2022 Owners Manual
[x] Cancel search | Manufacturer: CHEVROLET, Model Year: 2022, Model line: EQUINOX, Model: CHEVROLET EQUINOX 2022Pages: 360, PDF Size: 14.71 MB
Page 182 of 360
Chevrolet Equinox Owner Manual (GMNA-Localizing-U.S./Canada-
16540728) - 2023 - crc - 6/16/22
Driving and Operating 181
.Slow down and adjust your driving
according to weather conditions. Stopping
distance can be longer and vehicle control
can be affected when traction is reduced
by water, snow, ice, gravel, or other
material on the road. Learn to recognize
warning clues—such as enough water,
ice, or packed snow on the road to make
a mirrored surface —and slow down
when you have any doubt.
.Try to avoid sudden steering, acceleration,
or braking, including reducing vehicle
speed by shifting to a lower gear. Any
sudden changes could cause the tires to
slide.
Remember: Antilock brakes help avoid only
the braking skid.
Off-Road Driving
All-wheel-drive vehicles can be used for
off-road driving. Vehicles without all-wheel
drive and vehicles not equipped with All
Terrain (AT) or On-Off Road (OOR) tires must
not be driven off-road except on a level,
solid surface. To contact the tire
manufacturer for more information about
the original equipment tires, see the
warranty manual. Controlling the vehicle is the key to
successful off-road driving. One of the best
ways to control the vehicle is to control the
speed.
{Warning
When driving off-road, bouncing and
quick changes in direction can easily
throw you out of position. This could
cause you to lose control and crash. You
and your passengers should always wear
seat belts.
Before Driving Off-Road
.Have all necessary maintenance and
service work completed.
.Fuel the vehicle, fill fluid levels, and check
inflation pressure in all tires, including the
spare, if equipped.
.Read all the information about
all-wheel-drive vehicles in this manual.
.Make sure all underbody shields,
if equipped, are properly attached.
.Know the local laws that apply to off-road
driving.
Loading the Vehicle for Off-Road Driving
{Warning
.Unsecured cargo on the load floor can
be tossed about when driving over
rough terrain. You or your passengers
can be struck by flying objects. Secure
the cargo properly.
.Keep cargo in the cargo area as far
forward and as low as possible. The
heaviest things should be on the floor,
forward of the rear axle.
.Heavy loads on the roof raise the
vehicle's center of gravity, making it
more likely to roll over. You can be
seriously or fatally injured if the
vehicle rolls over. Put heavy loads
inside the cargo area, not on the roof.
For more information about loading the
vehicle, see Vehicle Load Limits 0187.
Environmental Concerns
.Always use established trails, roads, and
areas that have been set aside for public
off-road recreational driving and obey all
posted regulations.
.Do not damage shrubs, flowers, trees,
or grasses or disturb wildlife.
Page 202 of 360
Chevrolet Equinox Owner Manual (GMNA-Localizing-U.S./Canada-
16540728) - 2023 - crc - 6/16/22
Driving and Operating 201
reactivated when the vehicle is turned on.
SeeDriving Characteristics and Towing Tips
0 238.
Automatic Engine Grade Braking
Automatic Engine Grade Braking assists
when driving downhill. It maintains vehicle
speed by automatically implementing a shift
pattern that uses the engine and the
transmission to slow the vehicle. The system
will automatically command downshifts to
reduce vehicle speed. The normal shift
pattern will return once the vehicle is on a
low grade or when the accelerator pedal is
pressed.
While in the Electronic Range Select (ERS)
mode, grade braking is deactivated, allowing
the driver to select a range and limiting the
highest gear available. Grade braking is
available for normal driving and in Tow/
Haul Mode.
See Automatic Transmission 0198.
Drive Systems
All-Wheel Drive
Vehicles with this feature can operate in
All-Wheel Drive (AWD) Mode. The AWD system delivers power to all four
wheels and the system adjusts as needed to
improve traction.
Press the AWD switch on the center console
to activate the system. The AWD light will
flash briefly while the system is engaging
and stay lit to indicate AWD is active. Press
the switch again to disable the system. The
light will flash briefly while the system
disables and then stay off.
The AWD Mode will stay selected until the
mode is changed.
When operated in Front-Wheel Drive (FWD)
Mode, the vehicle will deliver power to the
front wheels only and may provide better
fuel economy.
A system off message displays when there
is a temporary condition making the AWD
system unavailable. The vehicle will run
in FWD.
This could be caused by:
.A compact spare tire on the vehicle.
.AWD system overheat.
.Loss of wheel or vehicle speed.
.Certain other vehicle electrical conditions.
The message turns off when the compact
spare tire is replaced by a full-size tire, the
differential fluid cools, or the above
conditions are no longer present and the
warning message is reset.
To reset the warning message manually,
turn the ignition off and then back on again
after 30 seconds. If the message stays on,
see your dealer.
Brakes
Electric Brake Boost
Vehicles equipped with electric brake boost
have hydraulic brake circuits that are
electronically controlled when the brake
pedal is applied during normal operation.
The system performs routine tests and turns
off within a few minutes after the vehicle is
turned off. Noise may be heard during this
time. If the brake pedal is pressed during
the tests or when the electric brake boost
system is off, a noticeable change in pedal
force and travel may be felt. This is normal.
Antilock Brake System (ABS)
The Antilock Brake System (ABS) helps
prevent a braking skid and maintain steering
while braking hard.
Page 238 of 360
Chevrolet Equinox Owner Manual (GMNA-Localizing-U.S./Canada-
16540728) - 2023 - crc - 6/16/22
Driving and Operating 237
Warning (Continued)
.Keep children away from the fuel
pump and never let children
pump fuel.
.Before touching the fill nozzle, touch a
metallic object to discharge static
electricity from your body.
.Fuel can spray out if the fill nozzle is
inserted too quickly. This spray can
happen if the tank is nearly full, and is
more likely in hot weather. Insert the
fill nozzle slowly and wait for any hiss
noise to stop before beginning to
flow fuel.
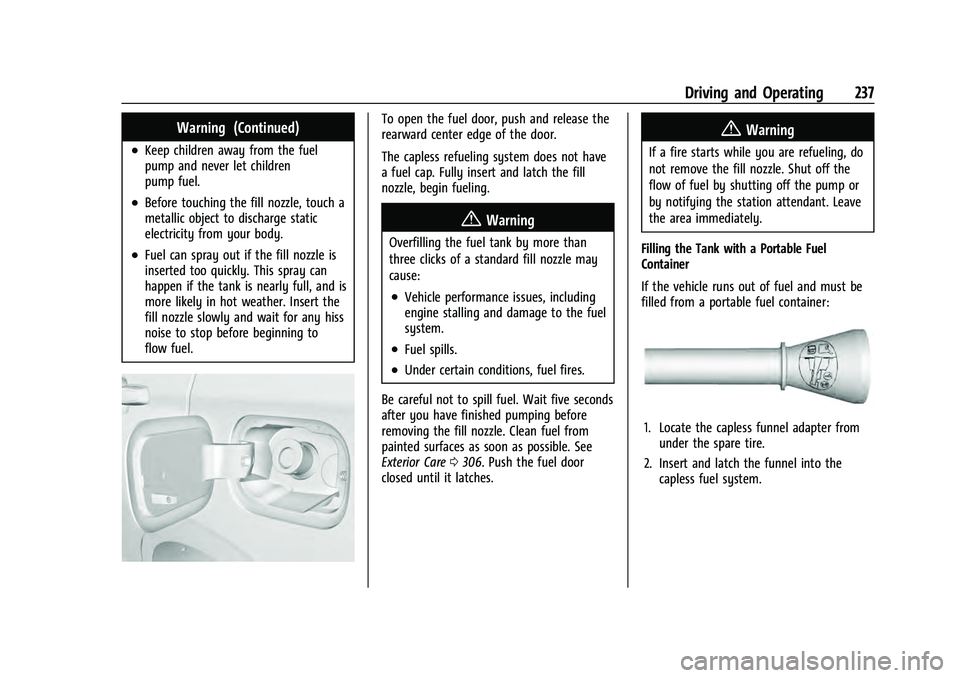
To open the fuel door, push and release the
rearward center edge of the door.
The capless refueling system does not have
a fuel cap. Fully insert and latch the fill
nozzle, begin fueling.
{Warning
Overfilling the fuel tank by more than
three clicks of a standard fill nozzle may
cause:
.Vehicle performance issues, including
engine stalling and damage to the fuel
system.
.Fuel spills.
.Under certain conditions, fuel fires.
Be careful not to spill fuel. Wait five seconds
after you have finished pumping before
removing the fill nozzle. Clean fuel from
painted surfaces as soon as possible. See
Exterior Care 0306. Push the fuel door
closed until it latches.
{Warning
If a fire starts while you are refueling, do
not remove the fill nozzle. Shut off the
flow of fuel by shutting off the pump or
by notifying the station attendant. Leave
the area immediately.
Filling the Tank with a Portable Fuel
Container
If the vehicle runs out of fuel and must be
filled from a portable fuel container:
1. Locate the capless funnel adapter from under the spare tire.
2. Insert and latch the funnel into the capless fuel system.
Page 246 of 360
Chevrolet Equinox Owner Manual (GMNA-Localizing-U.S./Canada-
16540728) - 2023 - crc - 6/16/22
Driving and Operating 245
2. Pull the bottom edge of the coverrearward.
3. Disengage the cover at the upper attachments (1) and remove.
Consider using mechanical sway controls
with any trailer. Ask a trailering professional
about sway controls or refer to the trailer
manufacturer's recommendations and
instructions.
Tires
.Do not tow a trailer while using a
compact spare tire on the vehicle.
.Tires must be properly inflated to support
loads while towing a trailer. See Tires
0 277 for instructions on proper tire
inflation.
Safety Chains
Always attach chains between the vehicle
and the trailer, and attach the chains to the
holes on the trailer hitch platform.
Instructions about safety chains may be
provided by the hitch manufacturer or by
the trailer manufacturer.
Cross the safety chains under the tongue of
the trailer to help prevent the tongue from
contacting the road if it becomes separated from the hitch. Always leave just enough
slack so the combination can turn. Never
allow safety chains to drag on the ground.
Trailer Brakes
Loaded trailers over 450 kg (1,000 lb) must
be equipped with brake systems and with
brakes for each axle. Trailer braking
equipment conforming to Canadian
Standards Association (CSA) requirement
CAN3-D313, or its equivalent, is
recommended.
State or local regulations may require
trailers to have their own braking system if
the loaded weight of the trailer exceeds
certain minimums that can vary from state
to state. Read and follow the instructions for
the trailer brakes so they are installed,
adjusted, and maintained properly. Never
attempt to tap into your vehicle's hydraulic
brake system. If you do, both the vehicle
anti-lock brakes and the trailer brakes may
not function, which could result in a crash.
Trailer Lamps
Always check all trailer lamps are working at
the beginning of each trip, and periodically
on longer trips.
Turn Signals When Towing a Trailer
When properly connected, the trailer turn
signals should will illuminate to indicate the
vehicle is turning, changing lanes,
or stopping. When towing a trailer, the
arrows on the instrument cluster will
illuminate even if the trailer is not properly
connected or the bulbs are burned out.
Trailer Tires
Special Trailer (ST) tires differ from vehicle
tires. Trailer tires are designed with stiff
sidewalls to help prevent sway and to
support heavy loads. These features can
make it difficult to determine if the trailer
tire pressures are low only based on a visual
inspection.
Always check all trailer tire pressures before
each trip when the tires are cool. Low trailer
tire pressure is a leading cause of trailer tire
blow-outs.
Trailer tires deteriorate over time. The trailer
tire sidewall will show the week and year
the tire was manufactured. Many trailer tire
manufacturers recommend replacing tires
more than six years old.
Page 248 of 360
Chevrolet Equinox Owner Manual (GMNA-Localizing-U.S./Canada-
16540728) - 2023 - crc - 6/16/22
Vehicle Care 247
Vehicle Care
General Information
General Information . . . . . . . . . . . . . . . . . . . 248
California Perchlorate MaterialsRequirements . . . . . . . . . . . . . . . . . . . . . . . . 248
Accessories and Modifications . . . . . . . . . 248
Vehicle Checks
Doing Your Own Service Work . . . . . . . . 248
Hood . . . . . . . . . . . . . . . . . . . . . . . . . . . . . . . . . . 249
Engine Compartment Overview . . . . . . . . 251
Engine Oil . . . . . . . . . . . . . . . . . . . . . . . . . . . . . 252
Engine Oil Life System . . . . . . . . . . . . . . . . 254
Automatic Transmission Fluid . . . . . . . . . . 255
Engine Air Filter Life System . . . . . . . . . . . 255
Engine Air Cleaner/Filter . . . . . . . . . . . . . . . 255
Cooling System . . . . . . . . . . . . . . . . . . . . . . . . 257
Engine Overheating . . . . . . . . . . . . . . . . . . . 259
Washer Fluid . . . . . . . . . . . . . . . . . . . . . . . . . . 260
Brakes . . . . . . . . . . . . . . . . . . . . . . . . . . . . . . . . . 261
Brake Fluid . . . . . . . . . . . . . . . . . . . . . . . . . . . . 262
Battery - North America . . . . . . . . . . . . . . . 263
All-Wheel Drive . . . . . . . . . . . . . . . . . . . . . . . . 263
Park Brake and P (Park) Mechanism Check . . . . . . . . . . . . . . . . . . . . . . . . . . . . . . . . 263
Wiper Blade Replacement . . . . . . . . . . . . . 264
Windshield Replacement . . . . . . . . . . . . . . 265
Gas Strut(s) . . . . . . . . . . . . . . . . . . . . . . . . . . . 265
Headlamp Aiming
Front Headlamp Aiming . . . . . . . . . . . . . . . 266
Bulb Replacement
Bulb Replacement . . . . . . . . . . . . . . . . . . . . . 266
Halogen Bulbs . . . . . . . . . . . . . . . . . . . . . . . . 266
High Intensity Discharge (HID) Lighting . . . . . . . . . . . . . . . . . . . . . . . . . . . . . 267
LED Lighting . . . . . . . . . . . . . . . . . . . . . . . . . . . 267
Headlamps . . . . . . . . . . . . . . . . . . . . . . . . . . . . 267
Front Turn Signal and Fog Lamps . . . . . 268
Taillamps . . . . . . . . . . . . . . . . . . . . . . . . . . . . . . 268
License Plate Lamp . . . . . . . . . . . . . . . . . . . . 268
Electrical System
Electrical System Overload . . . . . . . . . . . . 269
Fuses and Circuit Breakers . . . . . . . . . . . . . 271
Engine Compartment Fuse Block . . . . . . . 271
Instrument Panel Fuse Block . . . . . . . . . . . 273
Rear Compartment Fuse Block . . . . . . . . . 275
Wheels and Tires
Tires . . . . . . . . . . . . . . . . . . . . . . . . . . . . . . . . . . . 277
All-Season Tires . . . . . . . . . . . . . . . . . . . . . . . . 277
Winter Tires . . . . . . . . . . . . . . . . . . . . . . . . . . . 278
Tire Sidewall Labeling . . . . . . . . . . . . . . . . . 278
Tire Designations . . . . . . . . . . . . . . . . . . . . . . 280
Tire Terminology and Definitions . . . . . 280
Tire Pressure . . . . . . . . . . . . . . . . . . . . . . . . . . 282
Tire Pressure Monitor System . . . . . . . . . 283
Tire Pressure Monitor Operation . . . . . . 284 Tire Inspection . . . . . . . . . . . . . . . . . . . . . . . . 287
Tire Rotation . . . . . . . . . . . . . . . . . . . . . . . . . . 287
When It Is Time for New Tires . . . . . . . . 288
Buying New Tires . . . . . . . . . . . . . . . . . . . . . 289
Different Size Tires and Wheels . . . . . . . 290
Uniform Tire Quality Grading . . . . . . . . . 290
Wheel Alignment and Tire Balance . . . . 292
Wheel Replacement . . . . . . . . . . . . . . . . . . . 292
Tire Chains . . . . . . . . . . . . . . . . . . . . . . . . . . . . 292
If a Tire Goes Flat . . . . . . . . . . . . . . . . . . . . . 293
Tire Changing . . . . . . . . . . . . . . . . . . . . . . . . . 294
Compact Spare Tire . . . . . . . . . . . . . . . . . . . 299
Jump Starting
Jump Starting - North America . . . . . . . . 300
Towing the Vehicle
Transporting a Disabled Vehicle . . . . . . . 302
Recreational Vehicle Towing . . . . . . . . . . . 304
Appearance Care
Exterior Care . . . . . . . . . . . . . . . . . . . . . . . . . . 306
Interior Care . . . . . . . . . . . . . . . . . . . . . . . . . . . 310
Floor Mats . . . . . . . . . . . . . . . . . . . . . . . . . . . . . 313
Page 279 of 360
Chevrolet Equinox Owner Manual (GMNA-Localizing-U.S./Canada-
16540728) - 2023 - crc - 6/16/22
278 Vehicle Care
Consider installing winter tires on the
vehicle if frequent driving on snow or
ice-covered roads is expected. All-season tires
provide adequate performance for most
winter driving conditions, but they may not
offer the same level of traction or
performance as winter tires on snow or
ice-covered roads. SeeWinter Tires0278.
Winter Tires
This vehicle was not originally equipped
with winter tires. Winter tires are designed
for increased traction on snow and
ice-covered roads. Consider installing winter
tires on the vehicle if frequent driving on ice
or snow covered roads is expected. See your
dealer for details regarding winter tire
availability and proper tire selection. Also,
see Buying New Tires 0289.
With winter tires, there may be decreased
dry road traction, increased road noise, and
shorter tread life. After changing to winter
tires, be alert for changes in vehicle
handling and braking.
If using winter tires:
.Use tires of the same brand and tread
type on all four wheel positions.
.Use only radial ply tires of the same size,
load range, and speed rating as the
original equipment tires.
Winter tires with the same speed rating as
the original equipment tires may not be
available for H, V, W, Y, and ZR speed rated
tires. If winter tires with a lower speed
rating are chosen, never exceed the tire's
maximum speed capability.
Tire Sidewall Labeling
Useful information about a tire is
molded into its sidewall. The examples
show a typical passenger vehicle tire
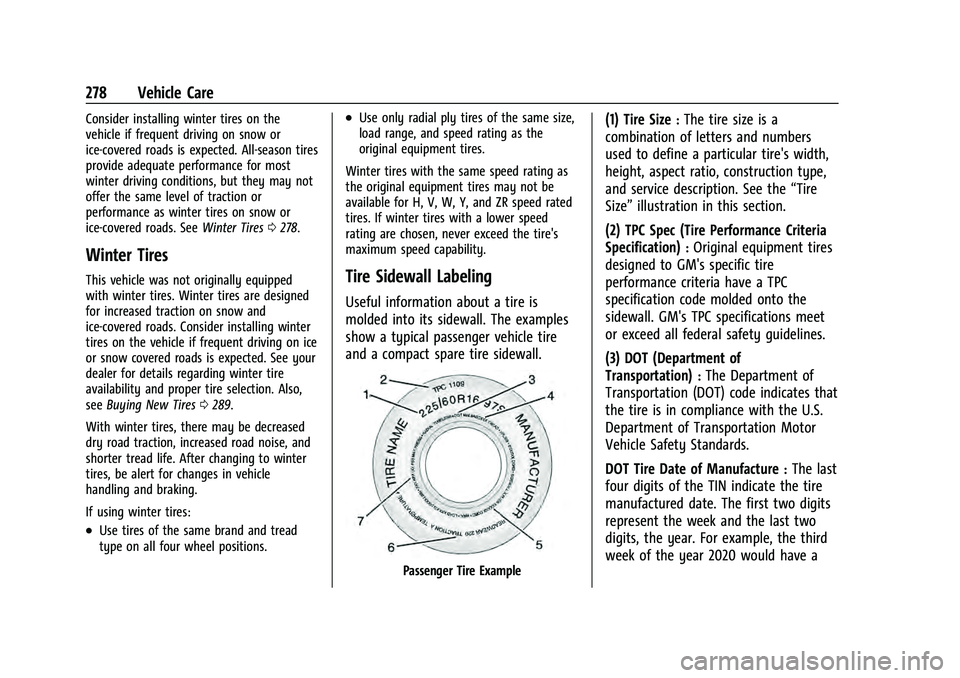
and a compact spare tire sidewall.
Passenger Tire Example
(1) Tire Size:The tire size is a
combination of letters and numbers
used to define a particular tire's width,
height, aspect ratio, construction type,
and service description. See the “Tire
Size” illustration in this section.
(2) TPC Spec (Tire Performance Criteria
Specification)
:Original equipment tires
designed to GM's specific tire
performance criteria have a TPC
specification code molded onto the
sidewall. GM's TPC specifications meet
or exceed all federal safety guidelines.
(3) DOT (Department of
Transportation)
:The Department of
Transportation (DOT) code indicates that
the tire is in compliance with the U.S.
Department of Transportation Motor
Vehicle Safety Standards.
DOT Tire Date of Manufacture
:The last
four digits of the TIN indicate the tire
manufactured date. The first two digits
represent the week and the last two
digits, the year. For example, the third
week of the year 2020 would have a
Page 280 of 360
Chevrolet Equinox Owner Manual (GMNA-Localizing-U.S./Canada-
16540728) - 2023 - crc - 6/16/22
Vehicle Care 279
4-digit DOT date of 0320. Week 01 is
the first full week (Sunday through
Saturday) of each year.
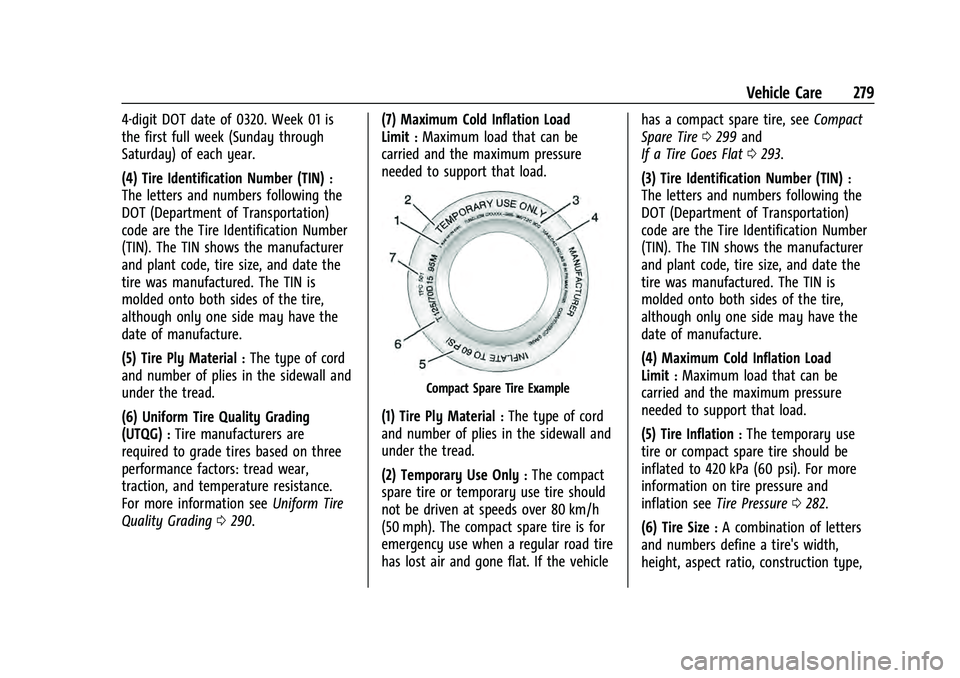
(4) Tire Identification Number (TIN)
:
The letters and numbers following the
DOT (Department of Transportation)
code are the Tire Identification Number
(TIN). The TIN shows the manufacturer
and plant code, tire size, and date the
tire was manufactured. The TIN is
molded onto both sides of the tire,
although only one side may have the
date of manufacture.
(5) Tire Ply Material
:The type of cord
and number of plies in the sidewall and
under the tread.
(6) Uniform Tire Quality Grading
(UTQG)
:Tire manufacturers are
required to grade tires based on three
performance factors: tread wear,
traction, and temperature resistance.
For more information see Uniform Tire
Quality Grading 0290. (7) Maximum Cold Inflation Load
Limit
:Maximum load that can be
carried and the maximum pressure
needed to support that load.
Compact Spare Tire Example
(1) Tire Ply Material:The type of cord
and number of plies in the sidewall and
under the tread.
(2) Temporary Use Only
:The compact
spare tire or temporary use tire should
not be driven at speeds over 80 km/h
(50 mph). The compact spare tire is for
emergency use when a regular road tire
has lost air and gone flat. If the vehicle has a compact spare tire, see
Compact
Spare Tire 0299 and
If a Tire Goes Flat 0293.
(3) Tire Identification Number (TIN)
:
The letters and numbers following the
DOT (Department of Transportation)
code are the Tire Identification Number
(TIN). The TIN shows the manufacturer
and plant code, tire size, and date the
tire was manufactured. The TIN is
molded onto both sides of the tire,
although only one side may have the
date of manufacture.
(4) Maximum Cold Inflation Load
Limit
:Maximum load that can be
carried and the maximum pressure
needed to support that load.
(5) Tire Inflation
:The temporary use
tire or compact spare tire should be
inflated to 420 kPa (60 psi). For more
information on tire pressure and
inflation see Tire Pressure 0282.
(6) Tire Size
:A combination of letters
and numbers define a tire's width,
height, aspect ratio, construction type,
Page 284 of 360
Chevrolet Equinox Owner Manual (GMNA-Localizing-U.S./Canada-
16540728) - 2023 - crc - 6/16/22
Vehicle Care 283
The Tire and Loading Information label
on the vehicle indicates the original
equipment tires and the correct cold
tire inflation pressures. The
recommended pressure is the minimum
air pressure needed to support the
vehicle's maximum load carrying
capacity. SeeVehicle Load Limits 0187.
How the vehicle is loaded affects
vehicle handling and ride comfort.
Never load the vehicle with more
weight than it was designed to carry.
When to Check
Check the pressure of the tires once a
month or more. Do not forget the
spare, if the vehicle has one. The
compact spare cold tire pressure should
be at 420 kPa (60 psi). See Compact
Spare Tire 0299.
How to Check
Use a good quality pocket-type gauge
to check tire pressure. Proper tire
inflation cannot be determined by
looking at the tire. Check the tire
inflation pressure when the tires are cold, meaning the vehicle has not been
driven for at least three hours or no
more than 1.6 km (1 mi).
Remove the valve cap from the tire
valve stem. Press the tire gauge firmly
onto the valve to get a pressure
measurement. If the cold tire inflation
pressure matches the recommended
pressure on the Tire and Loading
Information label, no further adjustment
is necessary. If the inflation pressure is
low, add air until the recommended
pressure is reached. If the inflation
pressure is high, press on the metal
stem in the center of the tire valve to
release air.
Recheck the tire pressure with the tire
gauge.
Put the valve caps back on the valve
stems to keep out dirt and moisture.
Use only valve caps designed for the
vehicle by GM. TPMS sensors could be
damaged and would not be covered by
the vehicle warranty.Tire Pressure Monitor System
The Tire Pressure Monitor System (TPMS)
uses radio and sensor technology to check
tire pressure levels. The TPMS sensors
monitor the air pressure in your tires and
transmit tire pressure readings to a receiver
located in the vehicle.
Each tire, including the spare (if provided),
should be checked monthly when cold and
inflated to the inflation pressure
recommended by the vehicle manufacturer
on the vehicle placard or tire inflation
pressure label. (If your vehicle has tires of a
different size than the size indicated on the
vehicle placard or tire inflation pressure
label, you should determine the proper tire
inflation pressure for those tires.)
As an added safety feature, your vehicle has
been equipped with a tire pressure
monitoring system (TPMS) that illuminates a
low tire pressure telltale when one or more
of your tires is significantly under-inflated.
Accordingly, when the low tire pressure
telltale illuminates, you should stop and
check your tires as soon as possible, and
inflate them to the proper pressure. Driving
on a significantly under-inflated tire causes
the tire to overheat and can lead to tire
Page 285 of 360
Chevrolet Equinox Owner Manual (GMNA-Localizing-U.S./Canada-
16540728) - 2023 - crc - 6/16/22
284 Vehicle Care
failure. Under-inflation also reduces energy
efficiency and tire tread life, and may affect
the vehicle's handling and stopping ability.
Please note that the TPMS is not a
substitute for proper tire maintenance, and
it is the driver's responsibility to maintain
correct tire pressure, even if under-inflation
has not reached the level to trigger
illumination of the TPMS low tire pressure
telltale.
Your vehicle has also been equipped with a
TPMS malfunction indicator to indicate when
the system is not operating properly. The
TPMS malfunction indicator is combined
with the low tire pressure telltale. When the
system detects a malfunction, the telltale
will flash for approximately one minute and
then remain continuously illuminated. This
sequence will continue upon subsequent
vehicle start-ups as long as the malfunction
exists.
When the malfunction indicator is
illuminated, the system may not be able to
detect or signal low tire pressure as
intended. TPMS malfunctions may occur for
a variety of reasons, including the
installation of replacement or alternate tires
or wheels on the vehicle that prevent the
TPMS from functioning properly. Alwayscheck the TPMS malfunction telltale after
replacing one or more tires or wheels on
your vehicle to ensure that the replacement
or alternate tires and wheels allow the
TPMS to continue to function properly.
See
Tire Pressure Monitor Operation 0284.
See Radio Frequency Statement 0335.
Tire Pressure Monitor Operation
This vehicle may have a Tire Pressure
Monitor System (TPMS). The TPMS is
designed to warn the driver when a low tire
pressure condition exists. TPMS sensors are
mounted onto each tire and wheel
assembly, excluding the spare tire and
wheel assembly. The TPMS sensors monitor
the air pressure in the tires and transmit the
tire pressure readings to a receiver located
in the vehicle.
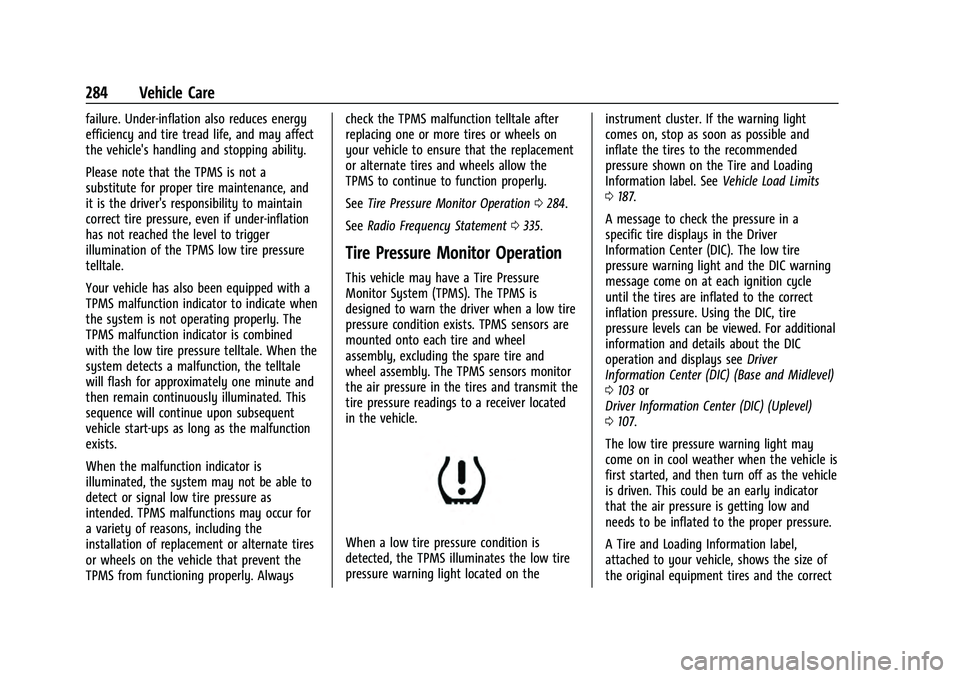
When a low tire pressure condition is
detected, the TPMS illuminates the low tire
pressure warning light located on the instrument cluster. If the warning light
comes on, stop as soon as possible and
inflate the tires to the recommended
pressure shown on the Tire and Loading
Information label. See
Vehicle Load Limits
0 187.
A message to check the pressure in a
specific tire displays in the Driver
Information Center (DIC). The low tire
pressure warning light and the DIC warning
message come on at each ignition cycle
until the tires are inflated to the correct
inflation pressure. Using the DIC, tire
pressure levels can be viewed. For additional
information and details about the DIC
operation and displays see Driver
Information Center (DIC) (Base and Midlevel)
0 103 or
Driver Information Center (DIC) (Uplevel)
0 107.
The low tire pressure warning light may
come on in cool weather when the vehicle is
first started, and then turn off as the vehicle
is driven. This could be an early indicator
that the air pressure is getting low and
needs to be inflated to the proper pressure.
A Tire and Loading Information label,
attached to your vehicle, shows the size of
the original equipment tires and the correct
Page 286 of 360
Chevrolet Equinox Owner Manual (GMNA-Localizing-U.S./Canada-
16540728) - 2023 - crc - 6/16/22
Vehicle Care 285
inflation pressure for the tires when they
are cold. SeeVehicle Load Limits 0187, for
an example of the Tire and Loading
Information label and its location. Also see
Tire Pressure 0282.
The TPMS can warn about a low tire
pressure condition but it does not replace
normal tire maintenance. See Tire Inspection
0 287, Tire Rotation 0287, and Tires0277.
Caution
Tire sealant materials are not all the
same. A non-approved tire sealant could
damage the TPMS sensors. TPMS sensor
damage caused by using an incorrect tire
sealant is not covered by the vehicle
warranty. Always use only the GM
approved tire sealant available through
your dealer or included in the vehicle.
TPMS Malfunction Light and Message
The TPMS will not function properly if one
or more of the TPMS sensors are missing or
inoperable. When the system detects a
malfunction, the low tire pressure warning
light flashes for about one minute and then
stays on for the remainder of the ignition
cycle. A DIC warning message also displays.
The malfunction light and DIC warning message come on at each ignition cycle
until the problem is corrected. Some of the
conditions that can cause these to come
on are:
.One of the road tires has been replaced
with the spare tire. The spare tire does
not have a TPMS sensor. The malfunction
light and DIC message should go off after
the road tire is replaced and the sensor
matching process is performed
successfully. See
“TPMS Sensor Matching
Process” later in this section.
.The TPMS sensor matching process was
not done or not completed successfully
after rotating the tires. The malfunction
light and the DIC message should go off
after successfully completing the sensor
matching process. See "TPMS Sensor
Matching Process" later in this section.
.One or more TPMS sensors are missing or
damaged. The malfunction light and the
DIC message should go off when the
TPMS sensors are installed and the sensor
matching process is performed
successfully. See your dealer for service.
.Replacement tires or wheels do not match
the original equipment tires or wheels.
Tires and wheels other than those recommended could prevent the TPMS
from functioning properly. See
Buying
New Tires 0289.
.Operating electronic devices or being near
facilities using radio wave frequencies
similar to the TPMS could cause the TPMS
sensors to malfunction.
If the TPMS is not functioning properly it
cannot detect or signal a low tire pressure
condition. See your dealer for service if the
TPMS malfunction light and DIC message
come on and stay on.
Tire Fill Alert (If Equipped)
This feature provides visual and audible
alerts outside the vehicle to help when
inflating an underinflated tire to the
recommended cold tire pressure.
When the low tire pressure warning light
comes on: 1. Park the vehicle in a safe, level place.
2. Set the parking brake firmly.
3. Place the vehicle in P (Park).
4. Add air to the tire that is underinflated. The turn signal lamp will flash.