tow CHEVROLET EXPRESS 2010 User Guide
[x] Cancel search | Manufacturer: CHEVROLET, Model Year: 2010, Model line: EXPRESS, Model: CHEVROLET EXPRESS 2010Pages: 440, PDF Size: 2.42 MB
Page 79 of 440
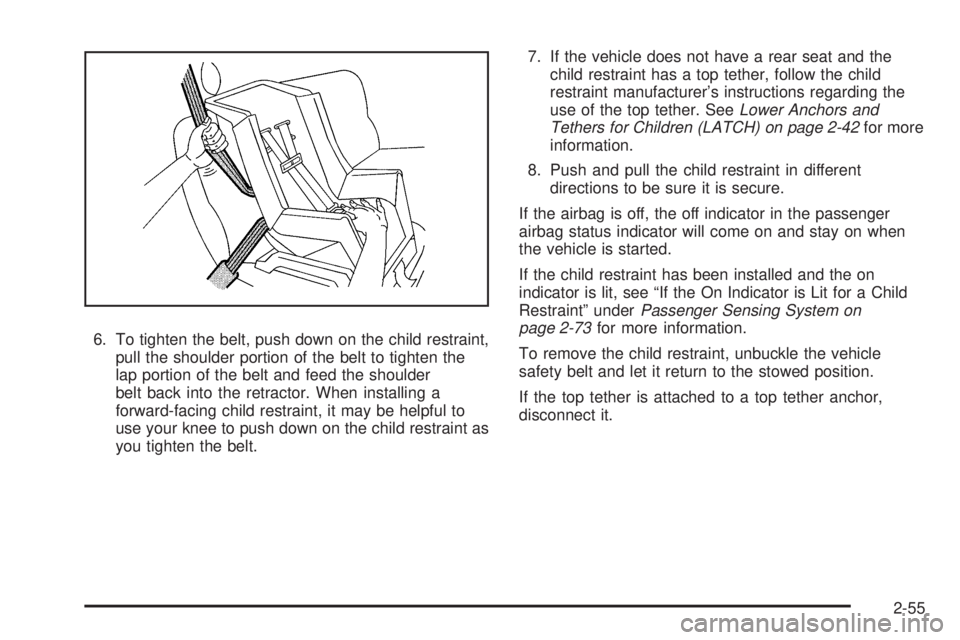
6. To tighten the belt, push down on the child restraint,
pull the shoulder portion of the belt to tighten the
lap portion of the belt and feed the shoulder
belt back into the retractor. When installing a
forward-facing child restraint, it may be helpful to
use your knee to push down on the child restraint as
you tighten the belt.7. If the vehicle does not have a rear seat and the
child restraint has a top tether, follow the child
restraint manufacturer’s instructions regarding the
use of the top tether. SeeLower Anchors and
Tethers for Children (LATCH) on page 2-42for more
information.
8. Push and pull the child restraint in different
directions to be sure it is secure.
If the airbag is off, the off indicator in the passenger
airbag status indicator will come on and stay on when
the vehicle is started.
If the child restraint has been installed and the on
indicator is lit, see “If the On Indicator is Lit for a Child
Restraint” underPassenger Sensing System on
page 2-73for more information.
To remove the child restraint, unbuckle the vehicle
safety belt and let it return to the stowed position.
If the top tether is attached to a top tether anchor,
disconnect it.
2-55
Page 83 of 440
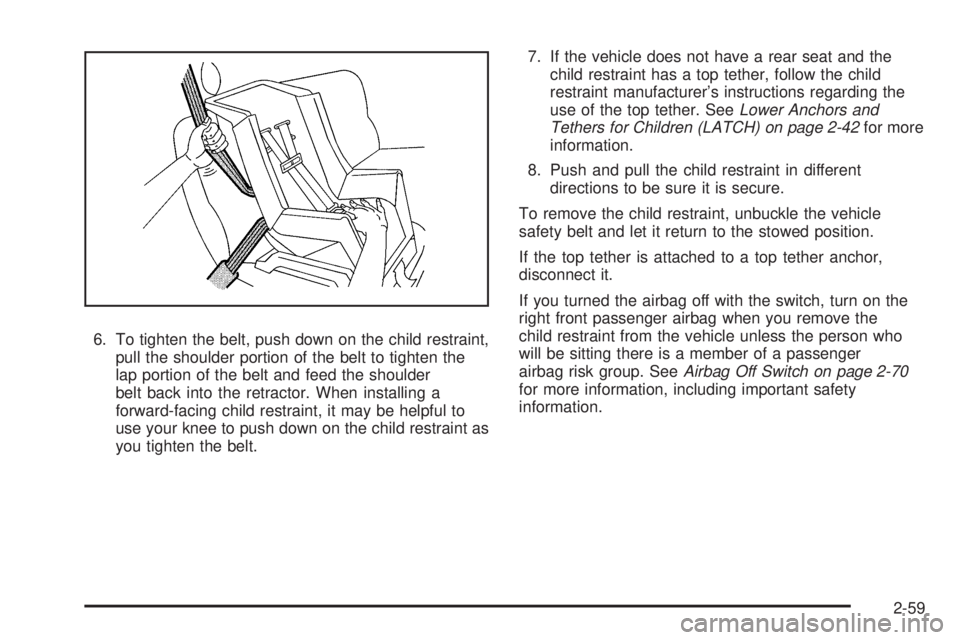
6. To tighten the belt, push down on the child restraint,
pull the shoulder portion of the belt to tighten the
lap portion of the belt and feed the shoulder
belt back into the retractor. When installing a
forward-facing child restraint, it may be helpful to
use your knee to push down on the child restraint as
you tighten the belt.7. If the vehicle does not have a rear seat and the
child restraint has a top tether, follow the child
restraint manufacturer’s instructions regarding the
use of the top tether. SeeLower Anchors and
Tethers for Children (LATCH) on page 2-42for more
information.
8. Push and pull the child restraint in different
directions to be sure it is secure.
To remove the child restraint, unbuckle the vehicle
safety belt and let it return to the stowed position.
If the top tether is attached to a top tether anchor,
disconnect it.
If you turned the airbag off with the switch, turn on the
right front passenger airbag when you remove the
child restraint from the vehicle unless the person who
will be sitting there is a member of a passenger
airbag risk group. SeeAirbag Off Switch on page 2-70
for more information, including important safety
information.
2-59
Page 91 of 440
In any particular crash, no one can say whether an
airbag should have inflated simply because of the
damage to a vehicle or because of what the repair costs
were. For frontal airbags, inflation is determined by
what the vehicle hits, the angle of the impact, and how
quickly the vehicle slows down. For roof-rail airbags,
deployment is determined by the location and severity of
the side impact.
What Makes an Airbag In�ate?
In a deployment event, the sensing system sends an
electrical signal triggering a release of gas from
the inflator. Gas from the inflator fills the airbag causing
the bag to break out of the cover and deploy. The
inflator, the airbag, and related hardware are all part of
the airbag module.
Frontal airbag modules are located inside the steering
wheel and instrument panel. For vehicles with
roof-rail airbags, there are airbag modules in the ceiling
of the vehicle, near the side windows for the first,
second, and third rows (if equipped). SeeWhere Are
the Airbags? on page 2-63for more information.
How Does an Airbag Restrain?
In moderate to severe frontal or near frontal collisions,
even belted occupants can contact the steering wheel or
the instrument panel. In moderate to severe side
collisions, even belted occupants can contact the inside
of the vehicle.
Airbags supplement the protection provided by safety
belts. Frontal airbags distribute the force of the
impact more evenly over the occupant’s upper body,
stopping the occupant more gradually. Roof-rail airbags
distribute the force of the impact more evenly over
the occupant’s upper body.
Rollover capable roof-rail airbags are designed to help
contain the head and chest of occupants in the
outboard seating positions in the first, second, and third
rows, if equipped. The rollover capable roof-rail
airbags are designed to help reduce the risk of full or
partial ejection in rollover events, although no system
can prevent all such ejections.
But airbags would not help in many types of collisions,
primarily because the occupant’s motion is not
toward those airbags. SeeWhen Should an Airbag
In�ate? on page 2-65for more information.
Airbags should never be regarded as anything more
than a supplement to safety belts.
2-67
Page 102 of 440
We recommend that you not use seat covers or other
aftermarket equipment except when approved by GM for
your specific vehicle. SeeAdding Equipment to Your
Airbag-Equipped Vehicle on page 2-79for more
information about modifications that can affect how the
system operates.
The on indicator may be lit if an object, such as a
briefcase, handbag, grocery bag, laptop or other
electronic device, is put on an unoccupied seat. If this is
not desired remove the object from the seat.
{WARNING:
Stowing of articles under the passenger seat or
between the passenger seat cushion and seatback
may interfere with the proper operation of the
passenger sensing system.
Servicing Your Airbag-Equipped
Vehicle
Airbags affect how the vehicle should be serviced.
There are parts of the airbag system in several places
around the vehicle. Your dealer/retailer and the
service manual have information about servicing the
vehicle and the airbag system. To purchase a service
manual, seeService Publications Ordering Information
on page 8-17.
{WARNING:
For up to 10 seconds after the ignition is turned off
and the battery is disconnected, an airbag can still
inflate during improper service. You can be injured
if you are close to an airbag when it inflates. Avoid
yellow connectors. They are probably part of the
airbag system. Be sure to follow proper service
procedures, and make sure the person performing
work for you is qualified to do so.
2-78
Page 108 of 440
Automatic Transmission Operation
(Six Speed Automatic Transmission)............3-27
Automatic Transmission Operation
(Four Speed Automatic Transmission)..........3-32
Tow/Haul Mode ............................................3-34
Parking Brake..............................................3-36
Shifting Into Park..........................................3-37
Shifting Out of Park......................................3-38
Parking Over Things That Burn.......................3-39
Engine Exhaust............................................3-40
Running the Vehicle While Parked..................3-41Mirrors...........................................................3-42
Manual Rearview Mirror.................................3-42
Outside Manual Mirrors..................................3-42
Outside Towing Mirrors..................................3-42
Outside Power Mirrors...................................3-43
Outside Convex Mirror...................................3-43
Outside Heated Mirrors..................................3-44
Storage Areas................................................3-44
Section 3 Features and Controls
3-2
Page 118 of 440

For the side sliding door,
move the button up to
engage the security
feature. Move the button
down to return the
door locks to normal
operation.
Lockout Protection
This feature protects you from locking the key in the
vehicle when the key is in the ignition and a door
is open.
If the power lock switch is pressed when either the
driver, passenger, or rear door is open, all the doors will
lock and then the driver door will unlock. This feature
does not include the side cargo door.
Sliding Side Door
To open the sliding side door from the outside, pull the
handle toward the rear of the vehicle and slide the
door open.
To close the sliding side door from the outside, use the
handle to slide the door toward the front of the
vehicle.
When the door is closed, it will be flush with the side of
the body. Side Sliding Door
3-12
Page 119 of 440
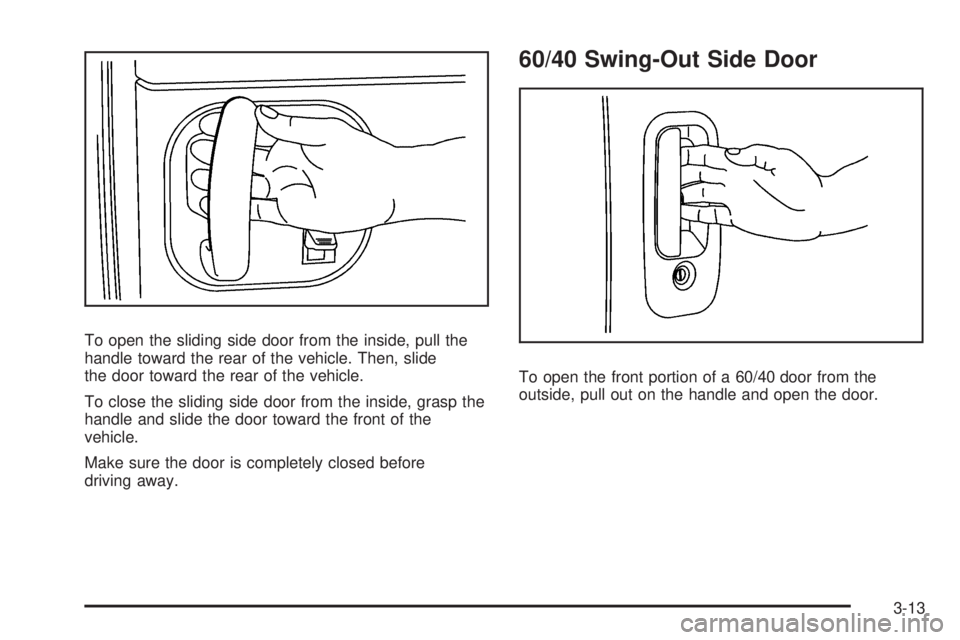
To open the sliding side door from the inside, pull the
handle toward the rear of the vehicle. Then, slide
the door toward the rear of the vehicle.
To close the sliding side door from the inside, grasp the
handle and slide the door toward the front of the
vehicle.
Make sure the door is completely closed before
driving away.
60/40 Swing-Out Side Door
To open the front portion of a 60/40 door from the
outside, pull out on the handle and open the door.
3-13
Page 120 of 440
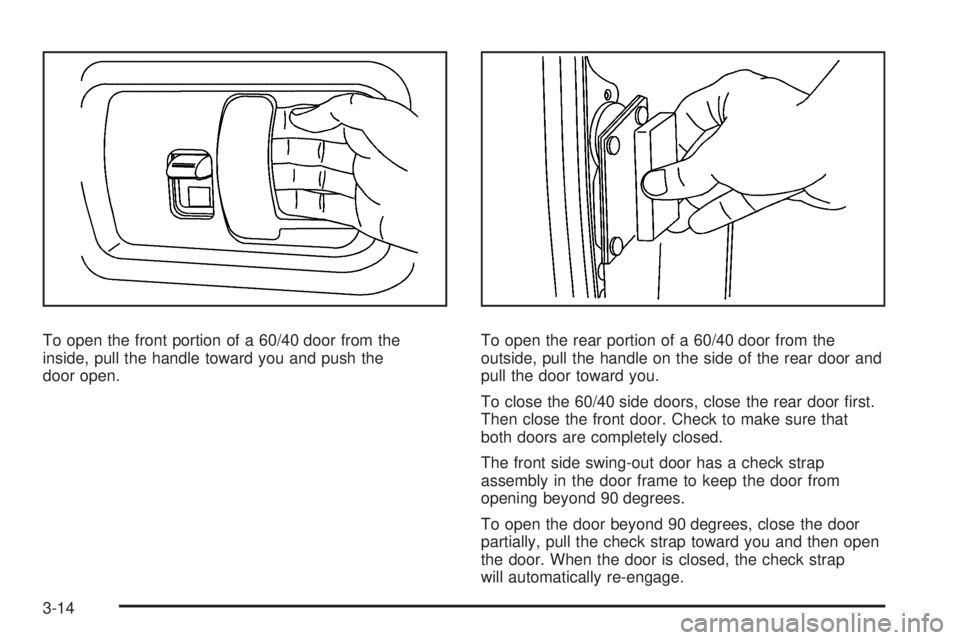
To open the front portion of a 60/40 door from the
inside, pull the handle toward you and push the
door open.To open the rear portion of a 60/40 door from the
outside, pull the handle on the side of the rear door and
pull the door toward you.
To close the 60/40 side doors, close the rear door first.
Then close the front door. Check to make sure that
both doors are completely closed.
The front side swing-out door has a check strap
assembly in the door frame to keep the door from
opening beyond 90 degrees.
To open the door beyond 90 degrees, close the door
partially, pull the check strap toward you and then open
the door. When the door is closed, the check strap
will automatically re-engage.
3-14
Page 121 of 440
Rear Doors
{WARNING:
Unlocked doors can be dangerous.
•Passengers, especially children, can easily
open the doors and fall out of a moving
vehicle. When a door is locked, the handle
will not open it. The chance of being thrown
out of the vehicle in a crash is increased if the
doors are not locked. So, all passengers
should wear safety belts properly and the
doors should be locked whenever the vehicle
is driven.
•Young children who get into unlocked vehicles
may be unable to get out. A child can be
overcome by extreme heat and can suffer
permanent injuries or even death from heat
stroke. Always lock the vehicle whenever
leaving it.
•Outsiders can easily enter through an
unlocked door when you slow down or stop
your vehicle. Locking your doors can help
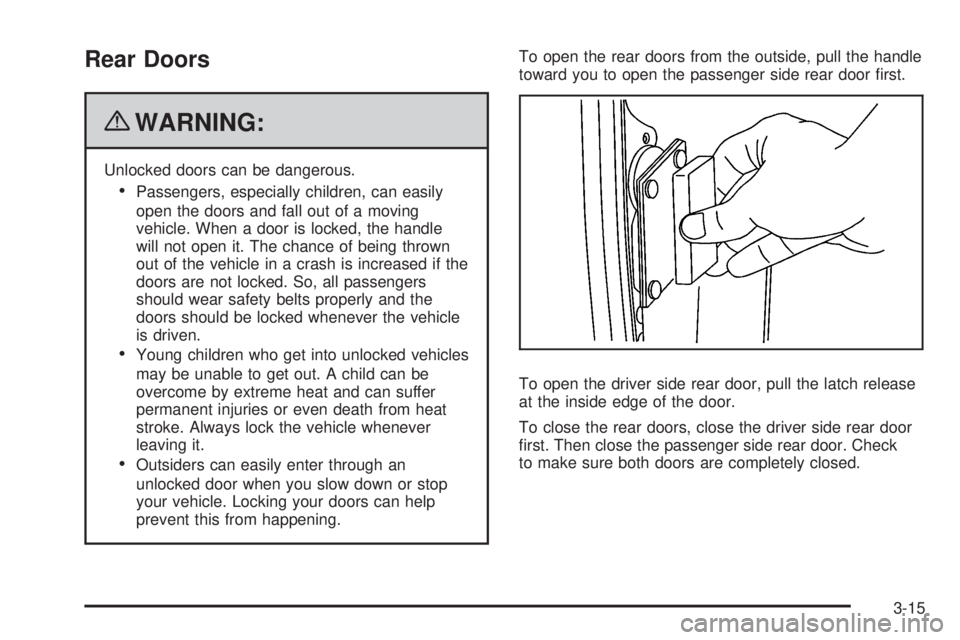
prevent this from happening.To open the rear doors from the outside, pull the handle
toward you to open the passenger side rear door first.
To open the driver side rear door, pull the latch release
at the inside edge of the door.
To close the rear doors, close the driver side rear door
first. Then close the passenger side rear door. Check
to make sure both doors are completely closed.
3-15
Page 124 of 440
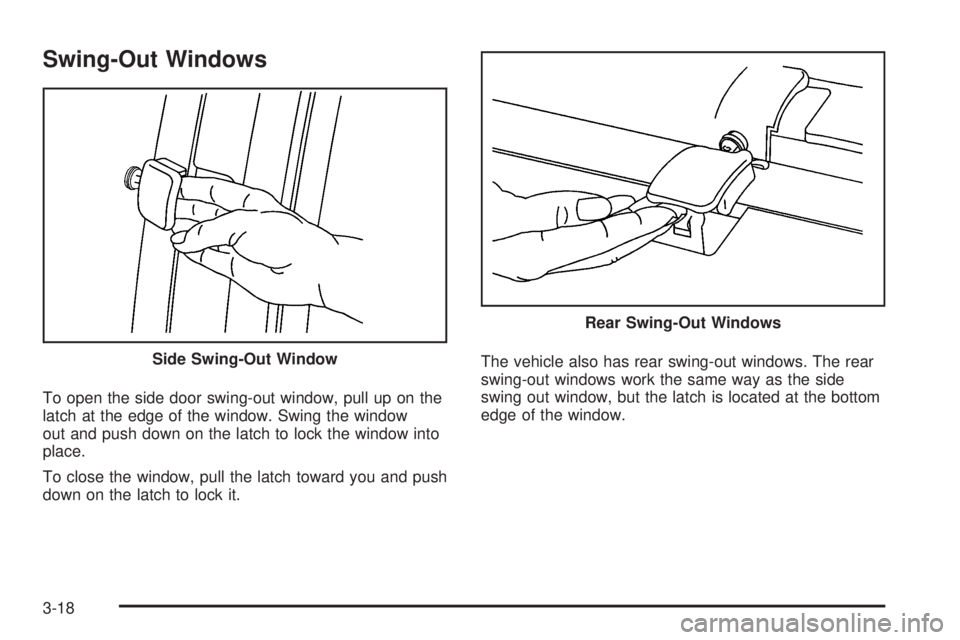
Swing-Out Windows
To open the side door swing-out window, pull up on the
latch at the edge of the window. Swing the window
out and push down on the latch to lock the window into
place.
To close the window, pull the latch toward you and push
down on the latch to lock it.The vehicle also has rear swing-out windows. The rear
swing-out windows work the same way as the side
swing out window, but the latch is located at the bottom
edge of the window. Side Swing-Out Window
Rear Swing-Out Windows
3-18