steering CHEVROLET EXPRESS 2010 Owner's Guide
[x] Cancel search | Manufacturer: CHEVROLET, Model Year: 2010, Model line: EXPRESS, Model: CHEVROLET EXPRESS 2010Pages: 440, PDF Size: 2.42 MB
Page 154 of 440
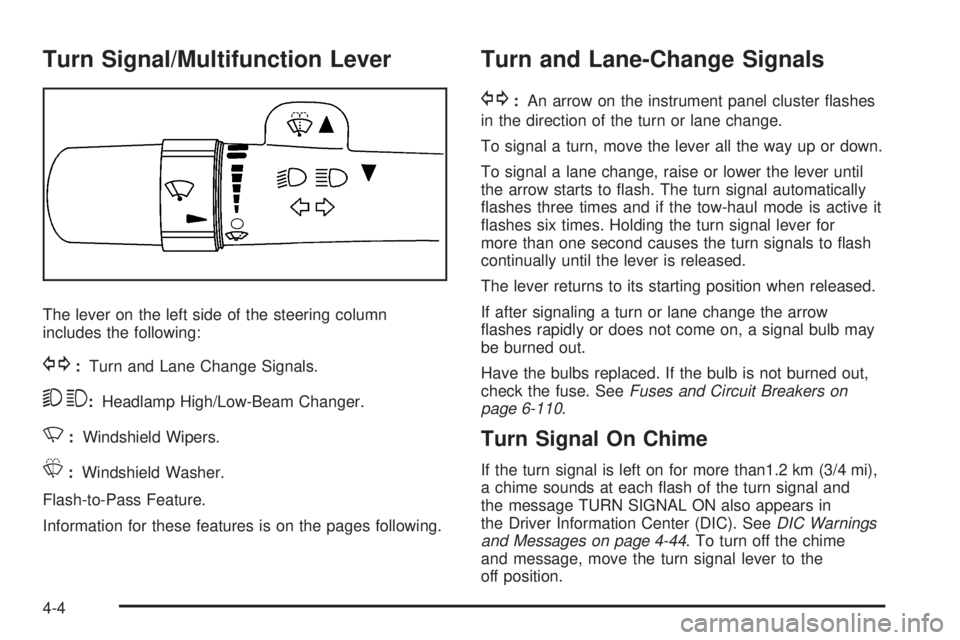
Turn Signal/Multifunction Lever
The lever on the left side of the steering column
includes the following:
G:Turn and Lane Change Signals.
53:Headlamp High/Low-Beam Changer.
N:Windshield Wipers.
L:Windshield Washer.
Flash-to-Pass Feature.
Information for these features is on the pages following.
Turn and Lane-Change Signals
G:An arrow on the instrument panel cluster flashes
in the direction of the turn or lane change.
To signal a turn, move the lever all the way up or down.
To signal a lane change, raise or lower the lever until
the arrow starts to flash. The turn signal automatically
flashes three times and if the tow-haul mode is active it
flashes six times. Holding the turn signal lever for
more than one second causes the turn signals to flash
continually until the lever is released.
The lever returns to its starting position when released.
If after signaling a turn or lane change the arrow
flashes rapidly or does not come on, a signal bulb may
be burned out.
Have the bulbs replaced. If the bulb is not burned out,
check the fuse. SeeFuses and Circuit Breakers on
page 6-110.
Turn Signal On Chime
If the turn signal is left on for more than1.2 km (3/4 mi),
a chime sounds at each flash of the turn signal and
the message TURN SIGNAL ON also appears in
the Driver Information Center (DIC). SeeDIC Warnings
and Messages on page 4-44. To turn off the chime
and message, move the turn signal lever to the
off position.
4-4
Page 155 of 440
Headlamp High/Low-Beam Changer
23(Headlamp High/Low-Beam Changer):Pull the
turn signal lever all the way toward you to change the
headlamps from low to high beam. Then release it.
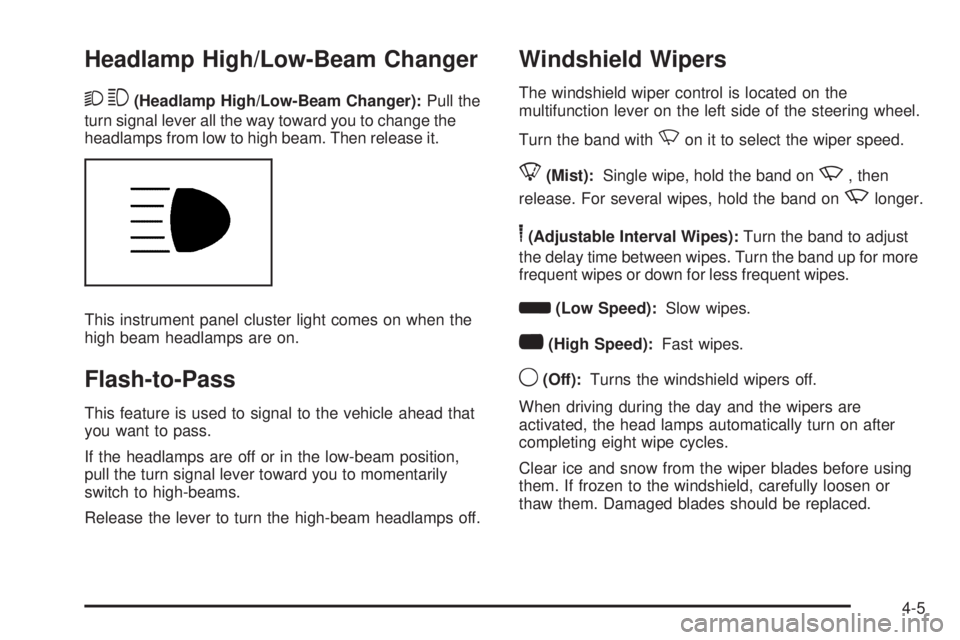
This instrument panel cluster light comes on when the
high beam headlamps are on.
Flash-to-Pass
This feature is used to signal to the vehicle ahead that
you want to pass.
If the headlamps are off or in the low-beam position,
pull the turn signal lever toward you to momentarily
switch to high-beams.
Release the lever to turn the high-beam headlamps off.
Windshield Wipers
The windshield wiper control is located on the
multifunction lever on the left side of the steering wheel.
Turn the band with
Non it to select the wiper speed.
8(Mist):Single wipe, hold the band onz, then
release. For several wipes, hold the band on
zlonger.
6(Adjustable Interval Wipes):Turn the band to adjust
the delay time between wipes. Turn the band up for more
frequent wipes or down for less frequent wipes.
d(Low Speed):Slow wipes.
a(High Speed):Fast wipes.
9(Off):Turns the windshield wipers off.
When driving during the day and the wipers are
activated, the head lamps automatically turn on after
completing eight wipe cycles.
Clear ice and snow from the wiper blades before using
them. If frozen to the windshield, carefully loosen or
thaw them. Damaged blades should be replaced.
4-5
Page 157 of 440
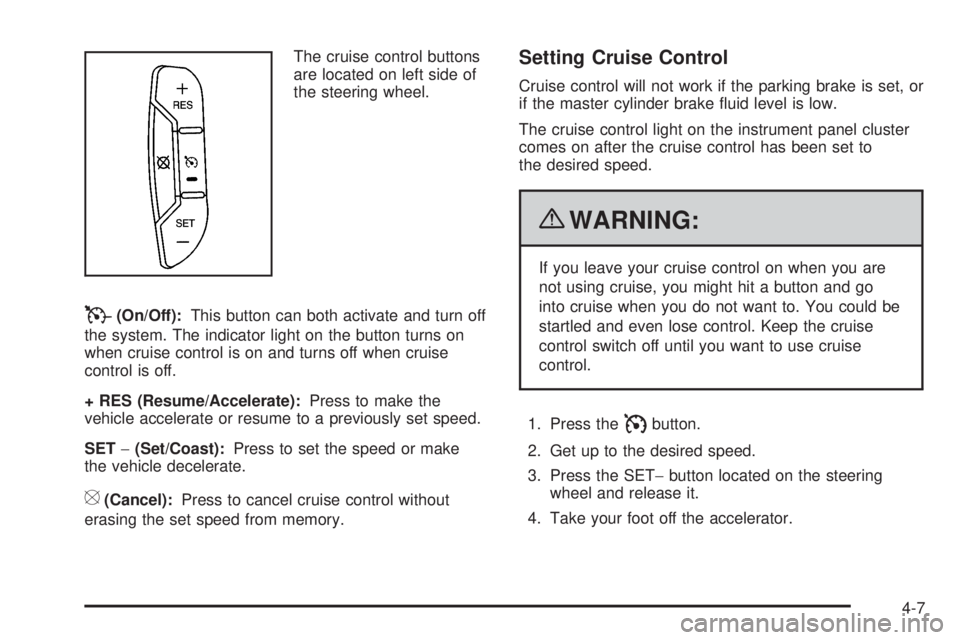
The cruise control buttons
are located on left side of
the steering wheel.
T(On/Off):This button can both activate and turn off
the system. The indicator light on the button turns on
when cruise control is on and turns off when cruise
control is off.
+ RES (Resume/Accelerate):Press to make the
vehicle accelerate or resume to a previously set speed.
SET−(Set/Coast):Press to set the speed or make
the vehicle decelerate.
[(Cancel):Press to cancel cruise control without
erasing the set speed from memory.
Setting Cruise Control
Cruise control will not work if the parking brake is set, or
if the master cylinder brake fluid level is low.
The cruise control light on the instrument panel cluster
comes on after the cruise control has been set to
the desired speed.
{WARNING:
If you leave your cruise control on when you are
not using cruise, you might hit a button and go
into cruise when you do not want to. You could be
startled and even lose control. Keep the cruise
control switch off until you want to use cruise
control.
1. Press the
Ibutton.
2. Get up to the desired speed.
3. Press the SET−button located on the steering
wheel and release it.
4. Take your foot off the accelerator.
4-7
Page 158 of 440
Resuming a Set Speed
If the cruise control is set at a desired speed and then
the brakes are applied, this shuts off the cruise
control. But it does not need to be reset.
Once the vehicle speed reaches about 25 mph
(40 km/h) or more, press the +RES button on the
steering wheel. The vehicle returns to the previously set
speed and stays there.
Increasing Speed While Using Cruise
Control
To increase the cruise speed while using cruise control:
•Press and hold the +RES button on the steering
wheel until the desired speed is reached, then
release it.
•To increase vehicle speed in small increments,
press the +RES button. Each time this is done,
the vehicle goes about 1 mph (1.6 km/h) faster.
Reducing Speed While Using Cruise
Control
To reduce the vehicle speed while using cruise control:
•Press and hold the SET– button on the steering
wheel until the desired lower speed is reached,
then release it.
•To slow down in very small amounts, press the
SET– button on the steering wheel briefly. Each
time this is done, the vehicle goes about 1 mph
(1.6 km/h) slower.
Passing Another Vehicle While Using
Cruise Control
Use the accelerator pedal to increase the vehicle speed.
When you take your foot off the pedal, the vehicle will
slow down to the previous set cruise speed.
Using Cruise Control on Hills
How well the cruise control will work on hills depends
upon the vehicle speed, load, and the steepness of the
hills. When going up steep hills, you might have to step
on the accelerator pedal to maintain the vehicle’s speed.
When going downhill, you might have to brake or shift to
a lower gear to keep the vehicle’s speed down. When the
brakes are applied the cruise control turns off.
4-8
Page 159 of 440
Ending Cruise Control
There are three ways to end cruise control:
•Step lightly on the brake pedal.
•Press the[button on the steering wheel.
•Press theIbutton on the steering wheel.
Erasing Speed Memory
The cruise control set speed memory is erased when
the cruise control or the ignition is turned off.
Exterior Lamps
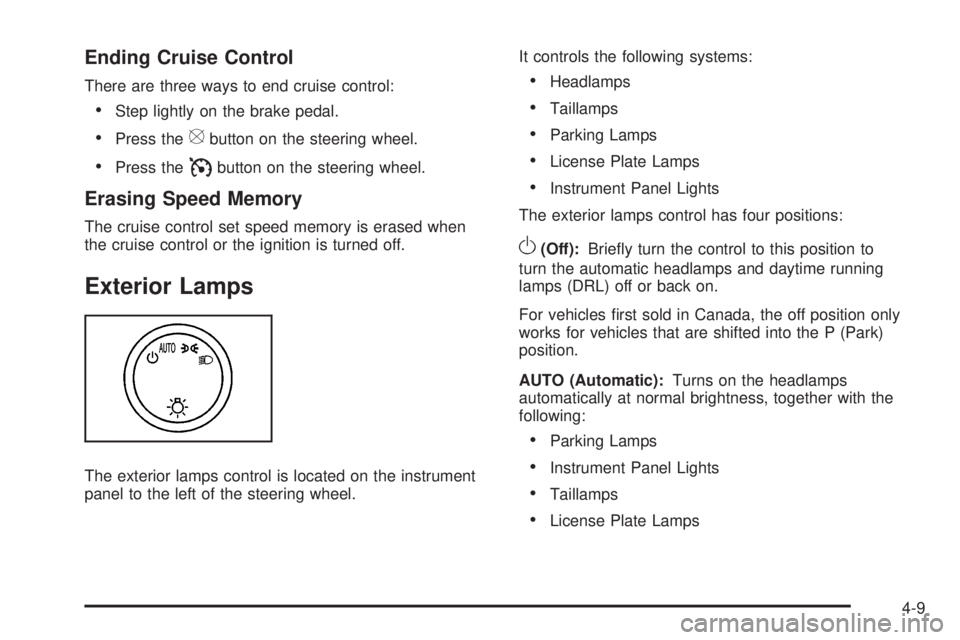
The exterior lamps control is located on the instrument
panel to the left of the steering wheel.It controls the following systems:
•Headlamps
•Taillamps
•Parking Lamps
•License Plate Lamps
•Instrument Panel Lights
The exterior lamps control has four positions:
O(Off):Briefly turn the control to this position to
turn the automatic headlamps and daytime running
lamps (DRL) off or back on.
For vehicles first sold in Canada, the off position only
works for vehicles that are shifted into the P (Park)
position.
AUTO (Automatic):Turns on the headlamps
automatically at normal brightness, together with the
following:
•Parking Lamps
•Instrument Panel Lights
•Taillamps
•License Plate Lamps
4-9
Page 162 of 440

Dome Lamps
The dome lamps come on when any door is opened.
They turn off after all the doors are closed.
The dome lamps can also be turned on by turning the
instrument panel brightness knob, located on the
instrument panel to the left of the steering column,
clockwise to the farthest position. In this position, the
dome lamps remain on whether a door is opened
or closed.
Dome Lamp Override
The dome lamp override button is located next to the
exterior lamps control.
The dome lamp override sets the dome lamps to remain
off or come on automatically when a door is opened.
E(Dome Lamp Override):Press the button in and the
dome lamps remain off when a door is opened. Press the
button again to return it to the extended position so that
the dome lamps come on when a door is opened.
4-12
Page 215 of 440
Setting Preset Stations
If the radio does not have a FAV button, up to
18 stations (six FM1, six FM2, and six AM), can be
programmed on the six numbered pushbuttons,
by performing the following steps:
1. Turn the radio on.
2. Press BAND to select FM1, FM2, or AM.
3. Tune in the desired station.
4. Press and hold one of the six numbered
pushbuttons for three seconds until a beep sounds.
When that pushbutton is pressed and released,
the station that was set, returns.
5. Repeat the Steps 2 through 4 for each pushbutton.
Storing a Radio Station as a Favorite
Drivers are encouraged to set up their radio station
favorites while the vehicle is parked. Tune to favorite
stations using the presets, favorites button, and
steering wheel controls, if the vehicle has this feature.
SeeDefensive Driving on page 5-2.FAV (Favorites):If the vehicle has a FAV button, a
maximum of 36 stations can be programmed as favorites
using the six pushbuttons positioned below the radio
station frequency labels and by using the radio favorites
page button (FAV button). Press the FAV button to go
through up to six pages of favorites, each having
six favorite stations available per page. Each page of
favorites can contain any combination of AM and FM
stations.
The balance/fade and tone settings that were previously
adjusted, are stored with the favorite stations.
To store a station as a favorite:
1. Tune to the desired radio station.
2. Press the FAV button to display the page where the
station is to be stored.
3. Press and hold one of the six pushbuttons until a
beep sounds. When that pushbutton is pressed
and released, the station that was set, returns.
4. Repeat the steps for each pushbutton radio station
you want stored as a favorite.
4-65
Page 227 of 440
Theft-Deterrent Feature
Non-RDS Radios
THEFTLOCK®is designed to discourage theft of your
vehicle’s radio. The feature works automatically by
learning a portion of the Vehicle Identification
Number (VIN). If the radio is moved to a different
vehicle, it does not operate and LOC displays.
With THEFTLOCK
®activated, the radio does not
operate if stolen.
RDS Radios
THEFTLOCK®is designed to discourage theft of your
vehicle’s radio. The feature works automatically by
learning a portion of the Vehicle Identification
Number (VIN). If the radio is moved to a different
vehicle, it does not operate and LOCKED displays.
When the radio and vehicle are turned off, the blinking
red light indicates that THEFTLOCK
®is armed.
With THEFTLOCK
®activated, the radio does not
operate if stolen.
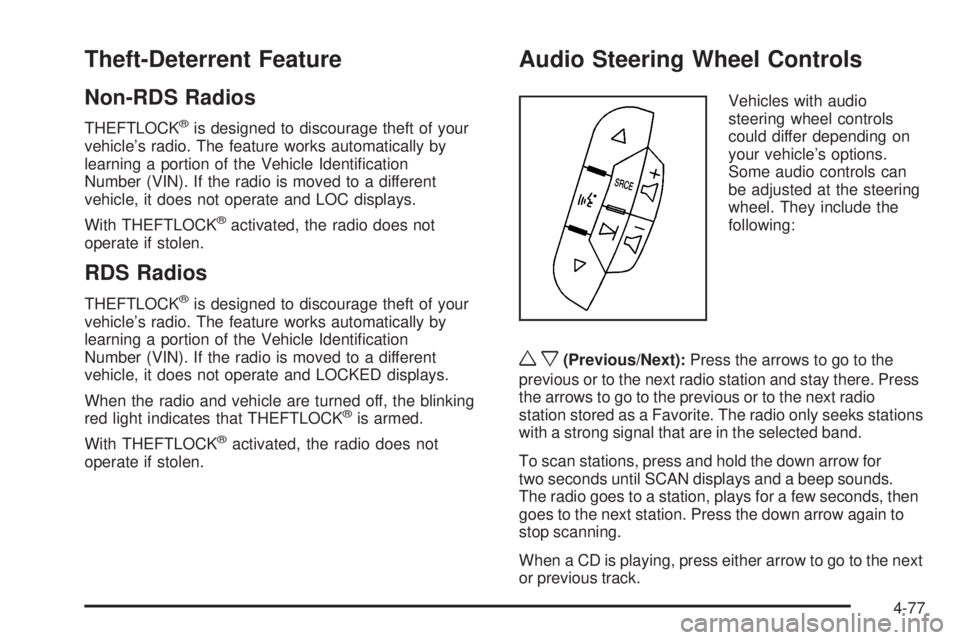
Audio Steering Wheel Controls
Vehicles with audio
steering wheel controls
could differ depending on
your vehicle’s options.
Some audio controls can
be adjusted at the steering
wheel. They include the
following:
wx(Previous/Next):Press the arrows to go to the
previous or to the next radio station and stay there. Press
the arrows to go to the previous or to the next radio
station stored as a Favorite. The radio only seeks stations
with a strong signal that are in the selected band.
To scan stations, press and hold the down arrow for
two seconds until SCAN displays and a beep sounds.
The radio goes to a station, plays for a few seconds, then
goes to the next station. Press the down arrow again to
stop scanning.
When a CD is playing, press either arrow to go to the next
or previous track.
4-77
Page 229 of 440
Your Driving, the Road, and the Vehicle............5-2
Defensive Driving...........................................5-2
Drunk Driving.................................................5-2
Control of a Vehicle........................................5-3
Braking.........................................................5-3
Antilock Brake System (ABS)...........................5-4
Braking in Emergencies...................................5-5
StabiliTrak
®System........................................5-5
Locking Rear Axle..........................................5-8
All-Wheel Drive (AWD) System.........................5-8
Steering........................................................5-8
Off-Road Recovery.......................................5-10
Passing.......................................................5-10
Loss of Control.............................................5-10Driving at Night............................................5-12
Driving in Rain and on Wet Roads..................5-13
Before Leaving on a Long Trip.......................5-14
Highway Hypnosis........................................5-14
Hill and Mountain Roads................................5-15
Winter Driving..............................................5-16
If Your Vehicle is Stuck in Sand, Mud,
Ice, or Snow.............................................5-18
Rocking Your Vehicle to Get It Out.................5-19
Loading the Vehicle......................................5-19
Towing..........................................................5-26
Towing Your Vehicle.....................................5-26
Recreational Vehicle Towing...........................5-26
Towing a Trailer...........................................5-30
Section 5 Driving Your Vehicle
5-1
Page 231 of 440
For persons under 21, it is against the law in every
U.S. state to drink alcohol. There are good medical,
psychological, and developmental reasons for
these laws.
The obvious way to eliminate the leading highway
safety problem is for people never to drink alcohol and
then drive.
Medical research shows that alcohol in a person’s
system can make crash injuries worse, especially
injuries to the brain, spinal cord, or heart. This means
that when anyone who has been drinking — driver
or passenger — is in a crash, that person’s chance of
being killed or permanently disabled is higher than if the
person had not been drinking.
Control of a Vehicle
The following three systems help to control the vehicle
while driving — brakes, steering, and accelerator.
At times, as when driving on snow or ice, it is easy to
ask more of those control systems than the tires
and road can provide. Meaning, you can lose control of
the vehicle.
Adding non-dealer/non-retailer accessories can affect
vehicle performance. SeeAccessories and Modi�cations
on page 6-3.
Braking
SeeBrake System Warning Light on page 4-27.
Braking action involves perception time and reaction
time. Deciding to push the brake pedal is perception
time. Actually doing it is reaction time.
Average reaction time is about three-fourths of a second.
But that is only an average. It might be less with one
driver and as long as two or three seconds or more with
another. Age, physical condition, alertness, coordination,
and eyesight all play a part. So do alcohol, drugs, and
frustration. But even in three-fourths of a second, a
vehicle moving at 100 km/h (60 mph) travels 20 m
(66 feet). That could be a lot of distance in an emergency,
so keeping enough space between the vehicle and others
is important.
And, of course, actual stopping distances vary greatly
with the surface of the road, whether it is pavement
or gravel; the condition of the road, whether it is
wet, dry, or icy; tire tread; the condition of the brakes;
the weight of the vehicle; and the amount of brake force
applied.
5-3