brake light CHEVROLET EXPRESS 2017 Owners Manual
[x] Cancel search | Manufacturer: CHEVROLET, Model Year: 2017, Model line: EXPRESS, Model: CHEVROLET EXPRESS 2017Pages: 289, PDF Size: 11.46 MB
Page 3 of 289
Chevrolet Express Owner Manual (GMNA-Localizing-U.S./Canada/Mexico-
15555951) - 2022 - CRC - 1/27/22
2 Introduction
Helm, Incorporated
Attention: Customer Service
47911 Halyard Drive
Plymouth, MI 48170
USA
Using this Manual
To quickly locate information about the
vehicle, use the Index in the back of the
manual. It is an alphabetical list of what is
in the manual and the page number where
it can be found.
Danger, Warning, and Caution
Warning messages found on vehicle labels
and in this manual describe hazards and
what to do to avoid or reduce them.
{Danger
Danger indicates a hazard with a high
level of risk which will result in serious
injury or death.
{Warning
Warning indicates a hazard that could
result in injury or death.
Caution
Caution indicates a hazard that could
result in property or vehicle damage.
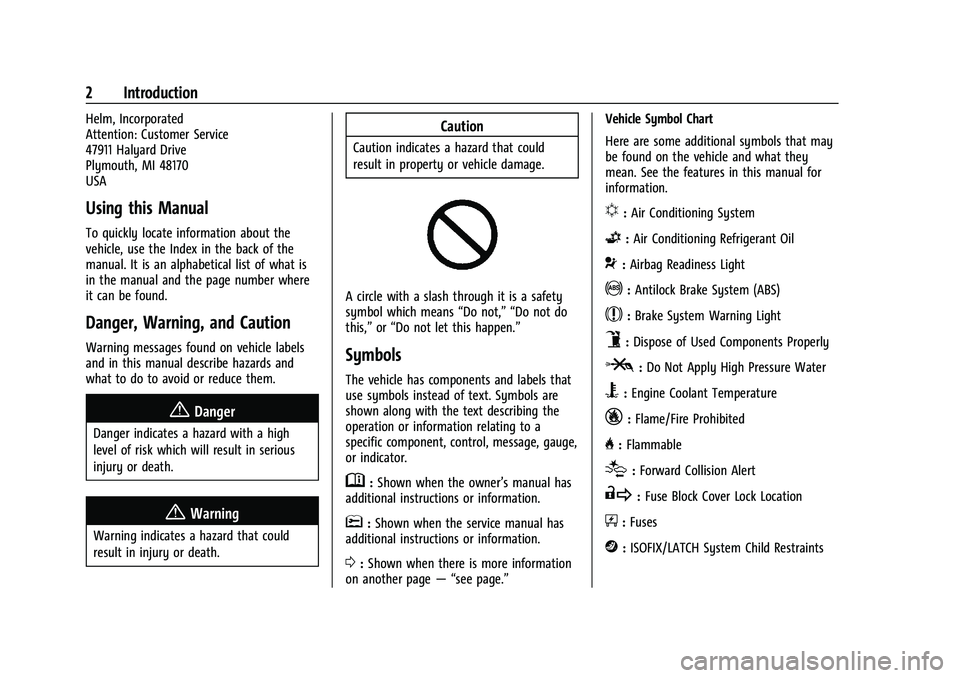
A circle with a slash through it is a safety
symbol which means“Do not,” “Do not do
this,” or“Do not let this happen.”
Symbols
The vehicle has components and labels that
use symbols instead of text. Symbols are
shown along with the text describing the
operation or information relating to a
specific component, control, message, gauge,
or indicator.
M:Shown when the owner’s manual has
additional instructions or information.
*: Shown when the service manual has
additional instructions or information.
0: Shown when there is more information
on another page — “see page.” Vehicle Symbol Chart
Here are some additional symbols that may
be found on the vehicle and what they
mean. See the features in this manual for
information.
u:
Air Conditioning System
G:Air Conditioning Refrigerant Oil
9:Airbag Readiness Light
!:Antilock Brake System (ABS)
$:Brake System Warning Light
9:Dispose of Used Components Properly
P:Do Not Apply High Pressure Water
B:Engine Coolant Temperature
_:Flame/Fire Prohibited
H: Flammable
[:Forward Collision Alert
R:Fuse Block Cover Lock Location
+:Fuses
j:ISOFIX/LATCH System Child Restraints
Page 6 of 289
Chevrolet Express Owner Manual (GMNA-Localizing-U.S./Canada/Mexico-
15555951) - 2022 - CRC - 1/27/22
Introduction 5
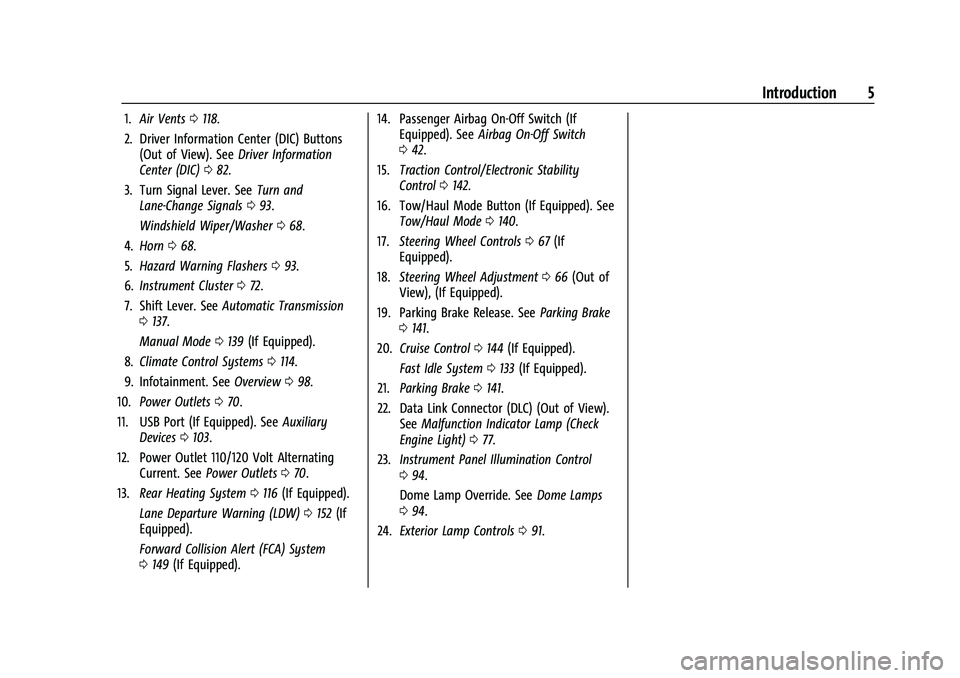
1.Air Vents 0118.
2. Driver Information Center (DIC) Buttons (Out of View). See Driver Information
Center (DIC) 082.
3. Turn Signal Lever. See Turn and
Lane-Change Signals 093.
Windshield Wiper/Washer 068.
4. Horn 068.
5. Hazard Warning Flashers 093.
6. Instrument Cluster 072.
7. Shift Lever. See Automatic Transmission
0 137.
Manual Mode 0139 (If Equipped).
8. Climate Control Systems 0114.
9. Infotainment. See Overview098.
10. Power Outlets 070.
11. USB Port (If Equipped). See Auxiliary
Devices 0103.
12. Power Outlet 110/120 Volt Alternating Current. See Power Outlets 070.
13. Rear Heating System 0116 (If Equipped).
Lane Departure Warning (LDW) 0152 (If
Equipped).
Forward Collision Alert (FCA) System
0 149 (If Equipped). 14. Passenger Airbag On-Off Switch (If
Equipped). See Airbag On-Off Switch
0 42.
15. Traction Control/Electronic Stability
Control 0142.
16. Tow/Haul Mode Button (If Equipped). See Tow/Haul Mode 0140.
17. Steering Wheel Controls 067 (If
Equipped).
18. Steering Wheel Adjustment 066 (Out of
View), (If Equipped).
19. Parking Brake Release. See Parking Brake
0 141.
20. Cruise Control 0144 (If Equipped).
Fast Idle System 0133 (If Equipped).
21. Parking Brake 0141.
22. Data Link Connector (DLC) (Out of View). SeeMalfunction Indicator Lamp (Check
Engine Light) 077.
23. Instrument Panel Illumination Control
094.
Dome Lamp Override. See Dome Lamps
0 94.
24. Exterior Lamp Controls 091.
Page 67 of 289

Chevrolet Express Owner Manual (GMNA-Localizing-U.S./Canada/Mexico-
15555951) - 2022 - CRC - 1/27/22
66 Instruments and Controls
Instruments and Controls
Controls
Steering Wheel Adjustment . . . . . . . . . . . . 66
Steering Wheel Controls . . . . . . . . . . . . . . . . 67
Horn . . . . . . . . . . . . . . . . . . . . . . . . . . . . . . . . . . . 68
Windshield Wiper/Washer . . . . . . . . . . . . . 68
Compass . . . . . . . . . . . . . . . . . . . . . . . . . . . . . . . 68
Clock . . . . . . . . . . . . . . . . . . . . . . . . . . . . . . . . . . . 70
Power Outlets . . . . . . . . . . . . . . . . . . . . . . . . . . 70
Cigarette Lighter . . . . . . . . . . . . . . . . . . . . . . . . 71
Ashtrays . . . . . . . . . . . . . . . . . . . . . . . . . . . . . . . . 71
Warning Lights, Gauges, and Indicators
Warning Lights, Gauges, andIndicators . . . . . . . . . . . . . . . . . . . . . . . . . . . . . 71
Instrument Cluster . . . . . . . . . . . . . . . . . . . . . . 72
Speedometer . . . . . . . . . . . . . . . . . . . . . . . . . . . 72
Odometer . . . . . . . . . . . . . . . . . . . . . . . . . . . . . . 72
Trip Odometer . . . . . . . . . . . . . . . . . . . . . . . . . . 72
Fuel Gauge . . . . . . . . . . . . . . . . . . . . . . . . . . . . . 72
Engine Oil Pressure Gauge . . . . . . . . . . . . . . 73
Engine Coolant Temperature Gauge . . . . 74
Voltmeter Gauge . . . . . . . . . . . . . . . . . . . . . . . 74
Seat Belt Reminders . . . . . . . . . . . . . . . . . . . . 75
Airbag Readiness Light . . . . . . . . . . . . . . . . . . 75
Airbag On-Off Light . . . . . . . . . . . . . . . . . . . . . 76
Charging System Light . . . . . . . . . . . . . . . . . . 77
Malfunction Indicator Lamp (Check Engine Light) . . . . . . . . . . . . . . . . . . . . . . . . . . 77 Brake System Warning Light . . . . . . . . . . . 78
Antilock Brake System (ABS) Warning
Light . . . . . . . . . . . . . . . . . . . . . . . . . . . . . . . . . . 79
Tow/Haul Mode Light . . . . . . . . . . . . . . . . . . 79
Lane Departure Warning (LDW) Light . . . 79
Vehicle Ahead Indicator . . . . . . . . . . . . . . . . 80
StabiliTrak OFF Light . . . . . . . . . . . . . . . . . . . 80
Traction Control System (TCS)/StabiliTrak Light . . . . . . . . . . . . . . . . . . . . . . . . . . . . . . . . . 80
Tire Pressure Light . . . . . . . . . . . . . . . . . . . . . 80
Engine Oil Pressure Light . . . . . . . . . . . . . . . 81
Low Fuel Warning Light . . . . . . . . . . . . . . . . 81
Security Light . . . . . . . . . . . . . . . . . . . . . . . . . . 82
High-Beam On Light . . . . . . . . . . . . . . . . . . . . 82
Cruise Control Light . . . . . . . . . . . . . . . . . . . . 82
Information Displays
Driver Information Center (DIC) . . . . . . . . . 82
Vehicle Messages
Vehicle Messages . . . . . . . . . . . . . . . . . . . . . . 86
Engine Power Messages . . . . . . . . . . . . . . . . 86
Vehicle Speed Messages . . . . . . . . . . . . . . . . 87
Vehicle Personalization
Vehicle Personalization . . . . . . . . . . . . . . . . . 87
Controls
Steering Wheel Adjustment
For vehicles with a tilt steering wheel, the
lever is located on the left side of the
steering column.
To adjust the steering wheel:
1. Pull the lever to move the steering wheel up or down into a comfortable
position.
2. Release the lever to lock the steering wheel in place.
Do not adjust the steering wheel while
driving.
Page 79 of 289
Chevrolet Express Owner Manual (GMNA-Localizing-U.S./Canada/Mexico-
15555951) - 2022 - CRC - 1/27/22
78 Instruments and Controls
If the light continues to flash, find a safe
place to park. Turn the vehicle off and wait
at least 10 seconds before restarting the
engine. If the light is still flashing, follow
the previous guidelines and see your dealer
for service as soon as possible.
If the light is on steady :A malfunction has
been detected. Diagnosis and service may be
required.
Check the following:
.A loose or missing fuel cap may cause
the light to come on. See Filling the Tank
0 154. A few driving trips with the cap
properly installed may turn the light off.
.Poor fuel quality can cause inefficient
engine operation and poor driveability,
which may go away once the engine is
warmed up. If this occurs, change the fuel
brand. It may require at least one full
tank of the proper fuel to turn the light
off. See Recommended Fuel 0153.
If the light remains on, see your dealer.
Emissions Inspection and Maintenance
Programs
If the vehicle requires an Emissions
Inspection/Maintenance test, the test
equipment will likely connect to the
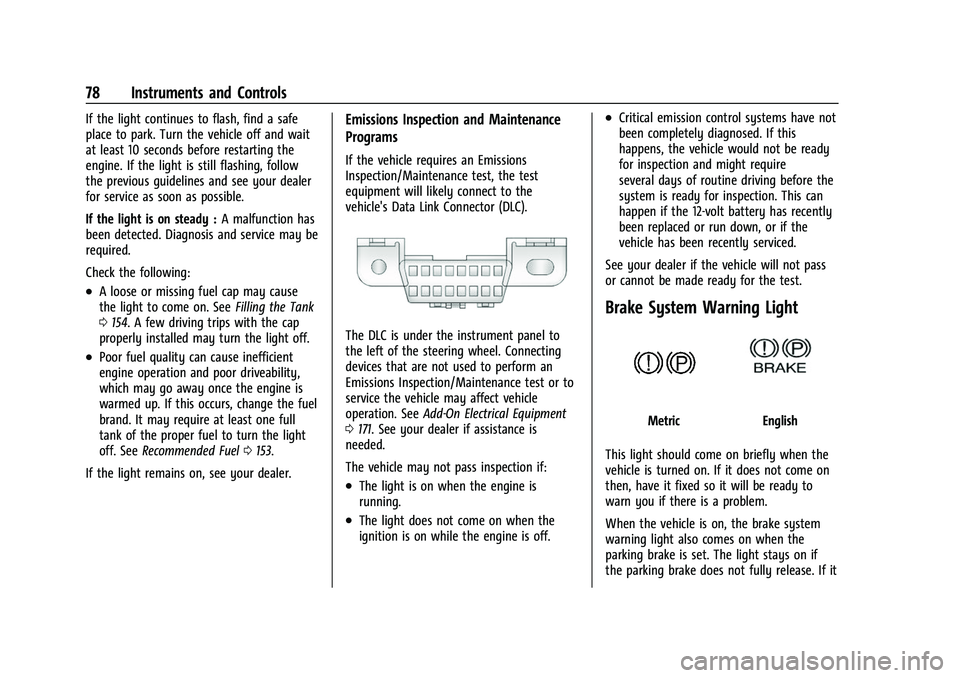
vehicle's Data Link Connector (DLC).
The DLC is under the instrument panel to
the left of the steering wheel. Connecting
devices that are not used to perform an
Emissions Inspection/Maintenance test or to
service the vehicle may affect vehicle
operation. See Add-On Electrical Equipment
0 171. See your dealer if assistance is
needed.
The vehicle may not pass inspection if:
.The light is on when the engine is
running.
.The light does not come on when the
ignition is on while the engine is off.
.Critical emission control systems have not
been completely diagnosed. If this
happens, the vehicle would not be ready
for inspection and might require
several days of routine driving before the
system is ready for inspection. This can
happen if the 12-volt battery has recently
been replaced or run down, or if the
vehicle has been recently serviced.
See your dealer if the vehicle will not pass
or cannot be made ready for the test.
Brake System Warning Light
MetricEnglish
This light should come on briefly when the
vehicle is turned on. If it does not come on
then, have it fixed so it will be ready to
warn you if there is a problem.
When the vehicle is on, the brake system
warning light also comes on when the
parking brake is set. The light stays on if
the parking brake does not fully release. If it
Page 80 of 289
Chevrolet Express Owner Manual (GMNA-Localizing-U.S./Canada/Mexico-
15555951) - 2022 - CRC - 1/27/22
Instruments and Controls 79
stays on after the parking brake is fully
released, there is a brake problem. Have the
brake system inspected right away.
If the light comes on while driving, pull off
the road and stop carefully. The brake pedal
might be harder to push, or the brake pedal
may go closer to the floor. It could take
longer to stop. If the light is still on, have
the vehicle towed for service. SeeTowing
the Vehicle 0233.
{Warning
The brake system might not be working
properly if the brake system warning
light is on. Driving with the brake system
warning light on can lead to a crash.
If the light is still on after the vehicle has
been pulled off the road and carefully
stopped, have the vehicle towed for
service.
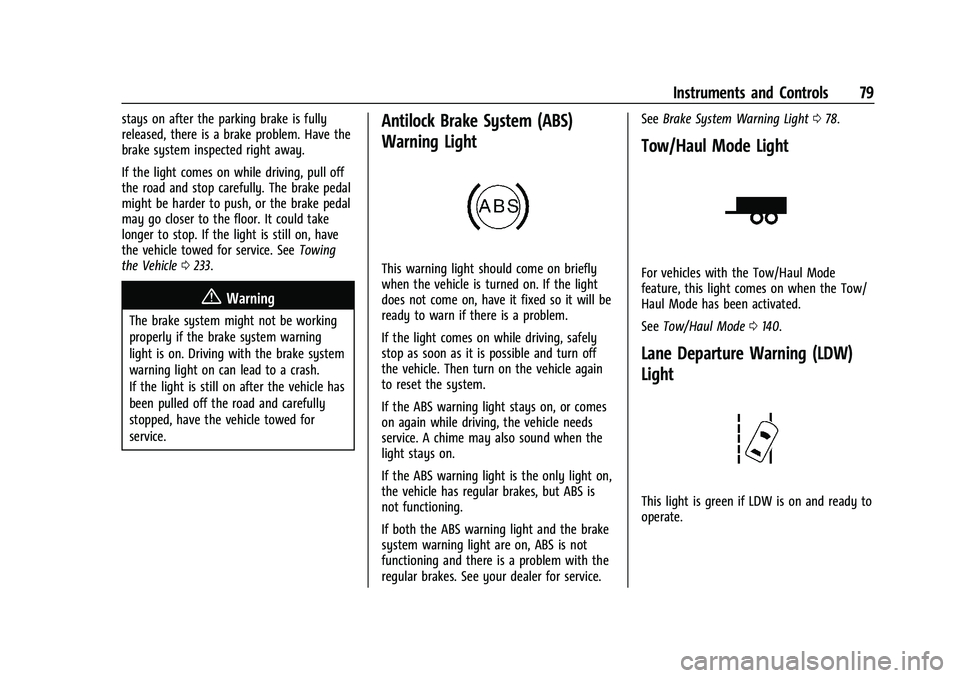
Antilock Brake System (ABS)
Warning Light
This warning light should come on briefly
when the vehicle is turned on. If the light
does not come on, have it fixed so it will be
ready to warn if there is a problem.
If the light comes on while driving, safely
stop as soon as it is possible and turn off
the vehicle. Then turn on the vehicle again
to reset the system.
If the ABS warning light stays on, or comes
on again while driving, the vehicle needs
service. A chime may also sound when the
light stays on.
If the ABS warning light is the only light on,
the vehicle has regular brakes, but ABS is
not functioning.
If both the ABS warning light and the brake
system warning light are on, ABS is not
functioning and there is a problem with the
regular brakes. See your dealer for service. See
Brake System Warning Light 078.
Tow/Haul Mode Light
For vehicles with the Tow/Haul Mode
feature, this light comes on when the Tow/
Haul Mode has been activated.
See Tow/Haul Mode 0140.
Lane Departure Warning (LDW)
Light
This light is green if LDW is on and ready to
operate.
Page 87 of 289
Chevrolet Express Owner Manual (GMNA-Localizing-U.S./Canada/Mexico-
15555951) - 2022 - CRC - 1/27/22
86 Instruments and Controls
Relearn Tire Positions
The vehicle may have this display. To access
this display, the vehicle must be in P (Park).
If the vehicle has the Tire Pressure Monitor
System (TPMS), after rotating the tires or
after replacing a tire or sensor, the system
must re-learn the tire positions. To re-learn
the tire positions, seeTire Pressure Monitor
System 0211. See Tire Inspection 0214 and
Tire Rotation 0214.
Change Compass Zone
The vehicle may have this feature. To
change the compass zone through the DIC,
see Compass 068.
Calibrate Compass
The vehicle may have this feature. The
compass can be manually calibrated. To
calibrate the compass through the DIC, see
Compass 068.
Blank Display
This display shows no information.Vehicle Messages
Messages displayed on the DIC indicate the
status of the vehicle or some action that
may be needed to correct a condition.
Multiple messages may appear one after
another.
The messages that do not require
immediate action can be acknowledged and
cleared by pressing
V. The messages that
require immediate action cannot be cleared
until that action is performed.
All messages should be taken seriously;
clearing the message does not correct the
problem.
If a SERVICE message appears, see your
dealer.
Follow the instructions given in the
messages. The system displays messages
regarding the following topics:
.Service Messages
.Fluid Levels
.Vehicle Security
.Brakes
.Steering
.Ride Control Systems
.Driver Assistance Systems
.Cruise Control
.Lighting and Bulb Replacement
.Wiper/Washer Systems
.Doors and Windows
.Seat Belts
.Airbag Systems
.Engine and Transmission
.Tire Pressure
.Battery
Engine Power Messages
ENGINE POWER IS REDUCED
This message displays when the vehicle's
propulsion power is reduced. A reduction in
propulsion power can affect the vehicle's
ability to accelerate. If this message is on,
but there is no observed reduction in
performance, proceed to your destination.
Under certain conditions the performance
may be reduced the next time the vehicle is
driven. The vehicle may be driven while this
message is on, but maximum acceleration
and speed may be reduced. Anytime this
message stays on, or displays repeatedly,
the vehicle should be taken to your dealer
for service as soon as possible.
Page 125 of 289
Chevrolet Express Owner Manual (GMNA-Localizing-U.S./Canada/Mexico-
15555951) - 2022 - CRC - 1/27/22
124 Driving and Operating
.Ease your foot off the accelerator pedal
and steer the way you want the vehicle
to go. The vehicle may straighten out. Be
ready for a second skid if it occurs.
.Slow down and adjust your driving
according to weather conditions. Stopping
distance can be longer and vehicle control
can be affected when traction is reduced
by water, snow, ice, gravel, or other
material on the road. Learn to recognize
warning clues—such as enough water,
ice, or packed snow on the road to make
a mirrored surface —and slow down
when you have any doubt.
.Try to avoid sudden steering, acceleration,
or braking, including reducing vehicle
speed by shifting to a lower gear. Any
sudden changes could cause the tires to
slide.
Remember: Antilock brakes help avoid only
the braking skid.
Driving on Wet Roads
Rain and wet roads can reduce vehicle
traction and affect your ability to stop and
accelerate. Always drive slower in these
types of driving conditions and avoid driving
through large puddles and deep-standing or
flowing water.
{Warning
Wet brakes can cause crashes. They
might not work as well in a quick stop
and could cause pulling to one side. You
could lose control of the vehicle.
After driving through a large puddle of
water or a car/vehicle wash, lightly apply
the brake pedal until the brakes work
normally.
Flowing or rushing water creates strong
forces. Driving through flowing water
could cause the vehicle to be carried
away. If this happens, you and other
vehicle occupants could drown. Do not
ignore police warnings and be very
cautious about trying to drive through
flowing water.
Hydroplaning
Hydroplaning is dangerous. Water can build
up under the vehicle's tires so they actually
ride on the water. This can happen if the
road is wet enough and you are going fast
enough. When the vehicle is hydroplaning, it
has little or no contact with the road. There is no hard and fast rule about
hydroplaning. The best advice is to slow
down when the road is wet.
Other Rainy Weather Tips
Besides slowing down, other wet weather
driving tips include:
.Allow extra following distance.
.Pass with caution.
.Keep windshield wiping equipment in
good shape.
.Keep the windshield washer fluid reservoir
filled.
.Have good tires with proper tread depth.
See
Tires 0204.
.Turn off cruise control.
Hill and Mountain Roads
Driving on steep hills or through mountains
is different than driving on flat or rolling
terrain. Tips include:
.Keep the vehicle serviced and in good
shape.
.Check all fluid levels and brakes, tires, and
cooling system.
.Shift to a lower gear when going down
steep or long hills.
Page 132 of 289
Chevrolet Express Owner Manual (GMNA-Localizing-U.S./Canada/Mexico-
15555951) - 2022 - CRC - 1/27/22
Driving and Operating 131
5. Remove the key.
6. Release the brake pedal.
See your dealer if the key can be removed
in any other position.
Retained Accessory Power (RAP) will remain
active. See Retained Accessory Power (RAP)
0 133.
A warning chime will sound when the driver
door is opened and the key is in the
ignition.
If equipped with a locking steering column,
the steering can bind with the front wheels
turned off center, which may prevent key
rotation out of LOCK/OFF. If this happens,
move the steering wheel from right to left
while turning the key to ACC/ACCESSORY.
If this does not work, then the vehicle needs
service.
{Warning
Turning off the vehicle while moving may
cause loss of power assist in the brake
and steering systems and disable the
airbags. While driving, turn off the
vehicle only in an emergency. In an emergency, if the vehicle cannot be
pulled over and must be turned off while
driving:
1. Push the key all the way in toward the steering column, then turn the key to
ACC/ACCESSORY.
2. Brake using firm and steady pressure. Do not pump the brakes repeatedly. This
may deplete power assist, requiring
increased brake pedal force.
3. Shift the vehicle to N (Neutral). This can be done while the vehicle is moving.
Continue braking and steer the vehicle to
a safe location.
4. Come to a complete stop.
5. Shift to P (Park).
6. Continue to hold the brake pedal, then set the parking brake. See Parking Brake
0 141.
7. Push the key all the way in toward the steering column, then turn the ignition
to LOCK/OFF.
8. Remove the key.
9. Release the brake pedal.
Caution
Use the correct key, make sure it is all
the way in —or pushed all the way in
toward the steering column when turning
off the vehicle —and turn it only with
your hand.
1 (ACC/ACCESSORY) : This position allows
features such as the infotainment system to
operate while the vehicle is off. It also
unlocks the steering column, if equipped
with a locking steering column. Use this
position if the vehicle must be pushed or
towed. See Retained Accessory Power (RAP)
0 133.
From ON/RUN, push the key all the way in
toward the steering column, then turn the
key to ACC/ACCESSORY.
If the key is left in ACC/ACCESSORY with the
engine off, the battery could drain and the
vehicle may not start.
A warning chime will sound when the driver
door is opened and the key is in the
ignition.
2 (ON/RUN) : This position can be used to
operate the electrical accessories and to
display some instrument cluster warning
and indicator lights. This position can also
Page 134 of 289
Chevrolet Express Owner Manual (GMNA-Localizing-U.S./Canada/Mexico-
15555951) - 2022 - CRC - 1/27/22
Driving and Operating 133
pushing the accelerator pedal all the way
to the floor and holding it there as you
hold the key in START for up to
15 seconds. Wait at least 15 seconds
between each try, to allow the cranking
motor to cool down. When the engine
starts, let go of the key and accelerator.
If the vehicle starts briefly but then
stops again, do the same thing. This
clears the extra gasoline from the
engine. Do not race the engine
immediately after starting it. Operate
the engine and transmission gently until
the oil warms up and lubricates all
moving parts.
Fast Idle System
If equipped, this feature is available only
with cruise control. The manual fast idle
switch is operated using the cruise control
buttons on the left side of the steering
wheel.
This system can be used to increase engine
idle speed whenever the following
conditions are met:
.The parking brake is set.
.The brake pedal is not pressed.
.The vehicle must not be moving and the
accelerator must not be pressed.To control the fast idle:
.To enable the Fast Idle System, press and
release the cruise control on/off button
and ensure that the switch indicator light
is lit.
.Press and release the cruise control SET-
button. Engine speed will be held at
approximately 1200 rpm.
When the fast idle is active, the Driver
Information Center (DIC) will display FAST
IDLE ON.
One of the following actions will turn off
the fast idle:
.Pressing the brake.
.Selecting the cruise control cancel button.
.Releasing the parking brake.
.Moving the transmission shift lever out of
P (Park) or N (Neutral).
.Selecting the cruise control on/off button
when it was previously on.
.Pressing the cruise control SET- button a
second time.
.Pressing the accelerator more than
one-quarter of the way down.
.Turning the ignition off.
Retained Accessory Power (RAP)
When the ignition is turned from on to off,
the following features (if equipped) will
continue to function for up to 10 minutes,
or until the driver door is opened. These
features will also work when the ignition is
in RUN or ACC/ACCESSORY:
.Infotainment System
.Power Windows (during RAP this
functionality will be lost when any door
is opened)
.Sunroof (during RAP this functionality will
be lost when any door is opened)
.Auxiliary Power Outlet
.Audio System
.OnStar System
Engine Coolant Heater
If the vehicle has a diesel engine, see the
Duramax diesel supplement.
{Warning
Do not plug in the engine block heater
while the vehicle is parked in a garage or
under a carport. Property damage or (Continued)
Page 141 of 289
Chevrolet Express Owner Manual (GMNA-Localizing-U.S./Canada/Mexico-
15555951) - 2022 - CRC - 1/27/22
140 Driving and Operating
To use this feature:1. Move the shift lever to M (Manual Mode).
2. Press the +/− buttons on the shift lever
to select the desired range of gears for
current driving conditions.
When M (Manual Mode) is selected, the
transmission will downshift and a number
displays in the Driver Information
Center (DIC) next to the M indicating the
current gear.
This number is the highest gear that can be
used. However, the vehicle can automatically
shift to lower gears as it adjusts to driving
conditions. This means that all gears below
that number are available. When 5 (Fifth) is
selected, 1 (First) through 5 (Fifth) gears are
automatically shifted by the vehicle, but
6 (Sixth) cannot be used until the +/−
button on the shift lever is used to change
to the gear.
Grade Braking is not available when Range
Selection Mode is active. See Tow/Haul
Mode 0140.
While using Range Selection Mode, cruise
control and the Tow/Haul Mode can
be used.Caution
Spinning the tires or holding the vehicle
in one place on a hill using only the
accelerator pedal may damage the
transmission. The repair will not be
covered by the vehicle warranty. If the
vehicle is stuck, do not spin the tires.
When stopping on a hill, use the brakes
to hold the vehicle in place.
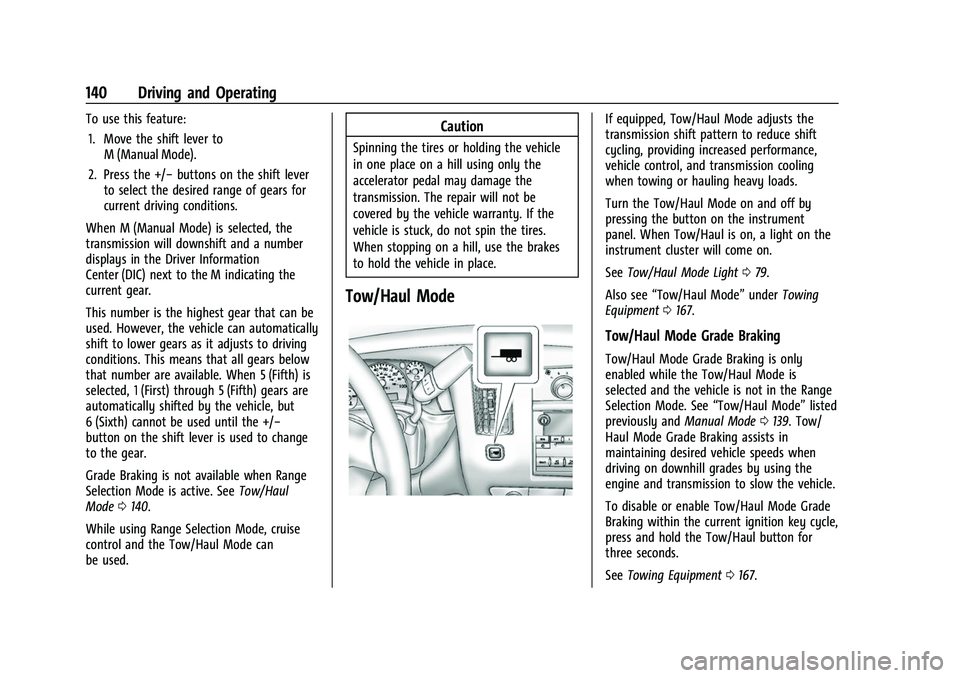
Tow/Haul Mode
If equipped, Tow/Haul Mode adjusts the
transmission shift pattern to reduce shift
cycling, providing increased performance,
vehicle control, and transmission cooling
when towing or hauling heavy loads.
Turn the Tow/Haul Mode on and off by
pressing the button on the instrument
panel. When Tow/Haul is on, a light on the
instrument cluster will come on.
See Tow/Haul Mode Light 079.
Also see “Tow/Haul Mode” underTowing
Equipment 0167.
Tow/Haul Mode Grade Braking
Tow/Haul Mode Grade Braking is only
enabled while the Tow/Haul Mode is
selected and the vehicle is not in the Range
Selection Mode. See “Tow/Haul Mode”listed
previously and Manual Mode0139. Tow/
Haul Mode Grade Braking assists in
maintaining desired vehicle speeds when
driving on downhill grades by using the
engine and transmission to slow the vehicle.
To disable or enable Tow/Haul Mode Grade
Braking within the current ignition key cycle,
press and hold the Tow/Haul button for
three seconds.
See Towing Equipment 0167.