lock CHEVROLET EXPRESS 2020 Get To Know Guide
[x] Cancel search | Manufacturer: CHEVROLET, Model Year: 2020, Model line: EXPRESS, Model: CHEVROLET EXPRESS 2020Pages: 356, PDF Size: 5.7 MB
Page 72 of 356

Chevrolet Express Owner Manual (GMNA-Localizing-U.S./Canada/Mexico-
13882570) - 2020 - CRC - 11/1/19
Seats and Restraints 71
In Canada, the law requires that
forward-facing child restraints have
a top tether, and that the tether be
attached.
If the child restraint or vehicle seat
position does not have the LATCH
system, you will be using the seat
belt to secure the child restraint.
Be sure to follow the instructions
that came with the child restraint.
If more than one child restraint
needs to be installed in the rear
seat, be sure to readWhere to Put
the Restraint 061.
1. Put the child restraint on the seat.
2. Pick up the latch plate, and run the lap and shoulder portions
of the vehicle seat belt through
or around the child restraint.
The child restraint instructions
will show you how.
3. Push the latch plate into thebuckle until it clicks.
Position the release button on
the buckle, away from the child
restraint, so that the seat belt
could be quickly unbuckled if
necessary.4. Pull the shoulder belt all theway out of the retractor to set
the lock. When the retractor
lock is set, the belt can be
tightened but not pulled out of
the retractor.
Page 73 of 356

Chevrolet Express Owner Manual (GMNA-Localizing-U.S./Canada/Mexico-
13882570) - 2020 - CRC - 11/1/19
72 Seats and Restraints
5. To tighten the belt, push downon the child restraint, pull the
shoulder portion of the belt to
tighten the lap portion of the
belt, and feed the shoulder belt
back into the retractor. When
installing a forward-facing child
restraint, it may be helpful to
use your knee to push down on
the child restraint as you
tighten the belt.
Try to pull the belt out of the
retractor to make sure the
retractor is locked. If the
retractor is not locked, repeat
Steps 4 and 5. 6. If the child restraint has a top
tether, follow the child restraint
manufacturer's instructions
regarding the use of the top
tether. See Lower Anchors and
Tethers for Children (LATCH
System) 062.
7. Before placing a child in the child restraint, make sure it is
securely held in place. To
check, grasp the child restraint
at the seat belt path and
attempt to move it side to side
and back and forth. When the
child restraint is properly
installed, there should be no
more than 2.5 cm (1 in) of
movement.
To remove the child restraint,
unbuckle the vehicle seat belt and
let it return to the stowed position.
If the top tether is attached to a top
tether anchor, disconnect it.
Securing Child Restraints
(With the Seat Belt in the
Front Seat)
This vehicle has airbags. A rear
seat is a safer place to secure a
forward-facing child restraint. See
Where to Put the Restraint 061.
There may be a switch on the
instrument panel that you can use to
turn off the front outboard
passenger frontal airbag. See
Airbag On-Off Switch 050 for more
information, including important
safety information.
Never put a rear-facing child
restraint in the front. This is because
the risk to the rear-facing child is so
great if the airbag deploys.
{Warning
A child in a rear-facing child
restraint can be seriously injured
or killed if the front outboard
passenger airbag inflates. This is
because the back of the
(Continued)
Page 75 of 356

Chevrolet Express Owner Manual (GMNA-Localizing-U.S./Canada/Mexico-
13882570) - 2020 - CRC - 11/1/19
74 Seats and Restraints
When the airbag off switch has
turned off the front outboard
passenger frontal airbag, the
off indicator in the airbag off
light should light and stay lit
when you start the vehicle. See
Airbag On-Off Light091.
2. Put the child restraint on the seat.
3. Pick up the latch plate, and run the lap and shoulder portions
of the vehicle seat belt through
or around the child restraint.
The child restraint instructions
will show you how.4. Push the latch plate into thebuckle until it clicks.
Position the release button on
the buckle, away from the child
restraint, so that the seat belt
could be quickly unbuckled
if necessary.
5. Pull the shoulder belt all theway out of the retractor to set
the lock. When the retractor
lock is set, the belt can be
tightened but not pulled out of
the retractor.
6. To tighten the belt, push downon the child restraint, pull the
shoulder portion of the belt to
tighten the lap portion of the
belt, and feed the shoulder belt
back into the retractor. When
installing a forward-facing child
restraint, it may be helpful to
use your knee to push down on
the child restraint as you
tighten the belt.
Try to pull the belt out of the
retractor to make sure the
retractor is locked. If the
retractor is not locked, repeat
Steps 5 and 6.
Page 79 of 356
Chevrolet Express Owner Manual (GMNA-Localizing-U.S./Canada/Mexico-
13882570) - 2020 - CRC - 11/1/19
78 Instruments and Controls
Instruments and
Controls
Controls
Steering Wheel Adjustment . . . . 79
Steering Wheel Controls . . . . . . . 79
Horn . . . . . . . . . . . . . . . . . . . . . . . . . . . 80
Windshield Wiper/Washer . . . . . . 80
Compass . . . . . . . . . . . . . . . . . . . . . . 81
Clock . . . . . . . . . . . . . . . . . . . . . . . . . . 83
Power Outlets . . . . . . . . . . . . . . . . . 83
Cigarette Lighter . . . . . . . . . . . . . . . 84
Ashtrays . . . . . . . . . . . . . . . . . . . . . . . 85
Warning Lights, Gauges, and
Indicators
Warning Lights, Gauges, andIndicators . . . . . . . . . . . . . . . . . . . . 85
Instrument Cluster . . . . . . . . . . . . . 86
Speedometer . . . . . . . . . . . . . . . . . . 87
Odometer . . . . . . . . . . . . . . . . . . . . . . 87
Trip Odometer . . . . . . . . . . . . . . . . . 87
Fuel Gauge . . . . . . . . . . . . . . . . . . . . 87
Engine Oil Pressure Gauge . . . . 88
Engine Coolant Temperature Gauge . . . . . . . . . . . . . . . . . . . . . . . . 89
Voltmeter Gauge . . . . . . . . . . . . . . . 90
Seat Belt Reminders . . . . . . . . . . . 90 Airbag Readiness Light . . . . . . . . 90
Airbag On-Off Light . . . . . . . . . . . . 91
Charging System Light . . . . . . . . . 92
Malfunction Indicator Lamp
(Check Engine Light) . . . . . . . . . 93
Brake System Warning Light . . . 94
Antilock Brake System (ABS) Warning Light . . . . . . . . . . . . . . . . 95
Tow/Haul Mode Light . . . . . . . . . . 96
Lane Departure Warning (LDW) Light . . . . . . . . . . . . . . . . . . . . . . . . . 96
Vehicle Ahead Indicator . . . . . . . . 96
StabiliTrak OFF Light . . . . . . . . . . 96
Traction Control System (TCS)/ StabiliTrak Light . . . . . . . . . . . . . . 97
Tire Pressure Light . . . . . . . . . . . . 97
Engine Oil Pressure Light . . . . . . 97
Low Fuel Warning Light . . . . . . . . 98
Security Light . . . . . . . . . . . . . . . . . . 98
High-Beam On Light . . . . . . . . . . . 98
Cruise Control Light . . . . . . . . . . . 99
Information Displays
Driver Information Center (DIC) . . . . . . . . . . . . . . . . . 99
Vehicle Messages
Vehicle Messages . . . . . . . . . . . . 104
Engine Power Messages . . . . . 104
Vehicle Speed Messages . . . . . 104
Vehicle Personalization
Vehicle Personalization . . . . . . . 105
Page 80 of 356
Chevrolet Express Owner Manual (GMNA-Localizing-U.S./Canada/Mexico-
13882570) - 2020 - CRC - 11/1/19
Instruments and Controls 79
Controls
Steering Wheel
Adjustment
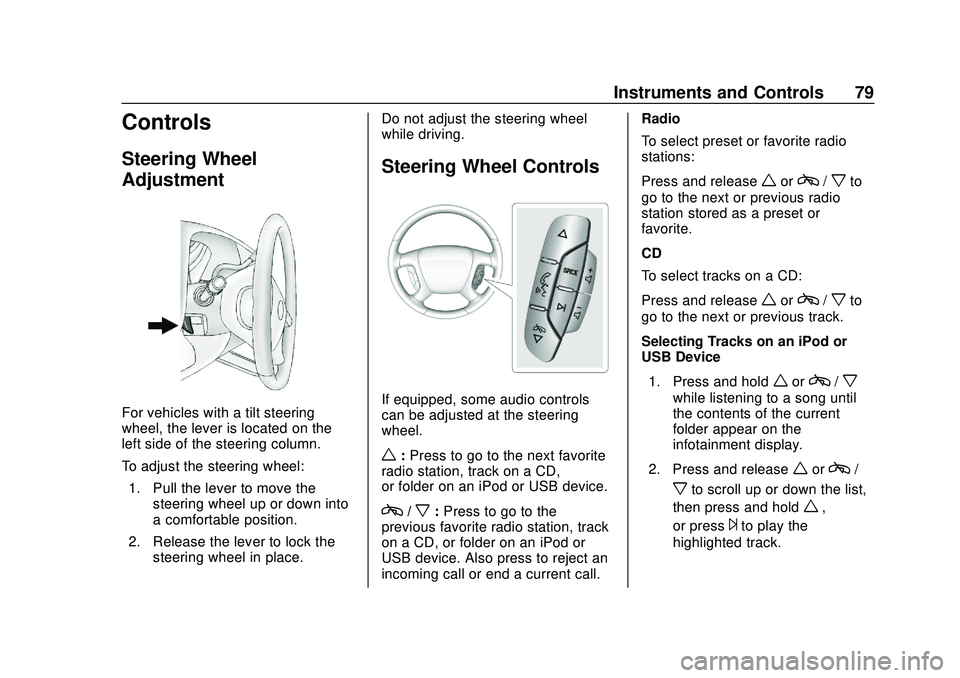
For vehicles with a tilt steering
wheel, the lever is located on the
left side of the steering column.
To adjust the steering wheel:1. Pull the lever to move the steering wheel up or down into
a comfortable position.
2. Release the lever to lock the steering wheel in place. Do not adjust the steering wheel
while driving.
Steering Wheel Controls
If equipped, some audio controls
can be adjusted at the steering
wheel.
w:
Press to go to the next favorite
radio station, track on a CD,
or folder on an iPod or USB device.
c/x: Press to go to the
previous favorite radio station, track
on a CD, or folder on an iPod or
USB device. Also press to reject an
incoming call or end a current call. Radio
To select preset or favorite radio
stations:
Press and release
worc/xto
go to the next or previous radio
station stored as a preset or
favorite.
CD
To select tracks on a CD:
Press and release
worc/xto
go to the next or previous track.
Selecting Tracks on an iPod or
USB Device
1. Press and hold
worc/x
while listening to a song until
the contents of the current
folder appear on the
infotainment display.
2. Press and release
worc/
xto scroll up or down the list,
then press and hold
w,
or press
¨to play the
highlighted track.
Page 82 of 356

Chevrolet Express Owner Manual (GMNA-Localizing-U.S./Canada/Mexico-
13882570) - 2020 - CRC - 11/1/19
Instruments and Controls 81
a:Slow wipes.
9:Use to turn the wipers off.
When driving during the day and the
wipers are activated, the headlamps
automatically turn on after
completing eight wipe cycles.
{Warning
In freezing weather, do not use
the washer until the windshield is
warmed. Otherwise the washer
fluid can form ice on the
windshield, blocking your vision.
{Warning
Before driving the vehicle, always
clear snow and ice from the hood,
windshield, roof, and rear of the
vehicle, including all lamps and
windows. Reduced visibility from
snow and ice buildup could lead
to a crash. Clear ice and snow from the wiper
blades before using them. If frozen
to the windshield, carefully loosen or
thaw them. Damaged blades should
be replaced.
Windshield Washer
The windshield wiper paddle is on
top of the turn signal lever.
L:
Push the paddle to spray
washer fluid on the windshield. The
wipers will clear the window and
then either stop or return to the
preset speed.
Compass
This vehicle may have a compass in
the Driver Information Center (DIC).
Compass Zone
Your dealer will set the correct zone
for your location.
Under certain circumstances, such
as during a long distance
cross-country trip or moving to a
new state or province, it will be
necessary to compensate for compass variance by resetting the
zone through the DIC if the zone is
not set correctly.
Compass variance is the difference
between the earth's magnetic north
and true geographic north. If the
compass is not set to the zone
where you live, the compass may
give false readings. The compass
must be set to the variance zone in
which the vehicle is traveling.
To adjust for compass variance, use
the following procedure:
Compass Variance (Zone)
Procedure
1. Do not set the compass zone when the vehicle is moving.
Only set it when the vehicle is
in P (Park).
Press
Tuntil PRESSVTO
CHANGE COMPASS ZONE
displays.
Page 84 of 356
Chevrolet Express Owner Manual (GMNA-Localizing-U.S./Canada/Mexico-
13882570) - 2020 - CRC - 11/1/19
Instruments and Controls 83
calibration is complete. The
DIC display will then return to
PRESS
VTO CALIBRATE
COMPASS.
Clock
Setting the Time or Date
1. With the radio on, pressHand
the HR, MIN, MM, DD, and
YYYY (hour, minute, month,
day, and year) display.
2. Press the softkey under any one of the tabs to be changed.
Every time the softkey is
pressed again, the time or the
date if selected, increases
by one.
Another way to increase the
time or date is to press
¨SEEK
or
\FWD (forward).
3. To decrease, press
©SEEK or
sREV. Turn thefknob, on
the upper right side of the
radio, to adjust the selected
setting. Changing the Time or Date Default
Settings
1. With the radio on, press
Hand
then the softkey under the
forward arrow that is currently
displayed on the infotainment
display until the time 12H
(hour) and 24H (hour), and the
date MM/DD (month and day)
and DD/MM (day and month)
are displayed.
2. Press the softkey under the desired option.
3. Press
Hagain to apply the
selected default, or let the
screen time out.
Power Outlets
Power Outlets 12 Volt Direct
Current
The accessory power outlets can be
used to plug in electrical equipment,
such as a cell phone or an MP3
player.
The vehicle may have two
accessory power outlets on the
instrument panel. Remove the cover to access and
replace when not in use.
Certain power accessory plugs may
not be compatible to the accessory
power outlet and could overload
vehicle or adapter fuses. If a
problem is experienced, see your
dealer.
{Warning
Power is always supplied to the
outlets. Do not leave electrical
equipment plugged in when the
vehicle is not in use because the
vehicle could catch fire and cause
injury or death.
Caution
Leaving electrical equipment
plugged in for an extended period
of time while the vehicle is off will
drain the battery. Always unplug
electrical equipment when not in
(Continued)
Page 96 of 356
Chevrolet Express Owner Manual (GMNA-Localizing-U.S./Canada/Mexico-
13882570) - 2020 - CRC - 11/1/19
Instruments and Controls 95
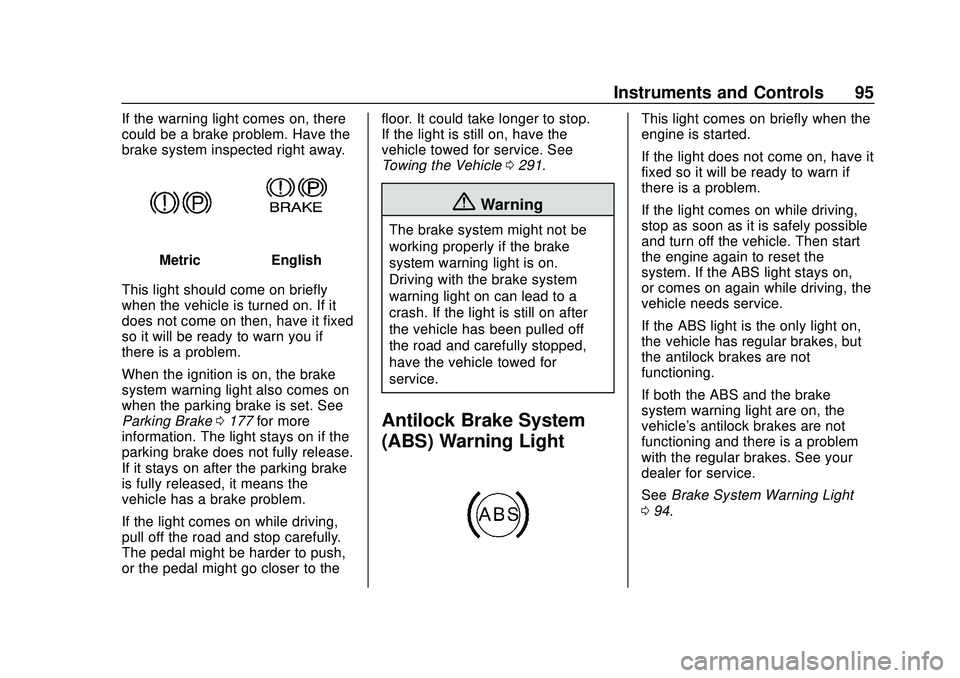
If the warning light comes on, there
could be a brake problem. Have the
brake system inspected right away.
MetricEnglish
This light should come on briefly
when the vehicle is turned on. If it
does not come on then, have it fixed
so it will be ready to warn you if
there is a problem.
When the ignition is on, the brake
system warning light also comes on
when the parking brake is set. See
Parking Brake 0177 for more
information. The light stays on if the
parking brake does not fully release.
If it stays on after the parking brake
is fully released, it means the
vehicle has a brake problem.
If the light comes on while driving,
pull off the road and stop carefully.
The pedal might be harder to push,
or the pedal might go closer to the floor. It could take longer to stop.
If the light is still on, have the
vehicle towed for service. See
Towing the Vehicle
0291.
{Warning
The brake system might not be
working properly if the brake
system warning light is on.
Driving with the brake system
warning light on can lead to a
crash. If the light is still on after
the vehicle has been pulled off
the road and carefully stopped,
have the vehicle towed for
service.
Antilock Brake System
(ABS) Warning Light
This light comes on briefly when the
engine is started.
If the light does not come on, have it
fixed so it will be ready to warn if
there is a problem.
If the light comes on while driving,
stop as soon as it is safely possible
and turn off the vehicle. Then start
the engine again to reset the
system. If the ABS light stays on,
or comes on again while driving, the
vehicle needs service.
If the ABS light is the only light on,
the vehicle has regular brakes, but
the antilock brakes are not
functioning.
If both the ABS and the brake
system warning light are on, the
vehicle's antilock brakes are not
functioning and there is a problem
with the regular brakes. See your
dealer for service.
See Brake System Warning Light
0 94.
Page 107 of 356
Chevrolet Express Owner Manual (GMNA-Localizing-U.S./Canada/Mexico-
13882570) - 2020 - CRC - 11/1/19
106 Instruments and Controls
To select a setting, pressVwhile
the desired setting is displayed on
the DIC. A beep will sound once a
language has been selected.
AUTO DOOR LOCK
This feature allows you to select
when the doors will
automatically lock.
Press
Uuntil AUTO DOOR LOCK
appears on the DIC display. Press
Vonce to access the settings for
this feature. Then press
Uto scroll
through the following settings:
SHIFT OUT OF PARK (default) :
The doors will automatically lock
when the vehicle is shifted out of
P (Park).
AT VEHICLE SPEED : The doors
will automatically lock when the
vehicle speed is above 13 km/h
(8 mph) for three seconds.
NO CHANGE : No change will be
made to this feature. The current
setting will remain. To select a setting, press
Vwhile
the desired setting is displayed on
the DIC.
AUTO DOOR UNLOCK
This feature allows you to select
whether or not to turn off the
automatic door unlocking feature.
It also allows you to select which
doors and when the doors will
automatically unlock.
Press
Uuntil AUTO DOOR
UNLOCK appears on the DIC
display. Press
Vonce to access the
settings for this feature. Then press
Uto scroll through the following
settings:
OFF : None of the doors will
automatically unlock.
DRIVER AT KEY OUT : Only the
driver door will unlock when the key
is taken out of the ignition.
DRIVER IN PARK : Only the driver
door will unlock when the vehicle is
shifted into P (Park). ALL AT KEY OUT :
All of the doors
will unlock when the key is taken
out of the ignition.
ALL IN PARK (default) : All of the
doors will unlock when the vehicle is
shifted into P (Park).
NO CHANGE : No change will be
made to this feature. The current
setting will remain.
To select a setting, press
Vwhile
the desired setting is displayed on
the DIC.
REMOTE DOOR LOCK
This feature allows you to select the
type of feedback you will receive
when locking the vehicle with the
Remote Keyless Entry (RKE)
transmitter. You will not receive
feedback when locking the vehicle
with the RKE transmitter if the doors
are open. See Remote Keyless
Entry (RKE) System Operation 09.
Press
Uuntil REMOTE DOOR
LOCK appears on the DIC display.
Press
Vonce to access the settings
for this feature. Then press
Uto
scroll through the following settings:
Page 108 of 356

Chevrolet Express Owner Manual (GMNA-Localizing-U.S./Canada/Mexico-
13882570) - 2020 - CRC - 11/1/19
Instruments and Controls 107
OFF :There will be no feedback
when you press
Qon the RKE
transmitter.
LIGHTS ONLY : The exterior lamps
will flash when you press
Qon the
RKE transmitter.
HORN ONLY : The horn will sound
on the second press of
Qon the
RKE transmitter.
HORN & LIGHTS (default) : The
exterior lamps will flash when you
press
Qon the RKE transmitter, and
the horn will sound when
Qis
pressed again within five seconds of
the previous command.
NO CHANGE : No change will be
made to this feature. The current
setting will remain.
To select a setting, press
Vwhile
the desired setting is displayed on
the DIC.
REMOTE DOOR UNLOCK
This feature allows you to select the
type of feedback you will receive
when unlocking the vehicle with the
Remote Keyless Entry (RKE) transmitter. You will not receive
feedback when unlocking the
vehicle with the RKE transmitter if
the doors are open. See
Remote
Keyless Entry (RKE) System
Operation 09.
Press
Uuntil REMOTE DOOR
UNLOCK appears on the DIC
display. Press
Vonce to access the
settings for this feature. Then press
Uto scroll through the following
settings:
LIGHTS OFF : The exterior lamps
will not flash when you press
Kon
the RKE transmitter.
LIGHTS ON (default) : The exterior
lamps will flash when you press
K
on the RKE transmitter.
NO CHANGE : No change will be
made to this feature. The current
setting will remain.
To select a setting, press
Vwhile
the desired setting is displayed on
the DIC. DELAY DOOR LOCK
This feature allows you to select
whether or not the locking of the
doors will be delayed. When locking
the doors with the power door lock
switch and a door is open, this
feature will delay locking the doors
until five seconds after the last door
is closed. You will hear three chimes
to signal that the delayed locking
feature is in use. The key must be
out of the ignition for this feature to
work. You can temporarily override
delayed locking by pressing the
power door lock switch twice or
Q
on the RKE transmitter twice. See
Delayed Locking
014.
Press
Uuntil DELAY DOOR LOCK
appears on the DIC display. Press
Vonce to access the settings for
this feature. Then press
Uto scroll
through the following settings:
OFF : There will be no delayed
locking of the vehicle's doors.
ON (default) : The doors will not
lock until five seconds after the last
door is closed.