reset CHEVROLET EXPRESS 2020 Get To Know Guide
[x] Cancel search | Manufacturer: CHEVROLET, Model Year: 2020, Model line: EXPRESS, Model: CHEVROLET EXPRESS 2020Pages: 356, PDF Size: 5.7 MB
Page 80 of 356
Chevrolet Express Owner Manual (GMNA-Localizing-U.S./Canada/Mexico-
13882570) - 2020 - CRC - 11/1/19
Instruments and Controls 79
Controls
Steering Wheel
Adjustment
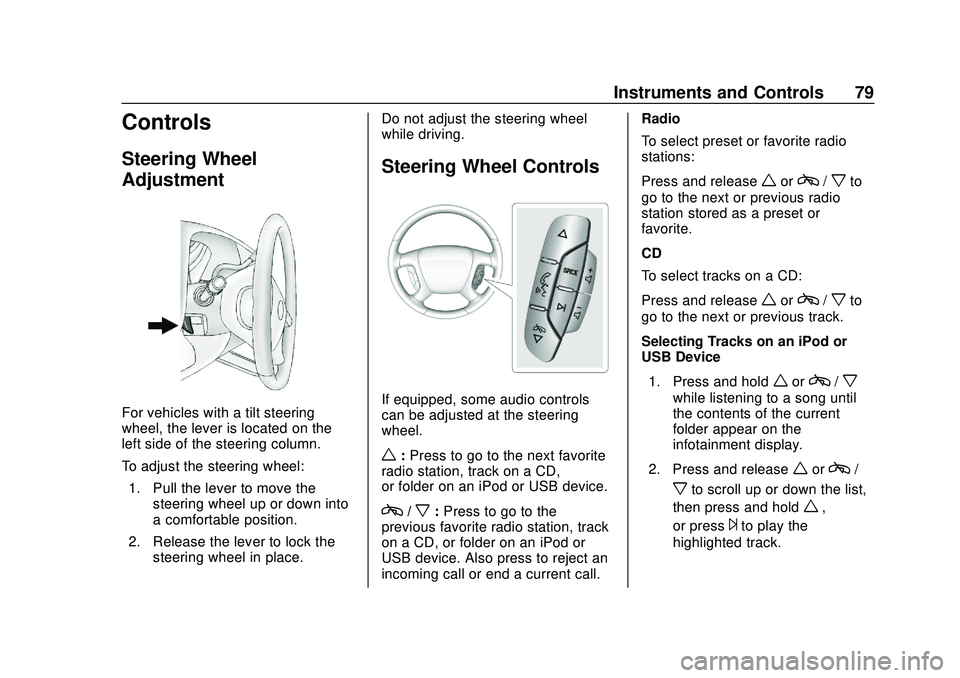
For vehicles with a tilt steering
wheel, the lever is located on the
left side of the steering column.
To adjust the steering wheel:1. Pull the lever to move the steering wheel up or down into
a comfortable position.
2. Release the lever to lock the steering wheel in place. Do not adjust the steering wheel
while driving.
Steering Wheel Controls
If equipped, some audio controls
can be adjusted at the steering
wheel.
w:
Press to go to the next favorite
radio station, track on a CD,
or folder on an iPod or USB device.
c/x: Press to go to the
previous favorite radio station, track
on a CD, or folder on an iPod or
USB device. Also press to reject an
incoming call or end a current call. Radio
To select preset or favorite radio
stations:
Press and release
worc/xto
go to the next or previous radio
station stored as a preset or
favorite.
CD
To select tracks on a CD:
Press and release
worc/xto
go to the next or previous track.
Selecting Tracks on an iPod or
USB Device
1. Press and hold
worc/x
while listening to a song until
the contents of the current
folder appear on the
infotainment display.
2. Press and release
worc/
xto scroll up or down the list,
then press and hold
w,
or press
¨to play the
highlighted track.
Page 82 of 356

Chevrolet Express Owner Manual (GMNA-Localizing-U.S./Canada/Mexico-
13882570) - 2020 - CRC - 11/1/19
Instruments and Controls 81
a:Slow wipes.
9:Use to turn the wipers off.
When driving during the day and the
wipers are activated, the headlamps
automatically turn on after
completing eight wipe cycles.
{Warning
In freezing weather, do not use
the washer until the windshield is
warmed. Otherwise the washer
fluid can form ice on the
windshield, blocking your vision.
{Warning
Before driving the vehicle, always
clear snow and ice from the hood,
windshield, roof, and rear of the
vehicle, including all lamps and
windows. Reduced visibility from
snow and ice buildup could lead
to a crash. Clear ice and snow from the wiper
blades before using them. If frozen
to the windshield, carefully loosen or
thaw them. Damaged blades should
be replaced.
Windshield Washer
The windshield wiper paddle is on
top of the turn signal lever.
L:
Push the paddle to spray
washer fluid on the windshield. The
wipers will clear the window and
then either stop or return to the
preset speed.
Compass
This vehicle may have a compass in
the Driver Information Center (DIC).
Compass Zone
Your dealer will set the correct zone
for your location.
Under certain circumstances, such
as during a long distance
cross-country trip or moving to a
new state or province, it will be
necessary to compensate for compass variance by resetting the
zone through the DIC if the zone is
not set correctly.
Compass variance is the difference
between the earth's magnetic north
and true geographic north. If the
compass is not set to the zone
where you live, the compass may
give false readings. The compass
must be set to the variance zone in
which the vehicle is traveling.
To adjust for compass variance, use
the following procedure:
Compass Variance (Zone)
Procedure
1. Do not set the compass zone when the vehicle is moving.
Only set it when the vehicle is
in P (Park).
Press
Tuntil PRESSVTO
CHANGE COMPASS ZONE
displays.
Page 85 of 356

Chevrolet Express Owner Manual (GMNA-Localizing-U.S./Canada/Mexico-
13882570) - 2020 - CRC - 11/1/19
84 Instruments and Controls
Caution (Continued)
use and do not plug in equipment
that exceeds the maximum
20 amp rating.
When adding electrical equipment,
be sure to follow the proper
installation instructions included with
the equipment. See Add-On
Electrical Equipment 0213.
Caution
Hanging heavy equipment from
the power outlet can cause
damage not covered by the
vehicle warranty. The power
outlets are designed for
accessory power plugs only, such
as cell phone charge cords.
Power Outlet 110/120 Volt
Alternating Current
This power outlet can be used to
plug in electrical equipment that
uses a maximum limit of 150 watts. The 110/120 volt power outlet is on
the instrument panel.
An indicator light on the outlet turns
on to show it is in use. The light
comes on when the ignition is on,
equipment requiring less than 150
watts is plugged into the outlet, and
no system fault is detected.
The indicator light does not come on
when the ignition is off, or if the
equipment is not fully seated into
the outlet.
If equipment is connected using
more than 150 watts or a system
fault is detected, a protection circuit
shuts off the power supply and the
indicator light turns off. To reset the
circuit, unplug the item and plug it
back in or turn the Retained
Accessory Power (RAP) off and
then back on. See
Retained
Accessory Power (RAP) 0167.
The power outlet is not designed for
the following, and may not work
properly if they are plugged in: .
Equipment with high initial peak
wattage, such as
compressor-driven refrigerators
and electric power tools
. Other equipment requiring an
extremely stable power supply,
such as
microcomputer-controlled
electric blankets and touch
sensor lamps
. Medical equipment
Cigarette Lighter
If equipped with a cigarette lighter,
to heat, push it in all the way and let
go. When it is ready for use, it will
pop back out by itself.
Do not use the lighter to plug in
accessory devices. Use the power
outlets provided.
Caution
Holding a cigarette lighter in while
it is heating does not let the
lighter back away from the
(Continued)
Page 88 of 356

Chevrolet Express Owner Manual (GMNA-Localizing-U.S./Canada/Mexico-
13882570) - 2020 - CRC - 11/1/19
Instruments and Controls 87
If the vehicle has a diesel engine,
see the Duramax diesel supplement
for more information.
Speedometer
The speedometer shows the vehicle
speed in kilometers per hour (km/h)
and miles per hour (mph).
Odometer
The odometer shows how far the
vehicle has been driven, in either
kilometers or miles.
Trip Odometer
The trip odometer shows how far
the vehicle has been driven since
the trip odometer was last reset.
The trip odometer is accessed and
reset through the Driver Information
Center (DIC). SeeDriver
Information Center (DIC) 099.
Fuel Gauge
Metric
English
The fuel gauge, when the ignition is
on, indicates how much fuel is left in
the vehicle fuel tank.
An arrow on the fuel gauge
indicates the side of the vehicle the
fuel door is on.
The gauge first indicates empty
before the vehicle is out of fuel, and
the fuel tank should be
refueled soon.
Listed are four situations customers
might experience with the fuel
gauge. None of these indicate a
problem with the fuel gauge:
Page 96 of 356
Chevrolet Express Owner Manual (GMNA-Localizing-U.S./Canada/Mexico-
13882570) - 2020 - CRC - 11/1/19
Instruments and Controls 95
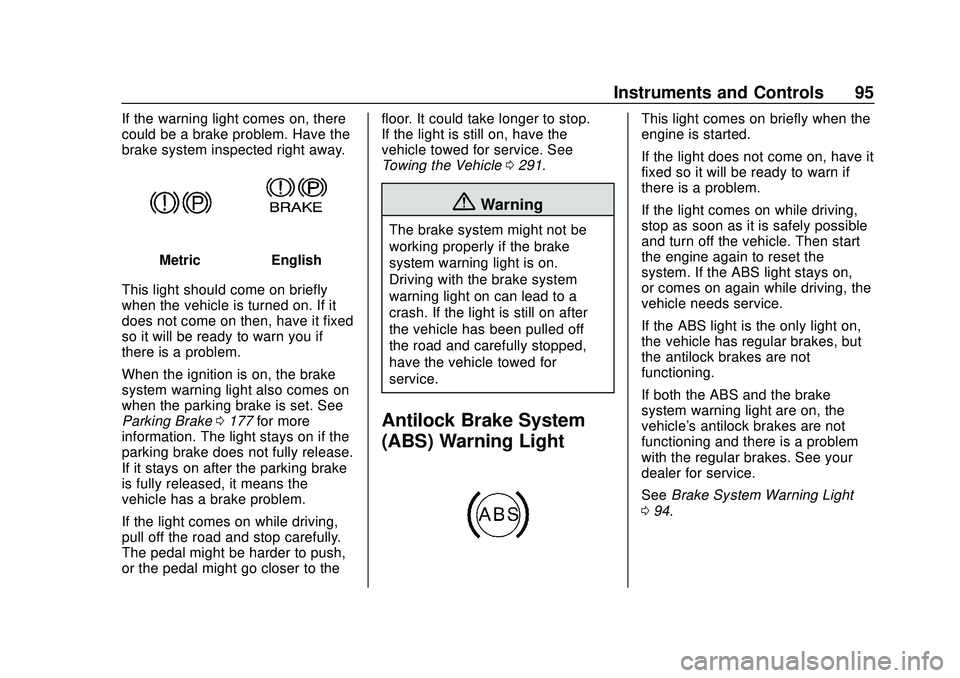
If the warning light comes on, there
could be a brake problem. Have the
brake system inspected right away.
MetricEnglish
This light should come on briefly
when the vehicle is turned on. If it
does not come on then, have it fixed
so it will be ready to warn you if
there is a problem.
When the ignition is on, the brake
system warning light also comes on
when the parking brake is set. See
Parking Brake 0177 for more
information. The light stays on if the
parking brake does not fully release.
If it stays on after the parking brake
is fully released, it means the
vehicle has a brake problem.
If the light comes on while driving,
pull off the road and stop carefully.
The pedal might be harder to push,
or the pedal might go closer to the floor. It could take longer to stop.
If the light is still on, have the
vehicle towed for service. See
Towing the Vehicle
0291.
{Warning
The brake system might not be
working properly if the brake
system warning light is on.
Driving with the brake system
warning light on can lead to a
crash. If the light is still on after
the vehicle has been pulled off
the road and carefully stopped,
have the vehicle towed for
service.
Antilock Brake System
(ABS) Warning Light
This light comes on briefly when the
engine is started.
If the light does not come on, have it
fixed so it will be ready to warn if
there is a problem.
If the light comes on while driving,
stop as soon as it is safely possible
and turn off the vehicle. Then start
the engine again to reset the
system. If the ABS light stays on,
or comes on again while driving, the
vehicle needs service.
If the ABS light is the only light on,
the vehicle has regular brakes, but
the antilock brakes are not
functioning.
If both the ABS and the brake
system warning light are on, the
vehicle's antilock brakes are not
functioning and there is a problem
with the regular brakes. See your
dealer for service.
See Brake System Warning Light
0 94.
Page 101 of 356
Chevrolet Express Owner Manual (GMNA-Localizing-U.S./Canada/Mexico-
13882570) - 2020 - CRC - 11/1/19
100 Instruments and Controls
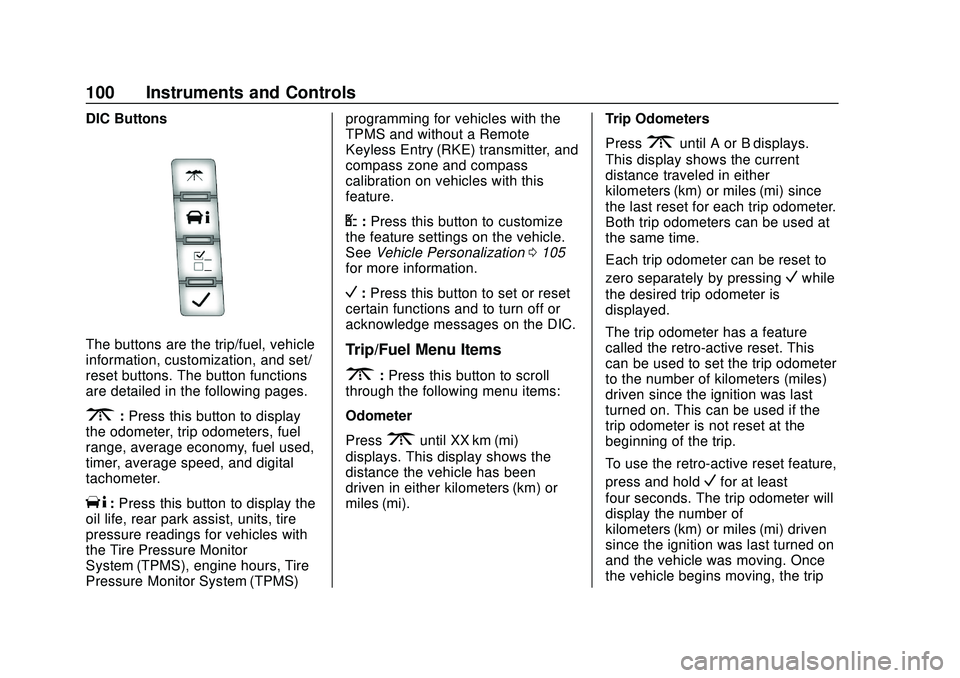
DIC Buttons
The buttons are the trip/fuel, vehicle
information, customization, and set/
reset buttons. The button functions
are detailed in the following pages.
3:Press this button to display
the odometer, trip odometers, fuel
range, average economy, fuel used,
timer, average speed, and digital
tachometer.
T: Press this button to display the
oil life, rear park assist, units, tire
pressure readings for vehicles with
the Tire Pressure Monitor
System (TPMS), engine hours, Tire
Pressure Monitor System (TPMS) programming for vehicles with the
TPMS and without a Remote
Keyless Entry (RKE) transmitter, and
compass zone and compass
calibration on vehicles with this
feature.
U:
Press this button to customize
the feature settings on the vehicle.
See Vehicle Personalization 0105
for more information.
V: Press this button to set or reset
certain functions and to turn off or
acknowledge messages on the DIC.
Trip/Fuel Menu Items
3: Press this button to scroll
through the following menu items:
Odometer
Press
3until XX km (mi)
displays. This display shows the
distance the vehicle has been
driven in either kilometers (km) or
miles (mi). Trip Odometers
Press
3until A or B displays.
This display shows the current
distance traveled in either
kilometers (km) or miles (mi) since
the last reset for each trip odometer.
Both trip odometers can be used at
the same time.
Each trip odometer can be reset to
zero separately by pressing
Vwhile
the desired trip odometer is
displayed.
The trip odometer has a feature
called the retro-active reset. This
can be used to set the trip odometer
to the number of kilometers (miles)
driven since the ignition was last
turned on. This can be used if the
trip odometer is not reset at the
beginning of the trip.
To use the retro-active reset feature,
press and hold
Vfor at least
four seconds. The trip odometer will
display the number of
kilometers (km) or miles (mi) driven
since the ignition was last turned on
and the vehicle was moving. Once
the vehicle begins moving, the trip
Page 102 of 356

Chevrolet Express Owner Manual (GMNA-Localizing-U.S./Canada/Mexico-
13882570) - 2020 - CRC - 11/1/19
Instruments and Controls 101
odometer will accumulate mileage.
For example, if the vehicle was
driven 8 km (5 miles) before it is
started again, and then the
retro-active reset feature is
activated, the display will show 8 km
(5 miles). As the vehicle begins
moving, the display will then
increase to 8.1 km (5.1 miles),
8.2 km (5.2 miles), etc.
If the retro-active reset feature is
activated after the vehicle is started,
but before it begins moving, the
display will show the number of
kilometers (km) or miles (mi) that
were driven during the last ignition
cycle.
Fuel Range
Press
3until FUEL RANGE
displays. This display shows the
approximate number of remaining
kilometers (km) or miles (mi) the
vehicle can be driven without
refueling.
The fuel range estimate is based on
an average of the fuel economy
over recent driving history and the
amount of fuel remaining in the fuel tank. This estimate will change if
driving conditions change. For
example, if driving in traffic and
making frequent stops, this display
may read one number, but if the
vehicle is driven on a freeway, the
number may change even though
the same amount of fuel is in the
fuel tank. This is because different
driving conditions produce different
fuel economies. Generally, freeway
driving produces better fuel
economy than city driving.
If the vehicle is low on fuel, the
FUEL LEVEL LOW message will be
displayed.
Average Economy
Press3until AVG ECONOMY
displays. This display shows the
approximate average liters per
100 kilometers (L/100 km) or miles
per gallon (mpg). This number is
calculated based on the number of
L/100 km (mpg) recorded since the
last time this menu item was reset.
To reset AVG ECONOMY, press and
hold
V. The display will return
to zero. Fuel Used
Press
3until FUEL USED
displays. This display shows the
number of liters (L) or gallons (gal)
of fuel used since the last reset of
this menu item. To reset the fuel
used information, press and hold
V
while FUEL USED is displayed.
Timer
Press
3until TIMER displays.
This display can be used as a timer.
To start the timer, press
Vwhile
TIMER is displayed. The display will
show the amount of time that has
passed since the timer was last
reset, not including time the ignition
is off. Time will continue to be
counted as long as the ignition is
on, even if another display is being
shown on the DIC. The timer will
record up to 99 hours, 59 minutes
and 59 seconds (99:59:59) after
which the display will return to zero.
To stop the timer, press
Vbriefly
while TIMER is displayed.
To reset the timer to zero, press and
Page 103 of 356
Chevrolet Express Owner Manual (GMNA-Localizing-U.S./Canada/Mexico-
13882570) - 2020 - CRC - 11/1/19
102 Instruments and Controls
holdVwhile TIMER is displayed.
Average Speed
Press
3until AVERAGE SPEED
displays. This display shows the
average speed of the vehicle in
kilometers per hour (km/h) or miles
per hour (mph). This average is
calculated based on the various
vehicle speeds recorded since the
last reset of this value. To reset the
value, press and hold
V. The
display will return to zero.
Digital Tachometer
Press
3until
Tachometer ##00 RPM displays.
This display shows the engine
speed in revolutions per
minute (RPM).
Blank Display
This display shows no information.
Vehicle Information Menu
Items
T: Press this button to scroll
through the following menu items:
Oil Life
Press
Tuntil OIL LIFE
REMAINING displays. This display
shows an estimate of the oil's
remaining useful life. If you see
99% OIL LIFE REMAINING on the
display, that means 99% of the
current oil life remains. The engine
oil life system will alert you to
change the oil on a schedule
consistent with your driving
conditions.
When the remaining oil life is low,
the CHANGE ENGINE OIL SOON
message will appear on the display.
You should change the oil as soon
as possible. See Engine Oil0222.
In addition to the engine oil life
system monitoring the oil life,
additional maintenance is
recommended. See Maintenance
Schedule 0305. Remember, you must reset the OIL
LIFE yourself after each oil change.
It will not reset itself. Also, be
careful not to reset the OIL LIFE
accidentally at any time other than
when the oil has just been changed.
It cannot be reset accurately until
the next oil change. To reset the
engine oil life system, see
Engine
Oil Life System 0224.
Side Blind Zone Alert
If the vehicle has Side Blind Zone
Alert (SBZA), this display allows the
system to be turned on or off. Press
Tuntil SBZA displays. Once in
this display, press
Vto select
between ON or OFF. When the
SBZA system is turned off, a DIC
message will display. See Side
Blind Zone Alert (SBZA) 0188.
Park Assist
If the vehicle has the Rear Park
Assist (RPA) system, press
Tuntil
PARK ASSIST displays. This
display allows the system to be
turned on or off. Once in this
display, press to select between ON
or OFF. The RPA system
Page 106 of 356
Chevrolet Express Owner Manual (GMNA-Localizing-U.S./Canada/Mexico-
13882570) - 2020 - CRC - 11/1/19
Instruments and Controls 105
Vehicle
Personalization
This vehicle may have
customization capabilities that allow
you to program certain features to
one preferred setting. Customization
features can only be programmed to
one setting on the vehicle and
cannot be programmed to a
preferred setting for two different
drivers.
All of the customization options may
not be available on your vehicle.
Only the options available will be
displayed on the DIC.
The default settings for the
customization features were set
when the vehicle left the factory, but
may have been changed from their
default state since then.
The customization preferences are
automatically recalled.
To change customization
preferences, use the following
procedure.
Entering the Feature
Settings Menu
1. Turn the ignition on and placethe vehicle in P (Park).
To avoid excessive drain on
the battery, it is recommended
that the headlamps are
turned off.
2. Press
Uto enter the feature
settings menu.
If the menu is not available,
FEATURE SETTINGS
AVAILABLE IN PARK will
display. Before entering the
menu, make sure the vehicle is
in P (Park).
Feature Settings Menu Items
The following are customization
features that allow you to program
settings to the vehicle:
DISPLAY IN ENGLISH
This feature will only display if a
language other than English has
been set. This feature allows you to
change the language in which the
DIC messages appear to English. Press
Uuntil the PRESSVTO
DISPLAY IN ENGLISH screen
appears on the DIC display. Press
the set/reset button once to display
all DIC messages in English.
LANGUAGE
This feature allows you to select the
language in which the DIC
messages will appear.
Press
Uuntil the LANGUAGE
screen appears on the DIC display.
Press
Vonce to access the settings
for this feature. Then press
Uto
scroll through the following settings:
ENGLISH (default) : All messages
will appear in English.
FRANCAIS : All messages will
appear in French.
ESPANOL : All messages will
appear in Spanish.
NO CHANGE : No change will be
made to this feature. The current
setting will remain.
Page 118 of 356
Chevrolet Express Owner Manual (GMNA-Localizing-U.S./Canada/Mexico-
13882570) - 2020 - CRC - 11/1/19
Infotainment System 117
Infotainment
System
Introduction
Infotainment . . . . . . . . . . . . . . . . . . 117
Theft-Deterrent Feature . . . . . . . 118
Overview (AM-FM Radio) . . . . . 118
Overview (Radio withCD/MP3) . . . . . . . . . . . . . . . . . . . . 120
Operation . . . . . . . . . . . . . . . . . . . . . 121
Radio
AM-FM Radio . . . . . . . . . . . . . . . . 123
Satellite Radio . . . . . . . . . . . . . . . . 124
Radio Reception . . . . . . . . . . . . . . 125
Multi-Band Antenna . . . . . . . . . . 126
Audio Players
Avoiding Untrusted Media Devices . . . . . . . . . . . . . . . . . . . . . 126
CD Player . . . . . . . . . . . . . . . . . . . . 126
Auxiliary Devices . . . . . . . . . . . . . 131
OnStar System
OnStar System . . . . . . . . . . . . . . . 136
Phone
Bluetooth . . . . . . . . . . . . . . . . . . . . . 136
Introduction
Infotainment
Base radio information is included in
this manual. See the infotainment
manual for information on other
available infotainment systems.
Read the following pages to
become familiar with the features.
{Warning
Taking your eyes off the road for
too long or too often while using
any infotainment feature can
cause a crash. You or others
could be injured or killed. Do not
give extended attention to
infotainment tasks while driving.
Limit your glances at the vehicle
displays and focus your attention
on driving. Use voice commands
whenever possible.
The infotainment system has built-in
features intended to help avoid
distraction by disabling some functions when driving. These
functions may gray out when they
are unavailable. Many infotainment
features are also available through
the instrument cluster and steering
wheel controls.
Before driving:
.
Become familiar with the
operation, center stack controls,
and infotainment display
controls.
. Set up the audio by presetting
favorite stations, setting the
tone, and adjusting the
speakers.
. Set up phone numbers in
advance so they can be called
easily by pressing a single
control or by using a single voice
command if equipped with
Bluetooth phone capability.
See Defensive Driving 0152.
To play the infotainment system with
the ignition off, see Retained
Accessory Power (RAP) 0167.