Gen 3 CHEVROLET EXPRESS 2023 Owners Manual
[x] Cancel search | Manufacturer: CHEVROLET, Model Year: 2023, Model line: EXPRESS, Model: CHEVROLET EXPRESS 2023Pages: 283, PDF Size: 16.23 MB
Page 2 of 283
Chevrolet Express Owner Manual (GMNA-Localizing-U.S./Canada/Mexico-
16547501) - 2023 - CRC - 6/10/22
Contents
Introduction . . . . . . . . . . . . . . . . . . . . . . . . . . . . . . 1
Keys, Doors, and Windows . . . . . . . . . . . . . . . 6
Seats and Restraints . . . . . . . . . . . . . . . . . . . . . 22
Storage . . . . . . . . . . . . . . . . . . . . . . . . . . . . . . . . . 64
Instruments and Controls . . . . . . . . . . . . . . . 66
Lighting . . . . . . . . . . . . . . . . . . . . . . . . . . . . . . . . . 91
Infotainment System . . . . . . . . . . . . . . . . . . . . 97
Climate Controls . . . . . . . . . . . . . . . . . . . . . . . . 114
Driving and Operating . . . . . . . . . . . . . . . . . . 120
Vehicle Care . . . . . . . . . . . . . . . . . . . . . . . . . . . . 172
Service and Maintenance . . . . . . . . . . . . . . . 241
Technical Data . . . . . . . . . . . . . . . . . . . . . . . . . 249
Customer Information . . . . . . . . . . . . . . . . . . 253
Reporting Safety Defects . . . . . . . . . . . . . . . 261
OnStar . . . . . . . . . . . . . . . . . . . . . . . . . . . . . . . . . 264
Connected Services . . . . . . . . . . . . . . . . . . . . . 269
Index . . . . . . . . . . . . . . . . . . . . . . . . . . . 272
Introduction
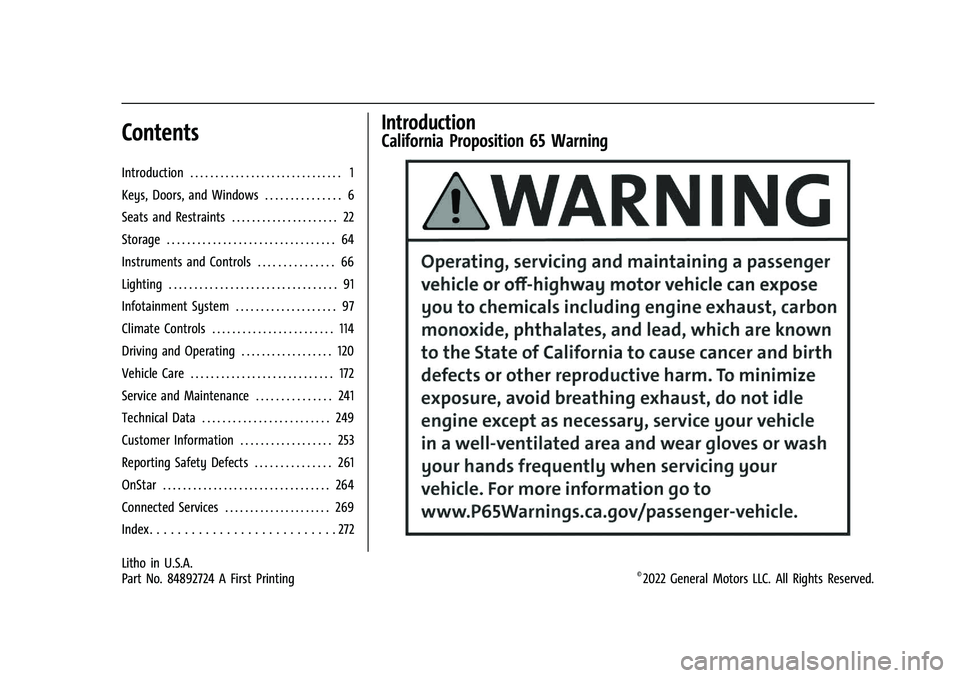
California Proposition 65 Warning
Litho in U.S.A.
Part No. 84892724 A First Printing©2022 General Motors LLC. All Rights Reserved.
Page 3 of 283
Chevrolet Express Owner Manual (GMNA-Localizing-U.S./Canada/Mexico-
16547501) - 2023 - CRC - 6/10/22
2 Introduction
Introduction
The names, logos, emblems, slogans, vehicle
model names, and vehicle body designs
appearing in this manual including, but not
limited to, GM, the GM logo, CHEVROLET,
the CHEVROLET Emblem, and EXPRESS are
trademarks and/or service marks of General
Motors LLC, its subsidiaries, affiliates,
or licensors.
For vehicles first sold in Canada, substitute
the name“General Motors of Canada
Company” for Chevrolet Motor Division
wherever it appears in this manual.
This manual describes features that may or
may not be on the vehicle because of
optional equipment that was not purchased
on the vehicle, model variants, country
specifications, features/applications that may
not be available in your region, or changes
subsequent to the printing of this owner’s
manual, including changes in standard or
optional content. Refer to the purchase documentation
relating to your specific vehicle to confirm
the features.
Keep this manual in the vehicle for quick
reference.
Canadian Vehicle Owners
A French language manual can be obtained
from your dealer, at www.helminc.com,
or from:
Propriétaires Canadiens
On peut obtenir un exemplaire de ce guide
en français auprès du concessionnaire ou à
l'adresse suivante:
Helm, Incorporated
Attention: Customer Service
47911 Halyard Drive
Plymouth, MI 48170
USA
Using this Manual
To quickly locate information about the
vehicle, use the Index in the back of the
manual. It is an alphabetical list of what is
in the manual and the page number where
it can be found.
Danger, Warning, and Caution
Warning messages found on vehicle labels
and in this manual describe hazards and
what to do to avoid or reduce them.
{Danger
Danger indicates a hazard with a high
level of risk which will result in serious
injury or death.
{Warning
Warning indicates a hazard that could
result in injury or death.
Caution
Caution indicates a hazard that could
result in property or vehicle damage.
Page 49 of 283

Chevrolet Express Owner Manual (GMNA-Localizing-U.S./Canada/Mexico-
16547501) - 2023 - CRC - 6/10/22
48 Seats and Restraints
Child restraints are devices used to restrain,
seat, or position children in the vehicle and
are sometimes called child seats or car seats.
There are three basic types of child
restraints:
.Forward-facing child restraints
.Rear-facing child restraints
.Belt-positioning booster seats
The proper child restraint for your child
depends on their size, weight, and age, and
also on whether the child restraint is
compatible with the vehicle in which it will
be used.
For each type of child restraint, there are
many different models available. When
purchasing a child restraint, be sure it is
designed to be used in a motor vehicle and
is designed by a genuine child restraint
manufacturer. If it is, the child restraint will
have a label saying that it meets federal
motor vehicle safety standards.
The instruction manual that is provided with
the child restraint states the weight and
height limitations for that particular child
restraint. In addition, there are many kinds
of child restraints available for children with
special needs.
{Warning
To reduce the risk of neck and head
injury in a crash, infants and toddlers
should be secured in a rear-facing child
restraint until age two, or until they
reach the maximum height and weight
limits of their child restraint.
{Warning
A young child's hip bones are still so
small that the vehicle seat belt may not
remain low on the hip bones, as it
should. Instead, it may settle up around
the child's abdomen. In a crash, the belt
would apply force on a body area that is
unprotected by any bony structure. This
alone could cause serious or fatal injuries.
To reduce the risk of serious or fatal
injuries during a crash, young children
should always be secured in an
appropriate child restraint.
Child Restraint Systems
Rear-Facing Infant Restraint
A rear-facing child restraint provides
restraint with the seating surface against
the back of the infant.
The harness system holds the infant in place
and, in a crash, acts to keep the infant
positioned in the restraint.
Page 70 of 283

Chevrolet Express Owner Manual (GMNA-Localizing-U.S./Canada/Mexico-
16547501) - 2023 - CRC - 6/10/22
Instruments and Controls 69
to the zone where you live, the compass
may give false readings. The compass must
be set to the variance zone in which the
vehicle is traveling.
To adjust for compass variance, use the
following procedure:
Compass Variance (Zone) Procedure1. Do not set the compass zone when the vehicle is moving. Only set it when the
vehicle is in P (Park).
Press
Tuntil PRESSVTO CHANGE
COMPASS ZONE displays.
2. Find the vehicle's current location and variance zone number on the map.
Zones 1 through 15 are available. 3. Press
Vto scroll through and select the
appropriate variance zone.
4. Press
3until the vehicle heading, for
example, N for North, is displayed in
the DIC.
5. If calibration is necessary, calibrate the compass. See “Compass Calibration
Procedure” following.
Compass Calibration
The compass can be manually calibrated.
Only calibrate the compass in a magnetically
clean and safe location, such as an open
parking lot, where driving the vehicle in
circles is not a danger. It is suggested to
calibrate away from tall buildings, utility
wires, manhole covers, or other industrial
structures, if possible.
If CAL should ever appear in the DIC display,
the compass should be calibrated.
If the DIC display does not show a heading,
for example, N for North, or the heading
does not change after making turns, there
may be a strong magnetic field interfering
with the compass. Such interference may be
caused by a magnetic CB or cell phone
antenna mount, a magnetic emergency
light, magnetic note pad holder, or any other magnetic item. Turn off the vehicle,
move the magnetic item, then turn on the
vehicle and calibrate the compass.
To calibrate the compass, use the following
procedure:
Compass Calibration Procedure
1. Before calibrating the compass, make sure the compass zone is set to the
variance zone in which the vehicle is
located. See “Compass Variance (Zone)
Procedure” earlier in this section.
Do not operate any switches such as
window, climate controls, seats, etc.
during the calibration procedure.
2. Press
Tuntil PRESSVTO CALIBRATE
COMPASS displays.
3. Press
Vto start the compass calibration.
4. The DIC will display CALIBRATING: DRIVE IN CIRCLES. Drive the vehicle in tight
circles at less than 8 km/h (5 mph) to
complete the calibration. The DIC will
display CALIBRATION COMPLETE for a few
seconds when the calibration is
complete. The DIC display will then
return to PRESS
VTO CALIBRATE
COMPASS.
Page 85 of 283

Chevrolet Express Owner Manual (GMNA-Localizing-U.S./Canada/Mexico-
16547501) - 2023 - CRC - 6/10/22
84 Instruments and Controls
Fuel Range
Press
3until FUEL RANGE displays. This
display shows the approximate number of
remaining kilometers (km) or miles (mi) the
vehicle can be driven without refueling.
The fuel range estimate is based on an
average of the fuel economy over recent
driving history and the amount of fuel
remaining in the fuel tank. This estimate
will change if driving conditions change. For
example, if driving in traffic and making
frequent stops, this display may read one
number, but if the vehicle is driven on a
freeway, the number may change even
though the same amount of fuel is in the
fuel tank. This is because different driving
conditions produce different fuel economies.
Generally, freeway driving produces better
fuel economy than city driving.
If the vehicle is low on fuel, the FUEL LEVEL
LOW message will be displayed.
Average Economy
Press
3until AVG ECONOMY displays.
This display shows the approximate average
liters per 100 kilometers (L/100 km) or miles
per gallon (mpg). This number is calculated
based on the number of L/100 km (mpg) recorded since the last time this menu item
was reset. To reset AVG ECONOMY, press
and hold
V. The display will return to zero.
Fuel Used
Press
3until FUEL USED displays. This
display shows the number of liters (L) or
gallons (gal) of fuel used since the last reset
of this menu item. To reset the fuel used
information, press and hold
Vwhile FUEL
USED is displayed.
Timer
Press
3until TIMER displays. This
display can be used as a timer.
To start the timer, press
Vwhile TIMER is
displayed. The display will show the amount
of time that has passed since the timer was
last reset, not including time the ignition is
off. Time will continue to be counted as
long as the ignition is on, even if another
display is being shown on the DIC. The
timer will record up to 99 hours, 59 minutes
and 59 seconds (99:59:59) after which the
display will return to zero.
To stop the timer, press
Vbriefly while
TIMER is displayed. To reset the timer to zero, press and hold
V
while TIMER is displayed.
Average Speed
Press
3until AVERAGE SPEED displays.
This display shows the average speed of the
vehicle in kilometers per hour (km/h) or
miles per hour (mph). This average is
calculated based on the various vehicle
speeds recorded since the last reset of this
value. To reset the value, press and hold
V.
The display will return to zero.
Digital Tachometer
Press
3until Tachometer ##00 RPM
displays. This display shows the engine
speed in revolutions per minute (RPM).
Blank Display
This display shows no information.
Vehicle Information Menu Items
T: Press this button to scroll through the
following menu items:
Oil Life
Press
Tuntil OIL LIFE REMAINING displays.
This display shows an estimate of the oil's
remaining useful life. If you see 99% OIL LIFE
REMAINING on the display, that means 99%
Page 97 of 283
Chevrolet Express Owner Manual (GMNA-Localizing-U.S./Canada/Mexico-
16547501) - 2023 - CRC - 6/10/22
96 Lighting
When the battery's state of charge is low,
the voltage is raised slightly to quickly bring
the charge back up. When the state of
charge is high, the voltage is lowered
slightly to prevent overcharging. If the
vehicle has a voltmeter gauge or a voltage
display on the Driver Information Center
(DIC), you may see the voltage move up or
down. This is normal. If there is a problem,
an alert will be displayed.
The battery can be discharged at idle if the
electrical loads are very high. This is true for
all vehicles. This is because the generator
(alternator) may not be spinning fast
enough at idle to produce all the power that
is needed for very high electrical loads.
A high electrical load occurs when several of
the following are on, such as: headlamps,
high beams, fog lamps, rear window
defogger, climate control fan at high speed,
heated seats, engine cooling fans, trailer
loads, and loads plugged into accessory
power outlets.
EPM works to prevent excessive discharge of
the battery. It does this by balancing the
generator's output and the vehicle's
electrical needs. It can increase engine idlespeed to generate more power, whenever
needed. It can temporarily reduce the power
demands of some accessories.
Normally, these actions occur in steps or
levels, without being noticeable. In rare
cases at the highest levels of corrective
action, this action may be noticeable to the
driver. If so, a Driver Information Center
(DIC) message might be displayed, such as
SERVICE BATTERY CHARGING SYSTEM. If this
messages displays, it is recommended that
the driver reduce the electrical loads as
much as possible.
Battery Power Protection
This feature helps prevent the battery from
being drained, if the interior courtesy lamps
or reading lamps are accidentally left on.
If any of these lamps are left on, they
automatically turn off after 10 minutes,
if the ignition is off. The lamps will not
come back on again until one of the
following occurs:
.The ignition is turned on.
.The doors are closed and then re-opened.
Exterior Lighting Battery Saver
The exterior lamps turn off about 10 minutes
after the vehicle is turned off, if the parking
lamps or headlamps have been manually
left on. This protects against draining the
battery. To restart the 10-minute timer, turn
the exterior lamp control to the
Oposition
and then back to the
;or2position.
To keep the lamps on for more than
10 minutes, the vehicle must be on or in
accessory mode.
Page 105 of 283
Chevrolet Express Owner Manual (GMNA-Localizing-U.S./Canada/Mexico-
16547501) - 2023 - CRC - 6/10/22
104 Infotainment System
BAND :If equipped, press to listen to the
radio when a portable audio device is
playing. The portable audio device continues
playing.
CD/AUX : If equipped, press to play a CD
when a portable audio device is playing.
Press again and the system begins playing
audio from the connected portable audio
player. If a portable audio player is not
connected, “No Input Device Found” displays.
SRCE : If equipped, press to listen to the
radio when a portable audio device is
playing. The portable audio device continues
playing.
Press to play a CD when a portable audio
device is playing. Press again and the
system begins playing audio from the
connected portable audio player. If a
portable audio player is not connected, “No
Input Device Found” displays.
Using the USB Port
Radios with a USB port can control a USB
storage device or an iPod using the radio
buttons and knobs. USB Support
Caution
To avoid vehicle damage, unplug all
accessories and disconnect all accessory
cables from the vehicle when not in use.
Accessory cables left plugged into the
vehicle, unconnected to a device, could be
damaged or cause an electrical short if
the unconnected end comes in contact
with liquids or another power source such
as the accessory power outlet.
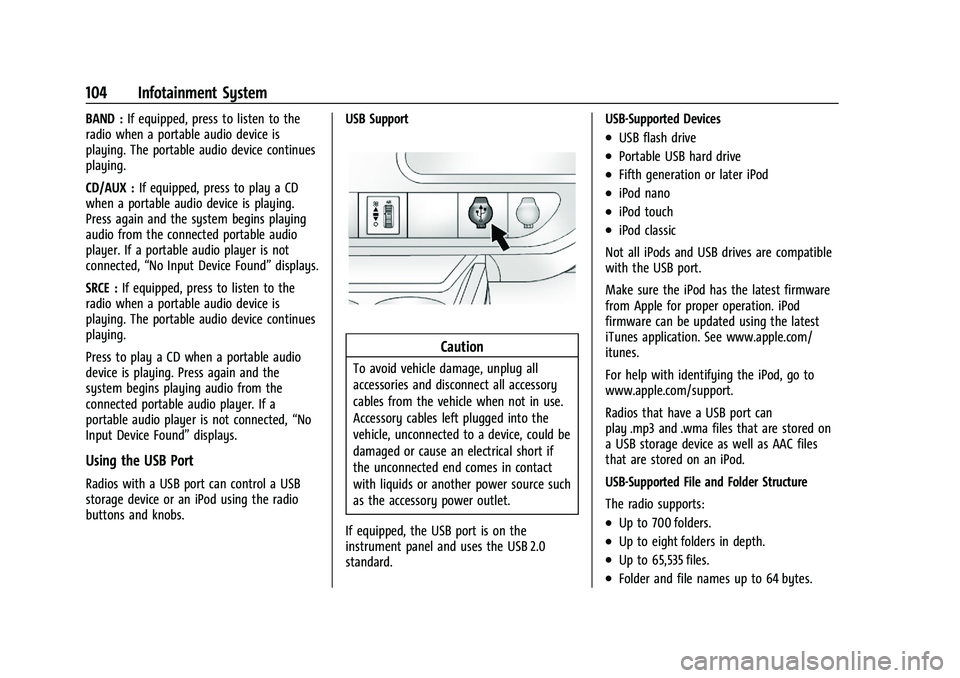
If equipped, the USB port is on the
instrument panel and uses the USB 2.0
standard. USB-Supported Devices
.USB flash drive
.Portable USB hard drive
.Fifth generation or later iPod
.iPod nano
.iPod touch
.iPod classic
Not all iPods and USB drives are compatible
with the USB port.
Make sure the iPod has the latest firmware
from Apple for proper operation. iPod
firmware can be updated using the latest
iTunes application. See www.apple.com/
itunes.
For help with identifying the iPod, go to
www.apple.com/support.
Radios that have a USB port can
play .mp3 and .wma files that are stored on
a USB storage device as well as AAC files
that are stored on an iPod.
USB-Supported File and Folder Structure
The radio supports:
.Up to 700 folders.
.Up to eight folders in depth.
.Up to 65,535 files.
.Folder and file names up to 64 bytes.
Page 107 of 283
Chevrolet Express Owner Manual (GMNA-Localizing-U.S./Canada/Mexico-
16547501) - 2023 - CRC - 6/10/22
106 Infotainment System
Back :Press the softkey below the Back tab
to go back to the main display screen on an
iPod, or the root directory on a USB storage
device.
c: Press the softkey belowcto view
the contents of the current folder on the
USB drive. To browse and select files:
1. Press the softkey below
c.
2. Turn
fto scroll through the list of
folders.
3. Press
fto select the desired folder.
If there is more then one folder, repeat
Steps 1 and 2 until the desired folder is
reached.
4. Turn
fto scroll through the files in the
selected folder.
5. Press
fto select the desired file to be
played.
To skip through large lists, the five softkeys
can be used to navigate in the following
order:
.First softkey, first item in the list.
.Second softkey, 1% through the list each
time the softkey is pressed.
.Third softkey, 5% through the list each
time the softkey is pressed.
.Fourth softkey, 10% through the list each
time the softkey is pressed.
.Fifth softkey, end of the list.
h: Press the softkey belowhto
view and select a file on an iPod, using the
iPod's menu system. Files are sorted by:
.Playlists
.Artists
.Albums
.Genres
.Songs
.Composers
To select files:
1. Press the softkey below
h.
2. Turn
fto scroll through the list of
menus.
3. Press
fto select the desired menu.
4. Turn
fto scroll through the folders or
files in the selected menu.
5. Press
fto select the desired file to be
played.
To skip through large lists, the five softkeys
can be used to navigate in the following
order:
.First softkey, first item in the list.
.Second softkey, 1% through the list each
time the softkey is pressed.
.Third softkey, 5% through the list each
time the softkey is pressed.
.Fourth softkey, 10% through the list each
time the softkey is pressed.
.Fifth softkey, end of the list.
Repeat Functionality
To use Repeat:
Press the softkey below
"or'to
select between Repeat All and Repeat Track.
": Press the softkey below"to repeat
all tracks. The tab appears lowered when
Repeat All is being used. This is the default
mode when a USB storage device or iPod is
first connected.
': Press the softkey below'to
repeat one track. The tab appears raised
when Repeat Track is being used.
Shuffle Functionality
To use Shuffle:
Press the softkey below
>,2,C,
or
=to select between Shuffle Off,
Shuffle All Songs/Shuffle Songs, Shuffle
Album, or Shuffle Folder.
Page 111 of 283

Chevrolet Express Owner Manual (GMNA-Localizing-U.S./Canada/Mexico-
16547501) - 2023 - CRC - 6/10/22
110 Infotainment System
2. Say“Delete.”
3. Say the name tag you want to delete.
Using the “Delete All Name Tags” Command
This command deletes all stored name tags
in the Hands-Free Calling Directory.
To delete all name tags:
1. Press and hold
b/gfor two seconds.
2. Say “Delete all name tags.”
Listing Stored Numbers
The list command will list all stored
numbers and name tags.
Using the “List”Command
1. Press and hold
b/gfor two seconds.
2. Say “Directory.”
3. Say “Hands-Free Calling.”
4. Say “List.”
Making a Call
Calls can be made using the following
commands.
Dial or Call : The dial or call command can
be used interchangeably to dial a phone
number or a stored name tag. Digit Dial :
This command allows a phone
number to be dialed by entering the digits
one at a time.
Re-dial : This command is used to dial the
last number used on the cell phone.
Using the “Dial”or“Call” Command
1. Press and hold
b/gfor two seconds.
2. Say “Dial”or“Call.”
3. Say the entire number without pausing, or say the name tag.
Once connected, the person called will be
heard through the audio speakers.
Calling Emergency
1. Press and hold
b/gfor two seconds.
The system responds “Ready,”followed
by a tone.
2. Say “Dial”or“Call.”
3. Say [emergency number].
4. Say “Dial”or“Call.”
Once connected, the person called will be
heard through the audio speakers. Using the
“Digit Dial” Command
The digit dial command allows a phone
number to be dialed by entering the digits
one at a time. After each digit is entered,
the system repeats back the digit it heard
followed by a tone.
If an unwanted number is recognized by the
system, say “Clear”at any time to clear the
last number.
To hear all of the numbers recognized by
the system, say “Verify”at any time.
1. Press and hold
b/gfor two seconds.
2. Say “Digit Dial.”
3. Say each digit, one at a time, that you want to dial. After each digit is entered,
the system repeats back the digit it
heard followed by a tone. After the last
digit has been entered, say “Dial.”
Once connected, the person called will be
heard through the audio speakers.
Using the “Re-dial”Command
1. Press and hold
b/gfor two seconds.
2. After the tone, say “Re-dial.”
Once connected, the person called will be
heard through the audio speakers.
Page 113 of 283
Chevrolet Express Owner Manual (GMNA-Localizing-U.S./Canada/Mexico-
16547501) - 2023 - CRC - 6/10/22
112 Infotainment System
3. Say“Voice.” The system responds “OK,
accessing
The cell phone's normal prompt messages
will go through their cycle according to the
phone's operating instructions.
Dual Tone Multi-Frequency (DTMF) Tones
The Bluetooth system can send numbers
and the numbers stored as name tags
during a call. You can use this feature when
calling a menu-driven phone system.
Account numbers can also be stored for use.
Sending a Number or Name Tag During
a Call
1. Press
b/g. The system responds
“Ready,” followed by a tone.
2. Say “Dial.”
3. Say the number or name tag to send.
Clearing the System
Unless information is deleted out of the
in-vehicle Bluetooth system, it will be
retained indefinitely. This includes all saved
name tags in the phone book and phone
pairing information. For information on how
to delete this information, see the previous
section “Deleting a Paired Phone” and the
previous sections on deleting name tags.
Other Information
The Bluetooth word mark and logos are
owned by the Bluetooth SIG, Inc. and any
use of such marks by General Motors is
under license. Other trademarks and trade
names are those of their respective owners.
See Radio Frequency Statement 0260.
Trademarks and License
Agreements
FCC Information
See Radio Frequency Statement 0260.
"Made for iPod," and "Made for iPhone,"
mean that an electronic accessory has been
designed to connect specifically to iPod or
iPhone, respectively, and has been certified
by the developer to meet Apple
performance standards. Apple is not
responsible for the operation of this device
or its compliance with safety and regulatory standards. Please note that the use of this
accessory with iPod or iPhone may affect
wireless performance. iPhone, iPod, iPod
classic, iPod nano, iPod shuffle, and iPod
touch are trademarks of Apple Inc.,
registered in the U.S. and other countries.
Trial length and service availability may vary
by model, model year or trim. Service will
automatically stop at the end of your trial
subscription period unless you decide to
continue service. If you do not wish to enjoy
your trial, you can cancel by calling the
number below. All SiriusXM services require
a subscription, each sold separately by
SiriusXM after the trial period. Service
subject to the applicable SiriusXM Customer
Agreement and Privacy Policy, visit
www.siriusxm.com (USA) or www.siriusxm.ca
(Canada) to see complete terms and how to
cancel which includes calling 1-866-635-2349
(USA) or 1-888-539-7474 (Canada). Some
services and features are subject to device
capabilities and location availability. Content