start stop button CHEVROLET EXPRESS CARGO VAN 2003 1.G Owners Manual
[x] Cancel search | Manufacturer: CHEVROLET, Model Year: 2003, Model line: EXPRESS CARGO VAN, Model: CHEVROLET EXPRESS CARGO VAN 2003 1.GPages: 386, PDF Size: 2.73 MB
Page 87 of 386
W(Unlock):Pressing this button once will unlock the
driver's door. The parking lamps will ¯ash twice and
the interior lamps will turn on. Press UNLOCK
again within ®ve seconds to unlock the remaining doors.
The parking lamps will ¯ash.
L(Panic Alarm):The remote keyless entry transmitter
comes equipped with an instant panic alarm. To use
the alarm, press the horn symbol when the ignition
is turned off. The horn will sound and both the interior
and exterior lamps will ¯ash for up to thirty seconds. To
stop the instant panic alarm, press the panic button
again, wait for thirty seconds, or start the vehicle.
j(Cargo Door):Press this button to unlock the cargo
doors only.
Matching Transmitter(s) to Your
Vehicle
Each remote keyless entry transmitter is coded to
prevent another transmitter from unlocking your vehicle.
If a transmitter is lost or stolen, a replacement can
be purchased through your dealer.Remember to bring any remaining transmitters with
you when you go to your dealer. When the dealer
matches the replacement transmitter to your vehicle,
any remaining transmitters must also be matched. Once
your dealer has coded the new transmitter, the lost
transmitter will not unlock your vehicle. Each vehicle can
have a maximum of four transmitters matched to it.
Resynchronization
Resynchronization may be necessary due to the
security method used by this system. The transmitter
does not send the same signal twice to the receiver. The
receiver will not respond to a signal that has been
sent previously. This prevents anyone from recording
and playing back the signal from the transmitter.
To resynchronize your transmitter, stand close to your
vehicle and press and hold the LOCK and UNLOCK
buttons on the transmitter at the same time for seven
seconds. The door locks should cycle to con®rm
synchronization. If the locks do not cycle, see your
dealer for service.
2-5
Page 176 of 386
4 FWD (Forward):Press and hold this pushbutton to
advance quickly within a track. Press and hold this
pushbutton for less than two seconds to advance
at six times the normal playing speed. Press and hold it
for more than two seconds to advance at 17 times
the normal playing speed. Release it to play the
passage. The display will show ET and the
elapsed time.
6 RDM (Random):Press this pushbutton to hear the
tracks in random, rather than sequential, order. RDM ON
will appear on the display. RDM T and the track
number will appear on the display when each track
starts to play. Press this pushbutton again to turn
off random play. RDM OFF will appear on the display.
qSEEKr:Press the left arrow to go to the start
of the current or to the previous track. Press the right
arrow to go to the start of the next track. If either
arrow is held or pressed more then once, the player will
continue moving backward or forward through the CD.
qSCANr:To scan the disc, press and hold
either SCAN arrow for more than two seconds until
SCAN appears on the display and you hear a beep.
Use this feature to listen to 10 seconds of each track of
the disc. Press either SCAN arrow again, to stop
scanning.DISP (Display):Press this knob to see how long the
current track has been playing. ET and the elapsed time
will appear on the display. To change the default on
the display (track or elapsed time), push the knob until
you see the display you want, then hold the knob
for two seconds. The radio will produce one beep and
selected display will now be the default.
BAND:Press this button to listen to the radio when a
CD is playing. The CD will stop but remain in the player.
TAPE DISC:Press this button to play a tape when
listening to the radio. Press this button to switch
between the tape and compact disc if both are loaded.
The inactive tape or CD will remain safely inside the
radio for future listening.
Z(Eject):Press this button to stop a CD when it is
playing or to eject a CD when it is not playing. Eject
may be activated with either the ignition or radio off. CDs
may be loaded with the radio and ignition off if this
button is pressed ®rst.
3-58
Page 184 of 386
LOAD CDZ:Press the LOAD side of this button to
load CDs into the compact disc player. This compact
disc player will hold up to six discs.
To insert one disc, do the following:
1. Turn the ignition on.
2. Press and release the LOAD side of the LOAD
CD button.
3. Wait for the light, located to the right of the slot, to
turn green.
4. Load a disc. Insert the disc partway into the slot,
label side up. The player will pull the disc in.
When a disc is inserted, the CD symbol will be
displayed. If you select an equalization setting for your
disc, it will be activated each time you play a disc.
If the radio is on or off, the disc will begin to play
automatically.
To insert multiple discs, do the following:
1. Turn the ignition on.
2. Press and hold the LOAD side of the LOAD CD
button for two seconds.
You will hear a beep and the light, located to the
right of the slot, will begin to ¯ash and LOAD
ALL will appear on the display.3. Once the light stops ¯ashing and turns green, load
a disc. Insert the disc partway into the slot, label
side up. The player will pull the disc in.
Once the disc is loaded, the light will begin ¯ashing
again. Once the light stops ¯ashing and turns
green you can load another disc. The disc player
takes up to six discs. Do not try to load more
than six.
To load more than one disc but less than six, complete
Steps 1 through 3. When you have ®nished loading
discs, with the radio on or off, press the LOAD side of
the LOAD CD button to cancel the loading function. The
radio will begin to play the last CD loaded.
When a disc is inserted, the CD symbol will be
displayed. If more than one disc has been loaded, a
number for each disc will be displayed. If you select an
equalization setting for your disc, it will be activated
each time you play a disc.
If the radio is on or off, the last disc loaded will begin to
play automatically.
As each new track starts to play, the track number will
appear on the display.
3-66
Page 185 of 386
Playing a Speci®c Loaded
Compact Disc
For every CD loaded, a number will appear on the radio
display. To play a speci®c CD, ®rst press the CD AUX
button to start playing a CD. Then press the numbered
pushbutton that corresponds to the CD you want to
play. A small bar will appear under the CD number that
is playing, and the track number will appear.
If an error appears on the radio display, see ªCompact
Disc Messagesº later in this section.
LOAD CD
Z(Eject):Pressing the CD eject side of
this button will eject a single disc or multiple discs.
To eject the disc that is currently playing, press
and release this button. To eject multiple discs, press
and hold this button for two seconds. You will hear
a beep and the light will ¯ash to let you know when a
disc is being ejected.
REMOVE CD will be displayed. You can now remove
the disc. If the disc is not removed, after 25 seconds, the
disc will be automatically pulled back into the receiver.
If you try to push the disc back into the receiver,
before the 25 second time period is complete, the
receiver will sense an error and will try to eject the disc
several times before stopping.Do not repeatedly press the CD eject side of the
LOAD CD eject button to eject a disc after you have
tried to push it in manually. The receivers 25-second
eject timer will reset at each press of eject, which
will cause the receiver to not eject the disc until the
25-second time period has elapsed.
Once the player stops and the disc is ejected, remove
the disc. After removing the disc, press the PWR
knob off and then on again. This will clear the
disc-sensing feature and enable discs to be loaded into
the player again.{REV (Reverse):Press and hold this button to
reverse quickly within a track. You will hear sound at a
reduced volume. Release it to play the passage.
The display will show elapsed time.
FWD
|(Forward):Press and hold this button to
advance quickly within a track. You will hear sound at a
reduced volume. Release it to play the passage. The
display will show elapsed time.
3-67
Page 186 of 386
RPT (Repeat):With repeat, you can repeat one track
or an entire disc. To use repeat, do the following:
·To repeat the track you are listening to, press and
release the RPT button. RPT will appear on the
display. Press RPT again to turn it off.
·To repeat the disc you are listening to, press and
hold the RPT button for two seconds. RPT will
appear on the display. Press RPT again to turn it off.
RDM (Random):With random, you can listen to
the tracks in random, rather than sequential, order, on
one disc or on all of the discs. To use random, do one of
the following:
·To play the tracks on the disc you are listening to in
random order, press and release the RDM button.
RANDOM ONE will appear on the display. Press
RDM again to turn it off.
·To play the tracks on all of the discs that are
loaded in random order, press and hold RDM
for more than two seconds. You will hear a beep
and RANDOM ALL will appear on the display. Press
RDM again to turn it off.
sSEEKt:Press the left arrow to go to the start of
the current track, if more than ten seconds have passed.
Press the right arrow to go to the next track. If you
press the button more than once, the player will continue
moving backward or forward through the disc.
sSCANt:To scan one disc, press and hold either
SCAN arrow for more than two seconds until SCAN
appears on the display and you hear a beep. Use this
feature to listen to 10 seconds of each track of the
currently selected disc. SCAN will appear on the display.
Press either SCAN arrow again, to stop scanning.
To scan all loaded discs, press and hold either SCAN
arrow for more than four seconds until DISC SCAN
appears on the display and you hear a beep. Use this
feature to listen to 10 seconds of the ®rst tracks of each
disc loaded. Press either SCAN arrow again, to stop
scanning.
RCL (Recall):Push this knob to see how long the
current track has been playing. To change the default
on the display (track or elapsed time), push the
knob until you see the display you want, then hold the
knob until the display ¯ashes. The selected display
will now be the default.
BAND:Press this button to play the radio when a
disc(s) is in the player.
3-68
Page 190 of 386
AM FM:Press this button to switch between AM, FM1
and FM2. If the front passengers are already listening
to the radio, the RSA controller will not switch between
the bands and cannot change the frequency. Press
this button to play a cassette tape or a compact
disc when listening to the radio. The inactive tape or CD
will remain safely inside the radio for future listening.
wSEEKx:While listening to the radio, press the up
or the down arrow to tune to the next or the previous
station and stay there. The sound will mute while
seeking. The SEEK button is inactive if the front radio is
in use.
While listening to a cassette tape, press the up or the
down arrow to hear the next or the previous selection.
The SEEK button is inactive if the tape mode on
the front radio is in use.
While listening to a CD, press the up arrow to hear the
next track on the CD. Press the down arrow to go
back to the start of the current track (if more than eight
seconds have played). The SEEK button is inactive
if the CD mode on the front radio is in use.To scan stations, press and hold one of the SEEK
arrows until the radio goes into scan mode. The radio
will scan to a station, play for a few seconds, then go on
to the next station. Press SEEK again to stop scanning.
The scan function is inactive if front radio is in use.
P.SET PROG (Preset Program):The front passengers
must be listening to something different for each of
these functions to work:
·Press this button to scan through the preset radio
stations set on the pushbuttons on the main radio.
The radio will go to a preset station stored on
your pushbuttons, play for a few seconds, then go
on to the next preset station. Press this button
again to stop scanning presets.
·When a cassette tape is playing, press this button
to go to the other side of the tape.
·When a CD is playing, press this button to select
a disc.
TAPE CD:Press this button to switch between playing
a cassette tape or a CD when listening to the radio.
The inactive tape or compact disc will remain safely
inside the radio for future listening.
3-72
Page 227 of 386
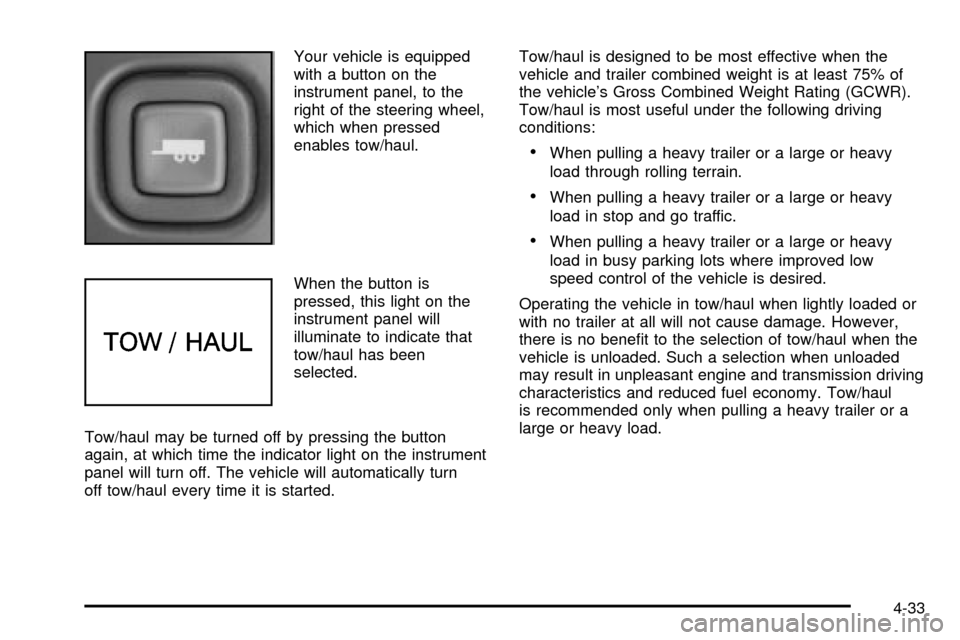
Your vehicle is equipped
with a button on the
instrument panel, to the
right of the steering wheel,
which when pressed
enables tow/haul.
When the button is
pressed, this light on the
instrument panel will
illuminate to indicate that
tow/haul has been
selected.
Tow/haul may be turned off by pressing the button
again, at which time the indicator light on the instrument
panel will turn off. The vehicle will automatically turn
off tow/haul every time it is started.Tow/haul is designed to be most effective when the
vehicle and trailer combined weight is at least 75% of
the vehicle's Gross Combined Weight Rating (GCWR).
Tow/haul is most useful under the following driving
conditions:
·When pulling a heavy trailer or a large or heavy
load through rolling terrain.
·When pulling a heavy trailer or a large or heavy
load in stop and go traffic.
·When pulling a heavy trailer or a large or heavy
load in busy parking lots where improved low
speed control of the vehicle is desired.
Operating the vehicle in tow/haul when lightly loaded or
with no trailer at all will not cause damage. However,
there is no bene®t to the selection of tow/haul when the
vehicle is unloaded. Such a selection when unloaded
may result in unpleasant engine and transmission driving
characteristics and reduced fuel economy. Tow/haul
is recommended only when pulling a heavy trailer or a
large or heavy load.
4-33