CHEVROLET EXPRESS CARGO VAN 2008 1.G Owners Manual
Manufacturer: CHEVROLET, Model Year: 2008, Model line: EXPRESS CARGO VAN, Model: CHEVROLET EXPRESS CARGO VAN 2008 1.GPages: 414, PDF Size: 2.34 MB
Page 91 of 414

To open the front portion of a 60/40 door from the
inside, pull the handle toward you and push open
the door.To open the rear portion of a 60/40 door from the
outside, pull the handle on the side of the rear door and
pull the door toward you.
To close the 60/40 side doors, close the rear door first.
Then close the front door. Check to make sure that
both doors are completely closed.
The front side swing-out door has a check strap
assembly in the door frame to keep the door from
opening beyond 90 degrees.
To open the door beyond 90 degrees, close the door
partially, pull the check strap toward you and then open
the door. When you close the door, the check strap
will automatically re-engage.
2-11
Page 92 of 414
Rear Doors
{CAUTION:
Unlocked doors can be dangerous.
Passengers, especially children, can easily
open the doors and fall out of a moving
vehicle. When a door is locked, the handle
will not open it. You increase the chance
of being thrown out of the vehicle in a
crash if the doors are not locked. So, wear
safety belts properly and lock the doors
whenever you drive.
Young children who get into unlocked
vehicles may be unable to get out. A child
can be overcome by extreme heat and can
suffer permanent injuries or even death
from heat stroke. Always lock your vehicle
whenever you leave it.
Outsiders can easily enter through an
unlocked door when you slow down or
stop your vehicle. Locking your doors can
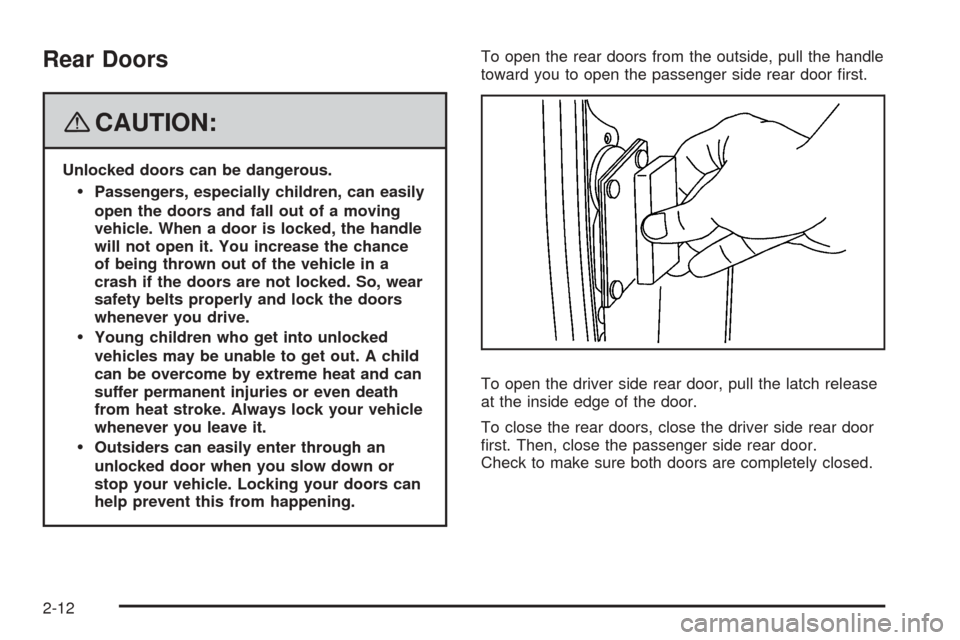
help prevent this from happening.To open the rear doors from the outside, pull the handle
toward you to open the passenger side rear door first.
To open the driver side rear door, pull the latch release
at the inside edge of the door.
To close the rear doors, close the driver side rear door
first. Then, close the passenger side rear door.
Check to make sure both doors are completely closed.
2-12
Page 93 of 414
Windows
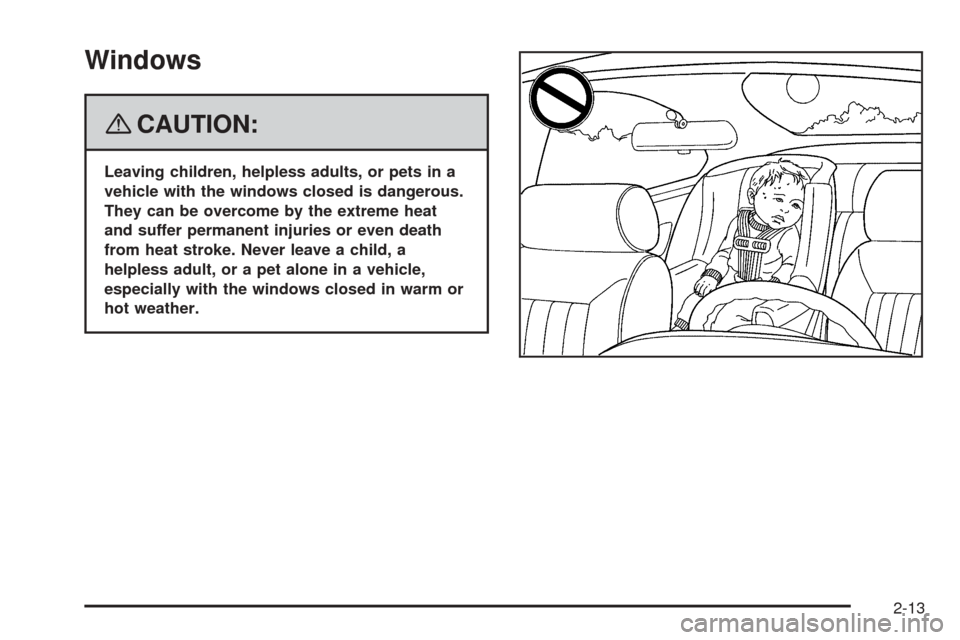
{CAUTION:
Leaving children, helpless adults, or pets in a
vehicle with the windows closed is dangerous.
They can be overcome by the extreme heat
and suffer permanent injuries or even death
from heat stroke. Never leave a child, a
helpless adult, or a pet alone in a vehicle,
especially with the windows closed in warm or
hot weather.
2-13
Page 94 of 414
Manual Windows
To operate your manual windows, turn the hand crank
on each door to raise or lower your side door windows.
Power Windows
{CAUTION:
Leaving children, helpless adults, or pets in a
vehicle with the windows closed is dangerous.
They can be overcome from extreme heat in
warm or hot weather and suffer permanent
injuries or even death from heat stroke.
CAUTION: (Continued)
CAUTION: (Continued)
Leaving children in a vehicle with the ignition
key is dangerous for many reasons, children or
others could be badly injured or even killed.
They could operate the power windows or other
controls or even make the vehicle move. The
windows will function with the keys in the
ignition and they could be seriously injured or
killed if caught in the path of a closing window.
Do not leave keys in a vehicle with children.
When there are children in the rear seat use the
window lockout button to prevent unintentional
operation of the windows.
2-14
Page 95 of 414
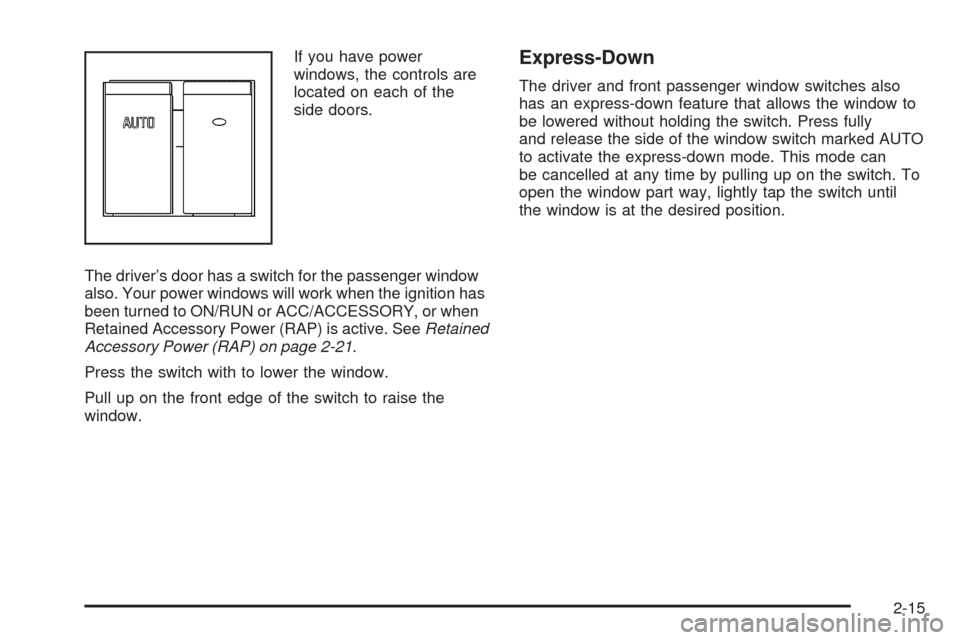
If you have power
windows, the controls are
located on each of the
side doors.
The driver’s door has a switch for the passenger window
also. Your power windows will work when the ignition has
been turned to ON/RUN or ACC/ACCESSORY, or when
Retained Accessory Power (RAP) is active. SeeRetained
Accessory Power (RAP) on page 2-21.
Press the switch with to lower the window.
Pull up on the front edge of the switch to raise the
window.Express-Down
The driver and front passenger window switches also
has an express-down feature that allows the window to
be lowered without holding the switch. Press fully
and release the side of the window switch marked AUTO
to activate the express-down mode. This mode can
be cancelled at any time by pulling up on the switch. To
open the window part way, lightly tap the switch until
the window is at the desired position.
2-15
Page 96 of 414
Swing-Out Windows
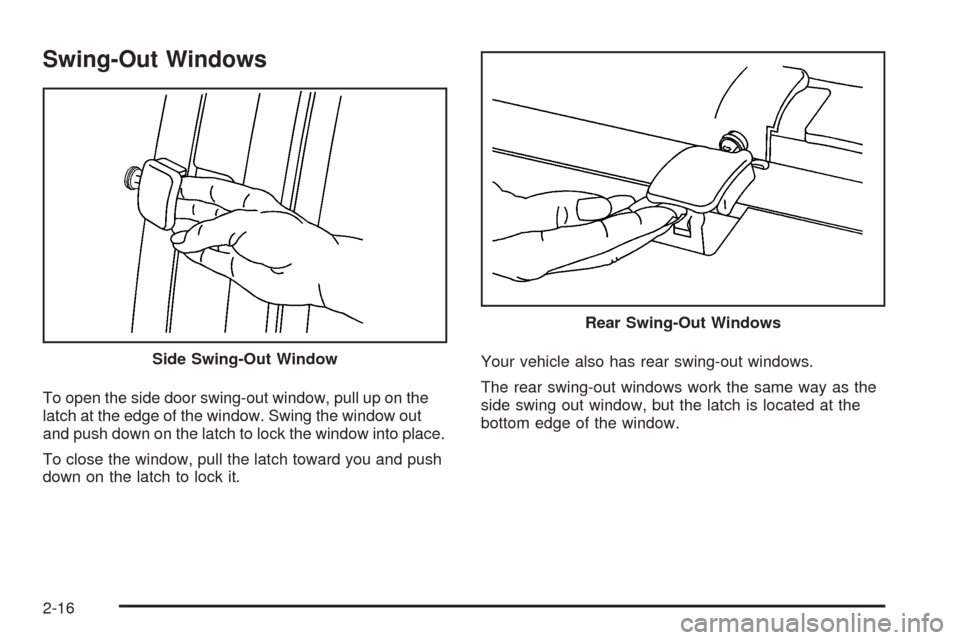
To open the side door swing-out window, pull up on the
latch at the edge of the window. Swing the window out
and push down on the latch to lock the window into place.
To close the window, pull the latch toward you and push
down on the latch to lock it.Your vehicle also has rear swing-out windows.
The rear swing-out windows work the same way as the
side swing out window, but the latch is located at the
bottom edge of the window. Side Swing-Out Window
Rear Swing-Out Windows
2-16
Page 97 of 414
Enhanced Technology Glass
Your vehicle may be equipped with Enhanced
Technology Glass (ETG). ETG is part of the overall
occupant protection system on passenger vans. ETG
may help to keep passengers sitting next to these fixed
windows from being ejected through the glass in some,
but not in all crashes. Even with this glass, seat belts
must still be worn at all times. For passenger vans, use
only ETG glass approved for your vehicle for replacement
when damaged.
The following table shows laminated glass location,
based on vehicle model and options.
Vehicle Con�guration ETG Locations
Eight Seat
Passenger VansSliding door forward
window
Twelve and Fifteen Seat
Passenger VansSliding door forward
window and rear-most
side windows
Long Wheelbase
Cargo VansRear-most side windows
Sun Visors
To block out glare, swing down the sun visors. You can
also swing them to the side.
Visor Vanity Mirror
You may have visor vanity mirrors, with or without
lamps. Lift the mirror cover to turn the lamps on, if you
have them.
Theft-Deterrent Systems
Vehicle theft is big business, especially in some cities.
Although your vehicle has a number of theft-deterrent
features, we know that nothing we put on it can make it
impossible to steal.
2-17
Page 98 of 414
PASS-Key®III+
The PASS-Key®III+ system operates on a radio
frequency subject to Federal Communications
Commission (FCC) Rules and with Industry Canada.
This device complies with Part 15 of the FCC Rules.
Operation is subject to the following two conditions:
1. This device may not cause harmful interference.
2. This device must accept any interference received,
including interference that may cause undesired
operation.
This device complies with RSS-210 of Industry Canada.
Operation is subject to the following two conditions:
1. This device may not cause interference.
2. This device must accept any interference received,
including interference that may cause undesired
operation of the device.
Changes or modifications to this system by other than
an authorized service facility could void authorization to
use this equipment.
PASS-Key
®III+ uses a radio frequency transponder in
the key that matches a decoder in your vehicle.
PASS-Key®III+ Operation
Your vehicle is equipped with the PASS-Key®III+
(Personalized Automotive Security System)
theft-deterrent system. PASS-Key
®III+ is a passive theft
deterrent system.
The system is automatically armed when the key is
removed from the ignition.
You do not have to manually arm or disarm the system.
The security light will come on if there is a problem
with arming or disarming the theft-deterrent system.
When the PASS-Key
®III+ system senses that someone
is using the wrong key, it shuts down the vehicle’s
starter and fuel systems. The starter will not work and
fuel will stop being delivered to the engine. Anyone
using a trial-and-error method to start the vehicle will be
discouraged because of the high number of electrical
key codes.
If the engine does not start and the security message
comes on, the key may have a damaged transponder.
Turn the ignition off and try again.
2-18
Page 99 of 414
If the engine still does not start, and the key appears to
be undamaged, try another ignition key. At this time,
you may also want to check the instrument panel PASS
KEY fuse. If the engine still does not start with the
other key, your vehicle needs service. If your vehicle
does start, the first key may be faulty. See your
dealer/retailer or a locksmith who can service the
PASS-Key
®III+ to have a new key made. SeeFuses
and Circuit Breakers on page 5-109.
It is possible for the PASS-Key
®III+ decoder to learn
the transponder value of a new or replacement key. Up
to 10 keys may be programmed for the vehicle. This
procedure is for learning additional keys only. If all the
currently programmed keys are lost or do not operate,
you must see your dealer/retailer or a locksmith who can
service PASS-Key
®III+ to have keys made and
programmed to the system.
See your dealer/retailer or a locksmith who can service
PASS-Key
®III+ to get a new key blank that is cut
exactly as the ignition key that operates the system.To program the new key:
1. Verify the new key has
1stamped on it.
2. Insert the original, already programmed key into the
ignition lock cylinder and start the engine. If the
engine will not start, see your dealer/retailer
for service.
3. After the engine has started, turn the key to
LOCK/OFF and remove the key.
4. Insert the key to be programmed and turn it to
ON/RUN within 10 seconds of removing the
previous key.
The security message will turn off once the key has
been programmed. It may not be apparent that
the security message went on due to how quickly
the key is programmed.
5. Repeat Steps 1 through 4 if additional keys are to
be programmed.
If you lose or damage a PASS-Key
®III+ key, see your
dealer/retailer or a locksmith who can service
PASS-Key
®III+ to have a new key made.
Do not leave the key or device that disarms or
deactivates the theft deterrent system in the vehicle.
2-19
Page 100 of 414
Starting and Operating Your
Vehicle
New Vehicle Break-In
Notice:Your vehicle does not need an elaborate
break-in. But it will perform better in the long run if
you follow these guidelines:
Keep your speed at 55 mph (88 km/h) or less for
the �rst 500 miles (805 km).
Do not drive at any one constant speed, fast or
slow, for the �rst 500 miles (805 km). Do not
make full-throttle starts. Avoid downshifting to
brake or slow the vehicle.
Avoid making hard stops for the �rst 200 miles
(322 km) or so. During this time the new brake
linings are not yet broken in. Hard stops
with new linings can mean premature wear and
earlier replacement. Follow this breaking-in
guideline every time you get new brake linings.
Do not tow a trailer during break-in. SeeTowing
a Trailer on page 4-28for the trailer towing
capabilities of your vehicle and more
information.
Following break-in, engine speed and load can be
gradually increased.
Ignition Positions
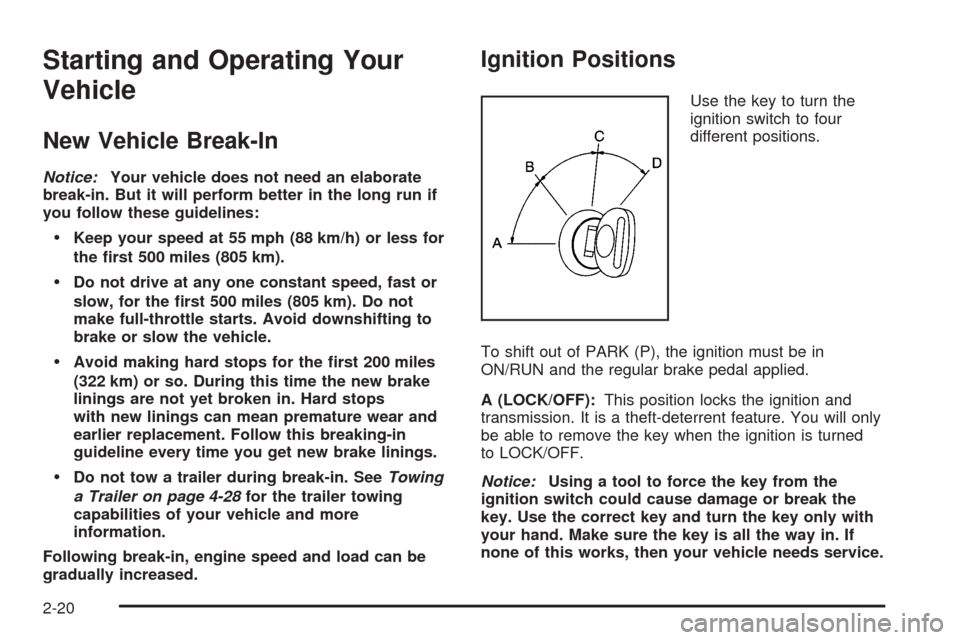
Use the key to turn the
ignition switch to four
different positions.
To shift out of PARK (P), the ignition must be in
ON/RUN and the regular brake pedal applied.
A (LOCK/OFF):This position locks the ignition and
transmission. It is a theft-deterrent feature. You will only
be able to remove the key when the ignition is turned
to LOCK/OFF.
Notice:Using a tool to force the key from the
ignition switch could cause damage or break the
key. Use the correct key and turn the key only with
your hand. Make sure the key is all the way in. If
none of this works, then your vehicle needs service.
2-20