lock CHEVROLET EXPRESS CARGO VAN 2013 1.G Owner's Manual
[x] Cancel search | Manufacturer: CHEVROLET, Model Year: 2013, Model line: EXPRESS CARGO VAN, Model: CHEVROLET EXPRESS CARGO VAN 2013 1.GPages: 402, PDF Size: 6.46 MB
Page 37 of 402
Black plate (11,1)Chevrolet Express Owner Manual - 2013 - 1stPrintReady - 6/19/12
Keys, Doors, and Windows 2-11
WARNING (CONTINUED)
injuries or even death from
heat stroke. Always lock the
vehicle whenever leaving it.
.Outsiders can easily enter
through an unlocked door
when you slow down or stop
the vehicle. Locking the doors
can help prevent this from
happening.
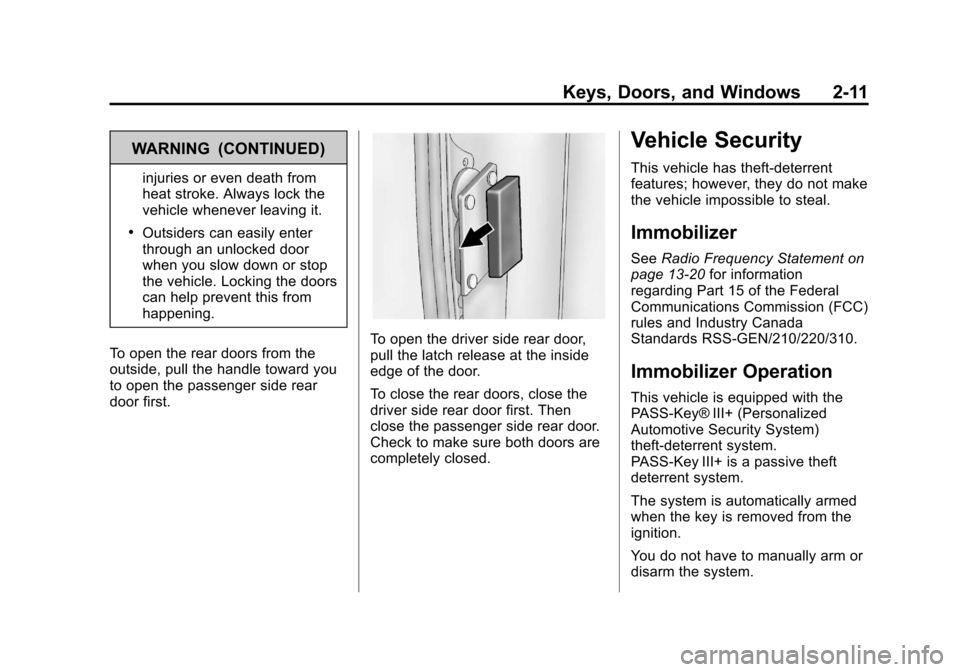
To open the rear doors from the
outside, pull the handle toward you
to open the passenger side rear
door first.
To open the driver side rear door,
pull the latch release at the inside
edge of the door.
To close the rear doors, close the
driver side rear door first. Then
close the passenger side rear door.
Check to make sure both doors are
completely closed.
Vehicle Security
This vehicle has theft-deterrent
features; however, they do not make
the vehicle impossible to steal.
Immobilizer
See Radio Frequency Statement on
page 13‑20 for information
regarding Part 15 of the Federal
Communications Commission (FCC)
rules and Industry Canada
Standards RSS-GEN/210/220/310.
Immobilizer Operation
This vehicle is equipped with the
PASS-Key® III+ (Personalized
Automotive Security System)
theft-deterrent system.
PASS-Key III+ is a passive theft
deterrent system.
The system is automatically armed
when the key is removed from the
ignition.
You do not have to manually arm or
disarm the system.
Page 38 of 402
Black plate (12,1)Chevrolet Express Owner Manual - 2013 - 1stPrintReady - 6/19/12
2-12 Keys, Doors, and Windows
The security light will come on if
there is a problem with arming or
disarming the theft-deterrent
system.
When the PASS-Key III+ system
senses that someone is using the
wrong key, it shuts down the
vehicle's starter and fuel systems.
The starter will not work and fuel will
stop being delivered to the engine.
Anyone using a trial-and-error
method to start the vehicle will be
discouraged because of the high
number of electrical key codes.
If the engine does not start and the
security message comes on, the
key may have a damaged
transponder. Turn the ignition off
and try again.
If the engine still does not start, and
the key appears to be undamaged,
try another ignition key. If the engine
still does not start with the other key,
the vehicle needs service. If thevehicle does start, the first key may
be faulty. See your dealer or a
locksmith who can service the
PASS-Key III+ to have a new
key made.
It is possible for the PASS-Key III+
decoder to learn the transponder
value of a new or replacement key.
Up to 10 keys may be programmed
for the vehicle. This procedure is for
learning additional keys only. If all
the currently programmed keys are
lost or do not operate, you must see
your dealer or a locksmith who can
service PASS-Key III+ to have keys
made and programmed to the
system.
See your dealer or a locksmith who
can service PASS-Key III+ to get a
new key blank that is cut exactly as
the ignition key that operates the
system.
To program the new key:
1. Verify the new key has
1
stamped on it.
2. Insert the original, already programmed key into the ignition
lock cylinder and start the
engine. If the engine will not
start, see your dealer for service.
3. After the engine has started, turn the key to LOCK/OFF and
remove the key.
4. Insert the key to be programmed and turn it to ON/RUN within
10 seconds of removing the
previous key.
The security message will turn
off once the key has been
programmed. It may not be
apparent that the security
message went on due to how
quickly the key is programmed.
Page 39 of 402
Black plate (13,1)Chevrolet Express Owner Manual - 2013 - 1stPrintReady - 6/19/12
Keys, Doors, and Windows 2-13
5. Repeat Steps 1–4 if additionalkeys are to be programmed.
If you lose or damage a
PASS-Key III+ key, see your dealer
or a locksmith who can service
PASS-Key III+ to have a new
key made.
Do not leave the key or device that
disarms or deactivates the
theft-deterrent system in the vehicle.Exterior Mirrors
Convex Mirrors
{WARNING
A convex mirror can make things,
like other vehicles, look farther
away than they really are. If you
cut too sharply into the right lane,
you could hit a vehicle on the
right. Check the inside mirror or
glance over your shoulder before
changing lanes.
The passenger side mirror is convex
shaped. A convex mirror's surface is
curved so more can be seen from
the driver seat.
Manual Mirrors
Adjust the mirrors by pressing the
mirror up and down and left and
right.
The mirrors can be manually folded
in or out.
On the lower portion of each mirror
is an auxiliary convex mirror.
A convex mirror's surface is curved
so you can see more from the driver
seat. The auxiliary convex mirrors
can be adjusted manually by
pressing the mirror.
Page 40 of 402
Black plate (14,1)Chevrolet Express Owner Manual - 2013 - 1stPrintReady - 6/19/12
2-14 Keys, Doors, and Windows
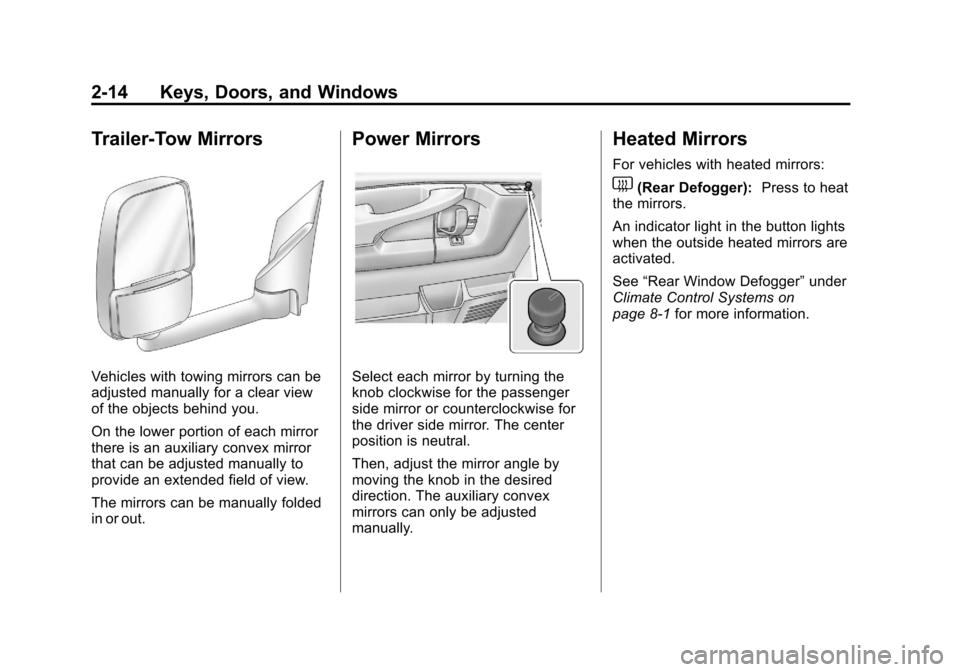
Trailer-Tow Mirrors
Vehicles with towing mirrors can be
adjusted manually for a clear view
of the objects behind you.
On the lower portion of each mirror
there is an auxiliary convex mirror
that can be adjusted manually to
provide an extended field of view.
The mirrors can be manually folded
in or out.
Power Mirrors
Select each mirror by turning the
knob clockwise for the passenger
side mirror or counterclockwise for
the driver side mirror. The center
position is neutral.
Then, adjust the mirror angle by
moving the knob in the desired
direction. The auxiliary convex
mirrors can only be adjusted
manually.
Heated Mirrors
For vehicles with heated mirrors:
1(Rear Defogger):Press to heat
the mirrors.
An indicator light in the button lights
when the outside heated mirrors are
activated.
See “Rear Window Defogger” under
Climate Control Systems on
page 8‑1 for more information.
Page 42 of 402
Black plate (16,1)Chevrolet Express Owner Manual - 2013 - 1stPrintReady - 6/19/12
2-16 Keys, Doors, and Windows
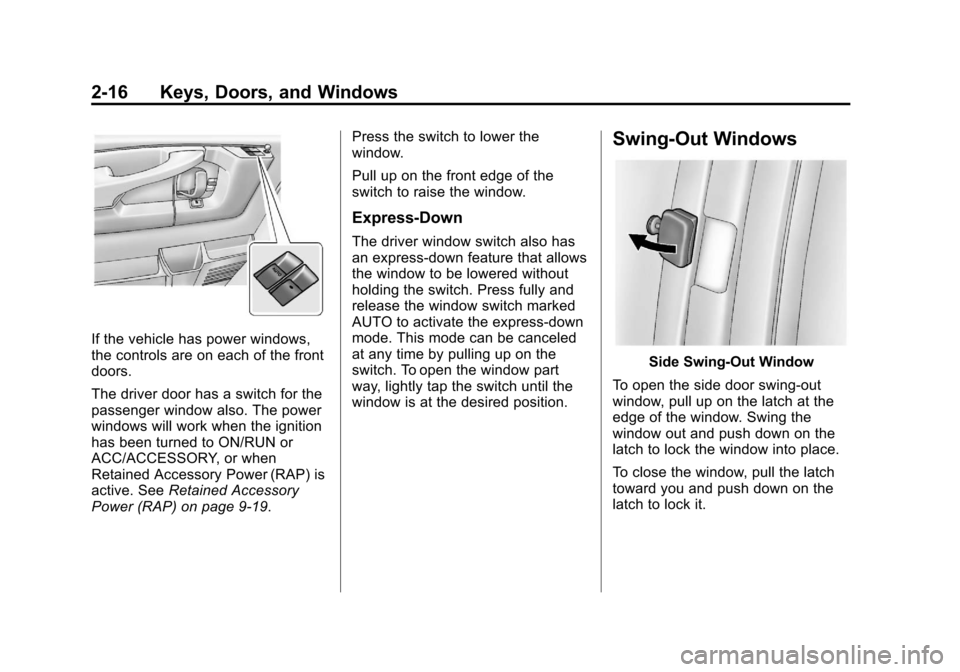
If the vehicle has power windows,
the controls are on each of the front
doors.
The driver door has a switch for the
passenger window also. The power
windows will work when the ignition
has been turned to ON/RUN or
ACC/ACCESSORY, or when
Retained Accessory Power (RAP) is
active. SeeRetained Accessory
Power (RAP) on page 9‑19. Press the switch to lower the
window.
Pull up on the front edge of the
switch to raise the window.
Express-Down
The driver window switch also has
an express-down feature that allows
the window to be lowered without
holding the switch. Press fully and
release the window switch marked
AUTO to activate the express-down
mode. This mode can be canceled
at any time by pulling up on the
switch. To open the window part
way, lightly tap the switch until the
window is at the desired position.
Swing-Out Windows
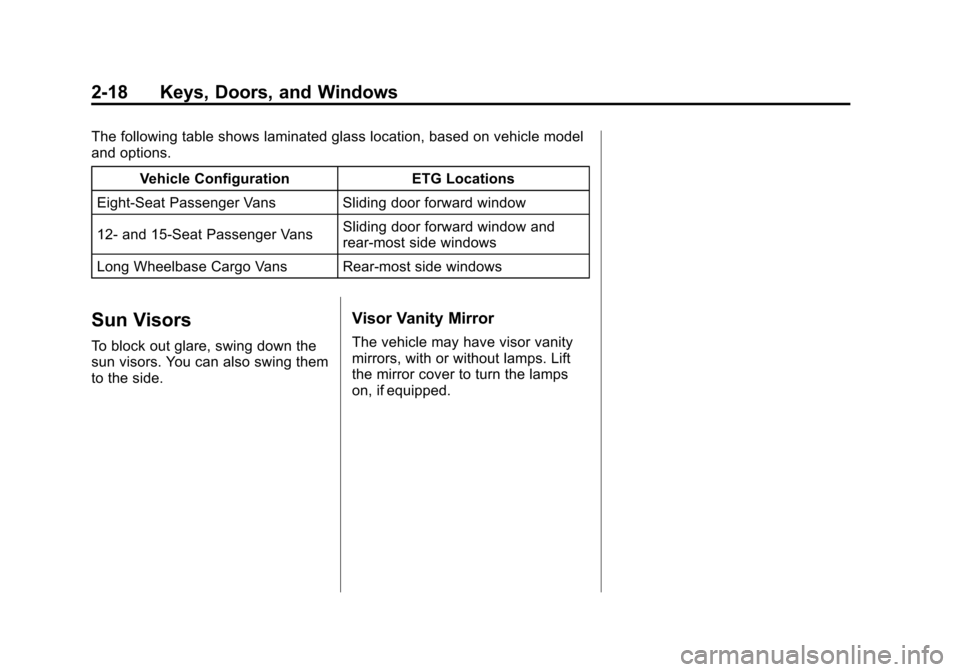
Side Swing-Out Window
To open the side door swing-out
window, pull up on the latch at the
edge of the window. Swing the
window out and push down on the
latch to lock the window into place.
To close the window, pull the latch
toward you and push down on the
latch to lock it.
Page 44 of 402
Black plate (18,1)Chevrolet Express Owner Manual - 2013 - 1stPrintReady - 6/19/12
2-18 Keys, Doors, and Windows
The following table shows laminated glass location, based on vehicle model
and options.Vehicle Configuration ETG Locations
Eight‐Seat Passenger Vans Sliding door forward window
12‐ and 15‐Seat Passenger Vans Sliding door forward window and
rear-most side windows
Long Wheelbase Cargo Vans Rear-most side windows
Sun Visors
To block out glare, swing down the
sun visors. You can also swing them
to the side.
Visor Vanity Mirror
The vehicle may have visor vanity
mirrors, with or without lamps. Lift
the mirror cover to turn the lamps
on, if equipped.
Page 46 of 402
Black plate (2,1)Chevrolet Express Owner Manual - 2013 - 1stPrintReady - 6/19/12
3-2 Seats and Restraints
Head Restraints
On vehicles with factory installed
seats, the front seats have built-in
head restraints that are not
adjustable in the outboard seating
positions.
Front Seats
Seat Adjustment
{WARNING
You can lose control of the
vehicle if you try to adjust a driver
seat while the vehicle is moving.
Adjust the driver seat only when
the vehicle is not moving.
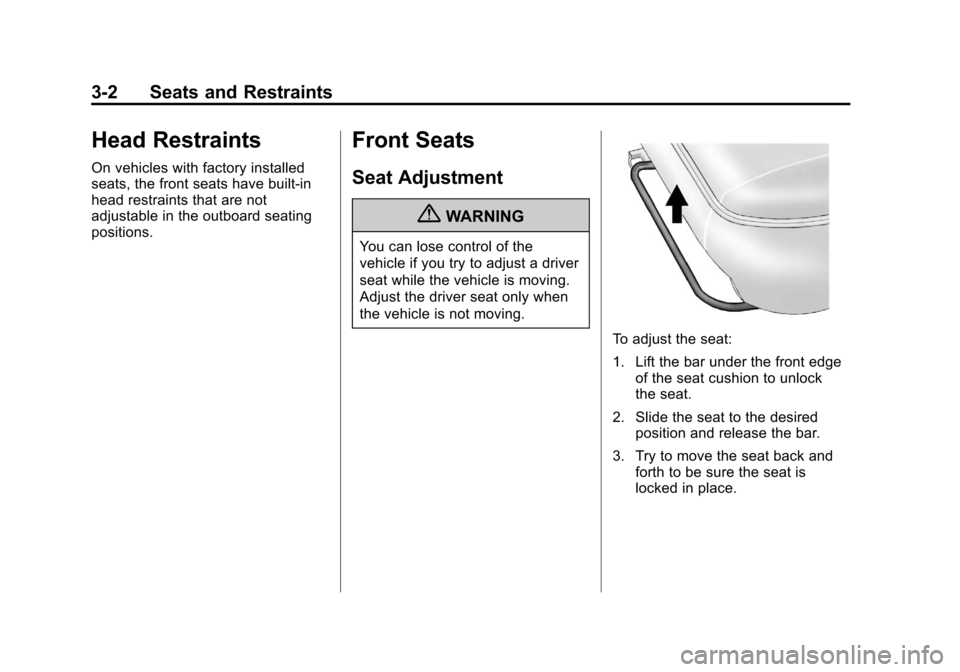
To adjust the seat:
1. Lift the bar under the front edgeof the seat cushion to unlock
the seat.
2. Slide the seat to the desired position and release the bar.
3. Try to move the seat back and forth to be sure the seat is
locked in place.
Page 47 of 402
Black plate (3,1)Chevrolet Express Owner Manual - 2013 - 1stPrintReady - 6/19/12
Seats and Restraints 3-3
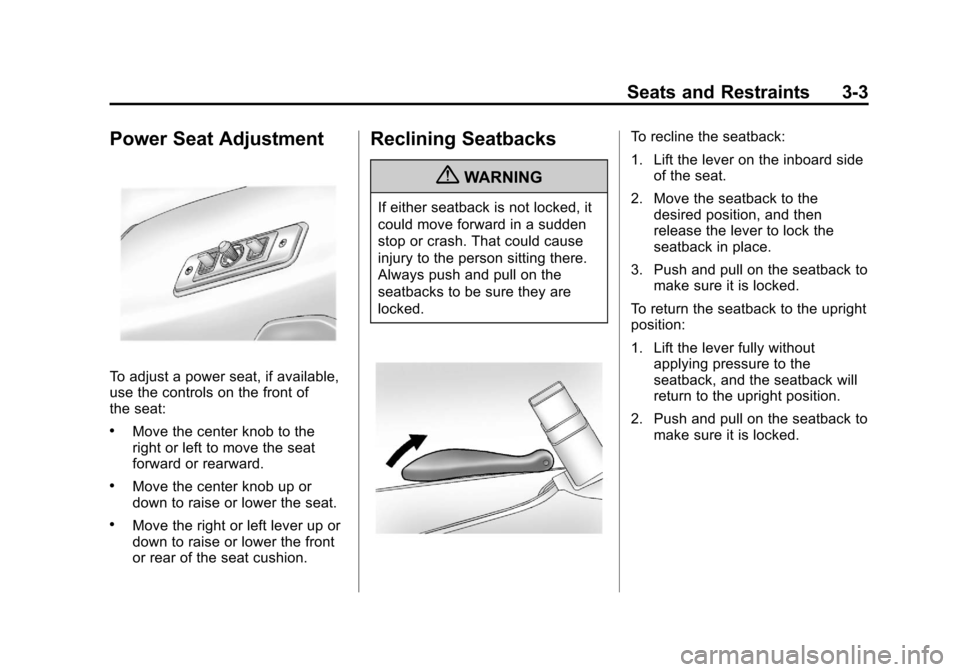
Power Seat Adjustment
To adjust a power seat, if available,
use the controls on the front of
the seat:
.Move the center knob to the
right or left to move the seat
forward or rearward.
.Move the center knob up or
down to raise or lower the seat.
.Move the right or left lever up or
down to raise or lower the front
or rear of the seat cushion.
Reclining Seatbacks
{WARNING
If either seatback is not locked, it
could move forward in a sudden
stop or crash. That could cause
injury to the person sitting there.
Always push and pull on the
seatbacks to be sure they are
locked.
To recline the seatback:
1. Lift the lever on the inboard sideof the seat.
2. Move the seatback to the desired position, and then
release the lever to lock the
seatback in place.
3. Push and pull on the seatback to make sure it is locked.
To return the seatback to the upright
position:
1. Lift the lever fully without applying pressure to the
seatback, and the seatback will
return to the upright position.
2. Push and pull on the seatback to make sure it is locked.
Page 50 of 402
Black plate (6,1)Chevrolet Express Owner Manual - 2013 - 1stPrintReady - 6/19/12
3-6 Seats and Restraints
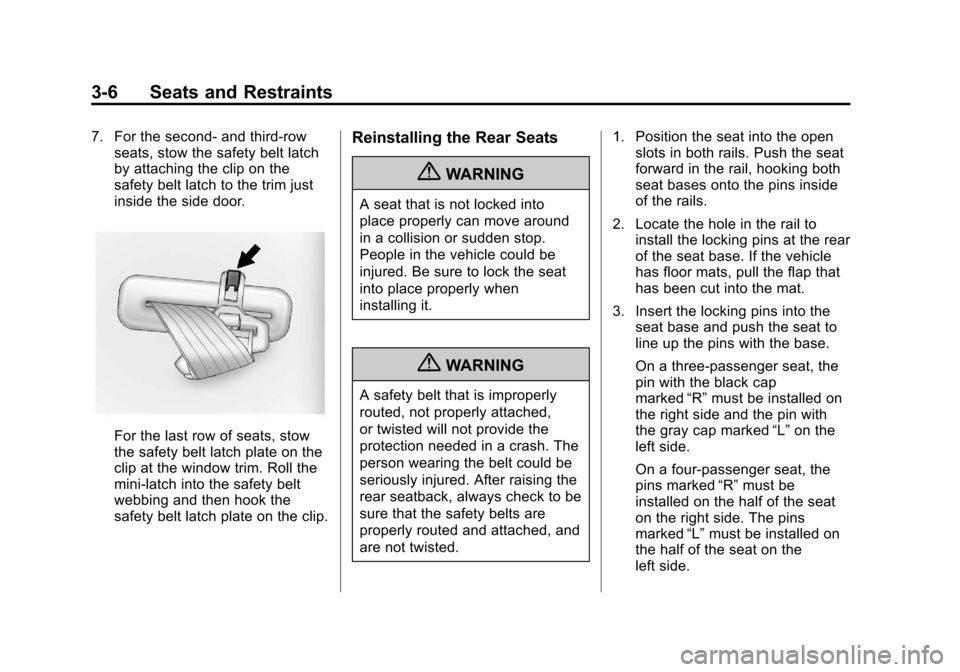
7. For the second- and third-rowseats, stow the safety belt latch
by attaching the clip on the
safety belt latch to the trim just
inside the side door.
For the last row of seats, stow
the safety belt latch plate on the
clip at the window trim. Roll the
mini-latch into the safety belt
webbing and then hook the
safety belt latch plate on the clip.
Reinstalling the Rear Seats
{WARNING
A seat that is not locked into
place properly can move around
in a collision or sudden stop.
People in the vehicle could be
injured. Be sure to lock the seat
into place properly when
installing it.
{WARNING
A safety belt that is improperly
routed, not properly attached,
or twisted will not provide the
protection needed in a crash. The
person wearing the belt could be
seriously injured. After raising the
rear seatback, always check to be
sure that the safety belts are
properly routed and attached, and
are not twisted. 1. Position the seat into the open
slots in both rails. Push the seat
forward in the rail, hooking both
seat bases onto the pins inside
of the rails.
2. Locate the hole in the rail to install the locking pins at the rear
of the seat base. If the vehicle
has floor mats, pull the flap that
has been cut into the mat.
3. Insert the locking pins into the seat base and push the seat to
line up the pins with the base.
On a three-passenger seat, the
pin with the black cap
marked “R”must be installed on
the right side and the pin with
the gray cap marked “L”on the
left side.
On a four-passenger seat, the
pins marked “R”must be
installed on the half of the seat
on the right side. The pins
marked “L”must be installed on
the half of the seat on the
left side.
Page 51 of 402

Black plate (7,1)Chevrolet Express Owner Manual - 2013 - 1stPrintReady - 6/19/12
Seats and Restraints 3-7
Three-Passenger Seat Shown
4. Push the pin(s) marked “R”down
until they are in the
retaining clip.Three-Passenger Seat Shown
5. Push the pin(s) marked “L”down
until they are in the
retaining clip. 6. If the vehicle has a floor mat, put
the flap back to its original
position.
7. Repeat this procedure for the other seat base.
8. Connect the mini-latch plates for the lap-shoulder belts by
inserting the latch plates into the
mini-buckles attached at the
outboard positions of the bench
seat. Do not twist the belts.
9. Check that all locking pins are locked into place before
operating the vehicle.