CHEVROLET HHR 2006 1.G Owners Manual
Manufacturer: CHEVROLET, Model Year: 2006, Model line: HHR, Model: CHEVROLET HHR 2006 1.GPages: 394, PDF Size: 2.33 MB
Page 111 of 394
Notice:Shifting to a drive gear from NEUTRAL (N)
while the vehicle is moving could damage the
transaxle. Make sure the vehicle is stopped before
shifting from NEUTRAL (N) into a drive gear.
AUTOMATIC OVERDRIVE (D):This position is for
normal driving with the automatic transaxle. If you need
more power for passing, and you are:
Going less than about 35 mph (55 km/h), push
your accelerator pedal about halfway down.
Going about 35 mph (55 km/h), push your
accelerator all the way down.
INTERMEDIATE (I):This position is also used for
normal driving. However, it offers braking from
the engine for slight downgrades where the vehicle
would otherwise accelerate due to steepness of
grade. If repetitive shifts occur between third and
fourth gears on steep uphills, this position can be
used to prevent repetitive shifting. Fuel economy
will be lower than AUTOMATIC OVERDRIVE (D).Here are some times you might choose
INTERMEDIATE (I) instead of AUTOMATIC
OVERDRIVE (D):
When driving on hilly, winding roads.
When towing a trailer, so there is less shifting
between gears.
LOW (L):This position gives you even more power
but lower fuel economy than INTERMEDIATE (I).
You can use it on very steep hills, or in deep snow or
mud. If the shift lever is put in LOW (L), the transaxle
will not shift into LOW (L) until the vehicle is going
slowly enough.
Notice:Spinning the tires or holding the vehicle
in one place on a hill using only the accelerator
pedal may damage the transaxle. If you are stuck,
do not spin the tires. When stopping on a hill,
use the brakes, or parking brake to hold the
vehicle in place.
2-29
Page 112 of 394
Manual Transaxle Operation
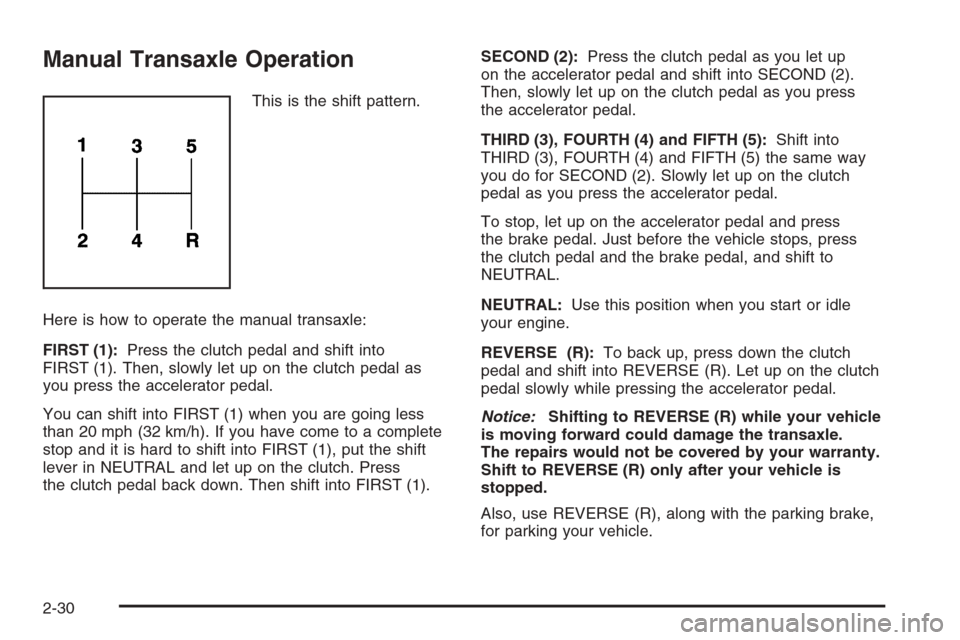
This is the shift pattern.
Here is how to operate the manual transaxle:
FIRST (1):Press the clutch pedal and shift into
FIRST (1). Then, slowly let up on the clutch pedal as
you press the accelerator pedal.
You can shift into FIRST (1) when you are going less
than 20 mph (32 km/h). If you have come to a complete
stop and it is hard to shift into FIRST (1), put the shift
lever in NEUTRAL and let up on the clutch. Press
the clutch pedal back down. Then shift into FIRST (1).SECOND (2):Press the clutch pedal as you let up
on the accelerator pedal and shift into SECOND (2).
Then, slowly let up on the clutch pedal as you press
the accelerator pedal.
THIRD (3), FOURTH (4) and FIFTH (5):Shift into
THIRD (3), FOURTH (4) and FIFTH (5) the same way
you do for SECOND (2). Slowly let up on the clutch
pedal as you press the accelerator pedal.
To stop, let up on the accelerator pedal and press
the brake pedal. Just before the vehicle stops, press
the clutch pedal and the brake pedal, and shift to
NEUTRAL.
NEUTRAL:Use this position when you start or idle
your engine.
REVERSE (R):To back up, press down the clutch
pedal and shift into REVERSE (R). Let up on the clutch
pedal slowly while pressing the accelerator pedal.
Notice:Shifting to REVERSE (R) while your vehicle
is moving forward could damage the transaxle.
The repairs would not be covered by your warranty.
Shift to REVERSE (R) only after your vehicle is
stopped.
Also, use REVERSE (R), along with the parking brake,
for parking your vehicle.
2-30
Page 113 of 394
Shift Speeds
{CAUTION:
If you skip a gear when you downshift, you
could lose control of your vehicle. You could
injure yourself or others. Do not shift down
more than one gear at a time when you
downshift.
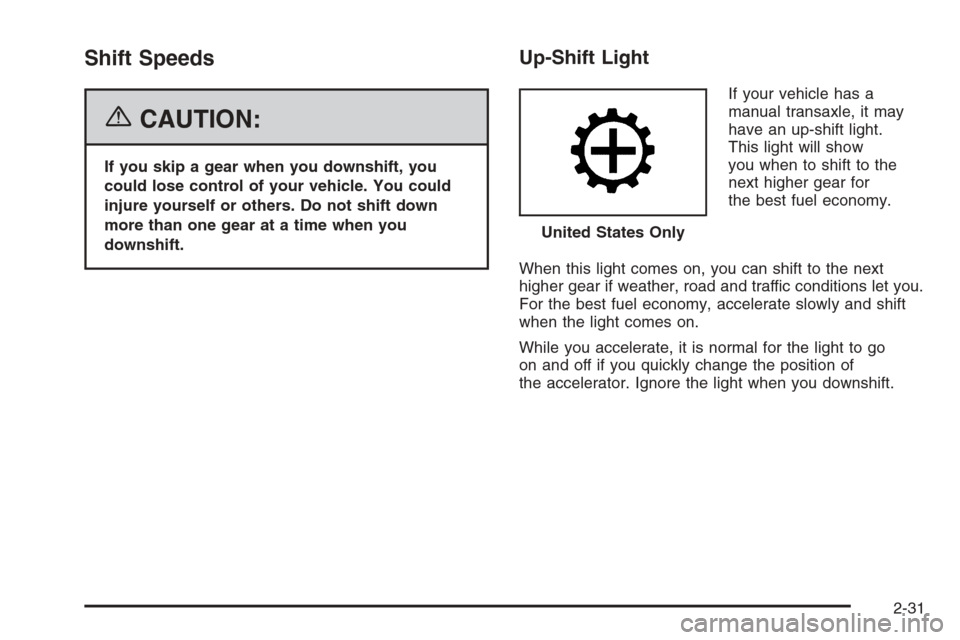
Up-Shift Light
If your vehicle has a
manual transaxle, it may
have an up-shift light.
This light will show
you when to shift to the
next higher gear for
the best fuel economy.
When this light comes on, you can shift to the next
higher gear if weather, road and traffic conditions let you.
For the best fuel economy, accelerate slowly and shift
when the light comes on.
While you accelerate, it is normal for the light to go
on and off if you quickly change the position of
the accelerator. Ignore the light when you downshift.United States Only
2-31
Page 114 of 394
Parking Brake
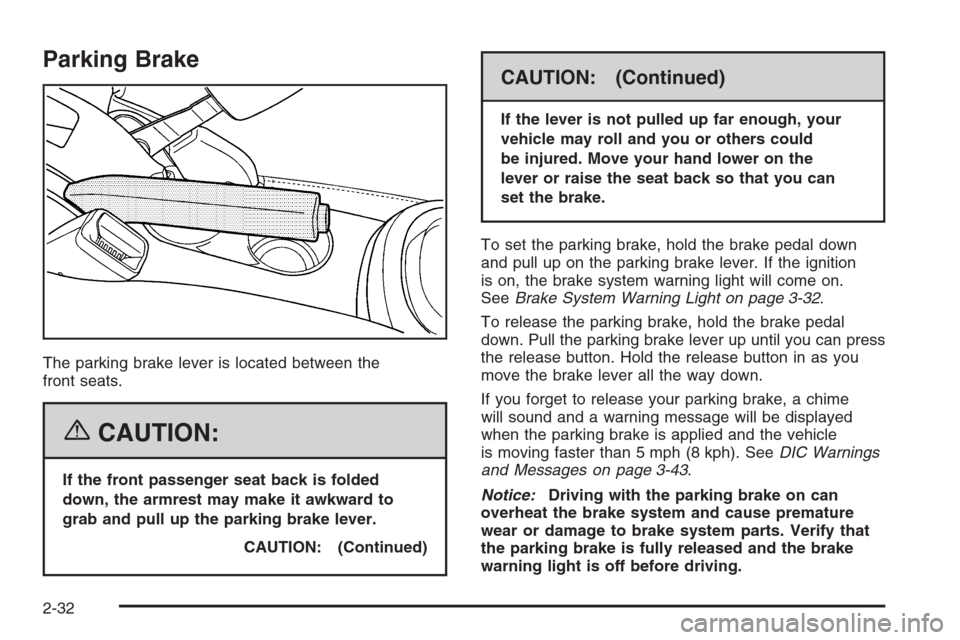
The parking brake lever is located between the
front seats.
{CAUTION:
If the front passenger seat back is folded
down, the armrest may make it awkward to
grab and pull up the parking brake lever.
CAUTION: (Continued)
CAUTION: (Continued)
If the lever is not pulled up far enough, your
vehicle may roll and you or others could
be injured. Move your hand lower on the
lever or raise the seat back so that you can
set the brake.
To set the parking brake, hold the brake pedal down
and pull up on the parking brake lever. If the ignition
is on, the brake system warning light will come on.
SeeBrake System Warning Light on page 3-32.
To release the parking brake, hold the brake pedal
down. Pull the parking brake lever up until you can press
the release button. Hold the release button in as you
move the brake lever all the way down.
If you forget to release your parking brake, a chime
will sound and a warning message will be displayed
when the parking brake is applied and the vehicle
is moving faster than 5 mph (8 kph). SeeDIC Warnings
and Messages on page 3-43.
Notice:Driving with the parking brake on can
overheat the brake system and cause premature
wear or damage to brake system parts. Verify that
the parking brake is fully released and the brake
warning light is off before driving.
2-32
Page 115 of 394
Shifting Into Park (P)
(Automatic Transaxle)
{CAUTION:
It can be dangerous to get out of your vehicle
if the shift lever is not fully in PARK (P) with
the parking brake �rmly set. Your vehicle
can roll. If you have left the engine running,
the vehicle can move suddenly. You or others
could be injured. To be sure your vehicle
will not move, even when you are on fairly
level ground, use the steps that follow.
If you are pulling a trailer, seeTowing a Trailer
(Manual Transaxle) on page 4-39 Towing a
Trailer (Automatic Transaxle) on page 4-39.1. Hold the brake pedal down and set the parking
brake.
2. Move the shift lever into PARK (P) by holding
the button on the shift lever and pushing the lever
all the way toward the front of the vehicle.
3. Turn the ignition key to LOCK.
4. Remove the key and take it with you. If you can
leave your vehicle with the ignition key in your
hand, your vehicle is in PARK (P).
2-33
Page 116 of 394
Leaving Your Vehicle With the
Engine Running
{CAUTION:
It can be dangerous to leave your vehicle with
the engine running. Your vehicle could move
suddenly if the shift lever is not fully in
PARK (P) with the parking brake �rmly set.
And, if you leave the vehicle with the engine
running, it could overheat and even catch �re.
You or others could be injured. Do not leave
your vehicle with the engine running.
If you have to leave your vehicle with the engine
running, be sure your vehicle is in PARK (P) and your
parking brake is �rmly set before you leave it. After you
have moved the shift lever into PARK (P), hold the
regular brake pedal down. Then, see if you can move
the shift lever away from PARK (P) without �rst pushing
the button. If you can, it means that the shift lever
was not fully locked into PARK (P).
Torque Lock
If you are parking on a hill and you do not shift your
transaxle into PARK (P) properly, the weight of the
vehicle may put too much force on the parking pawl in
the transaxle. You may �nd it difficult to pull the shift
lever out of PARK (P). This is called “torque lock.”
To prevent torque lock, set the parking brake and then
shift into PARK (P) properly before you leave the
driver’s seat. To �nd out how, seeShifting Into Park (P)
(Automatic Transaxle) on page 2-33.
When you are ready to drive, move the shift lever out of
PARK (P)beforeyou release the parking brake.
If torque lock does occur, you may need to have another
vehicle push yours a little uphill to take some of the
pressure from the parking pawl in the transaxle,
then you will be able to pull the shift lever out of
PARK (P).
2-34
Page 117 of 394
Shifting Out of Park (P)
(Automatic Transaxle)
This vehicle is equipped with an electronic shift lock
release system. The shift lock release is designed to:
Prevent ignition key removal unless the shift
lever is in PARK (P) with the shift lever button
fully released, and
Prevent movement of the shift lever out of PARK (P)
unless the ignition is in a position other than LOCK.
The shift lock release is always functional except in
the case of a an uncharged or low voltage (less than
9 volt) battery.
If your vehicle has an uncharged battery or a battery
with low voltage, try charging or jump starting the
battery. SeeJump Starting on page 5-33for more
information.
To shift out of PARK (P) use the following sequence:
1. Apply the brake pedal.
2. Then press the shift lever button.
3. Move the shift lever to the desired position.If you still are unable to shift out of PARK (P):
1. Fully release the shift lever button.
2. While holding down the brake pedal, press the
shift lever button again.
3. Move the shift lever to the desired position.
If you still cannot move the shift lever from PARK (P),
consult your dealer or a professional towing service.Parking Your Vehicle
Before leaving your vehicle, fully press the clutch pedal
in, move the shift lever into REVERSE (R), and �rmly
apply the parking brake. Once the shift lever has
been placed in REVERSE (R) with the clutch pedal
pressed in, you can turn the ignition key to LOCK,
remove the key and release the clutch. SeeManual
Transaxle Operation on page 2-30.
2-35
Page 118 of 394
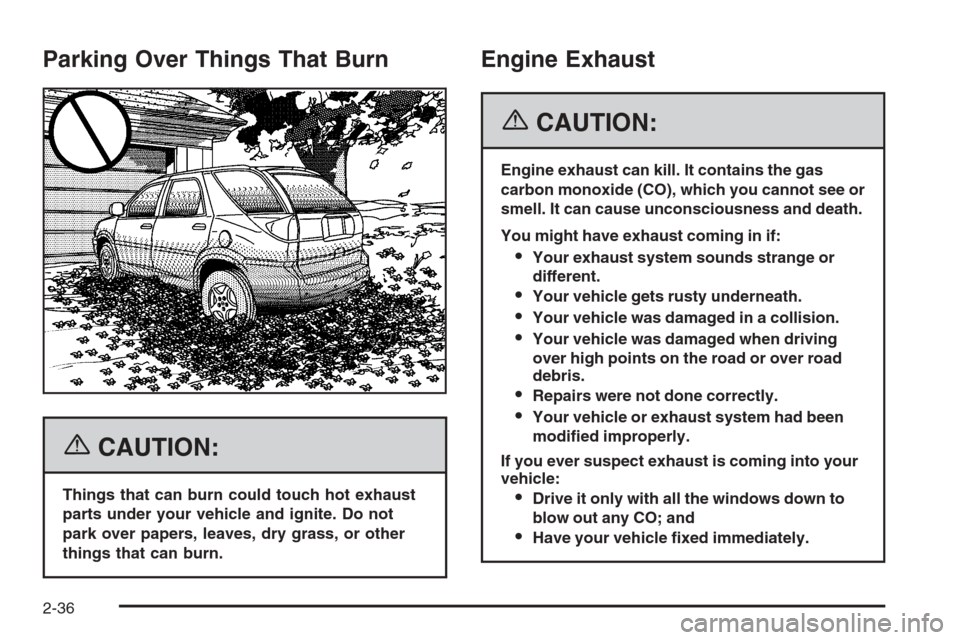
Parking Over Things That Burn
{CAUTION:
Things that can burn could touch hot exhaust
parts under your vehicle and ignite. Do not
park over papers, leaves, dry grass, or other
things that can burn.
Engine Exhaust
{CAUTION:
Engine exhaust can kill. It contains the gas
carbon monoxide (CO), which you cannot see or
smell. It can cause unconsciousness and death.
You might have exhaust coming in if:
Your exhaust system sounds strange or
different.
Your vehicle gets rusty underneath.
Your vehicle was damaged in a collision.
Your vehicle was damaged when driving
over high points on the road or over road
debris.
Repairs were not done correctly.
Your vehicle or exhaust system had been
modi�ed improperly.
If you ever suspect exhaust is coming into your
vehicle:
Drive it only with all the windows down to
blow out any CO; and
Have your vehicle �xed immediately.
2-36
Page 119 of 394
Running the Engine While Parked
It is better not to park with the engine running. But if you
ever have to, here are some things to know.
{CAUTION:
Idling the engine with the climate control
system off could allow dangerous exhaust into
your vehicle. See the earlier caution under
Engine Exhaust on page 2-36.
Also, idling in a closed-in place can let deadly
carbon monoxide (CO) into your vehicle even if
the climate control fan is at the highest setting.
One place this can happen is a garage.
Exhaust — with CO — can come in easily.
NEVER park in a garage with the engine
running.
Another closed-in place can be a blizzard.
SeeWinter Driving on page 4-26.
{CAUTION:
It can be dangerous to get out of your vehicle
if the shift lever is not fully in PARK (P) with
the parking brake �rmly set. Your vehicle can
roll. Do not leave your vehicle when the engine
is running unless you have to. If you have
left the engine running, the vehicle can move
suddenly. You or others could be injured.
To be sure your vehicle will not move, even
when you are on fairly level ground, always
set your parking brake and move the shift
lever to PARK (P).
Follow the proper steps to be sure your vehicle will not
move. SeeShifting Into Park (P) (Automatic Transaxle)
on page 2-33.
If you are parking on a hill and if you are pulling a
trailer, also seeTowing a Trailer (Manual Transaxle)
on page 4-39 Towing a Trailer (Automatic Transaxle)
on page 4-39.
2-37
Page 120 of 394
Mirrors
Manual Rearview Mirror
To reduce glare from lamps behind you, move the lever
toward you to the night position. Your vehicle may
also have reading lamps. Press the buttons, located
under the mirror, up to turn the lamps on or off.
Automatic Dimming Rearview Mirror
with OnStar
®and Compass
Your vehicle may have an automatic dimming rearview
mirror with OnStar®, compass and reading lamps.
This feature enables the mirror to sense nighttime glare
from vehicle headlamps from behind and automatically
dim to reduce the glare to a safe level.
The automatic dimming feature turns on each time the
vehicle is started. Press the MIRROR button once
and the green indicator light located to the left of the
button will go out indicating the feature is off. To turn
the feature back on, press and release the MIRROR
button and the green indicator light will come on.
The reading lamps, located under the mirror, can be
turned on or off by pushing the buttons up.There are three additional buttons for the OnStar
®
system. See your dealer for more information on the
system and how to subscribe to OnStar®. See OnStar®
in the Index for more information.
Compass Operation
Press the compass button once to turn the compass
on or off.
When the ignition and the compass feature are on,
the compass will show two character boxes for a
few seconds. After a few seconds, the mirror will
display the current compass direction.
Compass Calibration
If after a few seconds the display does not show a
compass direction, (N for North for example), there may
be a strong magnetic �eld interfering with the compass.
Such interference may be caused by a magnetic
antenna mount, note pad holder, or similar object. If the
letter C appears in the compass window, the compass
may need to be reset or calibrated.
The mirror can be calibrated by driving the vehicle in
circles at 5 mph (8 km/h) or less until the display reads
a direction.
2-38