reset CHEVROLET HHR 2010 1.G Owners Manual
[x] Cancel search | Manufacturer: CHEVROLET, Model Year: 2010, Model line: HHR, Model: CHEVROLET HHR 2010 1.GPages: 480, PDF Size: 5.25 MB
Page 21 of 480
Vehicle Features
Radio(s)
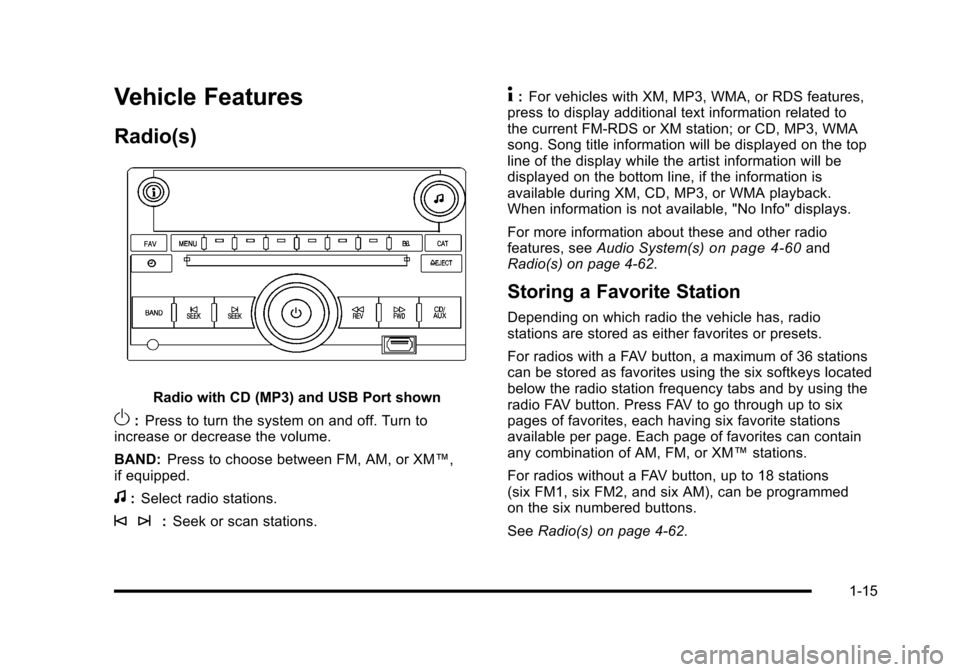
Radio with CD (MP3) and USB Port shown
O:Press to turn the system on and off. Turn to
increase or decrease the volume.
BAND: Press to choose between FM, AM, or XM™,
if equipped.
f: Select radio stations.
© ¨: Seek or scan stations.
4:For vehicles with XM, MP3, WMA, or RDS features,
press to display additional text information related to
the current FM-RDS or XM station; or CD, MP3, WMA
song. Song title information will be displayed on the top
line of the display while the artist information will be
displayed on the bottom line, if the information is
available during XM, CD, MP3, or WMA playback.
When information is not available, "No Info" displays.
For more information about these and other radio
features, see Audio System(s)
on page 4‑60and
Radio(s) on page 4‑62.
Storing a Favorite Station
Depending on which radio the vehicle has, radio
stations are stored as either favorites or presets.
For radios with a FAV button, a maximum of 36 stations
can be stored as favorites using the six softkeys located
below the radio station frequency tabs and by using the
radio FAV button. Press FAV to go through up to six
pages of favorites, each having six favorite stations
available per page. Each page of favorites can contain
any combination of AM, FM, or XM™ stations.
For radios without a FAV button, up to 18 stations
(six FM1, six FM2, and six AM), can be programmed
on the six numbered buttons.
See Radio(s) on page 4‑62.
1-15
Page 24 of 480
Driver Information Center (DIC)
The DIC display is located at the bottom of the
instrument panel cluster. It shows the status of
many vehicle systems and enables access to the
personalization menu.
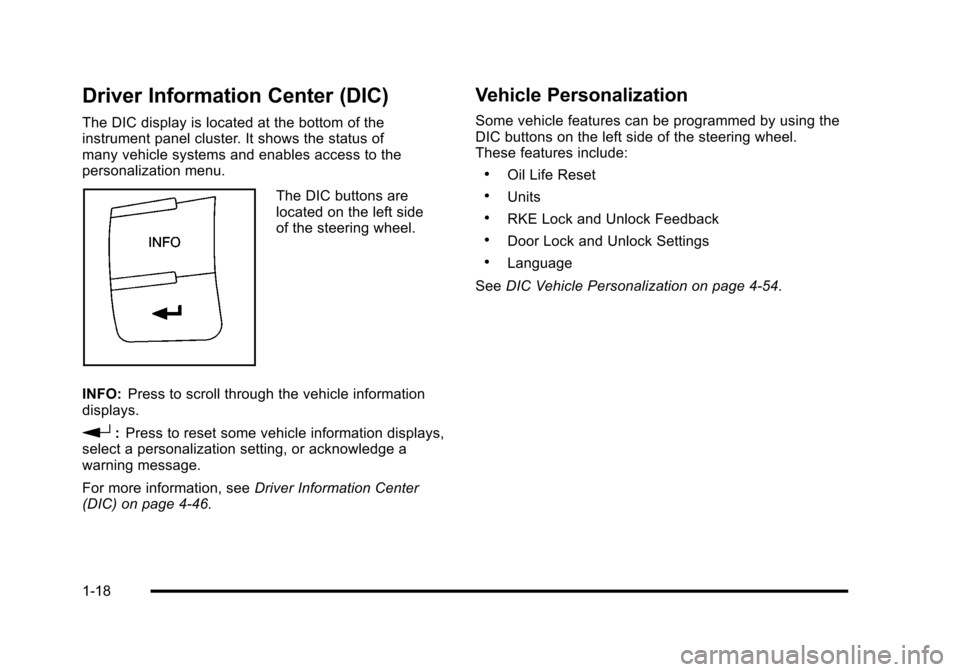
The DIC buttons are
located on the left side
of the steering wheel.
INFO: Press to scroll through the vehicle information
displays.
r: Press to reset some vehicle information displays,
select a personalization setting, or acknowledge a
warning message.
For more information, see Driver Information Center
(DIC) on page 4‑46.
Vehicle Personalization
Some vehicle features can be programmed by using the
DIC buttons on the left side of the steering wheel.
These features include:
.Oil Life Reset
.Units
.RKE Lock and Unlock Feedback
.Door Lock and Unlock Settings
.Language
See DIC Vehicle Personalization on page 4‑54.
1-18
Page 29 of 480

Engine Oil Life System
The engine oil life system calculates engine oil life
based on vehicle use and displays a DIC message
when it is necessary to change the engine oil and filter.
The oil life system should be reset to 100% only
following an oil change.
Resetting the Oil Life System
1. Turn the ignition to ON/RUN, with the engine off.
2. Press the information and reset buttons on theDriver Information Center (DIC) at the same time
to enter the personalization menu.
3. Press the information button to scroll through the available personalization menu modes until the
DIC display shows OIL-LIFE RESET.
4. Press and hold the reset button until the DIC display shows ACKNOWLEDGED. This will tell
you the system has been reset.
5. Turn the key to LOCK/OFF. For vehicles with the 2.2L (VIN Code V) or
2.4L (VIN Code B) engines, you can also reset
the system as follows:
1. Turn the ignition key to ON/RUN with the engine off.
2. Fully press and release the accelerator pedal slowly three times within five seconds.
3. Turn the key to LOCK/OFF, then start the engine.
See Engine Oil Life System on page 6‑23.
Fuel E85 (85% Ethanol)
Vehicles that have the 2.2L L4 engine (VIN Code B) or
the 2.4L L4 engine (VIN Code V) have a yellow fuel cap
and can use either unleaded gasoline or ethanol fuel
containing up to 85% ethanol (E85). See Fuel E85
(85% Ethanol)
on page 6‑8. In all other engines,
use only the unleaded gasoline described under
Gasoline Octane on page 6‑6.
1-23
Page 154 of 480
Compass Calibration
If after a few seconds the display does not show a
compass direction, (N for North for example), there may
be a strong magnetic field interfering with the compass.
Interference can be caused by a magnetic antenna
mount, note pad holder, or similar object. If CAL
appears in the compass window, the compass may
need to be reset or calibrated.
To calibrate the compass:1. Make sure CAL is displayed. If CAL is not displayed, press and hold the compass button until
CAL displays.
2. While CAL displays, drive the vehicle in circles at 5 mph (8 km/h) or less until the display reads a
direction.
Compass Variance
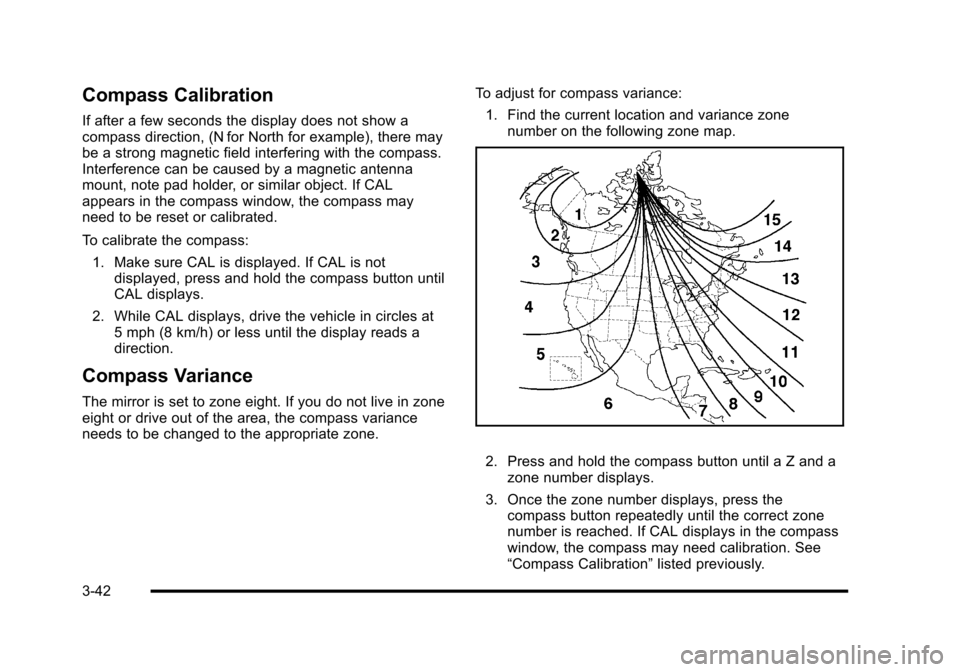
The mirror is set to zone eight. If you do not live in zone
eight or drive out of the area, the compass variance
needs to be changed to the appropriate zone. To adjust for compass variance:
1. Find the current location and variance zone number on the following zone map.
2. Press and hold the compass button until a Z and azone number displays.
3. Once the zone number displays, press the compass button repeatedly until the correct zone
number is reached. If CAL displays in the compass
window, the compass may need calibration. See
“Compass Calibration” listed previously.
3-42
Page 159 of 480
The rear vision camera system display in the rearview
mirror may turn off or not appear as expected due to
one of the following conditions. If this occurs the left
indicator light on the mirror will flash.
.A slow flash may indicate a loss of video signal,
or no video signal present during the reverse cycle.
.A fast flash may indicate that the display has
been on for the maximum allowable time during
a reverse cycle, or the display has reached an
Over Temperature limit.
The fast flash conditions are used to protect the
video device from high temperature conditions.
Once conditions return to normal the device will
reset and the green indicator will stop flashing.
During any of these fault conditions, the display will be
blank and the indicator will continue to flash as long as
the vehicle is in R (Reverse) or until the conditions
return to normal.
Pressing and holding
zwhen the left indicator light is
flashing will turn off the video display along with the left
indicator light.
Storage Areas
Glove Box
Lift up on the glove box lever to open it.
Cupholders
There are two cupholders located in the floor console
between the front seats. There is also a cupholder for
the rear seat passenger located at the rear of the floor
console.
Automatic transmission vehicles have a cupholder in
front of the shift lever.
Instrument Panel Storage
The vehicle has a storage compartment on the
instrument panel above the air vents. Push the button
on the compartment to open the cover.
Floor Console Storage Area
There are two small storage compartments on the floor
console.
3-47
Page 176 of 480
Increasing Speed While Using Cruise
Control
There are two ways to go to a higher speed.1. Disengage the cruise control by applying the brake pedal, but do not turn it off. Accelerate to a higher
speed and reset the cruise control.
2. If the cruise control system is already engaged, press the RES+ button. Hold it there until the
desired speed is reached, and then release the
button. To increase the vehicle speed in small
amounts, press the RES+ button briefly and then
release it. Each time this is done, the vehicle goes
about 1.6 km/h (1 mph) faster.
Reducing Speed While Using Cruise
Control
If the cruise control system is already engaged,
.Push and hold the SET− button until the lower
speed desired is reached, then release it.
.To slow down in small amounts, push the
SET− button briefly. Each time this is done, the
vehicle goes about 1.6 km/h (1 mph) slower.
Passing Another Vehicle While Using
Cruise Control
Use the accelerator pedal to increase the vehicle
speed. When you take your foot off the pedal, the
vehicle slows down to the cruise control speed you
set earlier.
Using Cruise Control on Hills
How well the cruise control works on hills depends upon
the vehicle speed, load and the steepness of the hills.
When going up steep hills, the accelerator pedal might
need to be applied to maintain the vehicle speed. When
going downhill, the brake might need to be applied or
the vehicle might have to be shifted to a lower gear to
keep the vehicle speed down. When the brakes are
applied the cruise control turns off.
Ending Cruise Control
To end cruise control, step lightly on the brake pedal or
the clutch pedal if the vehicle has a manual
transmission.
Stepping on the brake pedal or clutch pedal will only
end the current cruise control session.
Press
Ito turn the system completely off.
4-10
Page 197 of 480
Antilock Brake System (ABS)
Warning Light
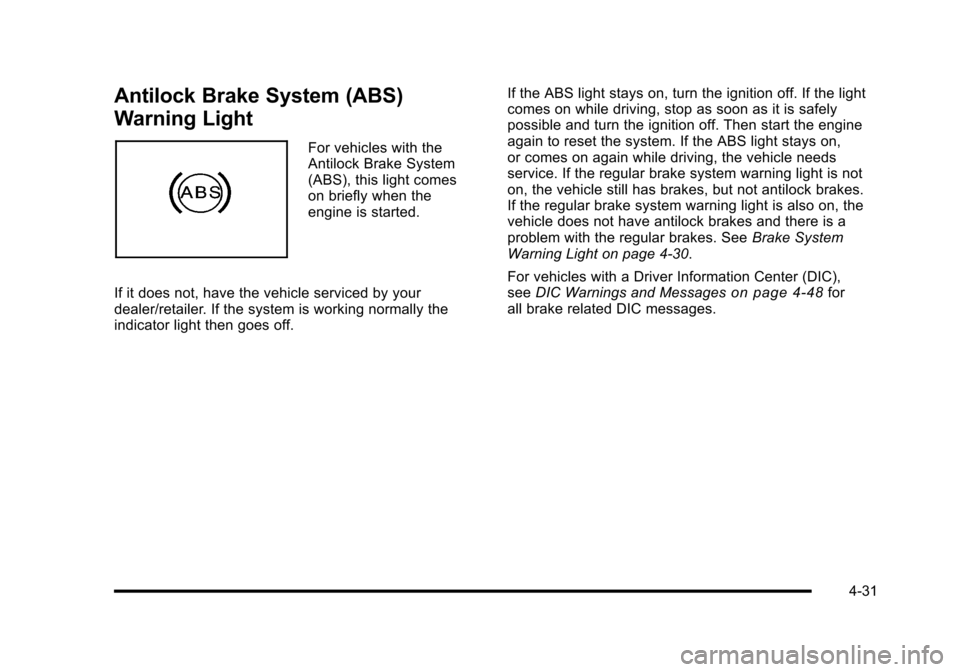
For vehicles with the
Antilock Brake System
(ABS), this light comes
on briefly when the
engine is started.
If it does not, have the vehicle serviced by your
dealer/retailer. If the system is working normally the
indicator light then goes off. If the ABS light stays on, turn the ignition off. If the light
comes on while driving, stop as soon as it is safely
possible and turn the ignition off. Then start the engine
again to reset the system. If the ABS light stays on,
or comes on again while driving, the vehicle needs
service. If the regular brake system warning light is not
on, the vehicle still has brakes, but not antilock brakes.
If the regular brake system warning light is also on, the
vehicle does not have antilock brakes and there is a
problem with the regular brakes. See
Brake System
Warning Light on page 4‑30.
For vehicles with a Driver Information Center (DIC),
see DIC Warnings and Messages
on page 4‑48for
all brake related DIC messages.
4-31
Page 208 of 480
Region A Gauge and Speedometer
Displays
Change the information displayed in Region A by
turning the knob either clockwise or counterclockwise.
The available gauges are:
BOOST:Displays positive boost pressure as
determined by the manifold air pressure (MAP) sensor.
AIR/FUEL RATIO: Displays the mass ratio of air to fuel.
CAM PHASER ANGLES: Displays orientation of the
intake and exhaust cam shafts relative to their park
positions as commanded by the engine control module.
OVERLAP represents the total distance the intake and
exhaust cam shafts have phased.
SPARK ADVANCE/ KNOCK RETARD: The spark
advance gauge displays ignition timing. Knock retard
indicates the amount of ignition delay to reduce spark
knock.
ENGINE POWER & TORQUE : Displayed engine
power and torque are engine flywheel output values
calculated by the engine control module. These
values are approximate and may change with the air
conditioning load, generator output, air temperature, air
pressure, and fuel octane. SPEEDOMETER & G FORCE :
The G FORCE meter
displays lateral acceleration. While turning right,
G forces are felt on the left, and vice versa. PEAK
values are stored indefinitely, and can be reset with
a press and hold of the RPD knob while viewing the
G FORCE meter.
SETUP MENU: Press the RPD knob to enter this
menu. The vehicle should be stopped while configuring
the setup menu selections.
SCREEN OFF: Turns the screen off.
Region B Readout Displays
Press the RPD knob to highlight Region B. The
information displayed can be changed by turning the
RPD knob either clockwise or counterclockwise.
Press the RPD knob again, to store the selection. The
selection will also be stored after a few seconds of no
activity. Available modes are:
Readouts #1
SHIFT LIGHTS/GEAR INDICATION: The shift lights
provide visual identification of engine speed for a
transmission gear. Shift light minimum and maximum
RPM settings can be viewed and configured in the
SETUP screen. The gear indication on manual
transmission vehicles is calculated by the engine
control module. The gear is only displayed when
enough torque is available to determine the selected
forward gear.
4-42
Page 212 of 480
Driver Information Center (DIC)
Your vehicle has a Driver Information Center (DIC). The
DIC display gives you the status of many of your
vehicle's systems. The DIC is also used to display
driver personalization menu modes and warning/status
messages. All messages will appear in the DIC display,
located at the bottom of the instrument panel cluster.
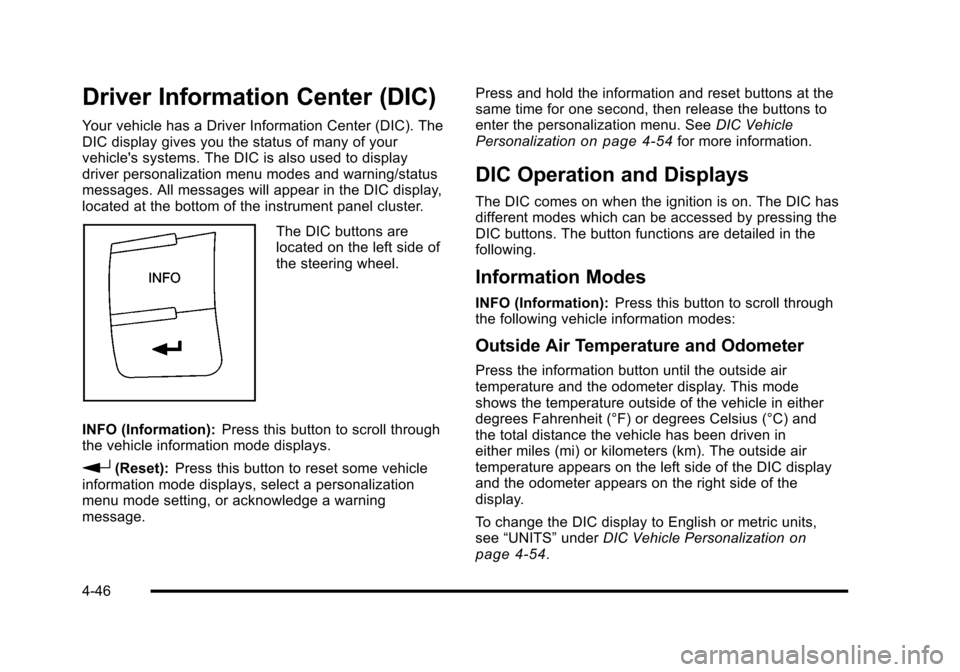
The DIC buttons are
located on the left side of
the steering wheel.
INFO (Information): Press this button to scroll through
the vehicle information mode displays.
r(Reset): Press this button to reset some vehicle
information mode displays, select a personalization
menu mode setting, or acknowledge a warning
message. Press and hold the information and reset buttons at the
same time for one second, then release the buttons to
enter the personalization menu. See
DIC Vehicle
Personalization
on page 4‑54for more information.
DIC Operation and Displays
The DIC comes on when the ignition is on. The DIC has
different modes which can be accessed by pressing the
DIC buttons. The button functions are detailed in the
following.
Information Modes
INFO (Information): Press this button to scroll through
the following vehicle information modes:
Outside Air Temperature and Odometer
Press the information button until the outside air
temperature and the odometer display. This mode
shows the temperature outside of the vehicle in either
degrees Fahrenheit (°F) or degrees Celsius (°C) and
the total distance the vehicle has been driven in
either miles (mi) or kilometers (km). The outside air
temperature appears on the left side of the DIC display
and the odometer appears on the right side of the
display.
To change the DIC display to English or metric units,
see “UNITS” underDIC Vehicle Personalization
on
page 4‑54.
4-46
Page 213 of 480
TRIP A or TRIP B
Press the information button until TRIP A or TRIP B
display. These modes show the current distance
traveled since the last reset for each trip odometer in
either miles (mi) or kilometers (km). Both odometers
can be used at the same time.
To reset the trip odometer to zero, press and hold the
reset button for a few seconds while the desired trip
odometer is displayed.
FUEL RANGE
Press the information button until FUEL RANGE
displays. This mode shows the remaining distance
you can drive without refueling in either miles (mi) or
kilometers (km). It is based on fuel economy and the
fuel remaining in the tank.
When the fuel level is low, FUEL RANGE LOW
displays.
The fuel economy data used to determine fuel range is
an average of recent driving conditions. As your driving
conditions change, this data is gradually updated. The
FUEL RANGE mode cannot be reset.
MPG (L/100 KM) AVG (Average)
Press the information button until MPG (L/100 KM)AVG displays. This mode shows how many miles per
gallon (mpg) or liters per 100 kilometers (L/100 km) your
vehicle is getting based on current and past driving
conditions.
To reset the average fuel economy, press and hold the
reset button while MPG (L/100 KM) AVG is displayed.
Average fuel economy is then calculated starting from
that point. If the average fuel economy is not reset, it is
continually updated each time you drive.
MPG (L/100 KM) INST (Instantaneous)
Press the information button until MPG (L/100 KM) INST
displays. This mode shows the current fuel economy at
a particular moment and changes frequently as driving
conditions change. This mode shows the instantaneous
fuel economy in miles per gallon (mpg) or liters per
100 kilometers (L/100 km). Unlike average fuel
economy, this screen cannot be reset.
4-47