CHEVROLET HHR 2011 1.G Owners Manual
Manufacturer: CHEVROLET, Model Year: 2011, Model line: HHR, Model: CHEVROLET HHR 2011 1.GPages: 430, PDF Size: 4.57 MB
Page 141 of 430
Black plate (35,1)Chevrolet HHR Owner Manual - 2011
Running the Vehicle While Parked
It is better not to park with the engine running. But if you
ever have to, here are some things to know.
{WARNING:
Idling a vehicle in an enclosed area with poor
ventilation is dangerous. Engine exhaust may
enter the vehicle. Engine exhaust contains
Carbon Monoxide (CO) which cannot be seen or
smelled. It can cause unconsciousness and even
death. Never run the engine in an enclosed area
that has no fresh air ventilation. For more
information, seeEngine Exhaust on page 3‑34.
{WARNING:
It can be dangerous to get out of the vehicle if the
automatic transmission shift lever is not fully in
P (Park) with the parking brake firmly set. The
vehicle can roll. Do not leave the vehicle when the
engine is running unless you have to. If you have
left the engine running, the vehicle can move
suddenly. You or others could be injured. To be
sure the vehicle will not move, even when you are
on fairly level ground, always set the parking
brake and move the shift lever to P (Park).
Follow the proper steps to be sure the vehicle will not
move. See Shifting Into Park (Automatic Transmission)
on page 3‑31.
If parking on a hill and pulling a trailer, see Towing a
Trailer (Automatic Transmission)
on page 5‑31or
Towing a Trailer (Manual Transmission) on page 5‑37.
3-35
Page 142 of 430
Black plate (36,1)Chevrolet HHR Owner Manual - 2011
Mirrors
Manual Rearview Mirror
Hold the inside rearview mirror in the center to move it
for a clearer view behind your vehicle. Adjust the mirror
to avoid glare from the headlamps behind you. Push the
tab forward for daytime use and pull it for nighttime use.
If the vehicle has map lamps, press the buttons located
at the bottom of the mirror to turn them on or off.
Automatic Dimming Rearview Mirror
The vehicle may have an automatic dimming inside
rearview mirror with a compass and map lights and/or
OnStar
®.
Vehicles with OnStar have three additional control
buttons located at the bottom of the mirror. See your
dealer for more information on the system and how to
subscribe to OnStar
®. See the OnStar®owners guide
for more information about the services OnStar
provides.
Press the buttons located at the bottom of the mirror to
turn the map lights on or off.
O(On/Off): Press to turn the dimming feature on or off.
Automatic Dimming Mirror Operation
Automatic dimming reduces the glare of lights from
behind the vehicle. The dimming feature comes on and
the indicator light illuminates each time the vehicle is
started.
Cleaning the Mirror
Do not spray glass cleaner directly on the mirror. Use a
soft towel dampened with water.
Compass
Compass Operation
Y
/O(On/Off): If the vehicle has one of these buttons,
press to turn the compass on or off.
With the compass feature on, each time the vehicle is
started, the compass displays the current compass
direction after a few seconds.
Compass Calibration
If after a few seconds the display does not show a
compass direction, (N for North for example), there may
be a strong magnetic field interfering with the compass.
Interference can be caused by a magnetic antenna
mount, note pad holder, or similar object. If CAL
appears in the compass window, the compass may
need to be reset or calibrated.
3-36
Page 143 of 430
Black plate (37,1)Chevrolet HHR Owner Manual - 2011
To calibrate the compass:1. Make sure CAL is displayed. If CAL is not displayed, press and hold the compass button until
CAL displays.
2. While CAL displays, drive the vehicle in circles at 5 mph (8 km/h) or less until the display reads a
direction.
Compass Variance
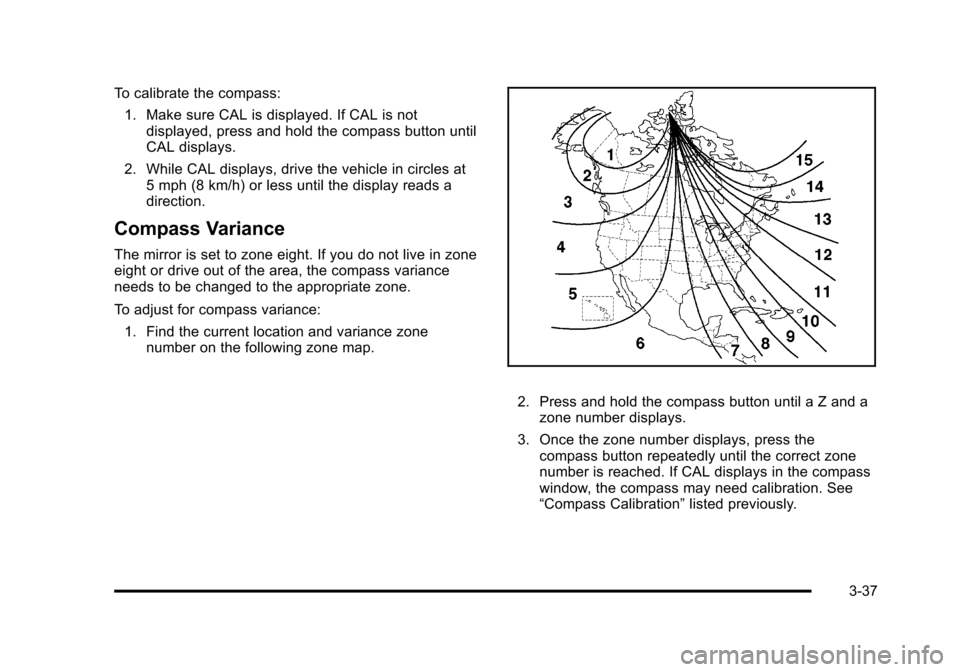
The mirror is set to zone eight. If you do not live in zone
eight or drive out of the area, the compass variance
needs to be changed to the appropriate zone.
To adjust for compass variance:
1. Find the current location and variance zone number on the following zone map.
2. Press and hold the compass button until a Z and a
zone number displays.
3. Once the zone number displays, press the compass button repeatedly until the correct zone
number is reached. If CAL displays in the compass
window, the compass may need calibration. See
“Compass Calibration” listed previously.
3-37
Page 144 of 430
Black plate (38,1)Chevrolet HHR Owner Manual - 2011
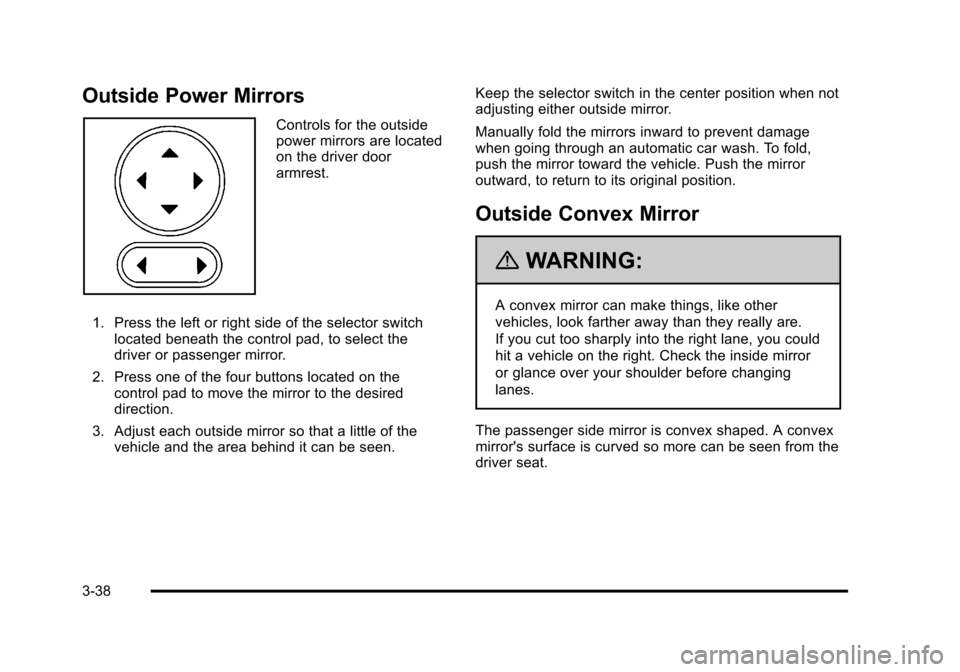
Outside Power Mirrors
Controls for the outside
power mirrors are located
on the driver door
armrest.
1. Press the left or right side of the selector switch located beneath the control pad, to select the
driver or passenger mirror.
2. Press one of the four buttons located on the control pad to move the mirror to the desired
direction.
3. Adjust each outside mirror so that a little of the vehicle and the area behind it can be seen. Keep the selector switch in the center position when not
adjusting either outside mirror.
Manually fold the mirrors inward to prevent damage
when going through an automatic car wash. To fold,
push the mirror toward the vehicle. Push the mirror
outward, to return to its original position.
Outside Convex Mirror
{WARNING:
A convex mirror can make things, like other
vehicles, look farther away than they really are.
If you cut too sharply into the right lane, you could
hit a vehicle on the right. Check the inside mirror
or glance over your shoulder before changing
lanes.
The passenger side mirror is convex shaped. A convex
mirror's surface is curved so more can be seen from the
driver seat.
3-38
Page 145 of 430
Black plate (39,1)Chevrolet HHR Owner Manual - 2011
Object Detection Systems
Rear Vision Camera (RVC)
The vehicle may have a Rear Vision Camera system.
Read this entire section before using it.
{WARNING:
The Rear Vision Camera (RVC) system does not
replace driver vision. RVC does not:
.Detect objects that are outside the camera's
field of view, below the bumper, or underneath
the vehicle.
.Detect children, pedestrians, bicyclists,
or pets.
Do not back the vehicle by only looking at the
RVC screen, or use the screen during longer,
higher speed backing maneuvers or where there
could be cross-traffic. Your judged distances using
the screen will differ from actual distances.
If you do not use proper care before backing up,
you could hit a vehicle, child, pedestrian, bicyclist,
or pet, resulting in vehicle damage, injury, (Continued)
WARNING: (Continued)
or death. Even though the vehicle has the RVC
system, always check carefully before backing up
by checking behind and around the vehicle.
The rear vision camera system is designed to help the
driver when backing up by displaying a view of the area
behind the vehicle. When the key is in the ON/RUN
position and the driver shifts the vehicle into
R (Reverse), the video image automatically appears on
the inside rear view mirror. Once the driver shifts out of
R (Reverse), the video image automatically disappears
from the inside rear view mirror.
Turning the Rear Vision Camera System Off
or On
To turn off the rear vision camera system, press and
hold
z, located on the inside rearview mirror, until the
left indicator light turns off. The rear vision camera
display is now disabled.
To turn the rear vision camera system on again, press
and hold
zuntil the left indicator light illuminates. The
rear vision camera system display is now enabled and
the display will appear in the mirror normally.
3-39
Page 146 of 430
Black plate (40,1)Chevrolet HHR Owner Manual - 2011
Rear Vision Camera Location
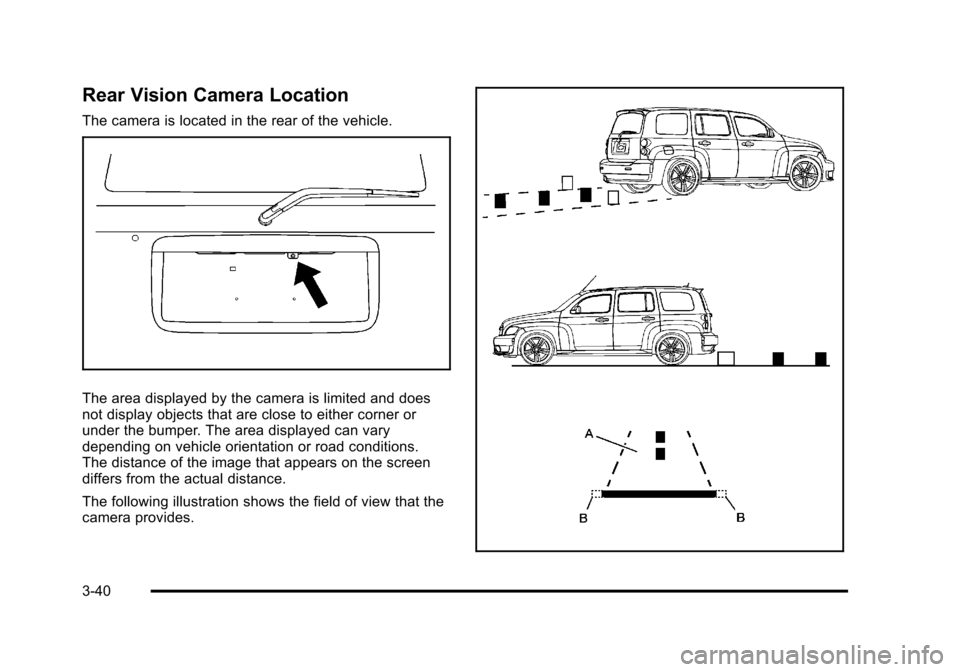
The camera is located in the rear of the vehicle.
The area displayed by the camera is limited and does
not display objects that are close to either corner or
under the bumper. The area displayed can vary
depending on vehicle orientation or road conditions.
The distance of the image that appears on the screen
differs from the actual distance.
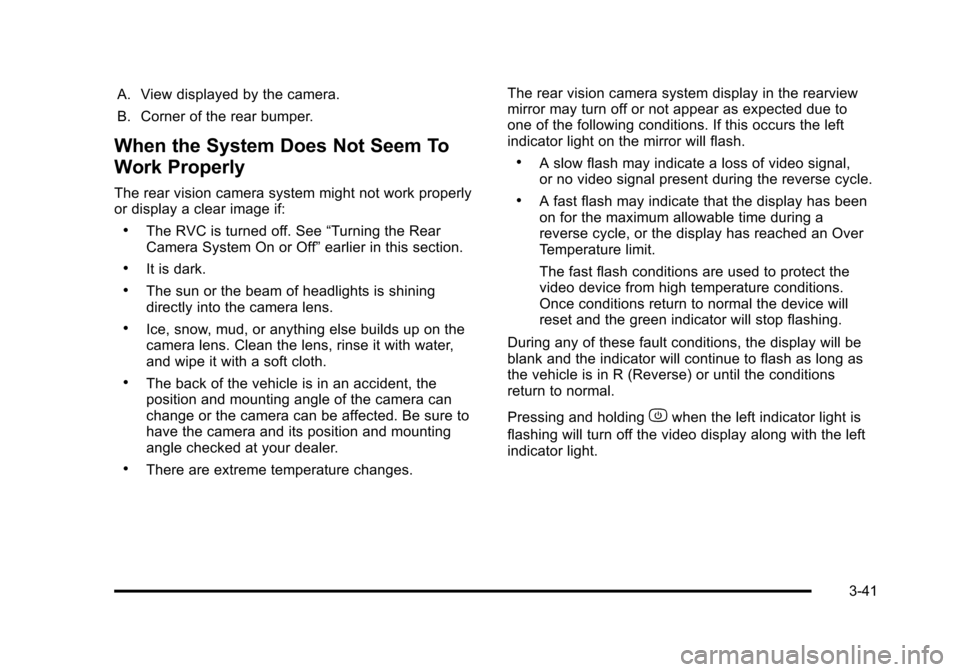
The following illustration shows the field of view that the
camera provides.
3-40
Page 147 of 430
Black plate (41,1)Chevrolet HHR Owner Manual - 2011
A. View displayed by the camera.
B. Corner of the rear bumper.
When the System Does Not Seem To
Work Properly
The rear vision camera system might not work properly
or display a clear image if:
.The RVC is turned off. See“Turning the Rear
Camera System On or Off” earlier in this section.
.It is dark.
.The sun or the beam of headlights is shining
directly into the camera lens.
.Ice, snow, mud, or anything else builds up on the
camera lens. Clean the lens, rinse it with water,
and wipe it with a soft cloth.
.The back of the vehicle is in an accident, the
position and mounting angle of the camera can
change or the camera can be affected. Be sure to
have the camera and its position and mounting
angle checked at your dealer.
.There are extreme temperature changes. The rear vision camera system display in the rearview
mirror may turn off or not appear as expected due to
one of the following conditions. If this occurs the left
indicator light on the mirror will flash.
.A slow flash may indicate a loss of video signal,
or no video signal present during the reverse cycle.
.A fast flash may indicate that the display has been
on for the maximum allowable time during a
reverse cycle, or the display has reached an Over
Temperature limit.
The fast flash conditions are used to protect the
video device from high temperature conditions.
Once conditions return to normal the device will
reset and the green indicator will stop flashing.
During any of these fault conditions, the display will be
blank and the indicator will continue to flash as long as
the vehicle is in R (Reverse) or until the conditions
return to normal.
Pressing and holding
zwhen the left indicator light is
flashing will turn off the video display along with the left
indicator light.
3-41
Page 148 of 430

Black plate (42,1)Chevrolet HHR Owner Manual - 2011
Storage Areas
Glove Box
Lift up on the glove box lever to open it.
Cupholders
There are two cupholders located in the floor console
between the front seats. There is also a cupholder for
the rear seat passenger located at the rear of the floor
console.
Automatic transmission vehicles have a cupholder in
front of the shift lever.
Instrument Panel Storage
The vehicle has a storage compartment on the
instrument panel above the air vents. Push the button
on the compartment to open the cover.
Floor Console Storage Area
There are two small storage compartments on the floor
console.
Floor Mats
{WARNING:
If a floor mat is the wrong size or is not properly
installed, it can interfere with the accelerator pedal
and/or brake pedal. Interference with the pedals
can cause unintended acceleration and/or
increased stopping distance which can cause a
crash and injury. Make sure the floor mat does not
interfere with the accelerator or brake pedal.
Use the following guidelines for proper floor mat usage.
.The original equipment floor mats were designed
for your vehicle. If the floor mats need replacing, it
is recommended that GM certified floor mats be
purchased. Non-GM floor mats may not fit properly
and may interfere with the accelerator or brake
pedal. Always check that the floor mats do not
interfere with the pedals.
.Use the floor mat with the correct side up. Do not
turn it over.
.Do not place anything on top of the driver side
floor mat.
.Use only a single floor mat on the drivers side.
.Do not place one floor mat on top of another.
3-42
Page 149 of 430
Black plate (43,1)Chevrolet HHR Owner Manual - 2011
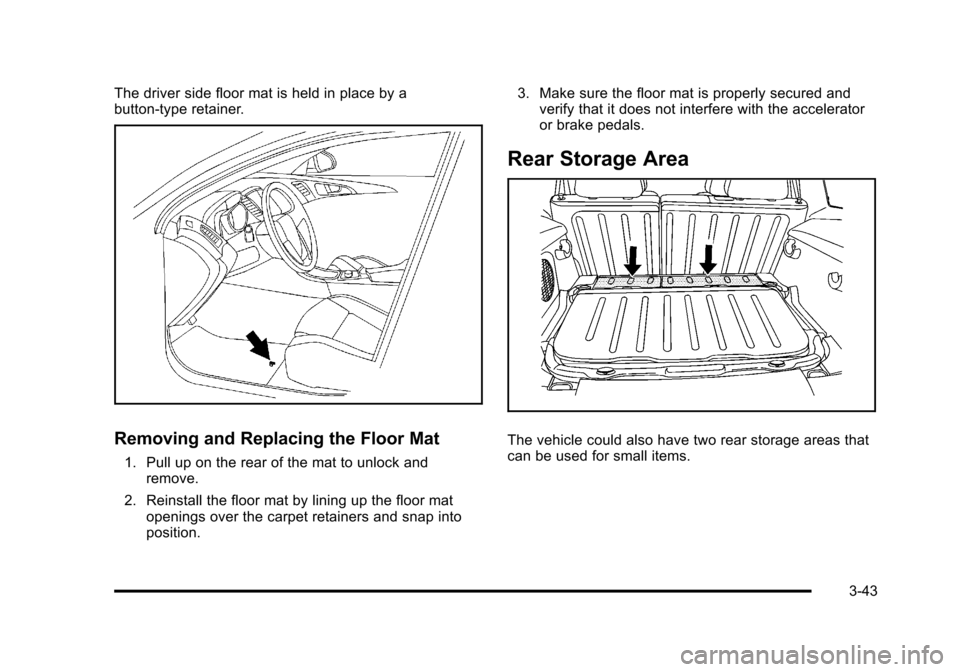
The driver side floor mat is held in place by a
button-type retainer.
Removing and Replacing the Floor Mat
1. Pull up on the rear of the mat to unlock andremove.
2. Reinstall the floor mat by lining up the floor mat openings over the carpet retainers and snap into
position. 3. Make sure the floor mat is properly secured and
verify that it does not interfere with the accelerator
or brake pedals.
Rear Storage Area
The vehicle could also have two rear storage areas that
can be used for small items.
3-43
Page 150 of 430
Black plate (44,1)Chevrolet HHR Owner Manual - 2011
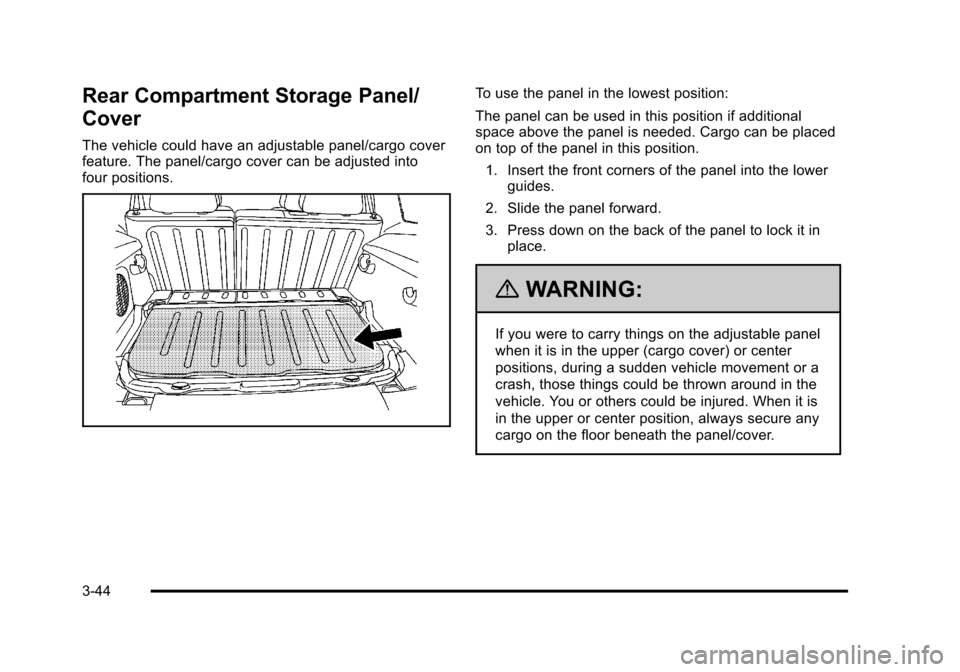
Rear Compartment Storage Panel/
Cover
The vehicle could have an adjustable panel/cargo cover
feature. The panel/cargo cover can be adjusted into
four positions.
To use the panel in the lowest position:
The panel can be used in this position if additional
space above the panel is needed. Cargo can be placed
on top of the panel in this position.1. Insert the front corners of the panel into the lower guides.
2. Slide the panel forward.
3. Press down on the back of the panel to lock it in place.
{WARNING:
If you were to carry things on the adjustable panel
when it is in the upper (cargo cover) or center
positions, during a sudden vehicle movement or a
crash, those things could be thrown around in the
vehicle. You or others could be injured. When it is
in the upper or center position, always secure any
cargo on the floor beneath the panel/cover.
3-44