stop start CHEVROLET HHR 2011 1.G Owner's Manual
[x] Cancel search | Manufacturer: CHEVROLET, Model Year: 2011, Model line: HHR, Model: CHEVROLET HHR 2011 1.GPages: 430, PDF Size: 4.57 MB
Page 273 of 430
Black plate (35,1)Chevrolet HHR Owner Manual - 2011
Before starting, check all trailer hitch parts and
attachments, safety chains, electrical connectors,
lamps, tires and mirror adjustments. If the trailer has
electric brakes, start the vehicle and trailer moving and
then apply the trailer brake controller by hand to be sure
the brakes are working. This checks the electrical
connection at the same time.
During the trip, check occasionally to be sure that the
load is secure, and that the lamps and any trailer
brakes are still working.
Following Distance
Stay at least twice as far behind the vehicle ahead as
you would when driving the vehicle without a trailer.
This can help to avoid situations that require heavy
braking and sudden turns.
Passing
More passing distance is needed when towing a trailer.
Because the rig is longer, it is necessary to go much
farther beyond the passed vehicle before returning to
the lane.
Backing Up
Hold the bottom of the steering wheel with one hand.
Then, to move the trailer to the left, move that hand to
the left. To move the trailer to the right, move your hand
to the right. Always back up slowly and, if possible,
have someone guide you.
Making Turns
When turning with a trailer, make wider turns than
normal. Do this so the trailer will not strike soft
shoulders, curbs, road signs, trees or other objects.
Avoid jerky or sudden maneuvers. Signal well in
advance.
Turn Signals When Towing a Trailer
The arrows on the instrument panel flash whenever
signaling a turn or lane change. Properly hooked up,
the trailer lamps also flash, telling other drivers the
vehicle is turning, changing lanes or stopping.
When towing a trailer, the arrows on the instrument
panel flash for turns even if the bulbs on the trailer are
burned out. For this reason you may think other drivers
are seeing the signal when they are not. It is important
to check occasionally to be sure the trailer bulbs are still
working.
5-35
Page 274 of 430
Black plate (36,1)Chevrolet HHR Owner Manual - 2011
Driving on Grades
Notice:Do not tow on steep continuous grades
exceeding 9.6 km (6 miles). Extended, higher than
normal engine and transmission temperatures may
result and damage the vehicle. Frequent stops are
very important to allow the engine and transmission
to cool.
When towing under severe conditions such as hot
ambient temperatures or steep grades, the vehicle may
experience more transmission shifting. A COOLING
MODE ON message may also appear in the DIC. This
alerts the driver that the shifting mode is in progress
and is aiding engine cooling. See DIC Warnings and
Messages
on page 4‑40DIC Warnings and Messages
for more information.
Reduce speed and shift to a lower gear beforestarting
down a long or steep downgrade. If the transmission is
not shifted down, the brakes might have to be used so
much that they would get hot and no longer work well.
Pay attention to the engine coolant gauge. If the
indicator is in the red area, turn off the air conditioning
to reduce engine load. See Engine Overheating
on
page 6‑28.
Parking on Hills
{WARNING:
Parking the vehicle on a hill with the trailer
attached can be dangerous. If something goes
wrong, the rig could start to move. People can be
injured, and both the vehicle and the trailer can be
damaged. When possible, always park the rig on
a flat surface.
If parking the rig on a hill: 1. Press the brake pedal, but do not shift into P (Park) yet. Turn the wheels into the curb if facing downhill
or into traffic if facing uphill.
2. Have someone place chocks under the trailer wheels.
3. When the wheel chocks are in place, release the brake pedal until the chocks absorb the load.
4. Reapply the brake pedal. Then apply the parking brake and shift into P (Park).
5. Release the brake pedal.
5-36
Page 275 of 430
Black plate (37,1)Chevrolet HHR Owner Manual - 2011
Leaving After Parking on a Hill
1. Apply and hold the brake pedal while you:
.start the engine,
.shift into a gear, and
.release the parking brake.
2. Let up on the brake pedal.
3. Drive slowly until the trailer is clear of the chocks.
4. Stop and have someone pick up and store the chocks.
Maintenance When Trailer Towing
The vehicle needs service more often when pulling a
trailer. See this manual's Maintenance Schedule or
Index for more information. Things that are especially
important in trailer operation are automatic transmission
fluid, engine oil, axle lubricant, belts, cooling system
and brake system. It is a good idea to inspect these
before and during the trip.
Check periodically to see that all hitch nuts and bolts
are tight.
Engine Cooling When Trailer Towing
The cooling system may temporarily overheat during
severe operating conditions. See Engine Overheating
on page 6‑28.
Towing a Trailer (Manual
Transmission)
Do not tow a trailer if the vehicle is equipped with a
manual transmission.
5-37
Page 277 of 430
Black plate (1,1)Chevrolet HHR Owner Manual - 2011
Section 6 Service and Appearance Care
Service. . . . . . . . . . . . . . . . . . . . . . . . . . . . . . . . . . . . . . . . . . . . . 6-3
Accessories and Modifications . . . . . . . . . . . . . . . . . . 6-3
California Proposition 65 Warning . . . . . . . . . . . . . . . 6-4
California Perchlorate Materials Requirements . . . . . . . . . . . . . . . . . . . . . . . . . . . . . . . . . 6-4
Doing Your Own Service Work . . . . . . . . . . . . . . . . . . 6-4
Adding Equipment to the Outside of the Vehicle . . . . . . . . . . . . . . . . . . . . . . . . . . . . . . . . . . . . . . . . 6-5
Fuel . . . . . . . . . . . . . . . . . . . . . . . . . . . . . . . . . . . . . . . . . . . . . . . . . 6-5
Gasoline Octane . . . . . . . . . . . . . . . . . . . . . . . . . . . . . . . . 6-6
Gasoline Specifications . . . . . . . . . . . . . . . . . . . . . . . . . 6-6
California Fuel . . . . . . . . . . . . . . . . . . . . . . . . . . . . . . . . . . 6-6
Additives . . . . . . . . . . . . . . . . . . . . . . . . . . . . . . . . . . . . . . . . 6-7
Fuel E85 (85% Ethanol) . . . . . . . . . . . . . . . . . . . . . . . . . 6-8
Fuels in Foreign Countries . . . . . . . . . . . . . . . . . . . . . . 6-9
Filling the Tank . . . . . . . . . . . . . . . . . . . . . . . . . . . . . . . . . . 6-9
Filling a Portable Fuel Container . . . . . . . . . . . . . . . 6-12
Checking Things Under the Hood . . . . . . . . . . . . . . .6-12
Hood Release . . . . . . . . . . . . . . . . . . . . . . . . . . . . . . . . . 6-13
Engine Compartment Overview . . . . . . . . . . . . . . . . 6-14
Engine Oil . . . . . . . . . . . . . . . . . . . . . . . . . . . . . . . . . . . . . 6-16
Engine Oil Life System . . . . . . . . . . . . . . . . . . . . . . . . 6-19
Engine Air Cleaner/Filter . . . . . . . . . . . . . . . . . . . . . . . 6-20
Automatic Transmission Fluid . . . . . . . . . . . . . . . . . . 6-21
Manual Transmission Fluid . . . . . . . . . . . . . . . . . . . . 6-22
Hydraulic Clutch . . . . . . . . . . . . . . . . . . . . . . . . . . . . . . . 6-22 Cooling System . . . . . . . . . . . . . . . . . . . . . . . . . . . . . . . . 6-22
Engine Coolant . . . . . . . . . . . . . . . . . . . . . . . . . . . . . . . . 6-24
Engine Overheating . . . . . . . . . . . . . . . . . . . . . . . . . . . 6-28
Windshield Washer Fluid . . . . . . . . . . . . . . . . . . . . . . 6-30
Brakes . . . . . . . . . . . . . . . . . . . . . . . . . . . . . . . . . . . . . . . . . 6-30
Battery . . . . . . . . . . . . . . . . . . . . . . . . . . . . . . . . . . . . . . . . . 6-33
Jump Starting . . . . . . . . . . . . . . . . . . . . . . . . . . . . . . . . . . 6-34
Headlamp Aiming . . . . . . . . . . . . . . . . . . . . . . . . . . . . . . . . 6-38
Bulb Replacement . . . . . . . . . . . . . . . . . . . . . . . . . . . . . . . . 6-41
Halogen Bulbs . . . . . . . . . . . . . . . . . . . . . . . . . . . . . . . . . 6-41
Headlamps, Front Turn Signal, and Parking Lamps . . . . . . . . . . . . . . . . . . . . . . . . . . . . . . . . . . . . . . . 6-41
Center High-Mounted Stoplamp (CHMSL) . . . . . 6-43
Taillamps, Turn Signal, Stoplamps and Back-up Lamps . . . . . . . . . . . . . . . . . . . . . . . . . . . . . . . . . . . . . . . 6-44
License Plate Lamp . . . . . . . . . . . . . . . . . . . . . . . . . . . . 6-45
Replacement Bulbs . . . . . . . . . . . . . . . . . . . . . . . . . . . . 6-45
Windshield Wiper Blade Replacement . . . . . . . . . . .6-46
Tires . . . . . . . . . . . . . . . . . . . . . . . . . . . . . . . . . . . . . . . . . . . . . . . 6-47
Tire Sidewall Labeling . . . . . . . . . . . . . . . . . . . . . . . . . 6-48
Tire Terminology and Definitions . . . . . . . . . . . . . . . 6-51
Inflation - Tire Pressure . . . . . . . . . . . . . . . . . . . . . . . . 6-54
Tire Pressure Monitor System . . . . . . . . . . . . . . . . . 6-55
Tire Pressure Monitor Operation . . . . . . . . . . . . . . . 6-57
Tire Inspection and Rotation . . . . . . . . . . . . . . . . . . . 6-60
6-1
Page 303 of 430
Black plate (27,1)Chevrolet HHR Owner Manual - 2011
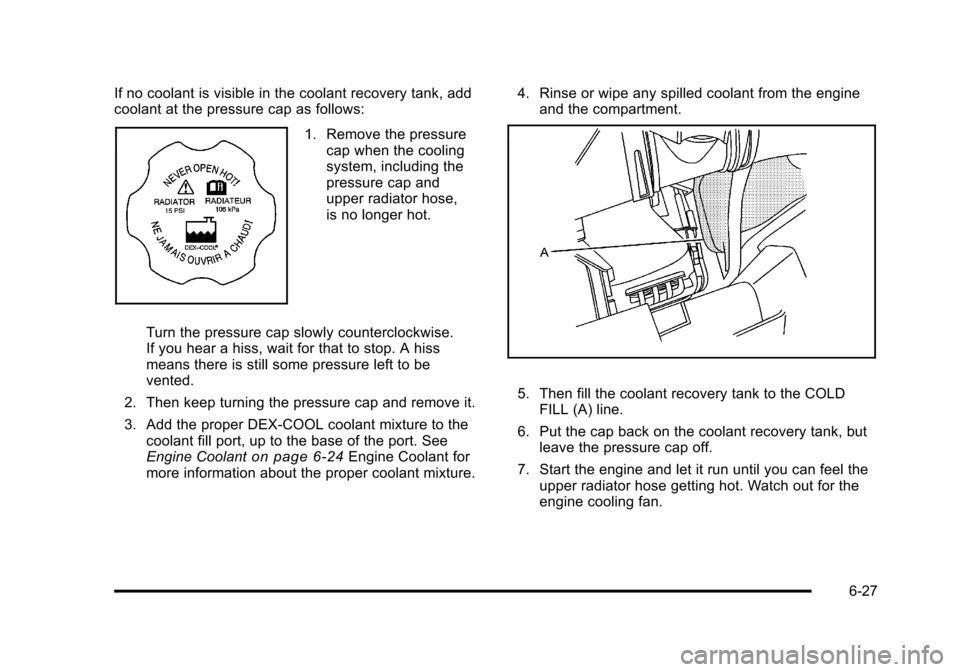
If no coolant is visible in the coolant recovery tank, add
coolant at the pressure cap as follows:
1. Remove the pressurecap when the cooling
system, including the
pressure cap and
upper radiator hose,
is no longer hot.
Turn the pressure cap slowly counterclockwise.
If you hear a hiss, wait for that to stop. A hiss
means there is still some pressure left to be
vented.
2. Then keep turning the pressure cap and remove it.
3. Add the proper DEX-COOL coolant mixture to the coolant fill port, up to the base of the port. See
Engine Coolant
on page 6‑24Engine Coolant for
more information about the proper coolant mixture. 4. Rinse or wipe any spilled coolant from the engine
and the compartment.
5. Then fill the coolant recovery tank to the COLDFILL (A) line.
6. Put the cap back on the coolant recovery tank, but leave the pressure cap off.
7. Start the engine and let it run until you can feel the upper radiator hose getting hot. Watch out for the
engine cooling fan.
6-27
Page 332 of 430
Black plate (56,1)Chevrolet HHR Owner Manual - 2011
Accordingly, when the low tire pressure telltale
illuminates, you should stop and check your tires as
soon as possible, and inflate them to the proper
pressure. Driving on a significantly under‐inflated tire
causes the tire to overheat and can lead to tire failure.
Under‐inflation also reduces fuel efficiency and tire
tread life, and may affect the vehicle's handling and
stopping ability.
Please note that the TPMS is not a substitute for proper
tire maintenance, and it is the driver's responsibility to
maintain correct tire pressure, even if under‐inflation
has not reached the level to trigger illumination of the
TPMS low tire pressure telltale.
Your vehicle has also been equipped with a TPMS
malfunction indicator to indicate when the system is not
operating properly. The TPMS malfunction indicator is
combined with the low tire pressure telltale. When the
system detects a malfunction, the telltale will flash for
approximately one minute and then remain continuously
illuminated. This sequence will continue upon
subsequent vehicle start‐ups as long as the malfunction
exists.When the malfunction indicator is illuminated, the
system may not be able to detect or signal low tire
pressure as intended. TPMS malfunctions may occur
for a variety of reasons, including the installation of
replacement or alternate tires or wheels on the vehicle
that prevent the TPMS from functioning properly.
Always check the TPMS malfunction telltale after
replacing one or more tires or wheels on your vehicle to
ensure that the replacement or alternate tires and
wheels allow the TPMS to continue to function properly.
See
Tire Pressure Monitor Operation
on page 6‑57for
additional information.
Federal Communications Commission
(FCC) and Industry Canada
See Radio Frequency Statementon page 8‑17for
information regarding Part 15 of the Federal
Communications Commission (FCC) rules and Industry
Canada Standards RSS-210/220/310.
6-56
Page 333 of 430
Black plate (57,1)Chevrolet HHR Owner Manual - 2011
Tire Pressure Monitor Operation
This vehicle may have a Tire Pressure Monitor System
(TPMS). The TPMS is designed to warn the driver when
a low tire pressure condition exists. If your vehicle has
this feature, TPMS sensors are mounted onto each tire
and wheel assembly, excluding the spare tire and wheel
assembly. The TPMS sensors monitor the air pressure
in the vehicle's tires and transmits the tire pressure
readings to a receiver located in the vehicle.
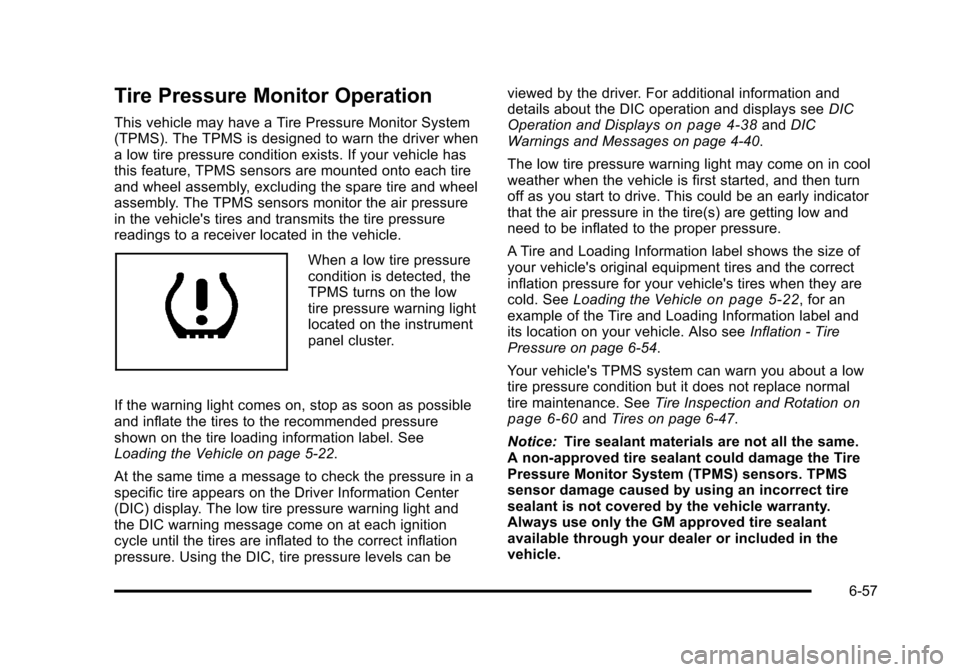
When a low tire pressure
condition is detected, the
TPMS turns on the low
tire pressure warning light
located on the instrument
panel cluster.
If the warning light comes on, stop as soon as possible
and inflate the tires to the recommended pressure
shown on the tire loading information label. See
Loading the Vehicle on page 5‑22.
At the same time a message to check the pressure in a
specific tire appears on the Driver Information Center
(DIC) display. The low tire pressure warning light and
the DIC warning message come on at each ignition
cycle until the tires are inflated to the correct inflation
pressure. Using the DIC, tire pressure levels can be viewed by the driver. For additional information and
details about the DIC operation and displays see
DIC
Operation and Displays
on page 4‑38and DIC
Warnings and Messages on page 4‑40.
The low tire pressure warning light may come on in cool
weather when the vehicle is first started, and then turn
off as you start to drive. This could be an early indicator
that the air pressure in the tire(s) are getting low and
need to be inflated to the proper pressure.
A Tire and Loading Information label shows the size of
your vehicle's original equipment tires and the correct
inflation pressure for your vehicle's tires when they are
cold. See Loading the Vehicle
on page 5‑22, for an
example of the Tire and Loading Information label and
its location on your vehicle. Also see Inflation - Tire
Pressure on page 6‑54.
Your vehicle's TPMS system can warn you about a low
tire pressure condition but it does not replace normal
tire maintenance. See Tire Inspection and Rotation
on
page 6‑60and Tires on page 6‑47.
Notice: Tire sealant materials are not all the same.
A non-approved tire sealant could damage the Tire
Pressure Monitor System (TPMS) sensors. TPMS
sensor damage caused by using an incorrect tire
sealant is not covered by the vehicle warranty.
Always use only the GM approved tire sealant
available through your dealer or included in the
vehicle.
6-57
Page 335 of 430
Black plate (59,1)Chevrolet HHR Owner Manual - 2011
TPMS Sensor Matching Process
Each TPMS sensor has a unique identification code.
Any time you replace one or more of the TPMS sensors
or rotate the vehicle's tires, the identification codes
need to be matched to the new tire/wheel location. The
sensors are matched, to the tire/wheel locations, in the
following order: driver side front tire, passenger side
front tire, passenger side rear tire, and driver side rear
tire using a TPMS diagnostic tool. See your dealer for
service.
The TPMS sensors can also be matched to each tire/
wheel position by increasing or decreasing the tire's air
pressure. When increasing the tire's pressure, do not
exceed the maximum inflation pressure indicated on the
tire's sidewall. To decrease the tire's air-pressure use
the pointed end of the valve cap, a pencil-style air
pressure gauge, or a key.
You have two minutes to match each tire and wheel
position. If it takes longer than two minutes to match
any tire and wheel position, the matching process stops
and you need to start over.
The TPMS matching process is outlined below:1. Set the parking brake.
2. Turn the ignition switch to ON/RUN with the engine off. 3. Press and hold the Remote Keyless Entry (RKE)
transmitter's LOCK and UNLOCK buttons, at the
same time, for about five seconds to start the
TPMS learn mode. The horn sounds twice
indicating the TPMS receiver is ready and in
learn mode.
4. Start with the driver side front tire. The driver side front turn signal also comes on to indicate that
corner's sensor is ready to be learned.
5. Remove the valve cap from the tire's valve stem. Activate the TPMS sensor by increasing or
decreasing the tire's air pressure for about
eight seconds. The horn chirp, can take up to
30 seconds to sound. It chirps one time and then
all the turn signals flash one time to confirm the
sensor identification code has been matched to the
tire/wheel position.
6. The passenger side front turn signal comes on to indicate that corner sensor is ready to be learned.
Proceed to the passenger side front tire and repeat
the procedure in Step 5.
7. The passenger side rear turn signal comes on to indicate that corner sensor is ready to be learned.
Proceed to the passenger side rear tire and repeat
the procedure in Step 5.
6-59
Page 336 of 430
Black plate (60,1)Chevrolet HHR Owner Manual - 2011
8. The driver side rear turn signal comes on toindicate that corner sensor is ready to be learned.
Proceed to the driver side rear tire, and repeat the
procedure in Step 5.
9. After hearing the single horn chirp for the driver side rear tire, two additional horn chirps sound to
indicate the tire learning process is done. Turn the
ignition switch to LOCK/OFF.
If no tires are learned after entering the TPMS
learn mode, or if communication with the receiver
stops, or if the time limit has expired, turn the
ignition switch to LOCK/OFF and start over
beginning with Step 2.
10. Set all four tires to the recommended air pressure level as indicated on the Tire and Loading
Information label.
11. Put the valve caps back on the valve stems.
Tire Inspection and Rotation
We recommend that you regularly inspect your
vehicle's tires, including the spare tire, for signs of
wear or damage. See When It Is Time for New
Tires
on page 6‑62for more information. Always remove the tires if any of the following
statements are true:
.You can see the indicators at three or more
places around the tire.
.You can see cord or fabric showing through
the tire's rubber.
.The tread or sidewall is cracked, cut,
or snagged deep enough to show cord or
fabric.
.The tire has a bump, bulge, or split.
.The tire has a puncture, cut, or other damage
that cannot be repaired well because of the
size or location of the damage.
Tires should be rotated every 12 000 km
(7,500 miles). See Scheduled Maintenance
on
page 7‑3
.
The purpose of a regular tire rotation is to achieve
a uniform wear for all tires on the vehicle. This will
ensure that your vehicle continues to perform
most like it did when the tires were new.
6-60
Page 428 of 430

Black plate (12,1)Chevrolet HHR Owner Manual - 2011
ShiftingOut of Park . . . . . . . . . . . . . . . . . . . . . . . . . . . . . . . . . . . . . . . 3-33
Shifting Into Park . . . . . . . . . . . . . . . . . . . . . . . . . . . . . . . . . . 3-31
Signals, Turn and Lane-Change . . . . . . . . . . . . . . . . . . . . .4-4
Spare Tire Compact . . . . . . . . . . . . . . . . . . . . . . . . . . . . . . . . . . . . . . . . . . 6-91
Installing . . . . . . . . . . . . . . . . . . . . . . . . . . . . . . . . . . . . . . . . . . 6-82
Removing . . . . . . . . . . . . . . . . . . . . . . . . . . . . . . . . . . . . . . . . 6-80
Storing . . . . . . . . . . . . . . . . . . . . . . . . . . . . . . . . . . . . . . . . . . . 6-87
Specifications and Capacities . . . . . . . . . . . . . . . . . . . . . 6-107
Speedometer . . . . . . . . . . . . . . . . . . . . . . . . . . . . . . . . . . . . . . 4-24
Split Folding Rear Seat . . . . . . . . . . . . . . . . . . . . . . . . . . . . 2-12
Start Vehicle, Remote . . . . . . . . . . . . . . . . . . . . . . . . . . . . . . .3-6
Starting the Engine . . . . . . . . . . . . . . . . . . . . . . . . . . . . . . . . 3-24
Steering . . . . . . . . . . . . . . . . . . . . . . . . . . . . . . . . . . . . . . . . . . . 5-12
Steering Wheel Controls, Audio . . . . . . . . . . . . . . . . . . . 4-79
Steering Wheel, Tilt Wheel . . . . . . . . . . . . . . . . . . . . . . . . . .4-3
Storage Areas Convenience Net . . . . . . . . . . . . . . . . . . . . . . . . . . . . . . . . . 3-46
Cupholders . . . . . . . . . . . . . . . . . . . . . . . . . . . . . . . . . . . . . . . 3-42
Floor Console Storage Area . . . . . . . . . . . . . . . . . . . . . . 3-42
Glove Box . . . . . . . . . . . . . . . . . . . . . . . . . . . . . . . . . . . . . . . . 3-42
Hideaway Rear Storage Bins . . . . . . . . . . . . . . . . . . . . . 3-47
Instrument Panel . . . . . . . . . . . . . . . . . . . . . . . . . . . . . . . . . 3-42
Rear . . . . . . . . . . . . . . . . . . . . . . . . . . . . . . . . . . . . . . . . . . . . . . 3-43
Rear Compartment Storage Panel/Cover . . . . . . . . . 3-44
Roof Rack System . . . . . . . . . . . . . . . . . . . . . . . . . . . . . . . . 3-46
Storing the Tire Sealant and Compressor Kit . . . . . . 6-78 Stuck in Sand, Mud, Ice, or Snow . . . . . . . . . . . . . . . . . 5-21
Sun Visors . . . . . . . . . . . . . . . . . . . . . . . . . . . . . . . . . . . . . . . . . 3-17
Sunroof . . . . . . . . . . . . . . . . . . . . . . . . . . . . . . . . . . . . . . . . . . . . 3-48
T
Tachometer . . . . . . . . . . . . . . . . . . . . . . . . . . . . . . . . . . . . . . . . 4-24
Taillamps
Turn Signal, Stoplamps and Back-up Lamps . . . . . . 6-44
Text Telephone (TTY) Users . . . . . . . . . . . . . . . . . . . . . . . . .8-5
Theft-Deterrent Feature . . . . . . . . . . . . . . . . . . . . . . . . . . . . 4-79
Theft-Deterrent Systems . . . . . . . . . . . . . . . . . . . . . . . . . . . 3-17
Content Theft-Deterrent . . . . . . . . . . . . . . . . . . . . . . . . . . 3-17
PASS-Key
®III+ Electronic Immobilizer . . . . . . . . . . . . 3-19
PASS-Key®III+ Electronic Immobilizer
Operation . . . . . . . . . . . . . . . . . . . . . . . . . . . . . . . . . . . . . . . 3-19
Tilt Wheel . . . . . . . . . . . . . . . . . . . . . . . . . . . . . . . . . . . . . . . . . . . .4-3
Time, Setting . . . . . . . . . . . . . . . . . . . . . . . . . . . . . . . . . . . . . . 4-51
Tires . . . . . . . . . . . . . . . . . . . . . . . . . . . . . . . . . . . . . . . . . . . . . . . 6-47 Aluminum or Chrome-Plated Wheels, Cleaning . . . 6-97
Buying New Tires . . . . . . . . . . . . . . . . . . . . . . . . . . . . . . . . . 6-62
Chains . . . . . . . . . . . . . . . . . . . . . . . . . . . . . . . . . . . . . . . . . . . . 6-68
Changing a Flat Tire . . . . . . . . . . . . . . . . . . . . . . . . . . . . . . 6-78
Cleaning . . . . . . . . . . . . . . . . . . . . . . . . . . . . . . . . . . . . . . . . . . 6-98
Compact Spare . . . . . . . . . . . . . . . . . . . . . . . . . . . . . . . . . . . 6-91
Different Size . . . . . . . . . . . . . . . . . . . . . . . . . . . . . . . . . . . . . 6-65
If a Tire Goes Flat . . . . . . . . . . . . . . . . . . . . . . . . . . . . . . . . 6-68
Inflation - Tire Pressure . . . . . . . . . . . . . . . . . . . . . . . . . . . 6-54
i - 12