CHEVROLET IMPALA 2003 8.G Owners Manual
Manufacturer: CHEVROLET, Model Year: 2003, Model line: IMPALA, Model: CHEVROLET IMPALA 2003 8.GPages: 408, PDF Size: 2.75 MB
Page 311 of 408

Headlamp Aiming
If your vehicle is damaged in an accident, the headlamp
aim may be affected. Aim adjustment to the low beam
may be necessary if it is difficult to see lane markers (for
horizontal aim), or if oncoming drivers ¯ash their high
beams at you (for vertical aim). If you believe your
headlamps need to be re-aimed, we recommend that
you take your vehicle to the dealer for service. However,
it is possible for you to re-aim your headlamps by
following the procedure in the service manual for
your vehicle.
Notice:To make sure your headlamps are aimed
properly, read all the instructions before beginning.
Failure to follow these instructions could cause
damage to headlamp parts.
5-55
Page 312 of 408
Bulb Replacement
For the proper type of replacement bulb, seeReplacement Bulbs on page 5-59.
For any bulb changing procedure not listed in this
section, contact your dealer.
Halogen Bulbs
{CAUTION:
Halogen bulbs have pressurized gas inside
and can burst if you drop or scratch the bulb.
You or others could be injured. Be sure to read
and follow the instructions on the bulb
package.
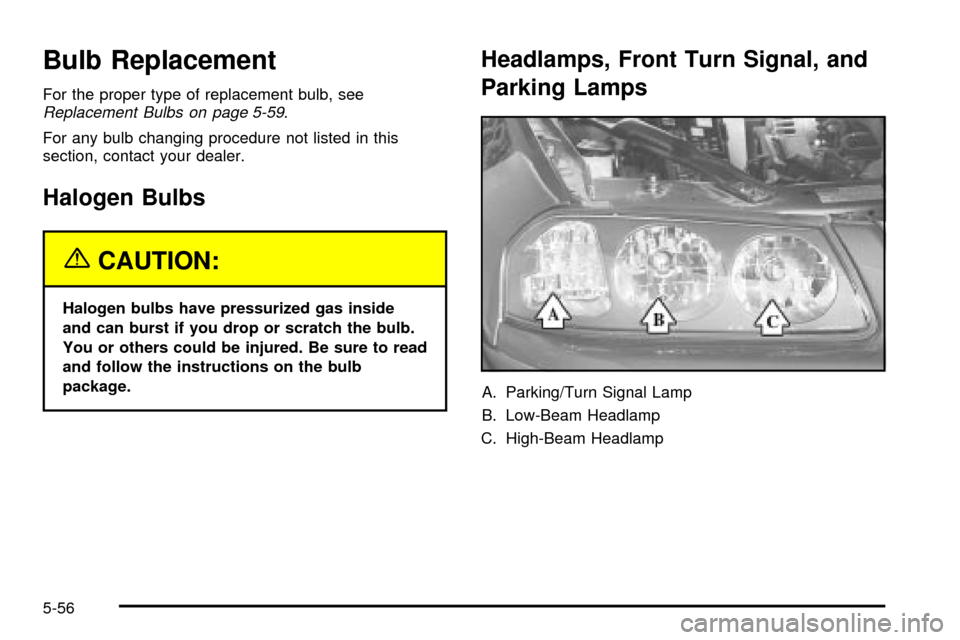
Headlamps, Front Turn Signal, and
Parking Lamps
A. Parking/Turn Signal Lamp
B. Low-Beam Headlamp
C. High-Beam Headlamp
5-56
Page 313 of 408
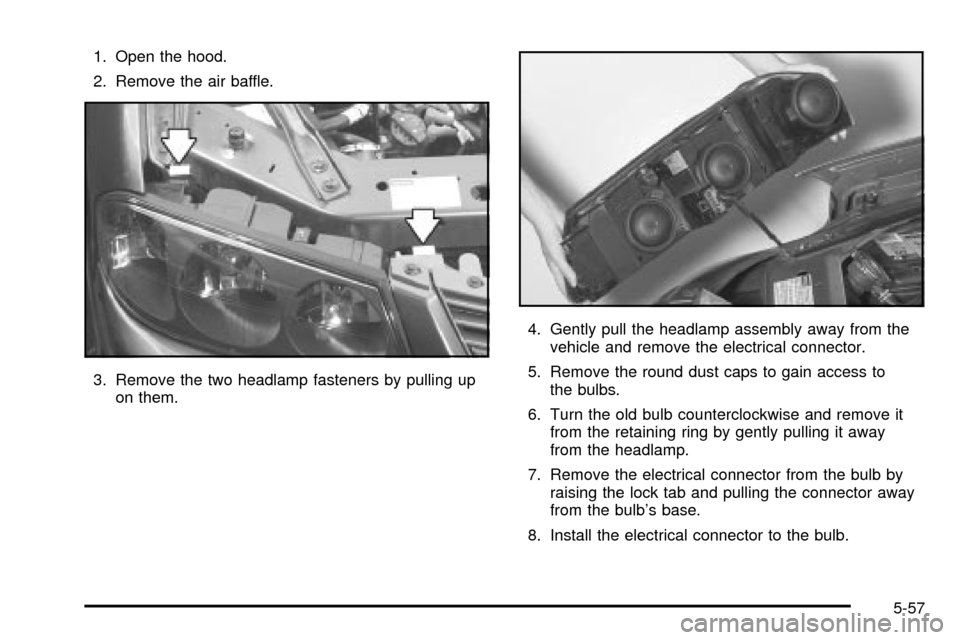
1. Open the hood.
2. Remove the air baffle.
3. Remove the two headlamp fasteners by pulling up
on them.4. Gently pull the headlamp assembly away from the
vehicle and remove the electrical connector.
5. Remove the round dust caps to gain access to
the bulbs.
6. Turn the old bulb counterclockwise and remove it
from the retaining ring by gently pulling it away
from the headlamp.
7. Remove the electrical connector from the bulb by
raising the lock tab and pulling the connector away
from the bulb's base.
8. Install the electrical connector to the bulb.
5-57
Page 314 of 408
9. Install the new bulb by inserting the smallest tab on
the bulb base into the matching notch in the
retaining ring. Turn the bulb a quarter-turn clockwise
until it stops.
10. Reverse Steps 1 through 5 to reinstall the headlamp
assembly. Then, check the lamps.
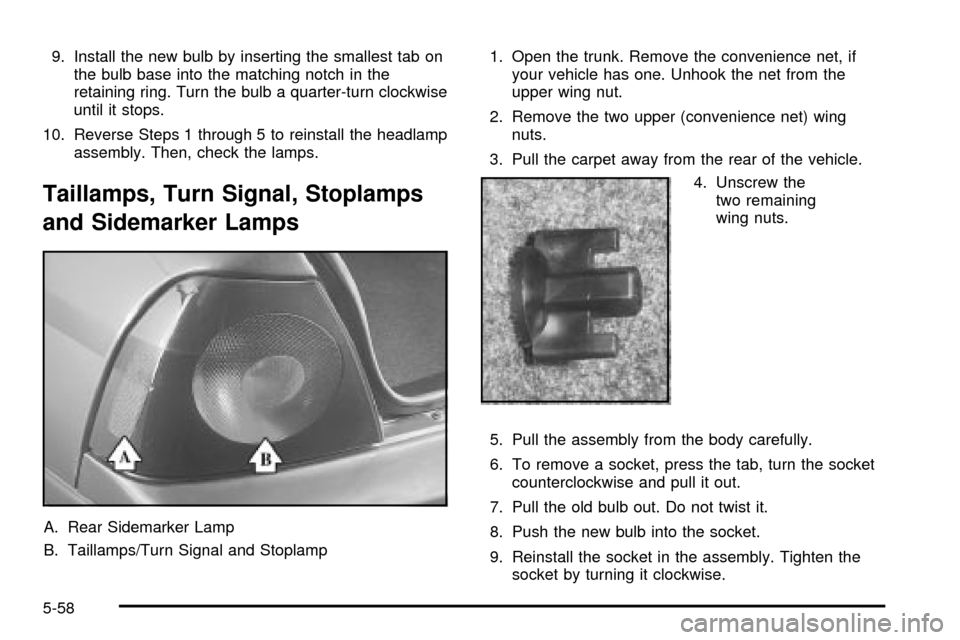
Taillamps, Turn Signal, Stoplamps
and Sidemarker Lamps
A. Rear Sidemarker Lamp
B. Taillamps/Turn Signal and Stoplamp1. Open the trunk. Remove the convenience net, if
your vehicle has one. Unhook the net from the
upper wing nut.
2. Remove the two upper (convenience net) wing
nuts.
3. Pull the carpet away from the rear of the vehicle.
4. Unscrew the
two remaining
wing nuts.
5. Pull the assembly from the body carefully.
6. To remove a socket, press the tab, turn the socket
counterclockwise and pull it out.
7. Pull the old bulb out. Do not twist it.
8. Push the new bulb into the socket.
9. Reinstall the socket in the assembly. Tighten the
socket by turning it clockwise.
5-58
Page 315 of 408
10. Reinstall the assembly and the two lower wing nuts.
11. Reinstall the carpeting.
12. Reinstall the upper (convenience net) wing nut and
convenience net, if equipped.
Back-Up Lamps
The back-up lamps are located in the applique on the
rear of the trunk lid.
1. Open the trunk.
2. Remove the nine wing nuts.
3. Pull the rear trunk applique away from the vehicle.
4. To remove a socket press the tab, turn the
socket counterclockwise and pull it out.
5. Pull the old bulb out. Do not twist it.
6. Push the new bulb into the socket.
7. Reinstall the socket in the assembly. Tighten the
socket by turning it clockwise.
8. Reinstall the applique and the nine wing nuts.
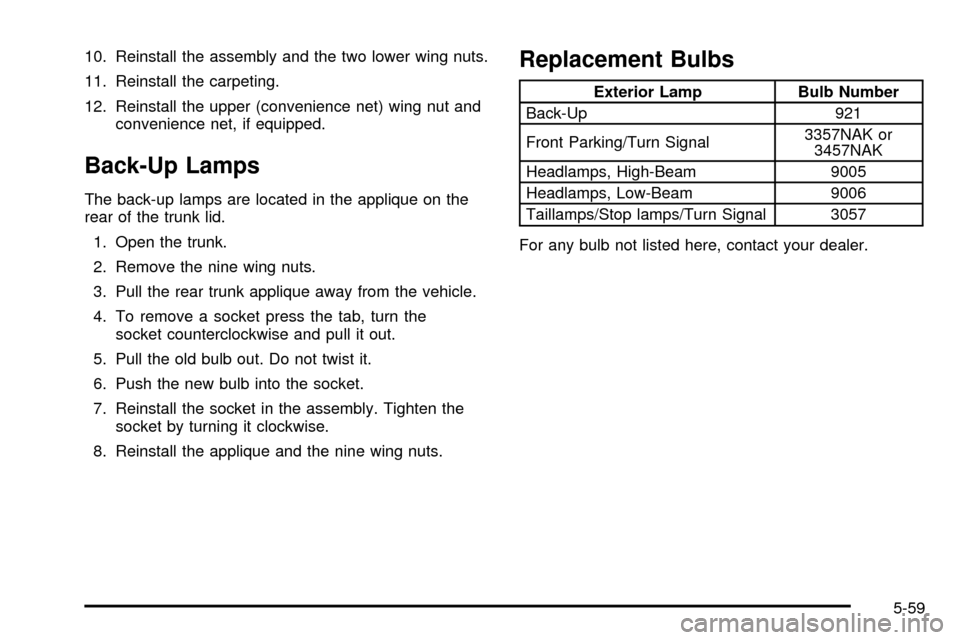
Replacement Bulbs
Exterior Lamp Bulb Number
Back-Up 921
Front Parking/Turn Signal3357NAK or
3457NAK
Headlamps, High-Beam 9005
Headlamps, Low-Beam 9006
Taillamps/Stop lamps/Turn Signal 3057
For any bulb not listed here, contact your dealer.
5-59
Page 316 of 408
Windshield Wiper Blade
Replacement
Windshield wiper blades should be inspected at least
twice a year for wear or cracking. See ªWindshield
Wipers, Blade Checkº under
At Least Twice a Year on
page 6-11for more information.
Replacement blades come in different types and are
removed in different ways. For proper type and length,
see
Normal Maintenance Replacement Parts on
page 5-105. Here's how to remove the wiper blades:
1. Turn on the wipers to the low wipe setting.
2. Turn off the ignition while the wipers are at the
outer positions of the wiper pattern. The blades
are more accessible for removal/replacement while
in this position.
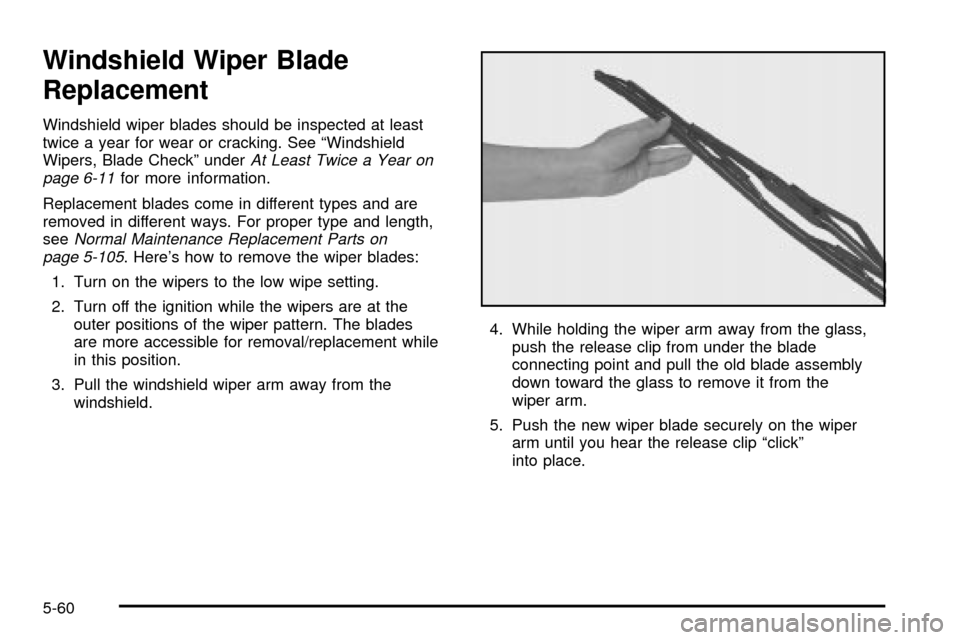
3. Pull the windshield wiper arm away from the
windshield.4. While holding the wiper arm away from the glass,
push the release clip from under the blade
connecting point and pull the old blade assembly
down toward the glass to remove it from the
wiper arm.
5. Push the new wiper blade securely on the wiper
arm until you hear the release clip ªclickº
into place.
5-60
Page 317 of 408
Tires
Your new vehicle comes with high-quality tires made by
a leading tire manufacturer. If you ever have questions
about your tire warranty and where to obtain service,
see your Chevrolet Warranty booklet for details.
{CAUTION:
Poorly maintained and improperly used tires
are dangerous.
·Overloading your tires can cause
overheating as a result of too much
friction. You could have an air-out and a
serious accident. See ªLoading Your
Vehicleº in the Index.
CAUTION: (Continued)
CAUTION: (Continued)
·
Underin¯ated tires pose the same danger
as overloaded tires. The resulting accident
could cause serious injury. Check all tires
frequently to maintain the recommended
pressure. Tire pressure should be checked
when your tires are cold.
·Overin¯ated tires are more likely to be cut,
punctured or broken by a sudden impact
Ð such as when you hit a pothole. Keep
tires at the recommended pressure.
·Worn, old tires can cause accidents. If
your tread is badly worn, or if your tires
have been damaged, replace them.
5-61
Page 318 of 408

In¯ation -- Tire Pressure
The Tire-Loading Information label, which is on the
inside of the trunk lid, shows the correct in¯ation
pressures for your tires when they're cold. ªColdº means
your vehicle has been sitting for at least three hours
or driven no more than 1 mile (1.6 km).
Notice:Don't let anyone tell you that underin¯ation
or overin¯ation is all right. It's not. If your tires
don't have enough air (underin¯ation), you can get
the following:
·Too much ¯exing
·Too much heat
·Tire overloading
·Bad wear
·Bad handling
·Bad fuel economy
If your tires have too much air (overin¯ation), you
can get the following:
·Unusual wear
·Bad handling
·Rough ride
·Needless damage from road hazards
When to Check
Check your tires once a month or more.
Don't forget your compact spare tire. It should be at
60 psi (420 kPa).
How to Check
Use a good quality pocket-type gage to check tire
pressure. You can't tell if your tires are properly in¯ated
simply by looking at them. Radial tires may look
properly in¯ated even when they're underin¯ated.
Be sure to put the valve caps back on the valve
stems. They help prevent leaks by keeping out dirt
and moisture.
5-62
Page 319 of 408

Tire Pressure Monitor System
If your vehicle has the tire pressure monitor system, it
can alert you to a large change in the pressure of
one tire. The system ªlearnsº the pressure at each tire
throughout the operating speed range of your vehicle.
The system normally takes between 45 and 90 minutes
of driving to learn the tire pressures. This time may
be longer depending on your individual driving habits.
Learning need not be accumulated during a single
trip. Once learned, the system will remember the tire
pressures until the system is recalibrated.
After the system has learned tire pressures with
properly in¯ated tires, the LOW TIRE PRESSURE
message will come on if the pressure in one tire
becomes 12 psi (83 kPa) lower than the other three
tires. The tire pressure monitor system won't alert you if
the pressure in more than one tire is low, if the
system is not properly calibrated, or if the vehicle is
moving faster than 70 mph (110 km/h).
The tire pressure monitor system detects differences in
tire rotation speeds that are caused by changes in
tire pressure. The system can alert you about a low
tire Ð but it doesn't replace normal tire maintenance.
See
Tires on page 5-61.When the LOW TIRE PRESSURE message comes on,
you should stop as soon as you can and check all
your tires for damage. (If a tire is ¯at, see
If a Tire Goes
Flat on page 5-71.) Also check the tire pressure in all
four tires as soon as you can. SeeIn¯ation -- Tire
Pressure on page 5-62.
The LOW TIRE PRESSURE message will also be
displayed (while the ignition is on) until you reset
(calibrate) the system.
Don't reset the tire pressure monitor system without ®rst
correcting the cause of the problem and checking
and adjusting the pressure in all four tires. If you reset
the system when the tire pressures are incorrect,
the system will not work properly and may not alert you
when a tire is low.
Any time you adjust a tire's pressure, rotate your tires,
or have one or more tires repaired or replaced, you'll
need to reset (calibrate) the tire pressure monitor
system. You'll also need to reset the system whenever
you buy new tires and whenever the vehicle's battery
has been disconnected.
To reset (calibrate) the system: The tire pressure
monitor system can be reset two ways. With the ignition
position at ON, pull the interior lamps control to the
ON and OFF settings three times.
5-63
Page 320 of 408

It can also be reset through the radio using the following
steps:
1. Turn the ignition to ACC or ON and turn the radio
off.
2. Press and hold the TUNE DISP button on the radio
for at least ®ve seconds until SETTINGS is
displayed.
3. Press the SEEK SCAN up or down arrow to scroll
through the main menu.
4. Scroll until TIRE MON appears on the display.
5. Press the 1 PREV or 2 NEXT button to enter the
submenu. RESET will be displayed.
6. Press the TUNE DISP button to reset. A chime will
be heard to verify the new setting and DONE will
be displayed for one second.
7. Once the monitor has been reset, scroll until EXIT
appears on the display.
8. Press the TUNE DISP button to exit programming.
A chime will be heard to verify exit.The system completes the calibration process
during driving.
The system normally takes 15 to 20 minutes of driving
in each of three speed ranges to²learn²tire pressures.
The speed ranges are 15 to 4 mph (25 to 65 km/h),
40 to 65 mph (65 to 105 km/h) and above 65 mph
(105 km/h). When learning is complete, the system will
alert you after two to eight minutes if a tire is 12 psi
(83 kPa) different from the other three tires. Detection
thresholds may be higher and detection times may
be longer on rough roads, curves and at high speeds.
The system is not capable of detection at speeds greater
than 70 mph (110 km/h).
5-64