CHEVROLET IMPALA 2010 9.G Owner's Guide
Manufacturer: CHEVROLET, Model Year: 2010, Model line: IMPALA, Model: CHEVROLET IMPALA 2010 9.GPages: 432, PDF Size: 1.89 MB
Page 31 of 432
Head Restraints...............................................2-2
Front Seats......................................................2-4
Manual Seats................................................2-4
Power Seats..................................................2-5
Manual Lumbar..............................................2-5
Heated Seats.................................................2-6
Reclining Seatbacks........................................2-6
Center Seat . . .................................................2-9
Rear Seats.....................................................2-10
Split Folding Rear Seat.................................2-10
Safety Belts...................................................2-12
Safety Belts: They Are for Everyone................2-12
How to Wear Safety Belts Properly.................2-17
Lap-Shoulder Belt.........................................2-25
Safety Belt Use During Pregnancy..................2-30
Lap Belt......................................................2-30
Safety Belt Extender.....................................2-31
Child Restraints.............................................2-32
Older Children..............................................2-32
Infants and Young Children............................2-35
Child Restraint Systems.................................2-39Where to Put the Restraint.............................2-42
Lower Anchors and Tethers for Children
(LATCH)..................................................2-43
Securing a Child Restraint in a Rear Seat
Position...................................................2-49
Securing a Child Restraint in the Center
Front Seat Position....................................2-52
Securing a Child Restraint in the Right
Front Seat Position....................................2-52
Airbag System...............................................2-56
Where Are the Airbags? . . ..............................2-59
When Should an Airbag Inflate? . . ...................2-61
What Makes an Airbag Inflate?.......................2-63
How Does an Airbag Restrain?.......................2-63
What Will You See After an Airbag Inflates? . . . . .2-64
Passenger Sensing System............................2-66
Servicing Your Airbag-Equipped Vehicle
...........2-72
Adding Equipment to Your Airbag-Equipped
Vehicle....................................................2-73
Restraint System Check..................................2-74
Checking the Restraint Systems......................2-74
Replacing Restraint System Parts After
a Crash...................................................2-75
Section 2 Seats and Restraint System
2-1
Page 32 of 432
Head RestraintsThe front seats have adjustable head restraints in the
outboard seating positions.
{
WARNING:
With head restraints that are not installed and
adjusted properly, there is a greater chance that
occupants will suffer a neck/spinal injury in a
crash. Do not drive until the head restraints for all
occupants are installed and adjusted properly.
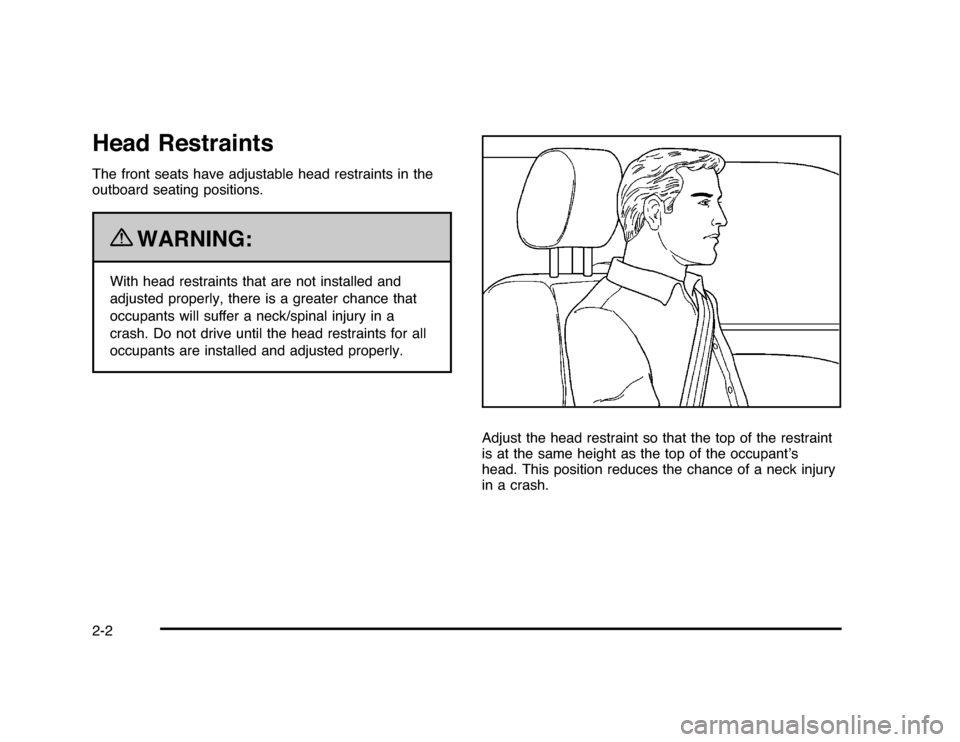
Adjust the head restraint so that the top of the restraint
is at the same height as the top of the occupant’s
head. This position reduces the chance of a neck injury
in a crash.
2-2
Page 33 of 432
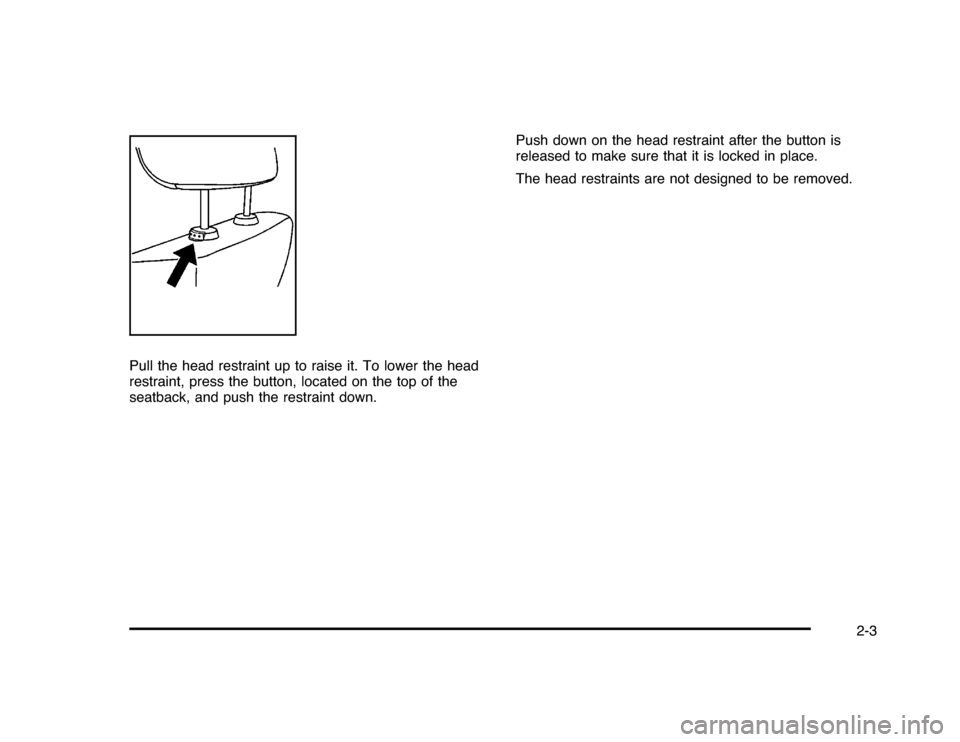
Pull the head restraint up to raise it. To lower the head
restraint, press the button, located on the top of the
seatback, and push the restraint down.Push down on the head restraint after the button is
released to make sure that it is locked in place.
The head restraints are not designed to be removed.
2-3
Page 34 of 432
Front SeatsManual Seats
{
WARNING:
You can lose control of the vehicle if you try to
adjust a manual driver’s seat while the vehicle is
moving. The sudden movement could startle and
confuse you, or make you push a pedal when you
do not want to. Adjust the driver’s seat only when
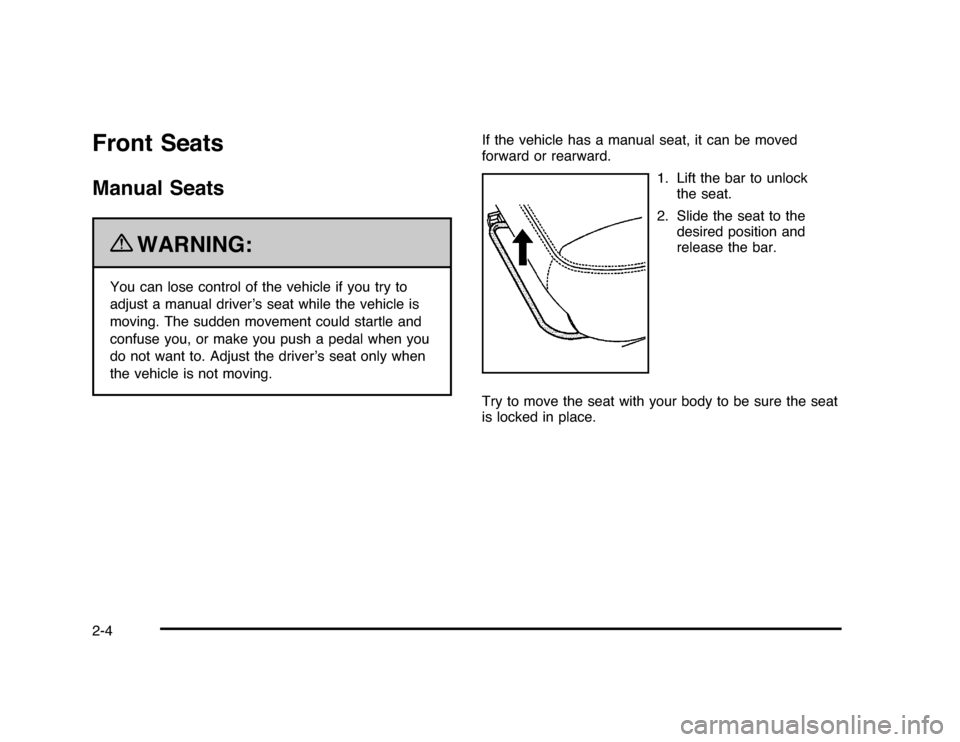
the vehicle is not moving.If the vehicle has a manual seat, it can be moved
forward or rearward.
1. Lift the bar to unlock
the seat.
2. Slide the seat to the
desired position and
release the bar.
Try to move the seat with your body to be sure the seat
is locked in place.
2-4
Page 35 of 432
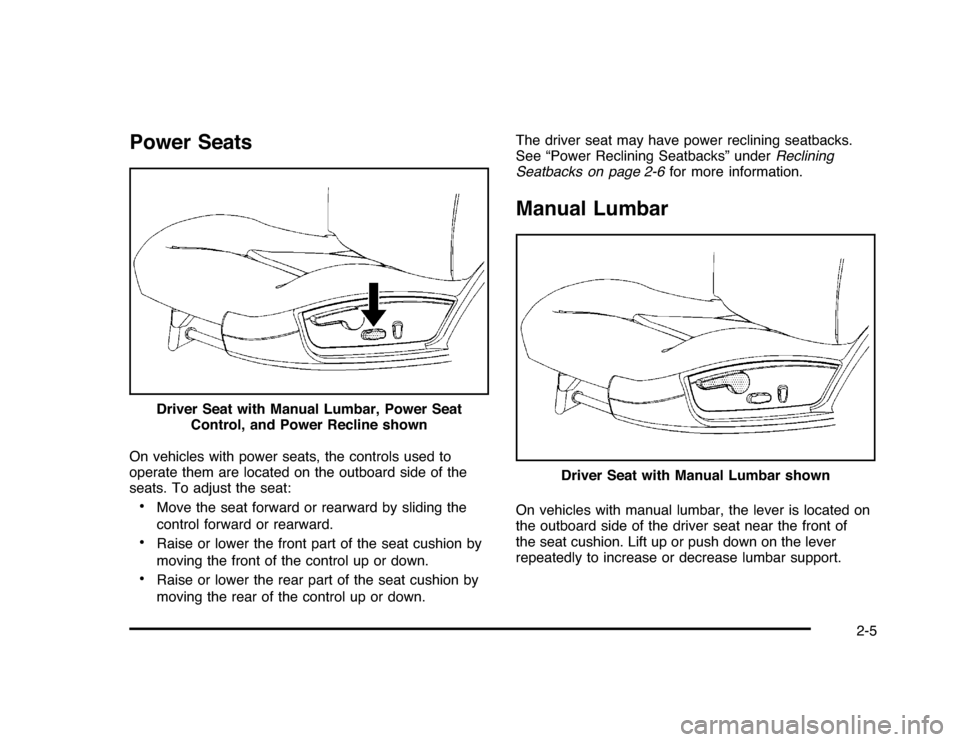
Power SeatsOn vehicles with power seats, the controls used to
operate them are located on the outboard side of the
seats. To adjust the seat:•
Move the seat forward or rearward by sliding the
control forward or rearward.
•
Raise or lower the front part of the seat cushion by
moving the front of the control up or down.
•
Raise or lower the rear part of the seat cushion by
moving the rear of the control up or down.The driver seat may have power reclining seatbacks.
See “Power Reclining Seatbacks” underReclining
Seatbacks on page 2-6for more information.
Manual LumbarOn vehicles with manual lumbar, the lever is located on
the outboard side of the driver seat near the front of
the seat cushion. Lift up or push down on the lever
repeatedly to increase or decrease lumbar support. Driver Seat with Manual Lumbar, Power Seat
Control, and Power Recline shown
Driver Seat with Manual Lumbar shown
2-5
Page 36 of 432
Heated Seats
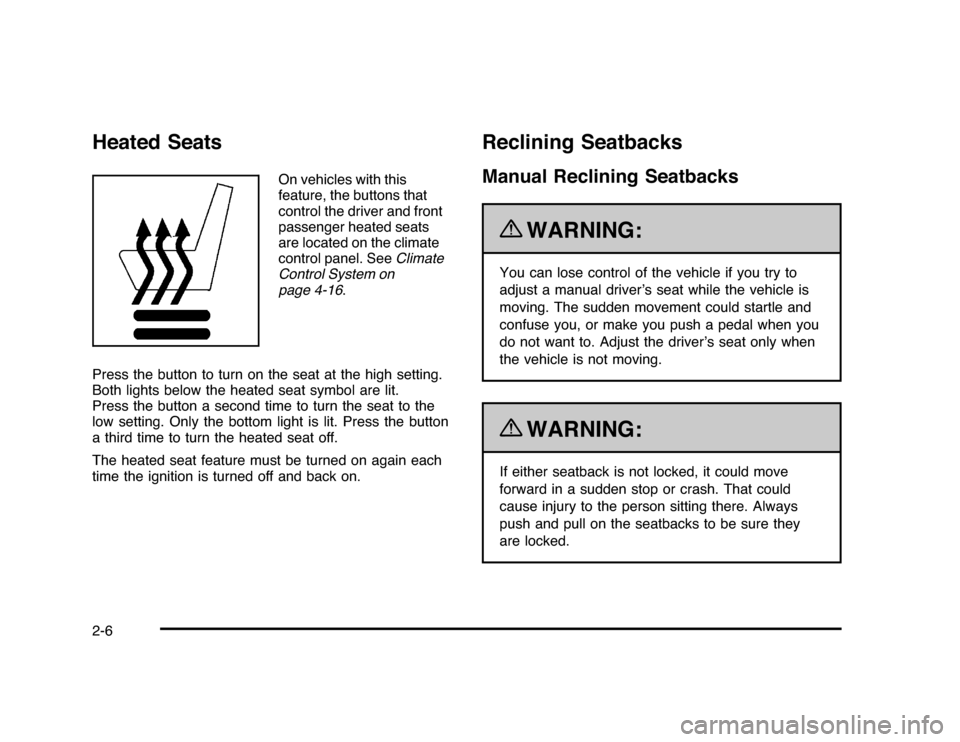
On vehicles with this
feature, the buttons that
control the driver and front
passenger heated seats
are located on the climate
control panel. SeeClimate
Control System on
page 4-16.
Press the button to turn on the seat at the high setting.
Both lights below the heated seat symbol are lit.
Press the button a second time to turn the seat to the
low setting. Only the bottom light is lit. Press the button
a third time to turn the heated seat off.
The heated seat feature must be turned on again each
time the ignition is turned off and back on.
Reclining SeatbacksManual Reclining Seatbacks
{
WARNING:
You can lose control of the vehicle if you try to
adjust a manual driver’s seat while the vehicle is
moving. The sudden movement could startle and
confuse you, or make you push a pedal when you
do not want to. Adjust the driver’s seat only when
the vehicle is not moving.{
WARNING:
If either seatback is not locked, it could move
forward in a sudden stop or crash. That could
cause injury to the person sitting there. Always
push and pull on the seatbacks to be sure they
are locked.
2-6
Page 37 of 432
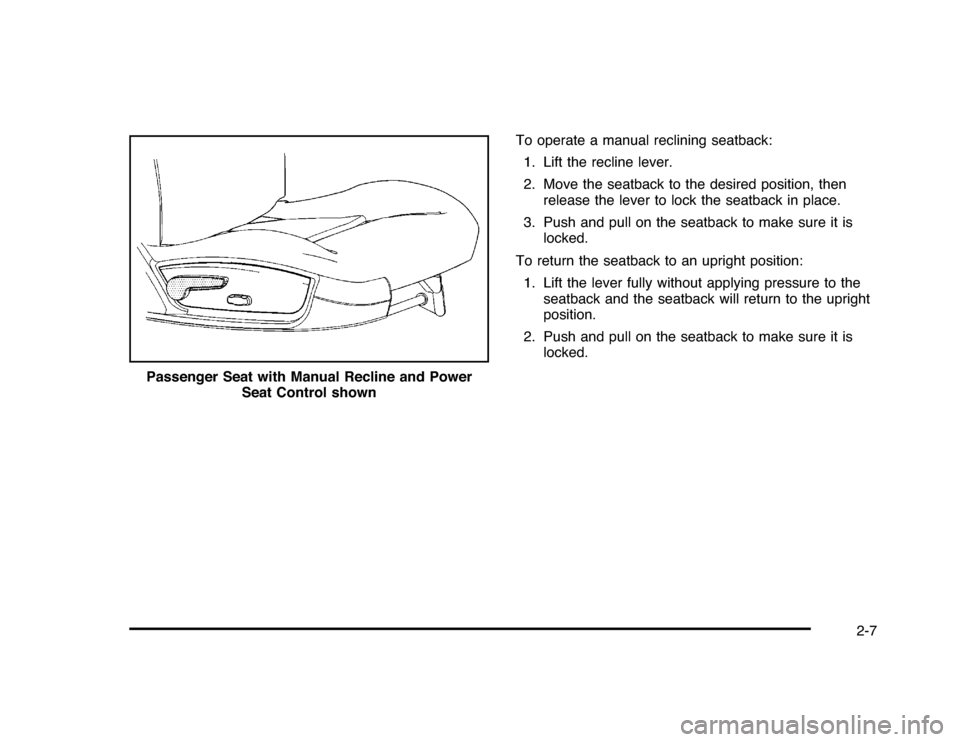
To operate a manual reclining seatback:
1. Lift the recline lever.
2. Move the seatback to the desired position, then
release the lever to lock the seatback in place.
3. Push and pull on the seatback to make sure it is
locked.
To return the seatback to an upright position:
1. Lift the lever fully without applying pressure to the
seatback and the seatback will return to the upright
position.
2. Push and pull on the seatback to make sure it is
locked.
Passenger Seat with Manual Recline and Power
Seat Control shown
2-7
Page 38 of 432
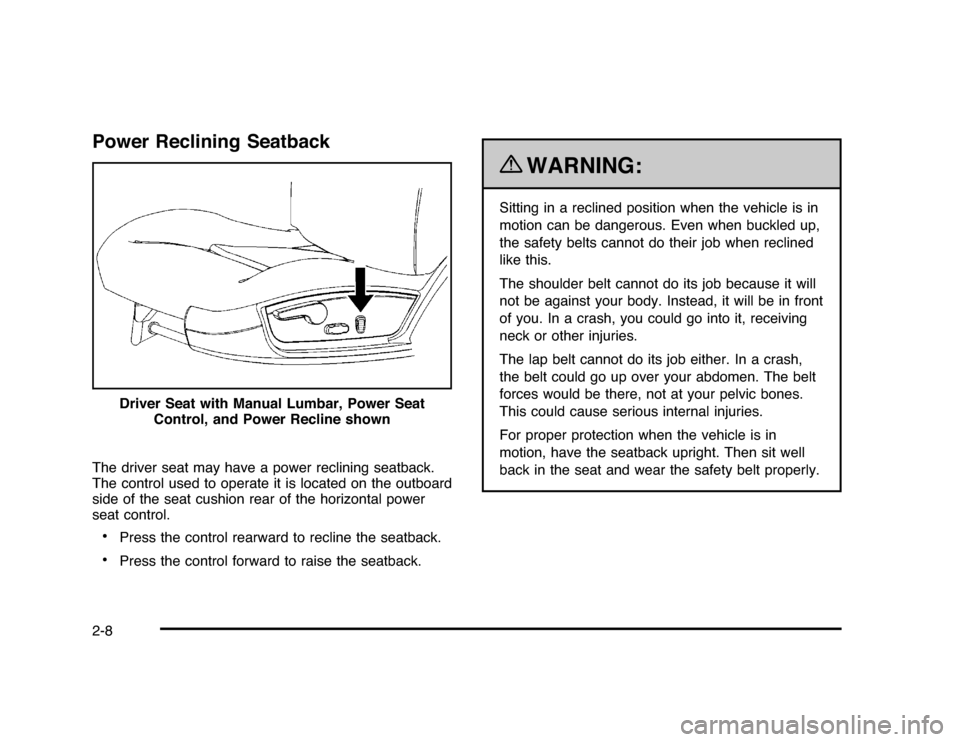
Power Reclining SeatbackThe driver seat may have a power reclining seatback.
The control used to operate it is located on the outboard
side of the seat cushion rear of the horizontal power
seat control.•
Press the control rearward to recline the seatback.
•
Press the control forward to raise the seatback.
{
WARNING:
Sitting in a reclined position when the vehicle is in
motion can be dangerous. Even when buckled up,
the safety belts cannot do their job when reclined
like this.
The shoulder belt cannot do its job because it will
not be against your body. Instead, it will be in front
of you. In a crash, you could go into it, receiving
neck or other injuries.
The lap belt cannot do its job either. In a crash,
the belt could go up over your abdomen. The belt
forces would be there, not at your pelvic bones.
This could cause serious internal injuries.
For proper protection when the vehicle is in
motion, have the seatback upright. Then sit well
back in the seat and wear the safety belt properly. Driver Seat with Manual Lumbar, Power Seat
Control, and Power Recline shown
2-8
Page 39 of 432
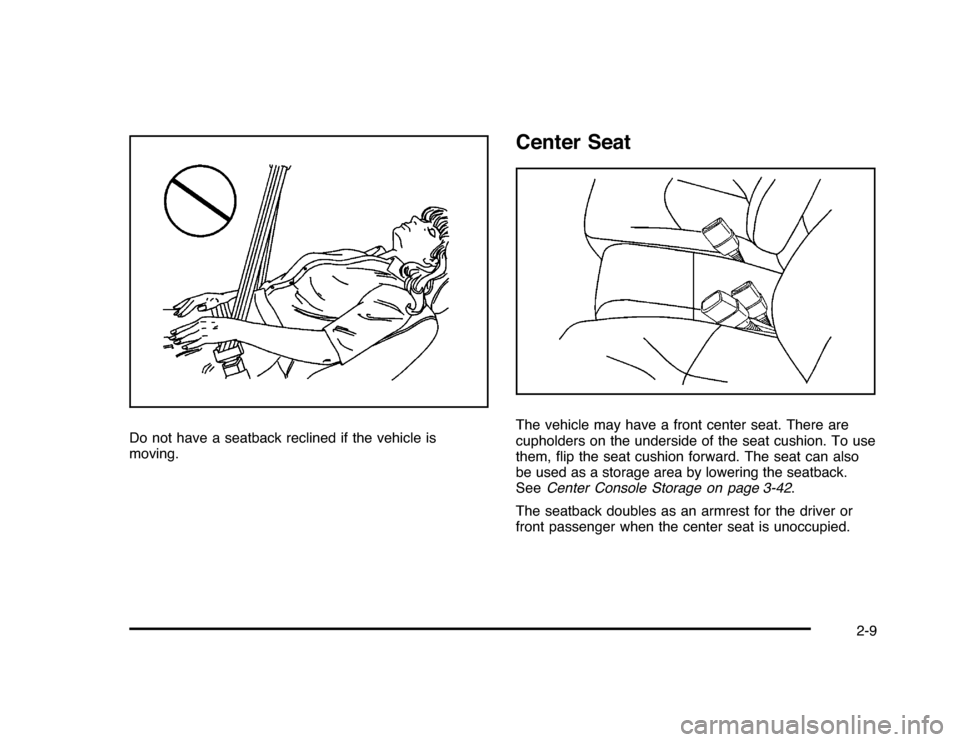
Do not have a seatback reclined if the vehicle is
moving.
Center SeatThe vehicle may have a front center seat. There are
cupholders on the underside of the seat cushion. To use
them, flip the seat cushion forward. The seat can also
be used as a storage area by lowering the seatback.
SeeCenter Console Storage on page 3-42.
The seatback doubles as an armrest for the driver or
front passenger when the center seat is unoccupied.
2-9
Page 40 of 432
Rear SeatsSplit Folding Rear SeatFlip and Fold FeatureOn vehicles with this feature, you can flip the bottom
seat cushion(s) forward and fold the seatback(s) down to
create an extended flat cargo area.
To use this feature:
1. Make sure the front seats are not reclined. If they
are, the seat cushion will not flip forward completely.
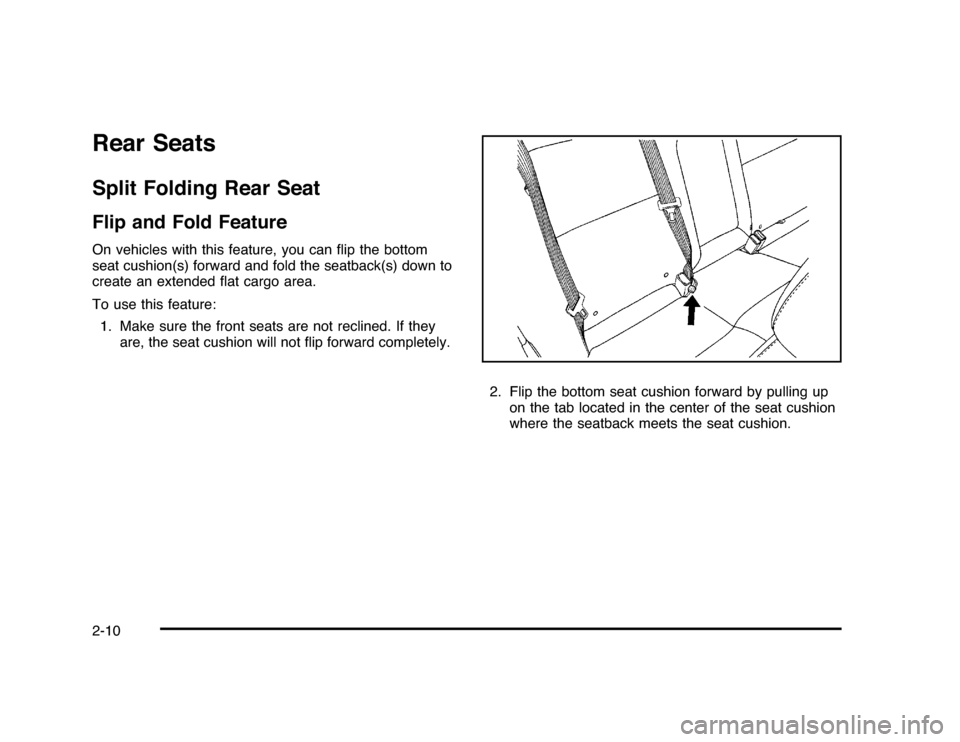
2. Flip the bottom seat cushion forward by pulling up
on the tab located in the center of the seat cushion
where the seatback meets the seat cushion.2-10