center console CHEVROLET IMPALA 2013 9.G Owners Manual
[x] Cancel search | Manufacturer: CHEVROLET, Model Year: 2013, Model line: IMPALA, Model: CHEVROLET IMPALA 2013 9.GPages: 350, PDF Size: 5.66 MB
Page 9 of 350
Black plate (3,1)Chevrolet Impala Owner Manual - 2013 - crc - 8/27/12
In Brief 1-3
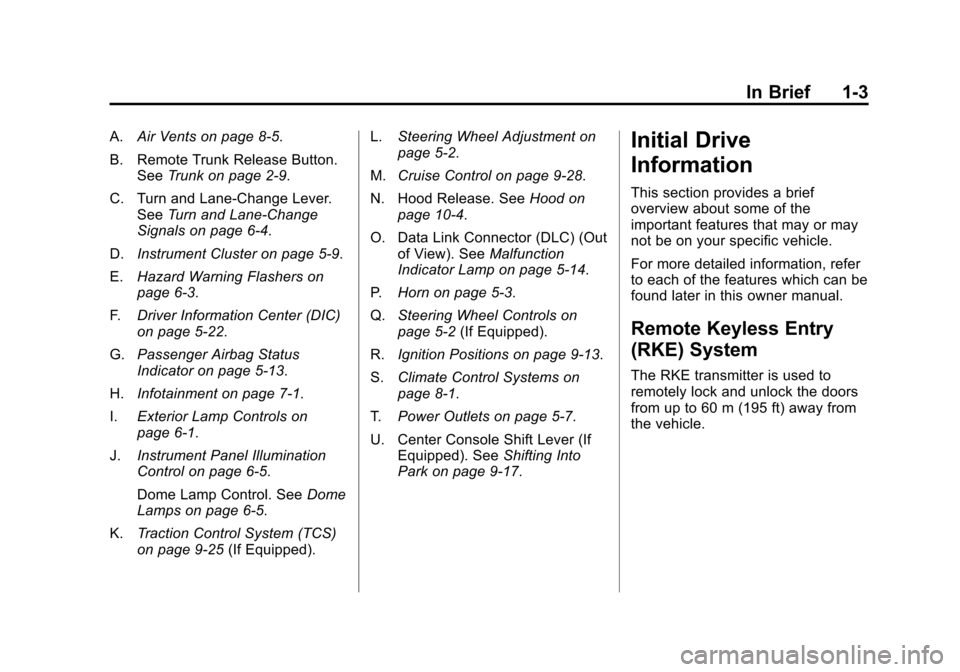
A.Air Vents on page 8‑5.
B. Remote Trunk Release Button. See Trunk on page 2‑9.
C. Turn and Lane‐Change Lever. See Turn and Lane-Change
Signals on page 6‑4.
D. Instrument Cluster on page 5‑9.
E. Hazard Warning Flashers on
page 6‑3.
F. Driver Information Center (DIC)
on page 5‑22.
G. Passenger Airbag Status
Indicator on page 5‑13.
H. Infotainment on page 7‑1.
I. Exterior Lamp Controls on
page 6‑1.
J. Instrument Panel Illumination
Control on page 6‑5.
Dome Lamp Control. See Dome
Lamps on page 6‑5.
K. Traction Control System (TCS)
on page 9‑25 (If Equipped). L.
Steering Wheel Adjustment on
page 5‑2.
M. Cruise Control on page 9‑28.
N. Hood Release. See Hood on
page 10‑4.
O. Data Link Connector (DLC) (Out of View). See Malfunction
Indicator Lamp on page 5‑14.
P. Horn on page 5‑3.
Q. Steering Wheel Controls on
page 5‑2 (If Equipped).
R. Ignition Positions on page 9‑13.
S. Climate Control Systems on
page 8‑1.
T. Power Outlets on page 5‑7.
U. Center Console Shift Lever (If Equipped). See Shifting Into
Park on page 9‑17.Initial Drive
Information
This section provides a brief
overview about some of the
important features that may or may
not be on your specific vehicle.
For more detailed information, refer
to each of the features which can be
found later in this owner manual.
Remote Keyless Entry
(RKE) System
The RKE transmitter is used to
remotely lock and unlock the doors
from up to 60 m (195 ft) away from
the vehicle.
Page 22 of 350
Black plate (16,1)Chevrolet Impala Owner Manual - 2013 - crc - 8/27/12
1-16 In Brief
SET−:Press to set the speed and
activate cruise control or make the
vehicle decelerate.
[: Press to disengage cruise
control without erasing the set
speed from memory.
For more information, see Cruise
Control on page 9‑28.
Power Outlets
The vehicle has three 12‐volt outlets
which can be used to plug in
electrical equipment, such as a cell
phone or MP3 player.
On vehicles with a center console,
one outlet is located inside the
center floor console and two outlets
are located at the front of the
console bin under the instrument
panel. On vehicles without a center
console, two are located under the
climate controls and another outlet
for the rear seat passengers is at
the rear of the center front seat.
Remove the cover to access and
replace when not in use.
See
Power Outlets on page 5‑7.
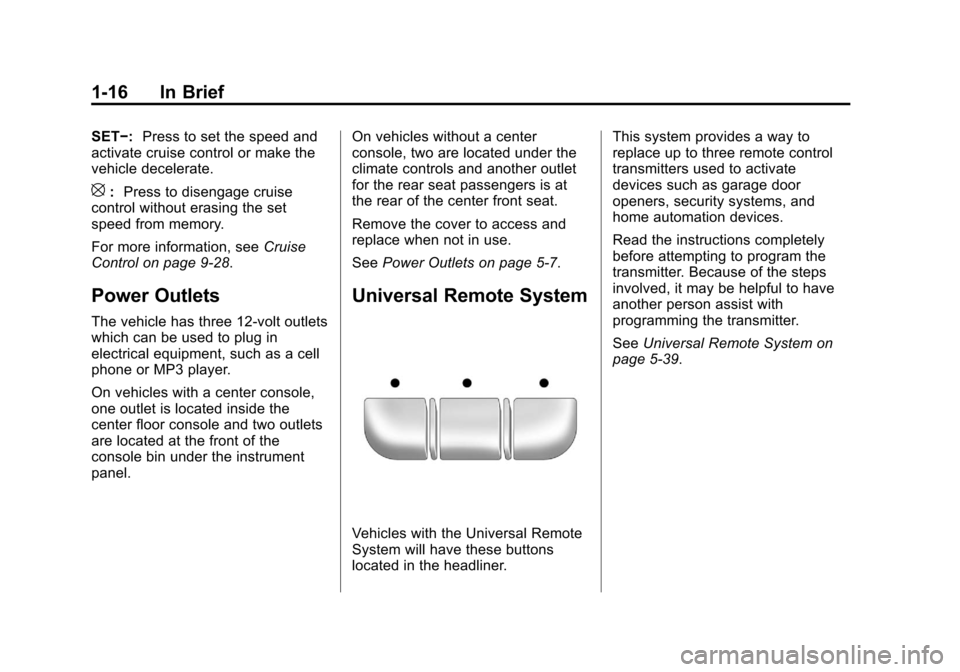
Universal Remote System
Vehicles with the Universal Remote
System will have these buttons
located in the headliner. This system provides a way to
replace up to three remote control
transmitters used to activate
devices such as garage door
openers, security systems, and
home automation devices.
Read the instructions completely
before attempting to program the
transmitter. Because of the steps
involved, it may be helpful to have
another person assist with
programming the transmitter.
See
Universal Remote System on
page 5‑39.
Page 42 of 350
Black plate (16,1)Chevrolet Impala Owner Manual - 2013 - crc - 8/27/12
2-16 Keys, Doors, and Windows
To lower the window, press and hold
the front of the switch to the first
position until the window is at the
desired level. To raise the window,
pull up and hold the front of the
switch.
Express-Down Window
The driver window switch has an
express-down feature labeled
AUTO. This lets you lower the
window completely without holding
the switch. Press the front of the
switch to the second position and
release.
To stop the window while it is
lowering, briefly pull up on the
switch.
Window Lockout
o(Window Lockout):The driver
window switches also include a
lockout switch. Press the right side
of the switch to prevent the rear
passengers from using their window switches. The driver can still control
all the windows and the front
passenger can control their own
window with the lockout on. Press
the left side of the switch to return to
normal window operation. A red bar
on the right side of the switch
indicates that the lockout is off.
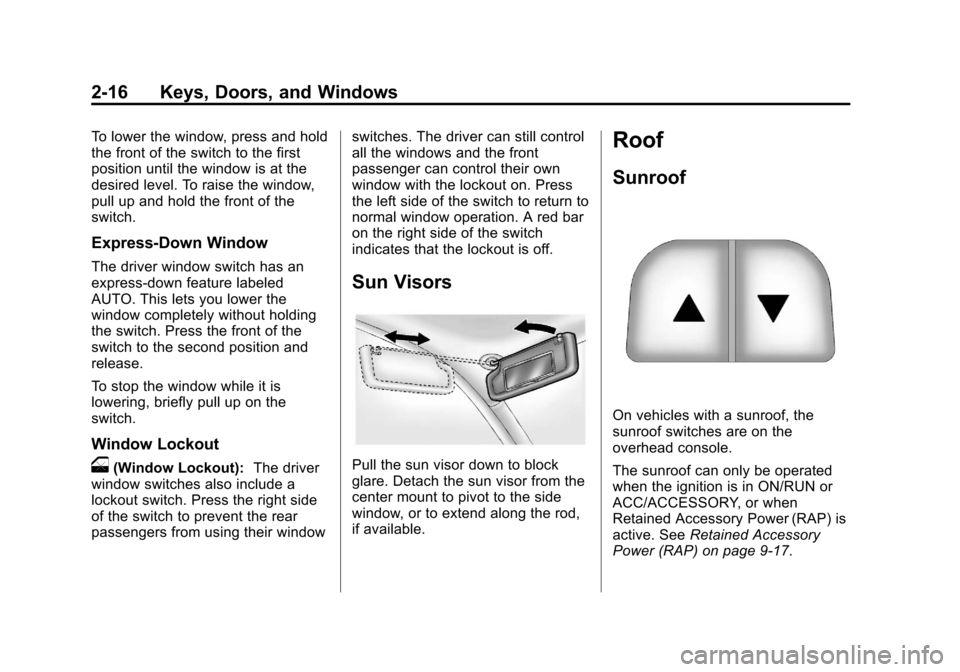
Sun Visors
Pull the sun visor down to block
glare. Detach the sun visor from the
center mount to pivot to the side
window, or to extend along the rod,
if available.
Roof
Sunroof
On vehicles with a sunroof, the
sunroof switches are on the
overhead console.
The sunroof can only be operated
when the ignition is in ON/RUN or
ACC/ACCESSORY, or when
Retained Accessory Power (RAP) is
active. See
Retained Accessory
Power (RAP) on page 9‑17.
Page 48 of 350
Black plate (4,1)Chevrolet Impala Owner Manual - 2013 - crc - 8/27/12
3-4 Seats and Restraints
Center Seat
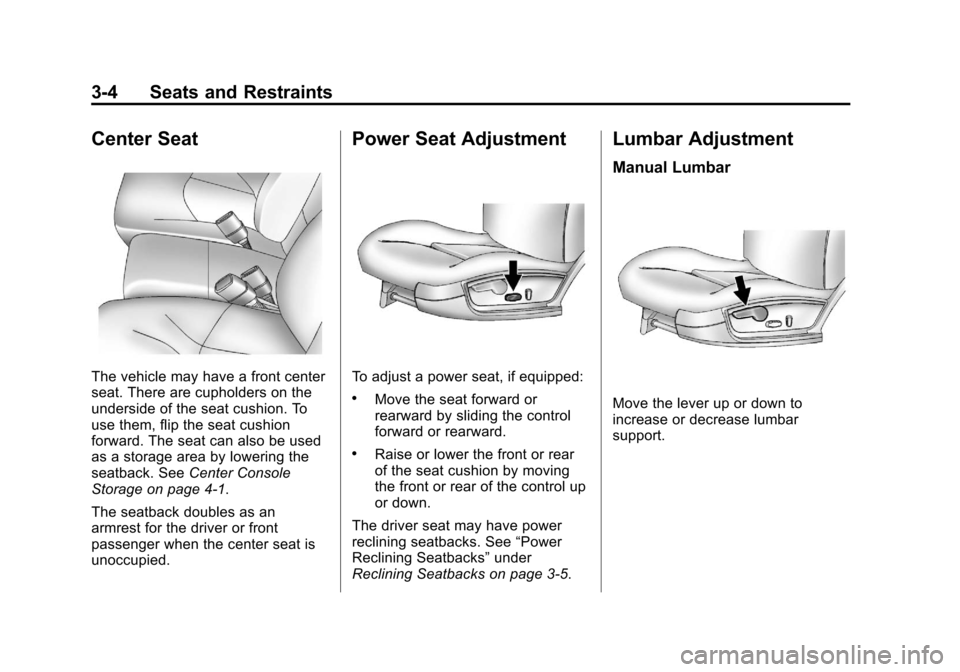
The vehicle may have a front center
seat. There are cupholders on the
underside of the seat cushion. To
use them, flip the seat cushion
forward. The seat can also be used
as a storage area by lowering the
seatback. SeeCenter Console
Storage on page 4‑1.
The seatback doubles as an
armrest for the driver or front
passenger when the center seat is
unoccupied.
Power Seat Adjustment
To adjust a power seat, if equipped:
.Move the seat forward or
rearward by sliding the control
forward or rearward.
.Raise or lower the front or rear
of the seat cushion by moving
the front or rear of the control up
or down.
The driver seat may have power
reclining seatbacks. See “Power
Reclining Seatbacks” under
Reclining Seatbacks on page 3‑5.
Lumbar Adjustment
Manual Lumbar
Move the lever up or down to
increase or decrease lumbar
support.
Page 95 of 350
Black plate (1,1)Chevrolet Impala Owner Manual - 2013 - crc - 8/27/12
Storage 4-1
Storage
Storage Compartments
Glove Box . . . . . . . . . . . . . . . . . . . . 4-1
Cupholders . . . . . . . . . . . . . . . . . . . 4-1
Sunglasses Storage . . . . . . . . . . 4-1
Armrest Storage . . . . . . . . . . . . . . 4-1
Rear Storage . . . . . . . . . . . . . . . . . 4-1
Center Console Storage . . . . . . 4-1
Additional Storage Features
Convenience Net . . . . . . . . . . . . . 4-2
Storage
Compartments
Glove Box
Lift up on the glove box lever to
open it.
Cupholders
Cupholders may be built into the
front center console, front portion of
the front center seat, and rear
armrest of the vehicle.
Sunglasses Storage
A storage compartment for
sunglasses may be located above
the rearview mirror. Push on the
cover to open the compartment.
Armrest Storage
For vehicles with a rear seat
armrest, pull the tab on the armrest
forward to access it.
Rear Storage
For vehicles with a split folding rear
seat, there are two storage areas
underneath. Pull the tab(s) located
by the passenger side safety belt
buckle and the driver side rear seat
to access the storage areas. See
Rear Seats (Split Folding) on
page 3‑7for more information.
Center Console Storage
For vehicles with a front center
console storage area, open it by
pulling up on the latch located in the
front of the console cover. There
may be a removable tray inside.
Page 103 of 350
Black plate (7,1)Chevrolet Impala Owner Manual - 2013 - crc - 8/27/12
Instruments and Controls 5-7
.PresssREV.
The date does not automatically
display. To see the date press the
H
button while the radio is on. The
date with display times out after a
few seconds and goes back to the
normal radio and time display.
To change the time default setting
from 12 hour to 24 hour or to
change the date default setting from
month/day/year to day/month/year:
1. Press the
Hbutton and then the
pushbutton located under the
forward arrow tab. The time 12H
and 24H, and the date MM/DD/
YYYY (month, day, and year)
and DD/MM/YYYY (day, month,
and year) displays.
2. Press the pushbutton located under the desired option.
3. Press the
Hor MENU button
again to apply the selected
default, or let the screen
time out.
Power Outlets
The vehicle has three 12‐volt outlets
which can be used to plug in
electrical equipment, such as a cell
phone or MP3 player.
On vehicles with a center console,
one outlet is located inside the
center floor console and two outlets
are located at the front of the
console bin under the instrument
panel.
On vehicles without a center
console, two are located under the
climate controls and another outlet
for the rear seat passengers is at
the rear of the center front seat.
Remove the cover to access and
replace when not in use.
{WARNING
Power is always supplied to the
outlets. Do not leave electrical
equipment plugged in when the
(Continued)
WARNING (Continued)
vehicle is not in use because the
vehicle could catch fire and cause
injury or death.
Notice: Leaving electrical
equipment plugged in for an
extended period of time while the
vehicle is off will drain the
battery. Always unplug electrical
equipment when not in use and
do not plug in equipment that
exceeds the maximum 20 ampere
rating.
Certain accessory plugs may not be
compatible with the accessory
power outlet and could overload
vehicle and adapter fuses. If a
problem is experienced, see your
dealer.
When adding electrical equipment,
be sure to follow the proper
installation instructions included with
the equipment. See Add-On
Electrical Equipment on page 9‑41.
Page 104 of 350
Black plate (8,1)Chevrolet Impala Owner Manual - 2013 - crc - 8/27/12
5-8 Instruments and Controls
Notice:Hanging heavy
equipment from the power outlet
can cause damage not covered
by the vehicle warranty. The
power outlets are designed for
accessory power plugs only, such
as cell phone charge cords.
Cigarette Lighter
The vehicle may have a cigarette
lighter. The cigarette lighter may be
located in the console, if the vehicle
has one; otherwise, it may be
located in the center armrest of the
front seat.
Notice: Holding a cigarette lighter
in while it is heating does not let
the lighter back away from the
heating element when it is hot.
Damage from overheating can
occur to the lighter or heating
element, or a fuse could be
blown. Do not hold a cigarette
lighter in while it is heating.
To use the lighter, just push it in all
the way and let go. When it is ready,
it will pop back out by itself.
Warning Lights,
Gauges, and
Indicators
Warning lights and gauges can
signal that something is wrong
before it becomes serious enough
to cause an expensive repair or
replacement. Paying attention to the
warning lights and gauges could
prevent injury.
Warning lights come on when there
could be a problem with a vehicle
function. Some warning lights come
on briefly when the engine is started
to indicate they are working. Gauges can indicate when there
could be a problem with a vehicle
function. Often gauges and warning
lights work together to indicate a
problem with the vehicle.
When one of the warning lights
comes on and stays on while
driving, or when one of the gauges
shows there may be a problem,
check the section that explains what
to do. Follow this manual's advice.
Waiting to do repairs can be costly
and even dangerous.
Page 340 of 350

Black plate (2,1)Chevrolet Impala Owner Manual - 2013 - crc - 8/27/12
i-2 INDEX
B
Battery . . . . . . . . . . . . . . . . . . . . . . . 10-19Jump Starting . . . . . . . . . . . . . . . 10-61
Load Management . . . . . . . . . . . . . 6-7
Power Protection . . . . . . . . . . . . . . 6-8
Voltage and ChargingMessages . . . . . . . . . . . . . . . . . . . 5-26
Blade Replacement, Wiper . . . 10-21
Bluetooth . . . . . . . . . . . . . . . . . . . . . . 7-19
Brake System Warning Light . . . . . . . . 5-17
Brakes . . . . . . . . . . . . . . . . . . . . . . . . 10-17 Antilock . . . . . . . . . . . . . . . . . . . . . . . 9-23
Fluid . . . . . . . . . . . . . . . . . . . . . . . . 10-18
Parking . . . . . . . . . . . . . . . . . . . . . . . 9-24
System Messages . . . . . . . . . . . . 5-26
Braking . . . . . . . . . . . . . . . . . . . . . . . . . 9-3
Break-In, New Vehicle . . . . . . . . . 9-13
Bulb Replacement . . . . . . . . . . . . 10-26 Fog Lamps . . . . . . . . . . . . . . . . . . . . 6-4
Halogen Bulbs . . . . . . . . . . . . . . 10-22
Headlamp Aiming . . . . . . . . . . . 10-22
Headlamps . . . . . . . . . . . . . . . . . 10-22 Bulb Replacement (cont'd)
Headlamps, Front Turn
Signal, Sidemarker, and
Parking Lamps . . . . . . . . . . . . 10-23
License Plate Lamps . . . . . . . 10-25
Taillamps, Turn Signal, Sidemarker, Stoplamps,
and Backup Lamps . . . . . . . . 10-24
Buying New Tires . . . . . . . . . . . . . 10-46
C
Calibration . . . . . . . . . . . . . . . . . . . . . . 5-4
California
Fuel Requirements . . . . . . . . . . . 9-31
Perchlorate MaterialsRequirements . . . . . . . . . . . . . . . 10-3
Warning . . . . . . . . . . . . . . . . . . . . . . 10-2
Canadian Vehicle Owners . . . . . . . . iii
Capacities and Specifications . . . . . . . . . . . . . . . . 12-2
Carbon Monoxide Engine Exhaust . . . . . . . . . . . . . . . 9-19
Trunk . . . . . . . . . . . . . . . . . . . . . . . . . . 2-9
Winter Driving . . . . . . . . . . . . . . . . . 9-7 Cautions, Danger, and
Warnings . . . . . . . . . . . . . . . . . . . . . . . . iv
CD Player . . . . . . . . . . . . . . . . . . . . . 7-13
Center Console Storage . . . . . . . . 4-1
Center Seat . . . . . . . . . . . . . . . . . . . . 3-4
Chains, Tire . . . . . . . . . . . . . . . . . . 10-51
Charging System Light . . . . . . . . 5-14
Check Engine Light . . . . . . . . . . . . . . . . . . 5-14
IgnitionTransmission Lock . . . . . . . . 10-20
Child Restraints Infants and YoungChildren . . . . . . . . . . . . . . . . . . . . . 3-34
Lower Anchors and Tethers for Children . . . . . . . . . 3-39
Older Children . . . . . . . . . . . . . . . . 3-32
Securing . . . . . . . . . . . . . . . . 3-45, 3-47
Systems . . . . . . . . . . . . . . . . . . . . . . 3-36
Cigarette Lighter . . . . . . . . . . . . . . . . 5-8
Circuit Breakers . . . . . . . . . . . . . . 10-27
Cleaning Exterior Care . . . . . . . . . . . . . . . 10-65
Interior Care . . . . . . . . . . . . . . . . 10-68
Page 348 of 350

Black plate (10,1)Chevrolet Impala Owner Manual - 2013 - crc - 8/27/12
i-10 INDEX
Service (cont'd)Maintenance Records . . . . . . .11-14
Maintenance, General
Information . . . . . . . . . . . . . . . . . . 11-1
Parts Identification Label . . . . . 12-1
Publications Ordering Information . . . . . . . . . . . . . . . . .13-11
Scheduling Appointments . . . . . 13-7
Vehicle Messages . . . . . . . . . . . . 5-31
Servicing the Airbag . . . . . . . . . . . 3-29
Shift Lock Control Function Check, Automatic
Transmission . . . . . . . . . . . . . . . . 10-20
Shifting
Into Park . . . . . . . . . . . . . . . . . . . . . . 9-17
Out of Park . . . . . . . . . . . . . . . . . . . 9-18
Sidemarker Bulb Replacement . . . . . . . . . . 10-24
Signals, Turn and Lane-Change . . . . . . . . . . . . . . . . . 6-4
Spare Tire Compact . . . . . . . . . . . . . . . . . . . . 10-60
Specifications and
Capacities . . . . . . . . . . . . . . . . . . . . 12-2 Speedometer . . . . . . . . . . . . . . . . . . 5-10
Start Vehicle, Remote . . . . . . . . . . 2-4
Starter Switch Check . . . . . . . . . 10-20
Starting the Engine . . . . . . . . . . . . 9-15
Steering . . . . . . . . . . . . . . . . . . . . . . . . 9-3
Fluid, Power . . . . . . . . . . . . . . . . 10-15
Wheel Adjustment . . . . . . . . . . . . . 5-2
Wheel Controls . . . . . . . . . . . . . . . . 5-2
Stoplamps and Back-Up Lamps Bulb Replacement . . . . . . . . . . 10-24
Storage
Rear . . . . . . . . . . . . . . . . . . . . . . . . . . . 4-1
Storage Areas Armrest . . . . . . . . . . . . . . . . . . . . . . . . 4-1
Center Console . . . . . . . . . . . . . . . . 4-1
Convenience Net . . . . . . . . . . . . . . 4-2
Glove Box . . . . . . . . . . . . . . . . . . . . . 4-1
Sunglasses . . . . . . . . . . . . . . . . . . . . 4-1
Stuck Vehicle . . . . . . . . . . . . . . . . . . . 9-8
Sun Visors . . . . . . . . . . . . . . . . . . . . . 2-16
Sunglass Storage . . . . . . . . . . . . . . . 4-1
Sunroof . . . . . . . . . . . . . . . . . . . . . . . . 2-16
Symbols . . . . . . . . . . . . . . . . . . . . . . . . . . iv
System Infotainment . . . . . . . . . . . . . . . . . . . 7-1T
Tachometer . . . . . . . . . . . . . . . . . . . . 5-10
Taillamps
Bulb Replacement . . . . . . . . . . 10-24
Text Telephone (TTY) Users . . . 13-4
Theft-Deterrent Systems . . . . . . . 2-11 Immobilizer . . . . . . . . . . . . . . . . . . . 2-11
Time . . . . . . . . . . . . . . . . . . . . . . . . . . . . 5-6
Tires Buying New Tires . . . . . . . . . . . 10-46
Chains . . . . . . . . . . . . . . . . . . . . . . 10-51
Changing . . . . . . . . . . . . . . . . . . . 10-53
Compact Spare . . . . . . . . . . . . . 10-60
Designations . . . . . . . . . . . . . . . 10-35
Different Size . . . . . . . . . . . . . . . 10-48
If a Tire Goes Flat . . . . . . . . . . 10-51
Inflation Monitor System . . . . 10-41
Inspection . . . . . . . . . . . . . . . . . . 10-44
Messages . . . . . . . . . . . . . . . . . . . . 5-32
Pressure Light . . . . . . . . . . . . . . . . 5-20
Pressure Monitor System . . . 10-40
Rotation . . . . . . . . . . . . . . . . . . . . 10-44
Sidewall Labeling . . . . . . . . . . . 10-33
Terminology andDefinitions . . . . . . . . . . . . . . . . . 10-36