headlamp CHEVROLET IMPALA 2016 10.G User Guide
[x] Cancel search | Manufacturer: CHEVROLET, Model Year: 2016, Model line: IMPALA, Model: CHEVROLET IMPALA 2016 10.GPages: 377, PDF Size: 5.07 MB
Page 151 of 377
Chevrolet Impala Owner Manual (GMNA-Localizing-U.S/Canada-9086448) -
2016 - CRC - 5/20/15
150 Lighting
Automatic Headlamp
System
When the exterior lamp control is
set to AUTO and it is dark enough
outside, the headlamps come on
automatically.
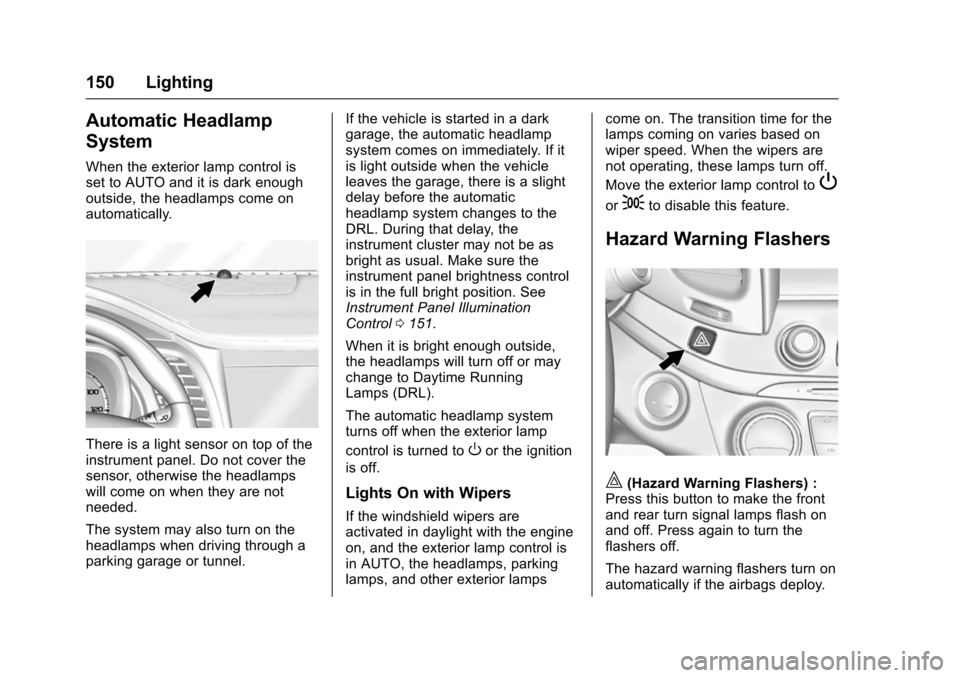
There is a light sensor on top of the
instrument panel. Do not cover the
sensor, otherwise the headlamps
will come on when they are not
needed.
The system may also turn on the
headlamps when driving through a
parking garage or tunnel.If the vehicle is started in a dark
garage, the automatic headlamp
system comes on immediately. If it
is light outside when the vehicle
leaves the garage, there is a slight
delay before the automatic
headlamp system changes to the
DRL. During that delay, the
instrument cluster may not be as
bright as usual. Make sure the
instrument panel brightness control
is in the full bright position. See
Instrument Panel Illumination
Control
0151.
When it is bright enough outside,
the headlamps will turn off or may
change to Daytime Running
Lamps (DRL).
The automatic headlamp system
turns off when the exterior lamp
control is turned toOor the ignition
is off.
Lights On with Wipers
If the windshield wipers are
activated in daylight with the engine
on, and the exterior lamp control is
in AUTO, the headlamps, parking
lamps, and other exterior lamps come on. The transition time for the
lamps coming on varies based on
wiper speed. When the wipers are
not operating, these lamps turn off.
Move the exterior lamp control to
P
or;to disable this feature.
Hazard Warning Flashers
|(Hazard Warning Flashers) :
Press this button to make the front
and rear turn signal lamps flash on
and off. Press again to turn the
flashers off.
The hazard warning flashers turn on
automatically if the airbags deploy.
Page 154 of 377
Chevrolet Impala Owner Manual (GMNA-Localizing-U.S/Canada-9086448) -
2016 - CRC - 5/20/15
Lighting 153
Lighting Features
Entry Lighting
Some exterior lamps and most of
the interior lights turn on briefly
when the Remote Keyless Entry
(RKE) transmitter
Kbutton is
pressed. After about 30 seconds the
exterior lamps turn off, then the
dome lamps and remaining interior
lights dim to off. Entry lighting can
be disabled manually by changing
the ignition out of the OFF position,
or by pressing the RKE transmitter
Qbutton.
This feature can be changed. See
Vehicle Personalization 0138.
Exit Lighting
Some exterior lamps come on at
night, or in areas with limited
lighting, when the key is removed
from the ignition. The dome lamps
also come on when the key is
removed from the ignition. The
exterior lamps and dome lamps remain on after the door is closed
for a set amount of time, then
automatically turn off.
For vehicles with Keyless Access,
the exterior lamps automatically turn
on when a door is opened after the
ignition is changed to the OFF
position. The dome lamps also
come on after the ignition is
changed to the OFF position. See
Ignition Positions (Keyless Access)
0
201 orIgnition Positions (Key
Access) 0203.
The exterior lamps turn off
immediately by turning the exterior
lamps control off.
This feature can be changed. See
Vehicle Personalization 0138.
Battery Load
Management
The vehicle has Electric Power
Management (EPM), which
estimates the battery's temperature
and state of charge. It then adjusts
the voltage for best performance
and extended life of the battery. When the battery's state of charge
is low, the voltage is raised slightly
to quickly bring the charge back up.
When the state of charge is high,
the voltage is lowered slightly to
prevent overcharging. If the vehicle
has a voltage display on the Driver
Information Center (DIC), you may
see the voltage move up or down.
This is normal. If there is a problem,
an alert will be displayed.
The battery can be discharged at
idle if the electrical loads are very
high. This is true for all vehicles.
This is because the generator
(alternator) may not be spinning fast
enough at idle to produce all the
power that is needed for very high
electrical loads.
A high electrical load occurs when
several of the following are on, such
as: headlamps, high beams, fog
lamps, rear window defogger,
climate control fan at high speed,
heated seats, engine cooling fans,
trailer loads, and loads plugged into
accessory power outlets.
Page 155 of 377
Chevrolet Impala Owner Manual (GMNA-Localizing-U.S/Canada-9086448) -
2016 - CRC - 5/20/15
154 Lighting
EPM works to prevent excessive
discharge of the battery. It does this
by balancing the generator's output
and the vehicle's electrical needs.
It can increase engine idle speed to
generate more power, whenever
needed. It can temporarily reduce
the power demands of some
accessories.
Normally, these actions occur in
steps or levels, without being
noticeable. In rare cases at the
highest levels of corrective action,
this action may be noticeable to the
driver. If so, a DIC message might
be displayed and it is recommended
that the driver reduce the electrical
loads as much as possible. See
Battery Voltage and Charging
Messages0130.
Battery Power Protection
The battery saver feature is
designed to protect the vehicle's
battery. If some interior lamps are left on
and the ignition is turned off, the
battery rundown protection system
automatically turns the lamp off after
some time.
Exterior Lighting Battery
Saver
The exterior lamps turn off about
10 minutes after the ignition is
turned off, if the parking lamps or
headlamps have been manually left
on. This protects against draining
the battery. To restart the 10-minute
timer, turn the exterior lamp control
to the
Oposition and then back to
the
;or2position.
To keep the lamps on for more than
10 minutes, the ignition must be in
the ACC/ACCESSORY or ON/RUN/
START position.
Page 198 of 377
Chevrolet Impala Owner Manual (GMNA-Localizing-U.S/Canada-9086448) -
2016 - CRC - 5/20/15
Driving and Operating 197
.Tie a red cloth to an outside
mirror.
{Warning
Snow can trap engine exhaust
under the vehicle. This may
cause exhaust gases to get
inside. Engine exhaust contains
carbon monoxide (CO), which
cannot be seen or smelled. It can
cause unconsciousness and even
death.
If the vehicle is stuck in snow:
. Clear snow from the base of
the vehicle, especially any
blocking the exhaust pipe.
. Open a window about 5 cm
(2 in) on the vehicle side
that is away from the wind,
to bring in fresh air.
. Fully open the air outlets on
or under the instrument
panel.
(Continued)
Warning (Continued)
.Adjust the climate control
system to circulate the air
inside the vehicle and set
the fan speed to the highest
setting. See “Climate
Control Systems.”
For more information about CO,
see Engine Exhaust 0210.
To save fuel, run the engine for
short periods to warm the vehicle
and then shut the engine off and
partially close the window. Moving
about to keep warm also helps.
If it takes time for help to arrive,
when running the engine, push the
accelerator pedal slightly so the
engine runs faster than the idle
speed. This keeps the battery
charged to restart the vehicle and to
signal for help with the headlamps.
Do this as little as possible, to
save fuel.
If the Vehicle Is Stuck
Slowly and cautiously spin the
wheels to free the vehicle when
stuck in sand, mud, ice, or snow.
If stuck too severely for the traction
system to free the vehicle, turn the
traction system off and use the
rocking method. See Traction
Control/Electronic Stability Control
0 216.
{Warning
If the vehicle's tires spin at high
speed, they can explode, and you
or others could be injured. The
vehicle can overheat, causing an
engine compartment fire or other
damage. Spin the wheels as little
as possible and avoid going
above 56 km/h (35 mph).
Rocking the Vehicle to Get
it Out
Turn the steering wheel left and
right to clear the area around the
front wheels. Turn off any traction
system. Shift back and forth
Page 232 of 377
Chevrolet Impala Owner Manual (GMNA-Localizing-U.S/Canada-9086448) -
2016 - CRC - 5/20/15
Driving and Operating 231
FCA can be disabled with the FCA
steering wheel control, or if your
vehicle is equipped with Adaptive
Cruise Control (ACC), through
vehicle personalization. See the
“Auto Collision Preparation”portion
of “Collision/Detection Systems”
under Vehicle Personalization
0 138.
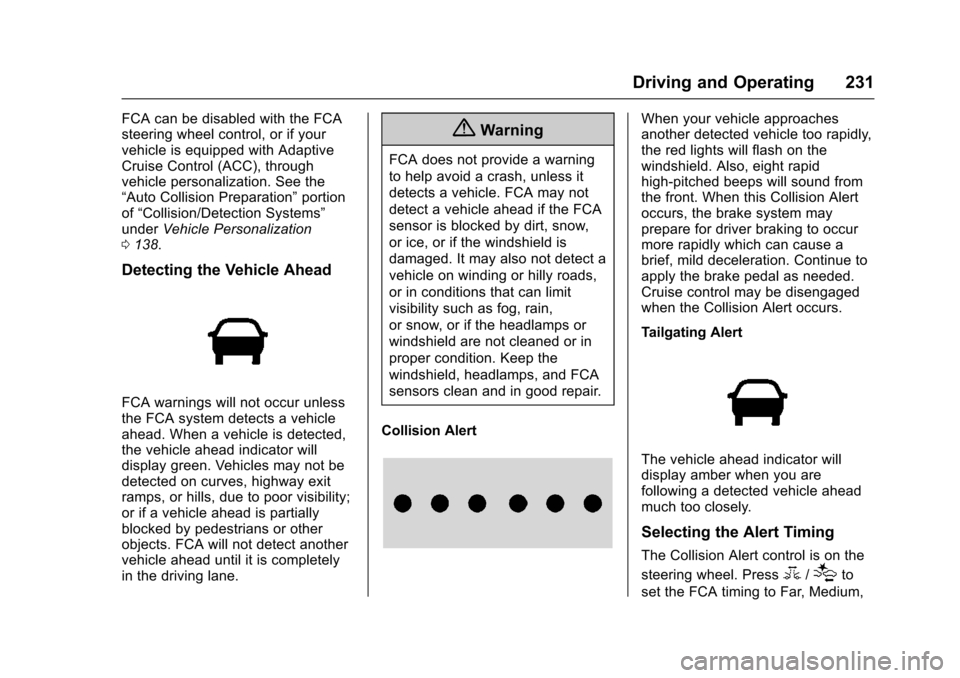
Detecting the Vehicle Ahead
FCA warnings will not occur unless
the FCA system detects a vehicle
ahead. When a vehicle is detected,
the vehicle ahead indicator will
display green. Vehicles may not be
detected on curves, highway exit
ramps, or hills, due to poor visibility;
or if a vehicle ahead is partially
blocked by pedestrians or other
objects. FCA will not detect another
vehicle ahead until it is completely
in the driving lane.
{Warning
FCA does not provide a warning
to help avoid a crash, unless it
detects a vehicle. FCA may not
detect a vehicle ahead if the FCA
sensor is blocked by dirt, snow,
or ice, or if the windshield is
damaged. It may also not detect a
vehicle on winding or hilly roads,
or in conditions that can limit
visibility such as fog, rain,
or snow, or if the headlamps or
windshield are not cleaned or in
proper condition. Keep the
windshield, headlamps, and FCA
sensors clean and in good repair.
Collision Alert
When your vehicle approaches
another detected vehicle too rapidly,
the red lights will flash on the
windshield. Also, eight rapid
high-pitched beeps will sound from
the front. When this Collision Alert
occurs, the brake system may
prepare for driver braking to occur
more rapidly which can cause a
brief, mild deceleration. Continue to
apply the brake pedal as needed.
Cruise control may be disengaged
when the Collision Alert occurs.
Tailgating Alert
The vehicle ahead indicator will
display amber when you are
following a detected vehicle ahead
much too closely.
Selecting the Alert Timing
The Collision Alert control is on the
steering wheel. Press
3/[to
set the FCA timing to Far, Medium,
Page 237 of 377
Chevrolet Impala Owner Manual (GMNA-Localizing-U.S/Canada-9086448) -
2016 - CRC - 5/20/15
236 Driving and Operating
sensor to detect the lane markings
at speeds of 56 km/h (35 mph) or
greater.
{Warning
The LDW system does not steer
the vehicle. The LDW system
may not:. Provide enough time to
avoid a crash.
. Detect lane markings under
poor weather or visibility
conditions. This can occur if
the windshield or
headlamps are blocked by
dirt, snow, or ice; if they are
not in proper condition; or if
the sun shines directly into
the camera.
. Detect road edges.
. Detect lanes on winding or
hilly roads.
If LDW only detects lane
markings on one side of the road,
it will only warn you when (Continued)
Warning (Continued)
departing the lane on the side
where it has detected a lane
marking. Always keep your
attention on the road and
maintain proper vehicle position
within the lane, or vehicle
damage, injury, or death could
occur. Always keep the
windshield, headlamps, and
camera sensors clean and in
good repair. Do not use LDW in
bad weather conditions.
How the System Works
The LDW camera sensor is on the
windshield ahead of the rearview
mirror.
To turn LDW on and off, press
@on
the instrument panel to the left of
the steering wheel. The control
indicator will light when LDW is on.
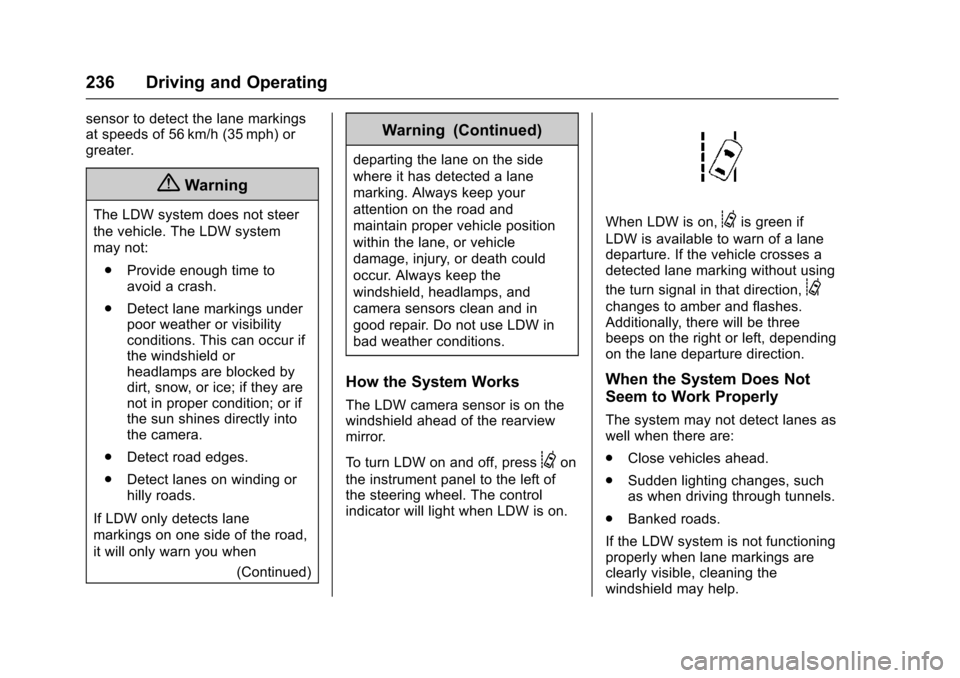
When LDW is on,@is green if
LDW is available to warn of a lane
departure. If the vehicle crosses a
detected lane marking without using
the turn signal in that direction,
@
changes to amber and flashes.
Additionally, there will be three
beeps on the right or left, depending
on the lane departure direction.
When the System Does Not
Seem to Work Properly
The system may not detect lanes as
well when there are:
. Close vehicles ahead.
. Sudden lighting changes, such
as when driving through tunnels.
. Banked roads.
If the LDW system is not functioning
properly when lane markings are
clearly visible, cleaning the
windshield may help.
Page 249 of 377
Chevrolet Impala Owner Manual (GMNA-Localizing-U.S/Canada-9086448) -
2016 - CRC - 5/20/15
248 Vehicle Care
Vehicle Care
General Information
General Information . . . . . . . . . . 249
California Proposition65 Warning . . . . . . . . . . . . . . . . . 249
California Perchlorate Materials Requirements . . . . . 249
Accessories and Modifications . . . . . . . . . . . . . . . . 249
Vehicle Checks
Doing Your OwnService Work . . . . . . . . . . . . . . . 250
Hood . . . . . . . . . . . . . . . . . . . . . . . . . 250
Engine Compartment Overview . . . . . . . . . . . . . . . . . . . . 252
Engine Oil . . . . . . . . . . . . . . . . . . . . 255
Engine Oil Life System . . . . . . . 257
Automatic Transmission Fluid . . . . . . . . . . . . . . . . . . . . . . . . 258
Engine Air Cleaner/Filter . . . . . . 259
Cooling System . . . . . . . . . . . . . . 260
Engine Coolant . . . . . . . . . . . . . . . 261
Engine Overheating . . . . . . . . . . 264
Overheated Engine Protection Operating Mode . . . . . . . . . . . . . 265
Washer Fluid . . . . . . . . . . . . . . . . . 265
Brakes . . . . . . . . . . . . . . . . . . . . . . . 266
Brake Fluid . . . . . . . . . . . . . . . . . . . 267 Battery - North America . . . . . . 268
Starter Switch Check . . . . . . . . . 269
Automatic Transmission Shift
Lock Control Function
Check . . . . . . . . . . . . . . . . . . . . . . . 269
Ignition Transmission Lock Check . . . . . . . . . . . . . . . . . . . . . . . 270
Park Brake and P (Park) Mechanism Check . . . . . . . . . . 270
Wiper Blade Replacement . . . . 270
Headlamp Aiming
Headlamp Aiming . . . . . . . . . . . . 271
Bulb Replacement
Bulb Replacement . . . . . . . . . . . . 271
Halogen Bulbs . . . . . . . . . . . . . . . . 271
High Intensity Discharge (HID) Lighting . . . . . . . . . . . . . . . . . . . . . 272
LED Lighting . . . . . . . . . . . . . . . . . 272
Headlamps, Front Turn Signal, Sidemarker, and Parking
Lamps . . . . . . . . . . . . . . . . . . . . . . 272
Taillamps, Turn Signal, Stoplamps, and Back-Up
Lamps . . . . . . . . . . . . . . . . . . . . . . 273
License Plate Lamp . . . . . . . . . . 275
Replacement Bulbs . . . . . . . . . . . 275
Electrical System
High Voltage Devices and Wiring . . . . . . . . . . . . . . . . . . . . . . . 276 Electrical System Overload . . . 276
Fuses . . . . . . . . . . . . . . . . . . . . . . . . 276
Engine Compartment Fuse
Block . . . . . . . . . . . . . . . . . . . . . . . . 277
Instrument Panel Fuse
Block . . . . . . . . . . . . . . . . . . . . . . . . 280
Wheels and Tires
Tires . . . . . . . . . . . . . . . . . . . . . . . . . . 283
All-Season Tires . . . . . . . . . . . . . . 284
Winter Tires . . . . . . . . . . . . . . . . . . 284
Summer Tires . . . . . . . . . . . . . . . . 284
Tire Sidewall Labeling . . . . . . . . 285
Tire Designations . . . . . . . . . . . . . 287
Tire Terminology andDefinitions . . . . . . . . . . . . . . . . . . 288
Tire Pressure . . . . . . . . . . . . . . . . . 290
Tire Pressure for High-Speed
Operation . . . . . . . . . . . . . . . . . . . 291
Tire Pressure Monitor System . . . . . . . . . . . . . . . . . . . . . . 292
Tire Pressure Monitor Operation . . . . . . . . . . . . . . . . . . . 293
Tire Inspection . . . . . . . . . . . . . . . . 296
Tire Rotation . . . . . . . . . . . . . . . . . 296
When It Is Time for New Tires . . . . . . . . . . . . . . . . . . . . . . . . 297
Buying New Tires . . . . . . . . . . . . . 298
Different Size Tires and Wheels . . . . . . . . . . . . . . . . . . . . . . 299
Page 272 of 377
Chevrolet Impala Owner Manual (GMNA-Localizing-U.S/Canada-9086448) -
2016 - CRC - 5/20/15
Vehicle Care 271
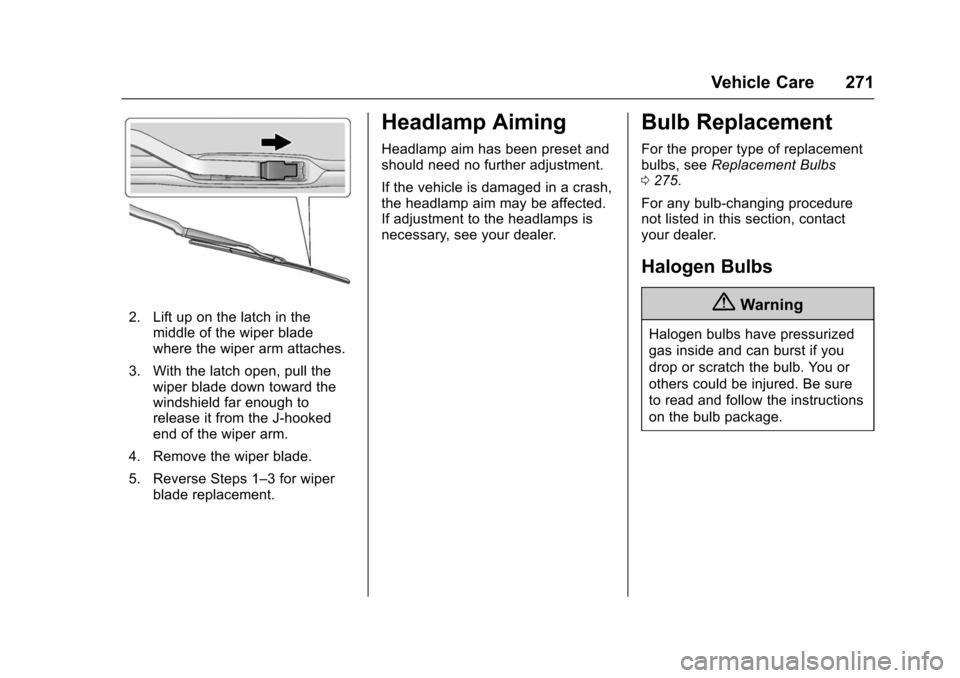
2. Lift up on the latch in themiddle of the wiper blade
where the wiper arm attaches.
3. With the latch open, pull the wiper blade down toward the
windshield far enough to
release it from the J-hooked
end of the wiper arm.
4. Remove the wiper blade.
5. Reverse Steps 1–3 for wiper blade replacement.
Headlamp Aiming
Headlamp aim has been preset and
should need no further adjustment.
If the vehicle is damaged in a crash,
the headlamp aim may be affected.
If adjustment to the headlamps is
necessary, see your dealer.
Bulb Replacement
For the proper type of replacement
bulbs, see Replacement Bulbs
0 275.
For any bulb-changing procedure
not listed in this section, contact
your dealer.
Halogen Bulbs
{Warning
Halogen bulbs have pressurized
gas inside and can burst if you
drop or scratch the bulb. You or
others could be injured. Be sure
to read and follow the instructions
on the bulb package.
Page 273 of 377
Chevrolet Impala Owner Manual (GMNA-Localizing-U.S/Canada-9086448) -
2016 - CRC - 5/20/15
272 Vehicle Care
High Intensity Discharge
(HID) Lighting
{Warning
The high intensity discharge
lighting system operates at a very
high voltage. If you try to service
any of the system components,
you could be seriously injured.
Have your dealer or a qualified
technician service them.
The vehicle may have HID
headlamps. After an HID headlamp
bulb has been replaced, you may
notice that the beam is a slightly
different shade than it was originally.
This is normal.
LED Lighting
This vehicle has several LED lamps.
For replacement of any LED lighting
assembly, contact your dealer.
Headlamps, Front Turn
Signal, Sidemarker, and
Parking Lamps
Base Headlamp Assembly
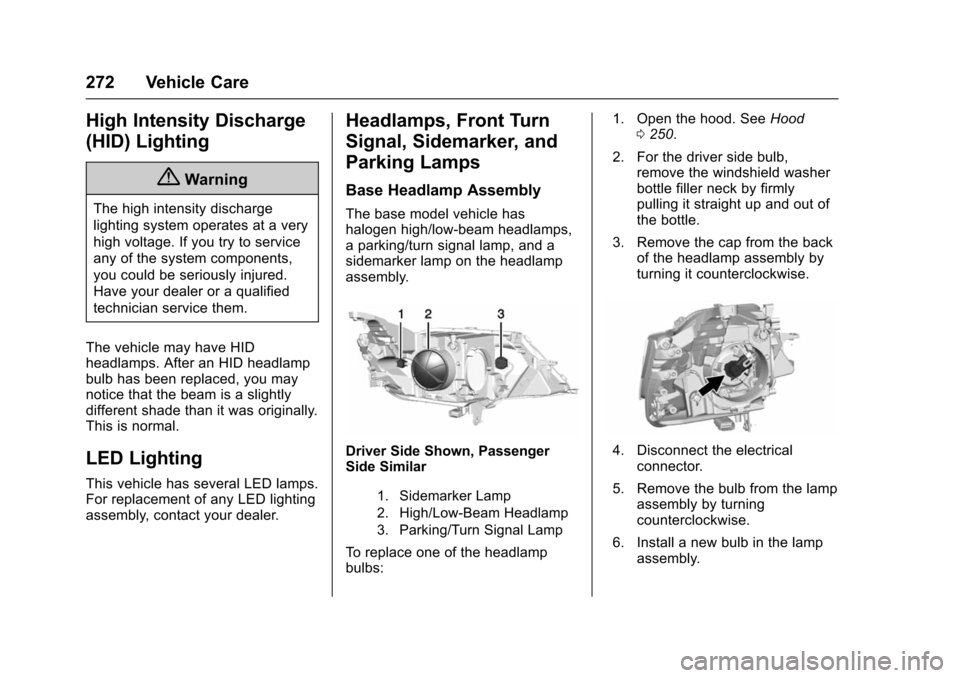
The base model vehicle has
halogen high/low-beam headlamps,
a parking/turn signal lamp, and a
sidemarker lamp on the headlamp
assembly.
Driver Side Shown, Passenger
Side Similar
1. Sidemarker Lamp
2. High/Low-Beam Headlamp
3. Parking/Turn Signal Lamp
To replace one of the headlamp
bulbs: 1. Open the hood. See
Hood
0 250.
2. For the driver side bulb, remove the windshield washer
bottle filler neck by firmly
pulling it straight up and out of
the bottle.
3. Remove the cap from the back of the headlamp assembly by
turning it counterclockwise.
4. Disconnect the electricalconnector.
5. Remove the bulb from the lamp assembly by turning
counterclockwise.
6. Install a new bulb in the lamp assembly.
Page 274 of 377
Chevrolet Impala Owner Manual (GMNA-Localizing-U.S/Canada-9086448) -
2016 - CRC - 5/20/15
Vehicle Care 273
7. Connect the electricalconnector.
8. Replace the cap on the back of the headlamp assembly by
turning it clockwise.
9. For the driver side, reinstall the windshield washer bottle filler
neck by firmly pushing it
straight into the bottle. Ensure
that the filler neck clip engages
into the underhood electrical
center retainer.
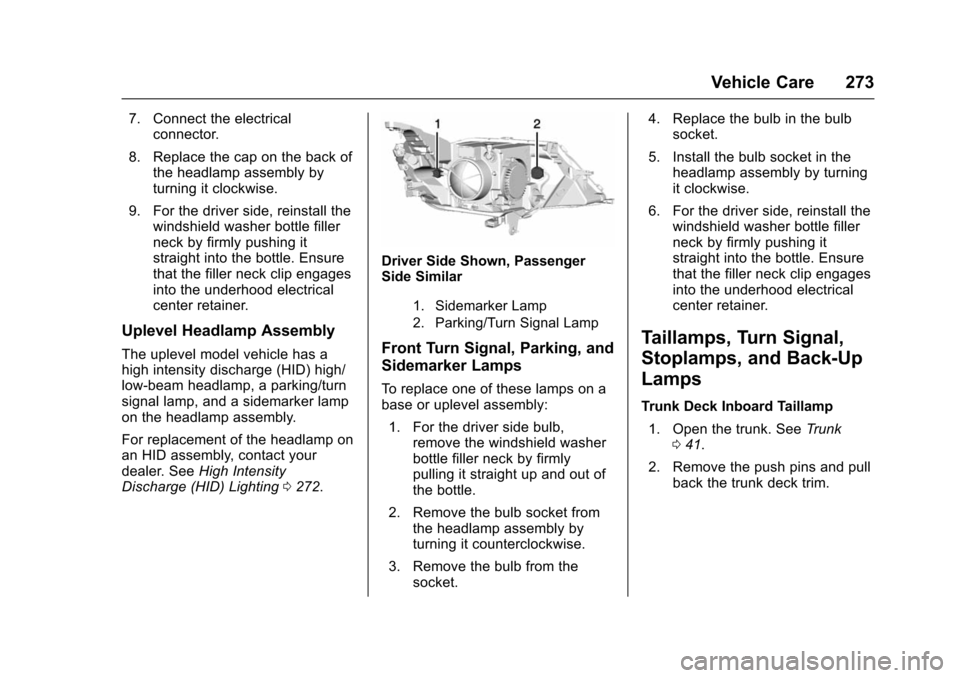
Uplevel Headlamp Assembly
The uplevel model vehicle has a
high intensity discharge (HID) high/
low-beam headlamp, a parking/turn
signal lamp, and a sidemarker lamp
on the headlamp assembly.
For replacement of the headlamp on
an HID assembly, contact your
dealer. See High Intensity
Discharge (HID) Lighting 0272.
Driver Side Shown, Passenger
Side Similar
1. Sidemarker Lamp
2. Parking/Turn Signal Lamp
Front Turn Signal, Parking, and
Sidemarker Lamps
To replace one of these lamps on a
base or uplevel assembly:
1. For the driver side bulb, remove the windshield washer
bottle filler neck by firmly
pulling it straight up and out of
the bottle.
2. Remove the bulb socket from the headlamp assembly by
turning it counterclockwise.
3. Remove the bulb from the socket. 4. Replace the bulb in the bulb
socket.
5. Install the bulb socket in the headlamp assembly by turning
it clockwise.
6. For the driver side, reinstall the windshield washer bottle filler
neck by firmly pushing it
straight into the bottle. Ensure
that the filler neck clip engages
into the underhood electrical
center retainer.
Taillamps, Turn Signal,
Stoplamps, and Back-Up
Lamps
Trunk Deck Inboard Taillamp
1. Open the trunk. See Trunk
0 41.
2. Remove the push pins and pull back the trunk deck trim.