consol CHEVROLET IMPALA 2017 10.G Owners Manual
[x] Cancel search | Manufacturer: CHEVROLET, Model Year: 2017, Model line: IMPALA, Model: CHEVROLET IMPALA 2017 10.GPages: 378, PDF Size: 6.09 MB
Page 8 of 378

Chevrolet Impala Owner Manual (GMNA-Localizing-U.S./Canada-9921197) -
2017 - crc - 3/30/16
In Brief 7
1.Instrument Panel Illumination
Control 0152.
2. Air Vents 0189.
3. Trunk Release. See Trunk 041.
Parking Assist Button. See
Assistance Systems for
Parking or Backing 0229 (If
Equipped).
Lane Departure Warning
(LDW) Button. See Lane
Departure Warning
(LDW) 0237.
4. Turn Signal Lever. See Turn
and Lane-Change
Signals 0152.
5. Instrument Cluster 0113.
Driver Information Center
(DIC) 0128.
6. Windshield Wiper/
Washer 0107.
7. Hazard Warning
Flashers 0151.
8. Light Sensor. See Automatic
Headlamp System 0151. 9. Storage Area with USB Port
Inside (If Equipped). See
Instrument Panel Storage
0100 andUSB Port 0165.
10. Infotainment 0156.
11. Climate Control
Systems 0182.
Dual Automatic Climate Control
System 0185.
12. Storage Area with Accessory Power Outlet Inside. See
Center Console Storage 0101
and Power Outlets 0109.
13. Heated and Ventilated Front
Seats 060 (If Equipped).
14. Traction Control/Electronic
Stability Control 0218.
15. Shift Lever. See Automatic
Transmission 0212.
16. Ignition Positions (Keyless
Access) 0204 orIgnition
Positions (Key Access) 0202.
17. Steering Wheel Controls 0106.
Driver Information Center
Buttons. See Driver Information
Center (DIC) 0128. 18.
Steering Wheel Controls 0106
(Out of View).
19. Horn 0106.
20. Steering Wheel
Adjustment 0105.
21. Cruise Control 0219 (If
Equipped).
Adaptive Cruise Control 0221
(If Equipped).
Heated Steering Wheel 0106
(If Equipped).
Forward Collision Alert (FCA)
System 0231 (If Equipped).
22. Instrument Panel Storage
0100 (If Equipped).
Fuse Cover. See Instrument
Panel Fuse Block 0281.
23. Hood Release. See Hood 0252.
24. Data Link Connector (Out of View). See Malfunction
Indicator Lamp (Check Engine
Light) 0120.
25. Electric Parking Brake 0215.
Page 14 of 378
Chevrolet Impala Owner Manual (GMNA-Localizing-U.S./Canada-9921197) -
2017 - crc - 3/30/16
In Brief 13
SeeMemory Seats 058 and
Vehicle Personalization 0139.
Second Row Seats
The rear seatbacks can be folded
down to increase cargo space.
See Rear Seats 061.
Heated and Ventilated
Seats
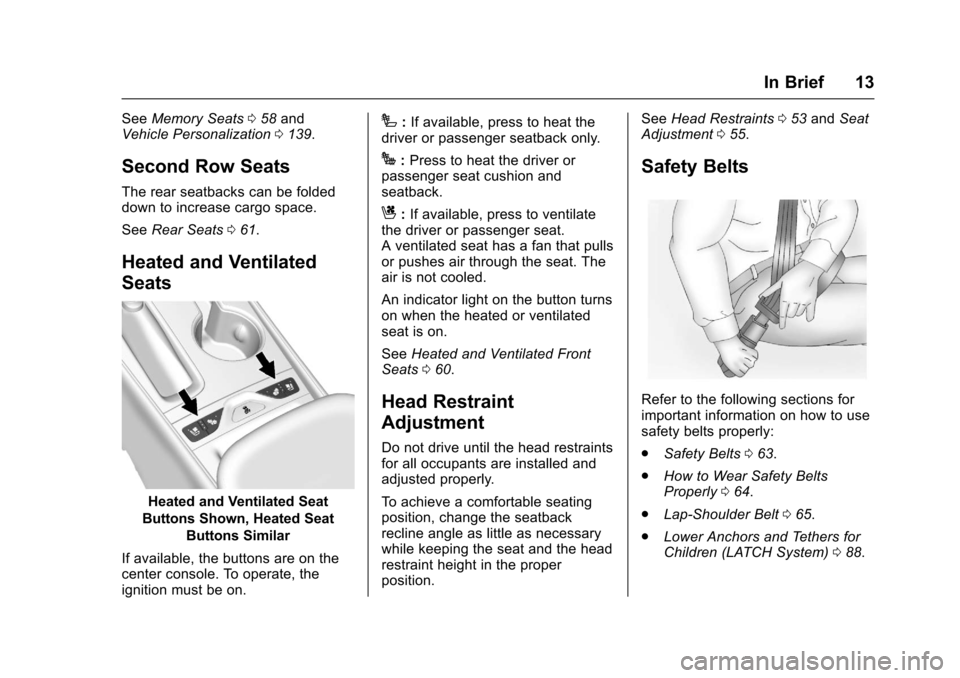
Heated and Ventilated Seat
Buttons Shown, Heated Seat Buttons Similar
If available, the buttons are on the
center console. To operate, the
ignition must be on.
I: If available, press to heat the
driver or passenger seatback only.
J: Press to heat the driver or
passenger seat cushion and
seatback.
C: If available, press to ventilate
the driver or passenger seat.
A ventilated seat has a fan that pulls
or pushes air through the seat. The
air is not cooled.
An indicator light on the button turns
on when the heated or ventilated
seat is on.
See Heated and Ventilated Front
Seats 060.
Head Restraint
Adjustment
Do not drive until the head restraints
for all occupants are installed and
adjusted properly.
To achieve a comfortable seating
position, change the seatback
recline angle as little as necessary
while keeping the seat and the head
restraint height in the proper
position. See
Head Restraints 053 and Seat
Adjustment 055.
Safety Belts
Refer to the following sections for
important information on how to use
safety belts properly:
.
Safety Belts 063.
. How to Wear Safety Belts
Properly 064.
. Lap-Shoulder Belt 065.
. Lower Anchors and Tethers for
Children (LATCH System) 088.
Page 15 of 378
Chevrolet Impala Owner Manual (GMNA-Localizing-U.S./Canada-9921197) -
2017 - crc - 3/30/16
14 In Brief
Passenger Sensing
System
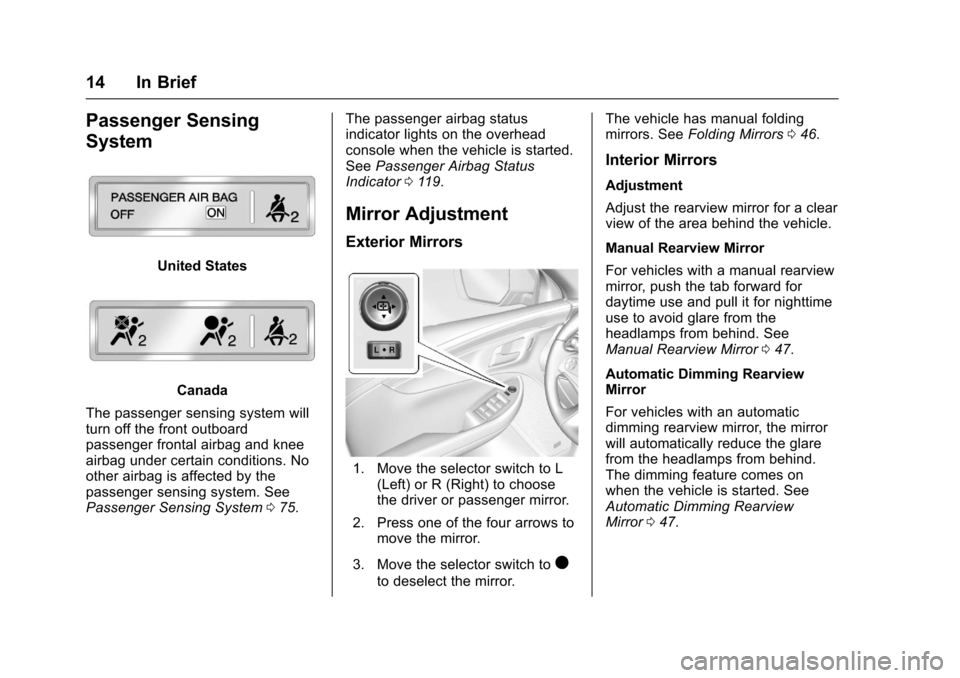
United States
Canada
The passenger sensing system will
turn off the front outboard
passenger frontal airbag and knee
airbag under certain conditions. No
other airbag is affected by the
passenger sensing system. See
Passenger Sensing System 075. The passenger airbag status
indicator lights on the overhead
console when the vehicle is started.
See
Passenger Airbag Status
Indicator 0119.
Mirror Adjustment
Exterior Mirrors
1. Move the selector switch to L
(Left) or R (Right) to choose
the driver or passenger mirror.
2. Press one of the four arrows to move the mirror.
3. Move the selector switch to
)
to deselect the mirror. The vehicle has manual folding
mirrors. See
Folding Mirrors 046.
Interior Mirrors
Adjustment
Adjust the rearview mirror for a clear
view of the area behind the vehicle.
Manual Rearview Mirror
For vehicles with a manual rearview
mirror, push the tab forward for
daytime use and pull it for nighttime
use to avoid glare from the
headlamps from behind. See
Manual Rearview Mirror 047.
Automatic Dimming Rearview
Mirror
For vehicles with an automatic
dimming rearview mirror, the mirror
will automatically reduce the glare
from the headlamps from behind.
The dimming feature comes on
when the vehicle is started. See
Automatic Dimming Rearview
Mirror 047.
Page 16 of 378
Chevrolet Impala Owner Manual (GMNA-Localizing-U.S./Canada-9921197) -
2017 - crc - 3/30/16
In Brief 15
Steering Wheel
Adjustment
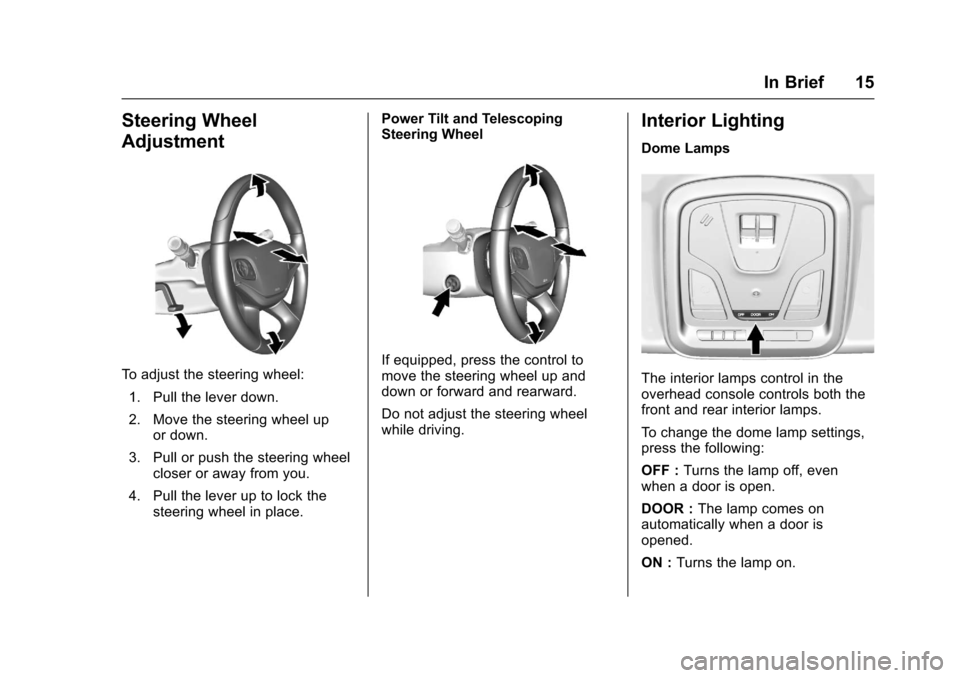
To adjust the steering wheel:1. Pull the lever down.
2. Move the steering wheel up or down.
3. Pull or push the steering wheel closer or away from you.
4. Pull the lever up to lock the steering wheel in place. Power Tilt and Telescoping
Steering WheelIf equipped, press the control to
move the steering wheel up and
down or forward and rearward.
Do not adjust the steering wheel
while driving.
Interior Lighting
Dome Lamps
The interior lamps control in the
overhead console controls both the
front and rear interior lamps.
To change the dome lamp settings,
press the following:
OFF :
Turns the lamp off, even
when a door is open.
DOOR : The lamp comes on
automatically when a door is
opened.
ON : Turns the lamp on.
Page 17 of 378
Chevrolet Impala Owner Manual (GMNA-Localizing-U.S./Canada-9921197) -
2017 - crc - 3/30/16
16 In Brief
Reading Lamps
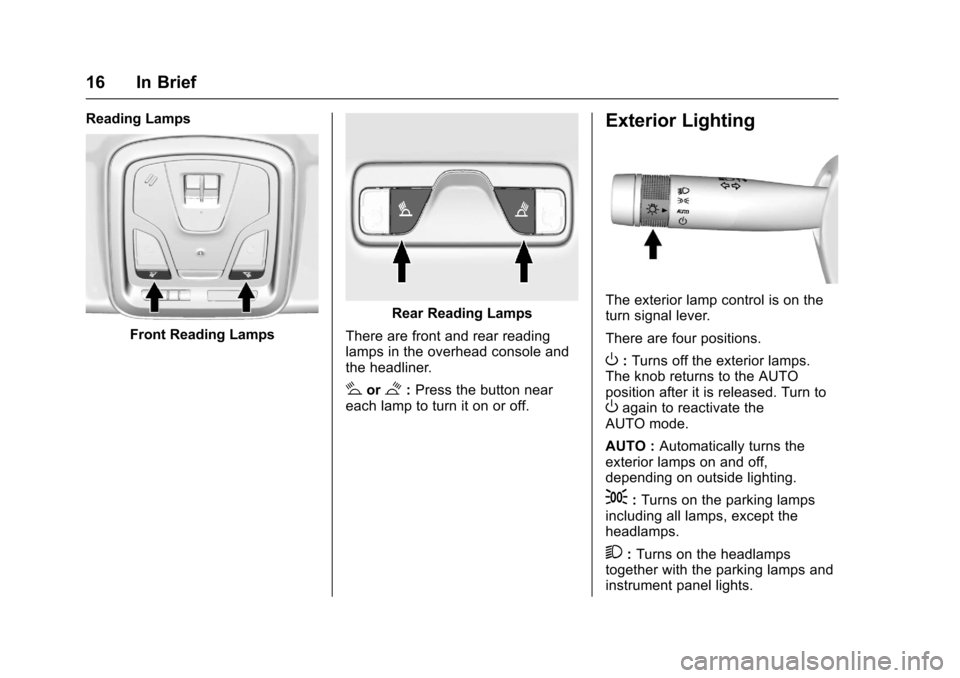
Front Reading Lamps
Rear Reading Lamps
There are front and rear reading
lamps in the overhead console and
the headliner.
#or$: Press the button near
each lamp to turn it on or off.
Exterior Lighting
The exterior lamp control is on the
turn signal lever.
There are four positions.
O: Turns off the exterior lamps.
The knob returns to the AUTO
position after it is released. Turn to
Oagain to reactivate the
AUTO mode.
AUTO : Automatically turns the
exterior lamps on and off,
depending on outside lighting.
;: Turns on the parking lamps
including all lamps, except the
headlamps.
2: Turns on the headlamps
together with the parking lamps and
instrument panel lights.
Page 22 of 378
Chevrolet Impala Owner Manual (GMNA-Localizing-U.S./Canada-9921197) -
2017 - crc - 3/30/16
In Brief 21
Portable Audio Devices
This vehicle has a 3.5 mm (1/8 in)
auxiliary input jack. If equipped,
there are up to two USB ports in the
center console and one in the
storage behind the radio. External
devices such as iPods
®, laptop
computers, MP3 players, CD
changers, and USB storage devices
may be connected, depending on
the audio system.
See Auxiliary Jack 0168 andUSB
Port 0165.
Bluetooth®
The Bluetooth®system allows users
with a Bluetooth-enabled cell phone
to make and receive hands-free
calls using the vehicle audio system
and controls.
The Bluetooth-enabled cell phone
must be paired with the in-vehicle
Bluetooth system before it can be
used in the vehicle. Not all phones
will support all functions. See
Bluetooth (Overview) 0169 or
Bluetooth (Infotainment Controls -
Base Radio) 0171 orBluetooth
(Voice Recognition - Base
Radio) 0175.
Steering Wheel Controls
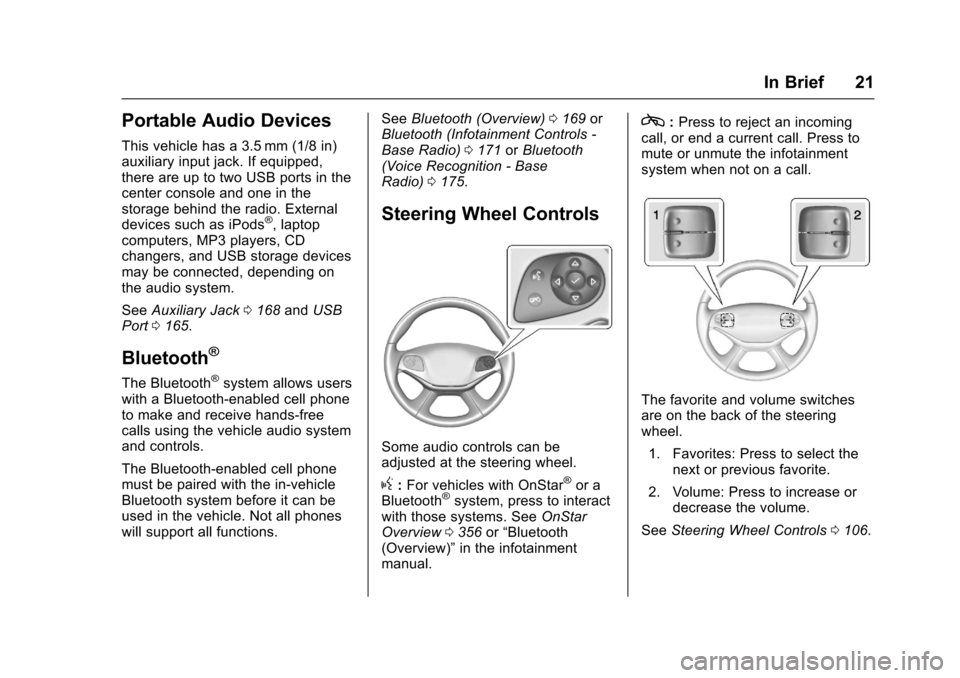
Some audio controls can be
adjusted at the steering wheel.
g:For vehicles with OnStar®or a
Bluetooth®system, press to interact
with those systems. See OnStar
Overview 0356 or“Bluetooth
(Overview)” in the infotainment
manual.
c: Press to reject an incoming
call, or end a current call. Press to
mute or unmute the infotainment
system when not on a call.
The favorite and volume switches
are on the back of the steering
wheel.
1. Favorites: Press to select the next or previous favorite.
2. Volume: Press to increase or decrease the volume.
See Steering Wheel Controls 0106.
Page 25 of 378
Chevrolet Impala Owner Manual (GMNA-Localizing-U.S./Canada-9921197) -
2017 - crc - 3/30/16
24 In Brief
avoiding objects while in
R (Reverse). It operates at speeds
less than 8 km/h (5 mph). RPA may
display a warning triangle on the
Rear Vision Camera screen and/or
a graphic on the instrument cluster
to provide the object distance. In
addition, multiple beeps may occur
if very close to an object.
SeeAssistance Systems for Parking
or Backing 0229.
Power Outlets
The accessory power outlets can be
used to plug in electrical equipment,
such as a cell phone or MP3 player.
The vehicle has three accessory
power outlets:
.
Inside the front storage area
below the climate control
system.
. Inside the center console.
. On the rear of the center
console.
Lift the cover to access the
accessory power outlet.
See Power Outlets 0109.
Universal Remote System
This system provides a way to
replace up to three remote control
transmitters used to activate
devices such as garage door
openers, security systems, and
home automation devices.
Read the instructions completely
before attempting to program the
Universal Remote system. Because
of the steps involved, it may be
helpful to have another person
available to assist with programming
the Universal Remote system.
See Universal Remote
System 0146.
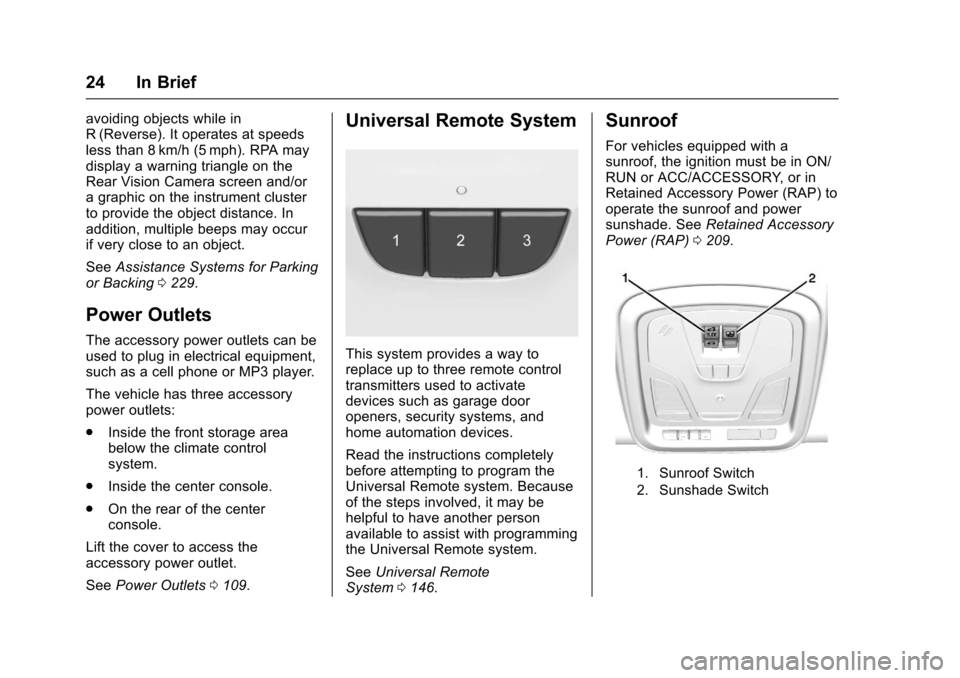
Sunroof
For vehicles equipped with a
sunroof, the ignition must be in ON/
RUN or ACC/ACCESSORY, or in
Retained Accessory Power (RAP) to
operate the sunroof and power
sunshade. See Retained Accessory
Power (RAP) 0209.
1. Sunroof Switch
2. Sunshade Switch
Page 26 of 378
Chevrolet Impala Owner Manual (GMNA-Localizing-U.S./Canada-9921197) -
2017 - crc - 3/30/16
In Brief 25
Sunroof Switch
Express-Open/Express-Close :
Fully press and release
Dto
express-open the sunroof. Fully
press and release
gto
express-close the sunroof.
Open/Close (Manual Mode) :
Press and hold
Dto open the
sunroof. Release
Dat the desired
position to stop movement. Press
and hold
gto close the sunroof.
Vent Feature : Press
Dto the first
detent to open the vent. Press
g
to the first detent to close the vent.
The sunshade partially opens and
closes automatically during the vent
operation. Sunshade Switch
Express-Open/Express-Close :
Fully press and release the front or
rear of
Qto express-open or
express-close the sunshade. If the
sunroof is open, the sunshade will
express-close just short of the open
sunroof.
Open/Close (Manual Mode) :
Press and hold the front or rear of
Qto open or close the sunshade.
Release the switch to stop at the
desired position.
The sunroof/sunshade is equipped
with an automatic reversal system.
See Sunroof 050.
Performance and
Maintenance
Traction Control/
Electronic Stability
Control
The Traction Control System (TCS)
limits wheel spin. The system turns
on automatically every time the
vehicle is started.
The StabiliTrak system assists with
directional control of the vehicle in
difficult driving conditions. The
system also turns on automatically
every time the vehicle is started.
.
To turn off traction control, press
and release
gon the center
console. The Traction Off light
i
illuminates.
. To turn off both traction control
and StabiliTrak, press and
hold
g, until the Traction Off
light
iand the StabiliTrak Off
light
gilluminate.
Page 35 of 378
Chevrolet Impala Owner Manual (GMNA-Localizing-U.S./Canada-9921197) -
2017 - crc - 3/30/16
34 Keys, Doors, and Windows
Programming with Recognized
Transmitters (Keyless Access
Vehicles Only)
A new transmitter can be
programmed to the vehicle when
there are two recognized
transmitters. To program, the vehicle
must be off and at least one
currently recognized transmitter and
all new transmitters, must be
with you.1. Place the two recognized transmitters in the cupholder.
2. Remove the key lock cylinder cap. See Door Locks 038.
Then insert the vehicle key into
the key lock cylinder on the
driver door handle and turn the
key, counterclockwise, to the
unlock position five times within
10 seconds.
The Driver Information Center
(DIC) displays READY FOR
REMOTE #2, 3, 4 or 5.
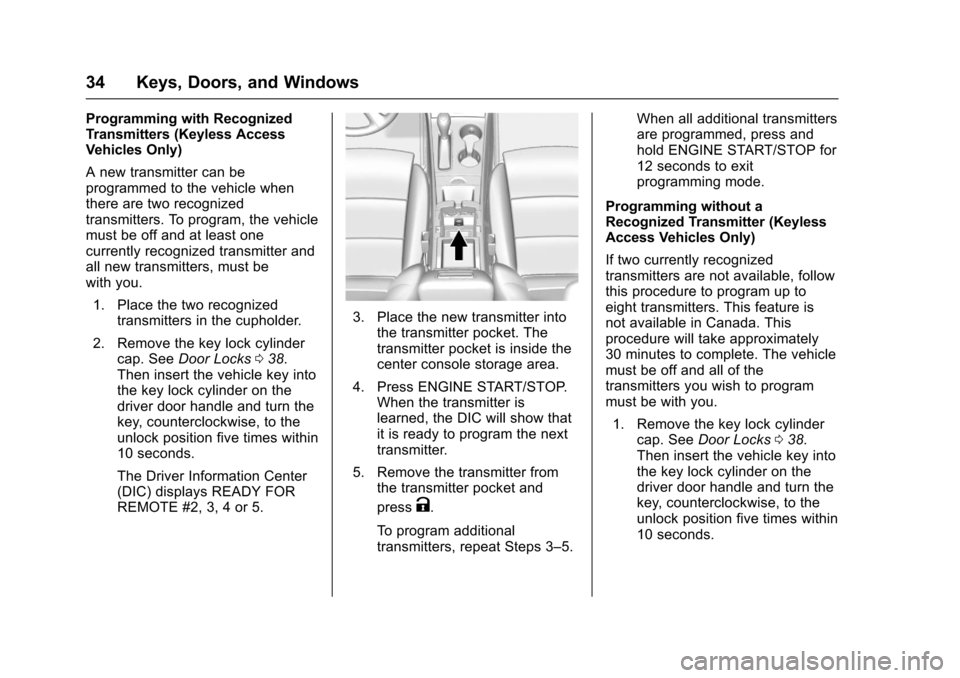
3. Place the new transmitter into the transmitter pocket. The
transmitter pocket is inside the
center console storage area.
4. Press ENGINE START/STOP. When the transmitter is
learned, the DIC will show that
it is ready to program the next
transmitter.
5. Remove the transmitter from the transmitter pocket and
press
K.
To program additional
transmitters, repeat Steps 3–5. When all additional transmitters
are programmed, press and
hold ENGINE START/STOP for
12 seconds to exit
programming mode.
Programming without a
Recognized Transmitter (Keyless
Access Vehicles Only)
If two currently recognized
transmitters are not available, follow
this procedure to program up to
eight transmitters. This feature is
not available in Canada. This
procedure will take approximately
30 minutes to complete. The vehicle
must be off and all of the
transmitters you wish to program
must be with you. 1. Remove the key lock cylinder cap. See Door Locks 038.
Then insert the vehicle key into
the key lock cylinder on the
driver door handle and turn the
key, counterclockwise, to the
unlock position five times within
10 seconds.
Page 36 of 378
Chevrolet Impala Owner Manual (GMNA-Localizing-U.S./Canada-9921197) -
2017 - crc - 3/30/16
Keys, Doors, and Windows 35
The Driver Information Center
(DIC) displays REMOTE
LEARN PENDING,
PLEASE WAIT.
2. Wait for 10 minutes until the DIC displays PRESS ENGINE
START BUTTON TO LEARN
and then press ENGINE
START/STOP.
The DIC displays will again
show REMOTE LEARN
PENDING, PLEASE WAIT.
3. Repeat Step 2 two additional times. After the third time, all
previously known transmitters
will no longer work with the
vehicle. Remaining transmitters
can be relearned during the
next steps.
The DIC display should now
show READY FOR REMOTE
# 1.
4. Place the new transmitter into the transmitter pocket. The
transmitter pocket is inside the
center console storage area. 5. Press ENGINE START/STOP.
When the transmitter is
learned, the DIC will show that
it is ready to program the next
transmitter.
6. Remove the transmitter from the transmitter pocket and
press
K.
To program additional
transmitters, repeat Steps 4–6.
When all additional transmitters
are programmed, press and
hold ENGINE START/STOP for
12 seconds to exit
programming mode.
Starting the Vehicle with a Low
Transmitter Battery or Wireless
Interference
If the transmitter battery is weak or
there is wireless interference, the
DIC may display NO REMOTE
DETECTED or PLACE
TRANSMITTER IN POCKET TO
START when you try to start the
vehicle. The REPLACE BATTERY
IN REMOTE KEY message may
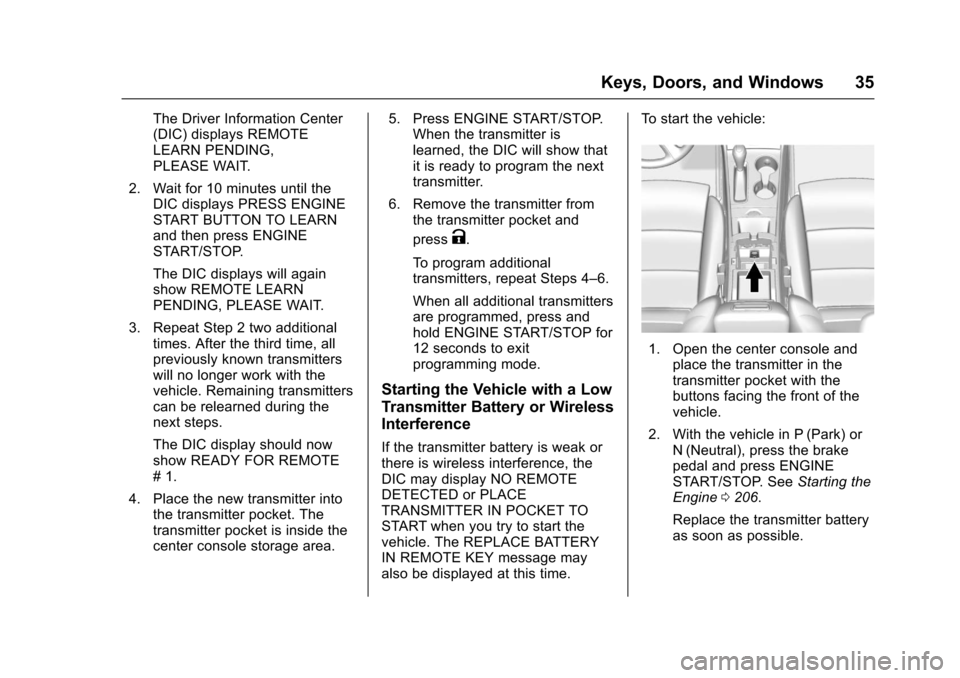
also be displayed at this time. To start the vehicle:
1. Open the center console and
place the transmitter in the
transmitter pocket with the
buttons facing the front of the
vehicle.
2. With the vehicle in P (Park) or N (Neutral), press the brake
pedal and press ENGINE
START/STOP. See Starting the
Engine 0206.
Replace the transmitter battery
as soon as possible.