tail light CHEVROLET IMPALA 2017 10.G Owners Manual
[x] Cancel search | Manufacturer: CHEVROLET, Model Year: 2017, Model line: IMPALA, Model: CHEVROLET IMPALA 2017 10.GPages: 378, PDF Size: 6.09 MB
Page 111 of 378
Chevrolet Impala Owner Manual (GMNA-Localizing-U.S./Canada-9921197) -
2017 - crc - 3/30/16
110 Instruments and Controls
Power Outlet 110/120 Volt
Alternating Current
The vehicle may have a power
outlet that can be used to plug in
electrical equipment that uses a
maximum limit of 150 watts.
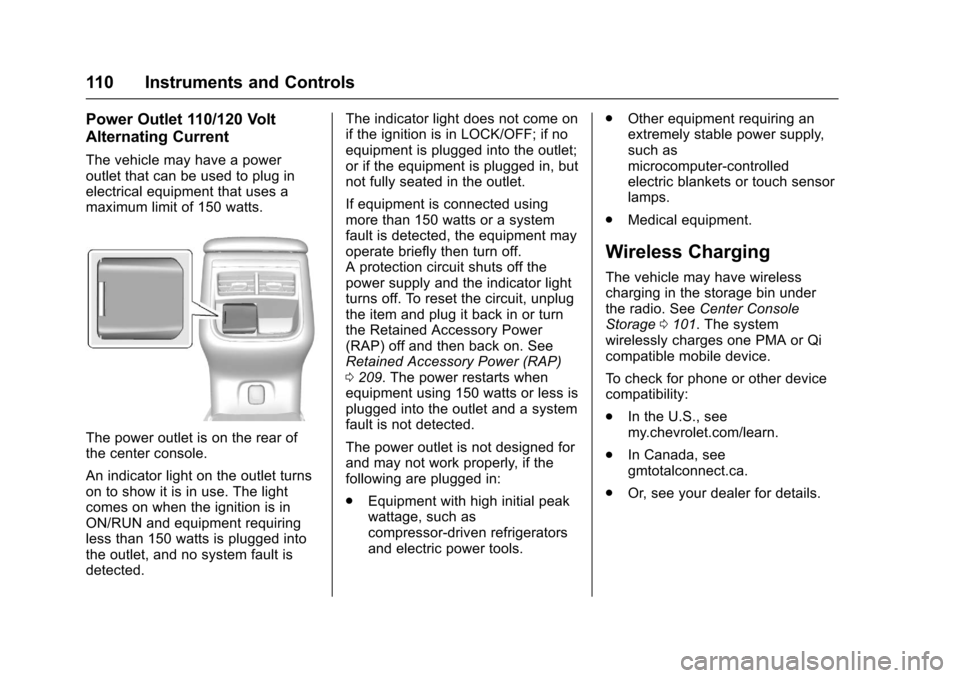
The power outlet is on the rear of
the center console.
An indicator light on the outlet turns
on to show it is in use. The light
comes on when the ignition is in
ON/RUN and equipment requiring
less than 150 watts is plugged into
the outlet, and no system fault is
detected.The indicator light does not come on
if the ignition is in LOCK/OFF; if no
equipment is plugged into the outlet;
or if the equipment is plugged in, but
not fully seated in the outlet.
If equipment is connected using
more than 150 watts or a system
fault is detected, the equipment may
operate briefly then turn off.
A protection circuit shuts off the
power supply and the indicator light
turns off. To reset the circuit, unplug
the item and plug it back in or turn
the Retained Accessory Power
(RAP) off and then back on. See
Retained Accessory Power (RAP)
0
209. The power restarts when
equipment using 150 watts or less is
plugged into the outlet and a system
fault is not detected.
The power outlet is not designed for
and may not work properly, if the
following are plugged in:
. Equipment with high initial peak
wattage, such as
compressor-driven refrigerators
and electric power tools. .
Other equipment requiring an
extremely stable power supply,
such as
microcomputer-controlled
electric blankets or touch sensor
lamps.
. Medical equipment.
Wireless Charging
The vehicle may have wireless
charging in the storage bin under
the radio. See Center Console
Storage 0101. The system
wirelessly charges one PMA or Qi
compatible mobile device.
To check for phone or other device
compatibility:
. In the U.S., see
my.chevrolet.com/learn.
. In Canada, see
gmtotalconnect.ca.
. Or, see your dealer for details.
Page 116 of 378
Chevrolet Impala Owner Manual (GMNA-Localizing-U.S./Canada-9921197) -
2017 - crc - 3/30/16
Instruments and Controls 115
Cluster Menu
There is an interactive display area
in the center of the instrument
cluster.
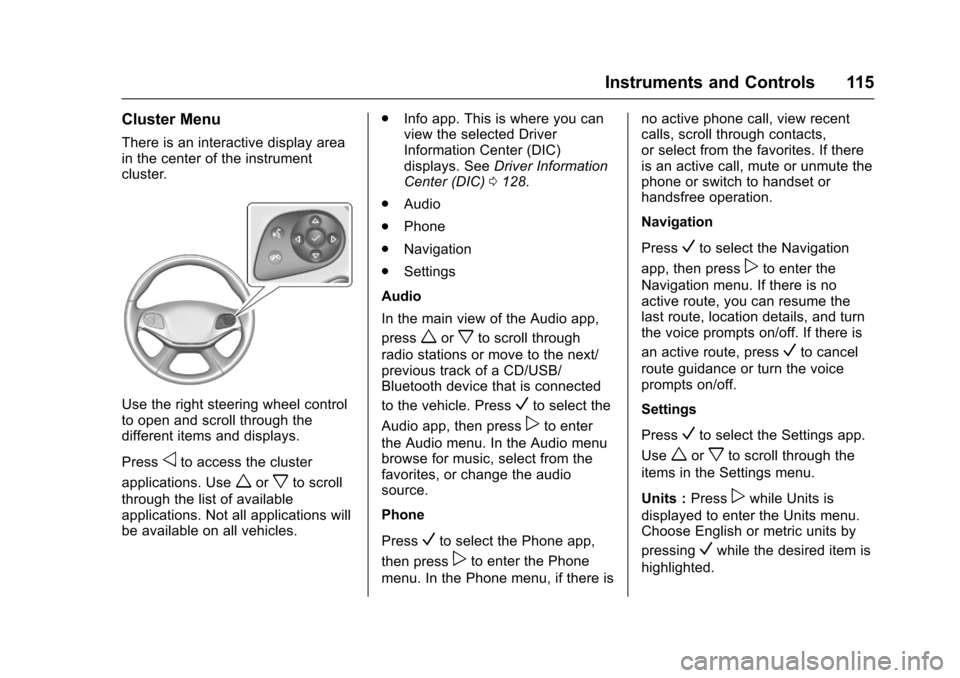
Use the right steering wheel control
to open and scroll through the
different items and displays.
Press
oto access the cluster
applications. Use
worxto scroll
through the list of available
applications. Not all applications will
be available on all vehicles. .
Info app. This is where you can
view the selected Driver
Information Center (DIC)
displays. See Driver Information
Center (DIC) 0128.
. Audio
. Phone
. Navigation
. Settings
Audio
In the main view of the Audio app,
press
worxto scroll through
radio stations or move to the next/
previous track of a CD/USB/
Bluetooth device that is connected
to the vehicle. Press
Vto select the
Audio app, then press
pto enter
the Audio menu. In the Audio menu
browse for music, select from the
favorites, or change the audio
source.
Phone
Press
Vto select the Phone app,
then press
pto enter the Phone
menu. In the Phone menu, if there is no active phone call, view recent
calls, scroll through contacts,
or select from the favorites. If there
is an active call, mute or unmute the
phone or switch to handset or
handsfree operation.
Navigation
Press
Vto select the Navigation
app, then press
pto enter the
Navigation menu. If there is no
active route, you can resume the
last route, location details, and turn
the voice prompts on/off. If there is
an active route, press
Vto cancel
route guidance or turn the voice
prompts on/off.
Settings
Press
Vto select the Settings app.
Use
worxto scroll through the
items in the Settings menu.
Units : Press
pwhile Units is
displayed to enter the Units menu.
Choose English or metric units by
pressing
Vwhile the desired item is
highlighted.
Page 141 of 378
Chevrolet Impala Owner Manual (GMNA-Localizing-U.S./Canada-9921197) -
2017 - crc - 3/30/16
140 Instruments and Controls
.Language (Language)
. Valet Mode
. Radio
. Vehicle
. Bluetooth
. Apple CarPlay
. Android Auto
. Voice
. Display
. Rear Camera
. Return to Factory Settings
. Software Information
Each menu is detailed in the
following information.
Time and Date
Manually set the time and date. See
Clock (Base Radio) 0108 orClock
(Uplevel Radio) 0109.
Language (Language)
Select Language, then select from
the available language(s).
Valet Mode (If Equipped)
This will lock the infotainment
system and steering wheel controls.
It may also limit access to vehicle
storage locations (if equipped).
To enable valet mode:
1. Enter a four-digit code on the keypad.
2. Select Enter to go to the confirmation screen.
3. Re-enter the four-digit code.
Press LOCK or UNLOCK to lock or
unlock the system. Press Back to go
back to the previous menu.
Radio
To manage the radio features, see
“Radio Setup” under“Setting Radio
Preferences” inHome Page 0159.
Vehicle
Select and the following may
display:
.
Climate and Air Quality
. Collision/Detection Systems
. Comfort and Convenience .
Lighting
. Power Door Locks
. Remote Lock, Unlock, Start
Climate and Air Quality
Select and the following may
display:
. Auto Fan Max Speed
. Air Conditioning Mode
. Auto Defog
. Auto Rear Defog
Auto Fan Max Speed
This feature will set the maximum
auto fan speed.
Select Low, Medium, or High.
Air Conditioning Mode
This feature changes the mode of
the air conditioning.
Select Off, On, or Last Setting.
Auto Defog
When set to On, the front defog will
automatically react to temperature
and humidity conditions that may
Page 143 of 378
Chevrolet Impala Owner Manual (GMNA-Localizing-U.S./Canada-9921197) -
2017 - crc - 3/30/16
142 Instruments and Controls
Chime Volume
This allows the selection of the
chime volume level.
Press + or−to adjust the volume.
Reverse Tilt Mirror
When on, both the driver and
passenger, driver, or passenger
mirrors will tilt downward when the
vehicle is shifted to R (Reverse) to
improve visibility of the ground near
the rear wheels. They will return to
their previous driving position when
the vehicle is shifted out of
R (Reverse) or the ignition is turned
to OFF.
Select Off, On - Driver and
Passenger, On - Driver, or On -
Passenger.
Lighting
Select and the following may
display:
. Vehicle Locator Lights
. Exit Lighting
. Daytime Tail Lights Vehicle Locator Lights
This feature will flash the exterior
lamps when
Kon the Remote
Keyless Entry (RKE) transmitter is
pressed to locate the vehicle.
Select Off or On.
Exit Lighting
This allows the selection of how
long the exterior lamps stay on
when leaving the vehicle when it is
dark outside.
Select Off, 30 Seconds, 60
Seconds, or 120 Seconds.
Daytime Tail Lights
This feature allows the taillamps to
be on during the day.
Select Off or On.
Power Door Locks
Select and the following may
display:
. Unlocked Door Anti-Lockout
. Auto Door Unlock
. Delayed Door Lock Unlocked Door Anti-Lockout
When on, this feature will keep the
driver door from locking when the
door is open. If Off is selected, the
Delayed Door Lock menu will be
available.
Select Off or On.
Auto Door Unlock
This allows selection of which of the
doors will automatically unlock when
the vehicle is shifted into P (Park).
Select Off, All Doors, or Driver Door.
Delayed Door Lock
When on, this feature will delay the
locking of the doors. To override the
delay, press the power door lock
switch on the door.
Select Off or On.
Remote Lock, Unlock, Start
Select and the following may
display:
.
Remote Unlock Light Feedback
. Remote Lock Feedback
. Remote Door Unlock
Page 151 of 378
Chevrolet Impala Owner Manual (GMNA-Localizing-U.S./Canada-9921197) -
2017 - crc - 3/30/16
150 Lighting
AUTO (Automatic) :Automatically
turns the exterior lamps on and off,
depending on outside lighting.
;: Turns on the parking lamps
including all lamps, except the
headlamps.
2: Turns on the headlamps
together with the parking lamps and
instrument panel lights.
Exterior Lamps Off
Reminder
A warning chime sounds if the driver
door is opened while the ignition is
off and the exterior lamps are on.
Headlamp High/
Low-Beam Changer
Push the turn signal lever away
from you and release to turn the
high beams on. To return to low
beams, push the lever again or pull
it toward you and release.
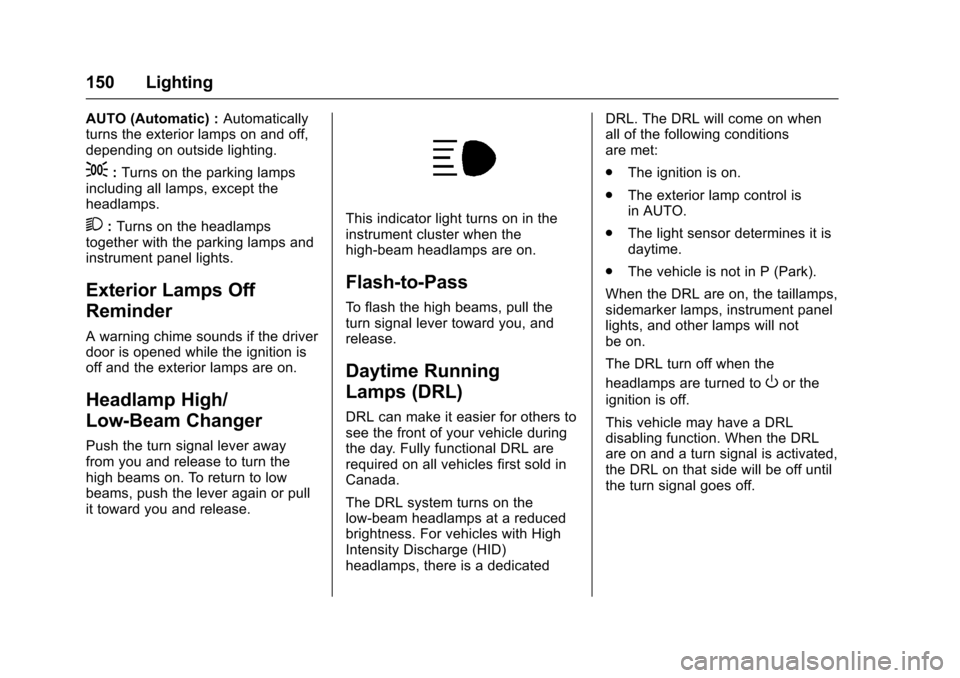
This indicator light turns on in the
instrument cluster when the
high-beam headlamps are on.
Flash-to-Pass
To flash the high beams, pull the
turn signal lever toward you, and
release.
Daytime Running
Lamps (DRL)
DRL can make it easier for others to
see the front of your vehicle during
the day. Fully functional DRL are
required on all vehicles first sold in
Canada.
The DRL system turns on the
low-beam headlamps at a reduced
brightness. For vehicles with High
Intensity Discharge (HID)
headlamps, there is a dedicated DRL. The DRL will come on when
all of the following conditions
are met:
.
The ignition is on.
. The exterior lamp control is
in AUTO.
. The light sensor determines it is
daytime.
. The vehicle is not in P (Park).
When the DRL are on, the taillamps,
sidemarker lamps, instrument panel
lights, and other lamps will not
be on.
The DRL turn off when the
headlamps are turned to
Oor the
ignition is off.
This vehicle may have a DRL
disabling function. When the DRL
are on and a turn signal is activated,
the DRL on that side will be off until
the turn signal goes off.
Page 234 of 378
Chevrolet Impala Owner Manual (GMNA-Localizing-U.S./Canada-9921197) -
2017 - crc - 3/30/16
Driving and Operating 233
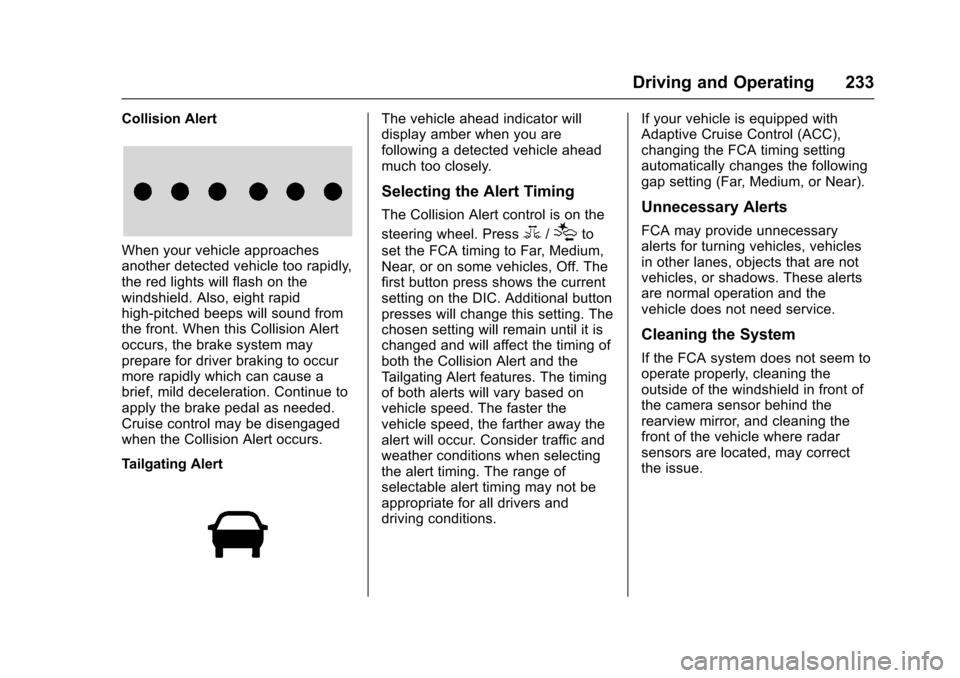
Collision Alert
When your vehicle approaches
another detected vehicle too rapidly,
the red lights will flash on the
windshield. Also, eight rapid
high-pitched beeps will sound from
the front. When this Collision Alert
occurs, the brake system may
prepare for driver braking to occur
more rapidly which can cause a
brief, mild deceleration. Continue to
apply the brake pedal as needed.
Cruise control may be disengaged
when the Collision Alert occurs.
Tailgating Alert
The vehicle ahead indicator will
display amber when you are
following a detected vehicle ahead
much too closely.
Selecting the Alert Timing
The Collision Alert control is on the
steering wheel. Press
3/[to
set the FCA timing to Far, Medium,
Near, or on some vehicles, Off. The
first button press shows the current
setting on the DIC. Additional button
presses will change this setting. The
chosen setting will remain until it is
changed and will affect the timing of
both the Collision Alert and the
Tailgating Alert features. The timing
of both alerts will vary based on
vehicle speed. The faster the
vehicle speed, the farther away the
alert will occur. Consider traffic and
weather conditions when selecting
the alert timing. The range of
selectable alert timing may not be
appropriate for all drivers and
driving conditions. If your vehicle is equipped with
Adaptive Cruise Control (ACC),
changing the FCA timing setting
automatically changes the following
gap setting (Far, Medium, or Near).
Unnecessary Alerts
FCA may provide unnecessary
alerts for turning vehicles, vehicles
in other lanes, objects that are not
vehicles, or shadows. These alerts
are normal operation and the
vehicle does not need service.
Cleaning the System
If the FCA system does not seem to
operate properly, cleaning the
outside of the windshield in front of
the camera sensor behind the
rearview mirror, and cleaning the
front of the vehicle where radar
sensors are located, may correct
the issue.
Page 250 of 378
Chevrolet Impala Owner Manual (GMNA-Localizing-U.S./Canada-9921197) -
2017 - crc - 3/30/16
Vehicle Care 249
Vehicle Care
General Information
General Information . . . . . . . . . . 250
California Proposition65 Warning . . . . . . . . . . . . . . . . . 250
California Perchlorate Materials Requirements . . . . . 250
Accessories and Modifications . . . . . . . . . . . . . . . . 251
Vehicle Checks
Doing Your OwnService Work . . . . . . . . . . . . . . . 251
Hood . . . . . . . . . . . . . . . . . . . . . . . . . 252
Engine Compartment Overview . . . . . . . . . . . . . . . . . . . . 253
Engine Oil . . . . . . . . . . . . . . . . . . . . 256
Engine Oil Life System . . . . . . . 258
Automatic Transmission Fluid . . . . . . . . . . . . . . . . . . . . . . . . 259
Engine Air Cleaner/Filter . . . . . . 260
Cooling System . . . . . . . . . . . . . . 261
Engine Coolant . . . . . . . . . . . . . . . 262
Engine Overheating . . . . . . . . . . 265
Overheated Engine Protection Operating Mode . . . . . . . . . . . . . 266
Washer Fluid . . . . . . . . . . . . . . . . . 266
Brakes . . . . . . . . . . . . . . . . . . . . . . . 267
Brake Fluid . . . . . . . . . . . . . . . . . . . 268 Battery - North America . . . . . . 269
Starter Switch Check . . . . . . . . . 270
Automatic Transmission Shift
Lock Control Function
Check . . . . . . . . . . . . . . . . . . . . . . . 270
Ignition Transmission Lock Check . . . . . . . . . . . . . . . . . . . . . . . 271
Park Brake and P (Park) Mechanism Check . . . . . . . . . . 271
Wiper Blade Replacement . . . . 271
Headlamp Aiming
Headlamp Aiming . . . . . . . . . . . . 272
Bulb Replacement
Bulb Replacement . . . . . . . . . . . . 273
Halogen Bulbs . . . . . . . . . . . . . . . . 273
High Intensity Discharge (HID) Lighting . . . . . . . . . . . . . . . . . . . . . 273
LED Lighting . . . . . . . . . . . . . . . . . 273
Headlamps, Front Turn Signal, Sidemarker, and Parking
Lamps . . . . . . . . . . . . . . . . . . . . . . 273
Taillamps, Turn Signal, Stoplamps, and Back-Up
Lamps . . . . . . . . . . . . . . . . . . . . . . 275
License Plate Lamp . . . . . . . . . . 276
Replacement Bulbs . . . . . . . . . . . 277
Electrical System
High Voltage Devices and Wiring . . . . . . . . . . . . . . . . . . . . . . . 277 Electrical System Overload . . . 277
Fuses . . . . . . . . . . . . . . . . . . . . . . . . 278
Engine Compartment Fuse
Block . . . . . . . . . . . . . . . . . . . . . . . . 278
Instrument Panel Fuse
Block . . . . . . . . . . . . . . . . . . . . . . . . 281
Wheels and Tires
Tires . . . . . . . . . . . . . . . . . . . . . . . . . . 283
All-Season Tires . . . . . . . . . . . . . . 284
Winter Tires . . . . . . . . . . . . . . . . . . 285
Low-Profile Tires . . . . . . . . . . . . . 285
Summer Tires . . . . . . . . . . . . . . . . 285
Tire Sidewall Labeling . . . . . . . . 286
Tire Designations . . . . . . . . . . . . . 288
Tire Terminology andDefinitions . . . . . . . . . . . . . . . . . . 289
Tire Pressure . . . . . . . . . . . . . . . . . 291
Tire Pressure for High-Speed Operation . . . . . . . . . . . . . . . . . . . 292
Tire Pressure Monitor System . . . . . . . . . . . . . . . . . . . . . . 293
Tire Pressure Monitor Operation . . . . . . . . . . . . . . . . . . . 294
Tire Inspection . . . . . . . . . . . . . . . . 297
Tire Rotation . . . . . . . . . . . . . . . . . 297
When It Is Time for New Tires . . . . . . . . . . . . . . . . . . . . . . . . 298
Buying New Tires . . . . . . . . . . . . . 299
Different Size Tires and Wheels . . . . . . . . . . . . . . . . . . . . . . 300
Page 295 of 378
Chevrolet Impala Owner Manual (GMNA-Localizing-U.S./Canada-9921197) -
2017 - crc - 3/30/16
294 Vehicle Care
pressure as intended. TPMS
malfunctions may occur for a variety
of reasons, including the installation
of replacement or alternate tires or
wheels on the vehicle that prevent
the TPMS from functioning properly.
Always check the TPMS malfunction
telltale after replacing one or more
tires or wheels on your vehicle to
ensure that the replacement or
alternate tires and wheels allow the
TPMS to continue to function
properly.
SeeTire Pressure Monitor
Operation 0294.
See Radio Frequency
Statement 0352.
Tire Pressure Monitor
Operation
This vehicle may have a Tire
Pressure Monitor System (TPMS).
The TPMS is designed to warn the
driver when a low tire pressure
condition exists. TPMS sensors are
mounted onto each tire and wheel
assembly, excluding the spare tire
and wheel assembly. The TPMS
sensors monitor the air pressure in the tires and transmits the tire
pressure readings to a receiver
located in the vehicle.
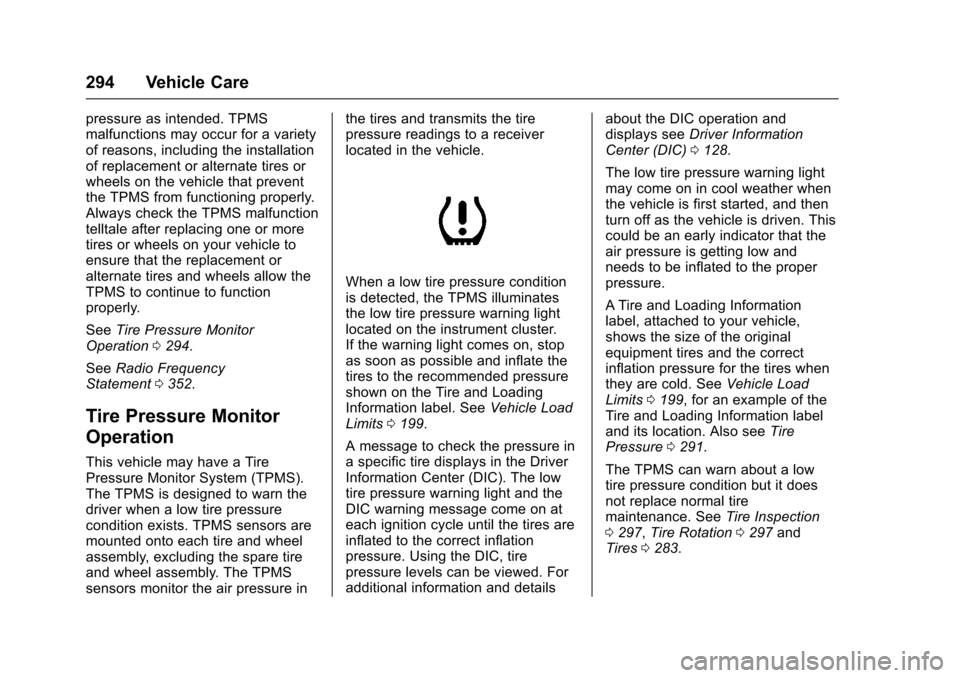
When a low tire pressure condition
is detected, the TPMS illuminates
the low tire pressure warning light
located on the instrument cluster.
If the warning light comes on, stop
as soon as possible and inflate the
tires to the recommended pressure
shown on the Tire and Loading
Information label. See
Vehicle Load
Limits 0199.
A message to check the pressure in
a specific tire displays in the Driver
Information Center (DIC). The low
tire pressure warning light and the
DIC warning message come on at
each ignition cycle until the tires are
inflated to the correct inflation
pressure. Using the DIC, tire
pressure levels can be viewed. For
additional information and details about the DIC operation and
displays see
Driver Information
Center (DIC) 0128.
The low tire pressure warning light
may come on in cool weather when
the vehicle is first started, and then
turn off as the vehicle is driven. This
could be an early indicator that the
air pressure is getting low and
needs to be inflated to the proper
pressure.
A Tire and Loading Information
label, attached to your vehicle,
shows the size of the original
equipment tires and the correct
inflation pressure for the tires when
they are cold. See Vehicle Load
Limits 0199, for an example of the
Tire and Loading Information label
and its location. Also see Tire
Pressure 0291.
The TPMS can warn about a low
tire pressure condition but it does
not replace normal tire
maintenance. See Tire Inspection
0 297, Tire Rotation 0297 and
Tires 0283.
Page 334 of 378
Chevrolet Impala Owner Manual (GMNA-Localizing-U.S./Canada-9921197) -
2017 - crc - 3/30/16
Service and Maintenance 333
.To avoid break-down or failure to
start the vehicle, maintain a
battery with full cranking power.
. Trained dealer technicians have
the diagnostic equipment to test
the battery and ensure that the
connections and cables are
corrosion-free.
Belts
. Belts may need replacing if they
squeak or show signs of
cracking or splitting.
. Trained dealer technicians have
access to tools and equipment
to inspect the belts and
recommend adjustment or
replacement when necessary.
Brakes
Brakes stop the vehicle and are
crucial to safe driving.
. Signs of brake wear may include
chirping, grinding, or squealing
noises, or difficulty stopping. .
Trained dealer technicians have
access to tools and equipment
to inspect the brakes and
recommend quality parts
engineered for the vehicle.
Fluids
Proper fluid levels and approved
fluids protect the vehicle’s systems
and components. See
Recommended Fluids and
Lubricants 0335 for GM approved
fluids.
. Engine oil and windshield
washer fluid levels should be
checked at every fuel fill.
. Instrument cluster lights may
come on to indicate that fluids
may be low and need to be
filled.
Hoses
Hoses transport fluids and should
be regularly inspected to ensure
that there are no cracks or leaks.
With a multi-point inspection, your
dealer can inspect the hoses and
advise if replacement is needed. Lamps
Properly working headlamps,
taillamps, and brake lamps are
important to see and be seen on
the road.
.
Signs that the headlamps need
attention include dimming, failure
to light, cracking, or damage.
The brake lamps need to be
checked periodically to ensure
that they light when braking.
. With a multi-point inspection,
your dealer can check the lamps
and note any concerns.
Shocks and Struts
Shocks and struts help aid in control
for a smoother ride.
. Signs of wear may include
steering wheel vibration, bounce/
sway while braking, longer
stopping distance, or uneven
tire wear.
. As part of the multi-point
inspection, trained dealer
technicians can visually inspect
the shocks and struts for signs
Page 357 of 378
Chevrolet Impala Owner Manual (GMNA-Localizing-U.S./Canada-9921197) -
2017 - crc - 3/30/16
356 OnStar
OnStar
OnStar Overview
OnStar Overview . . . . . . . . . . . . . 356
OnStar Services
Emergency . . . . . . . . . . . . . . . . . . . 357
Security . . . . . . . . . . . . . . . . . . . . . . 357
Navigation . . . . . . . . . . . . . . . . . . . . 358
Connections . . . . . . . . . . . . . . . . . . 358
Diagnostics . . . . . . . . . . . . . . . . . . . 360
OnStar Additional Information
OnStar AdditionalInformation . . . . . . . . . . . . . . . . . . 361
OnStar Overview
=Voice Command Button
QBlue OnStar Button
>Red Emergency Button
This vehicle may be equipped with a
comprehensive, in-vehicle system
that can connect to an OnStar
Advisor for Emergency, Security,
Navigation, Connections, and
Diagnostics Services. OnStar
services may require a paid
subscription and data plan. OnStar
requires the vehicle battery and
electrical system, cellular service,
and GPS satellite signals to be
available and operating. OnStar acts
as a link to existing emergency
service providers. OnStar may
collect information about you and
your vehicle, including location
information. See OnStar User Terms, Privacy Statement, and
Software Terms for more details
including system limitations at
www.onstar.com (U.S.) or
www.onstar.ca (Canada).
The OnStar system status light is
next to the OnStar buttons. If the
status light is:
.
Solid Green: System is ready.
. Flashing Green: On a call.
. Red: Indicates a problem.
. Off: System is active. Press
Q
twice to speak with an OnStar
Advisor.
Press
Qor call 1-888-4ONSTAR
(1-888-466-7827) to speak to an
Advisor.
Press
=to:
. Make a call, end a call,
or answer an incoming call.
. Give OnStar Hands-Free Calling
voice commands.
. Give OnStar Turn-by-Turn
Navigation voice commands.