engine CHEVROLET KODIAK 2005 Owners Manual
[x] Cancel search | Manufacturer: CHEVROLET, Model Year: 2005, Model line: KODIAK, Model: CHEVROLET KODIAK 2005Pages: 374, PDF Size: 5.46 MB
Page 254 of 374
How to Add Coolant to the Coolant
Surge Tank
If you have not found a problem yet, check to see if
coolant is visible in the surge tank. If coolant is visible
but the coolant level is not at the FULL COLD mark
or higher, add a 50/50 mixture ofclean, drinkable water
and DEX-COOL
®coolant at the coolant surge tank,
but be sure the cooling system, including the coolant
surge tank pressure cap, is cool before you do it.
SeeEngine Coolant (Gas and DURAMAX
®Engines)
on page 5-36orEngine Coolant (Caterpillar®Diesel
Engines) on page 5-38for more information.If no coolant is visible in the surge tank, add coolant
as follows:
{CAUTION:
Steam and scalding liquids from a hot cooling
system can blow out and burn you badly. They
are under pressure, and if you turn the coolant
surge tank pressure cap — even a little — they
can come out at high speed. Never turn the
cap when the cooling system, including the
coolant surge tank pressure cap, is hot. Wait
for the cooling system and coolant surge tank
pressure cap to cool if you ever have to turn
the pressure cap.
5-42
Page 255 of 374
{CAUTION:
Adding only plain water to your cooling
system can be dangerous. Plain water, or
some other liquid such as alcohol, can boil
before the proper coolant mixture will. Your
vehicle’s coolant warning system is set for the
proper coolant mixture. With plain water or the
wrong mixture, your engine could get too hot
but you would not get the overheat warning.
Your engine could catch �re and you or others
could be burned. Use a 50/50 mixture of clean,
drinkable water and DEX-COOL
®coolant.
Notice:In cold weather, water can freeze and crack
the engine, radiator, heater core and other parts.
Use the recommended coolant and the proper
coolant mixture.
{CAUTION:
You can be burned if you spill coolant on hot
engine parts. Coolant contains ethylene glycol
and it will burn if the engine parts are hot
enough. Do not spill coolant on a hot engine.
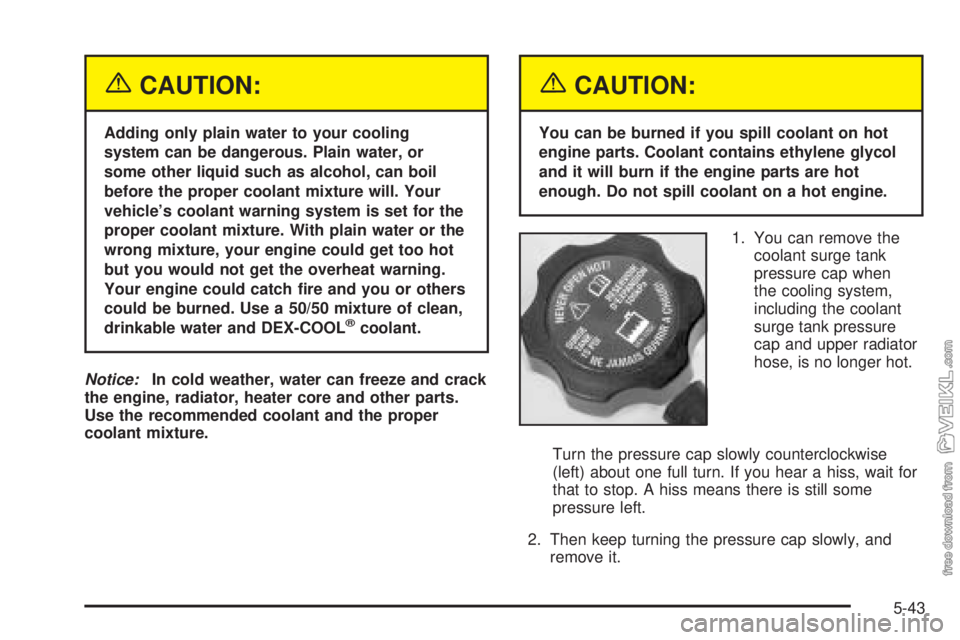
1. You can remove the
coolant surge tank
pressure cap when
the cooling system,
including the coolant
surge tank pressure
cap and upper radiator
hose, is no longer hot.
Turn the pressure cap slowly counterclockwise
(left) about one full turn. If you hear a hiss, wait for
that to stop. A hiss means there is still some
pressure left.
2. Then keep turning the pressure cap slowly, and
remove it.
5-43
Page 256 of 374
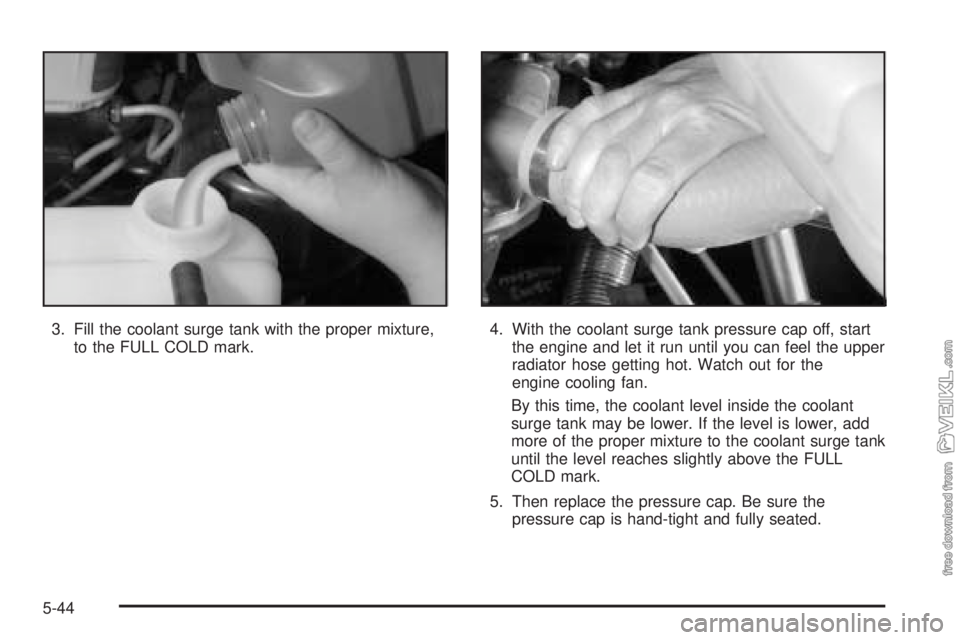
3. Fill the coolant surge tank with the proper mixture,
to the FULL COLD mark.4. With the coolant surge tank pressure cap off, start
the engine and let it run until you can feel the upper
radiator hose getting hot. Watch out for the
engine cooling fan.
By this time, the coolant level inside the coolant
surge tank may be lower. If the level is lower, add
more of the proper mixture to the coolant surge tank
until the level reaches slightly above the FULL
COLD mark.
5. Then replace the pressure cap. Be sure the
pressure cap is hand-tight and fully seated.
5-44
Page 257 of 374
Engine Fan Noise
Your vehicle has a clutched engine cooling fan. When
the clutch is engaged, the fan spins faster to provide
more air to cool the engine. In most everyday driving
conditions, the clutch is not fully engaged. This improves
fuel economy and reduces fan noise. Under heavy
vehicle loading, trailer towing and/or high outside
temperatures, the fan speed increases when the clutch
engages. So you may hear an increase in fan noise.
This is normal and should not be mistaken as the
transmission slipping or making extra shifts. It is merely
the cooling system functioning properly. The fan will
slow down when additional cooling is not required and
the clutch disengages.
You may also hear this fan noise when you start the
engine. It will go away as the fan clutch disengages.
Power Steering Fluid
SeeScheduled Maintenance on page 6-5to determine
when to check your power steering fluid.
How To Check Power Steering Fluid
Check your power steering fluid only when the engine is
warm. If the engine is not warm, you probably will not
get an accurate reading.
If the fluid level is between the MIN (Minimum) and
MAX (Maximum) marks, you have enough. If you need
fluid, add only enough of the proper fluid to bring it
in between the MIN and MAX marks.
If your power steering fluid level is low, this can cause
the brake or service brakes soon warning lights to come
on. In addition, the steering effort and emergency
brake distance could increase.
If either light remains on after you have added power
steering fluid to the proper level, then shut off the engine
for 10 seconds. This should reset the brake warning
lights. If one or both lights stay on, see “Hydraulic Brake
System Warning Lights” underBrake System Warning
Light on page 3-31for more information.
What to Use
To determine what kind of fluid to use, seePart C:
Recommended Fluids and Lubricants on page 6-32.
Notice:When adding power steering �uid or
making a complete �uid change, always use the
proper �uid. Failure to use the proper �uid can
cause leaks and damage hoses and seals.
5-45
Page 258 of 374
Windshield Washer Fluid
What to Use
When you need windshield washer fluid, be sure to read
the manufacturer’s instructions before use. If you will
be operating your vehicle in an area where the
temperature may fall below freezing, use a fluid that has
sufficient protection against freezing.
Adding Washer Fluid
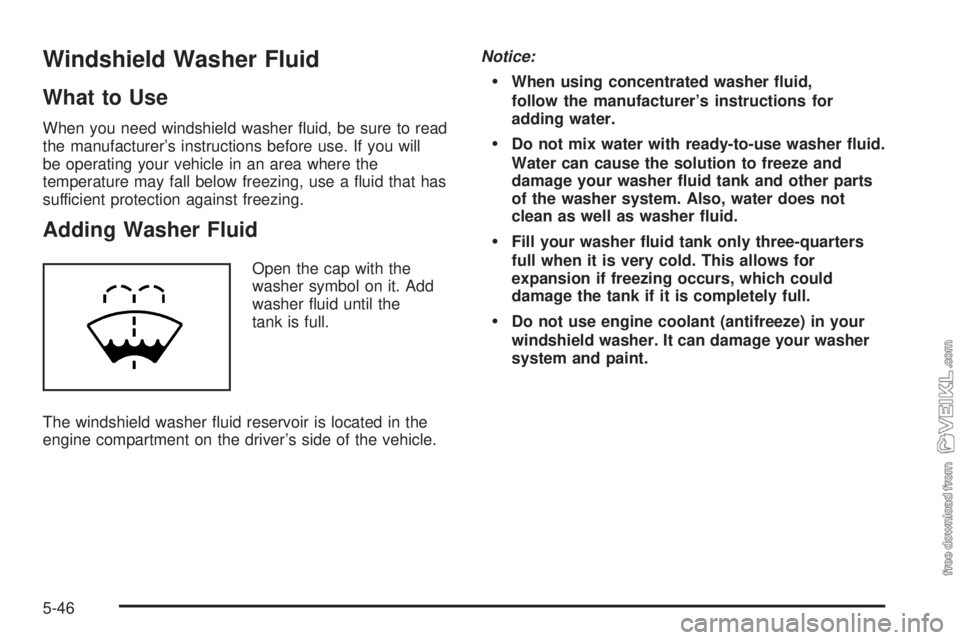
Open the cap with the
washer symbol on it. Add
washer fluid until the
tank is full.
The windshield washer fluid reservoir is located in the
engine compartment on the driver’s side of the vehicle.Notice:
When using concentrated washer �uid,
follow the manufacturer’s instructions for
adding water.
Do not mix water with ready-to-use washer �uid.
Water can cause the solution to freeze and
damage your washer �uid tank and other parts
of the washer system. Also, water does not
clean as well as washer �uid.
Fill your washer �uid tank only three-quarters
full when it is very cold. This allows for
expansion if freezing occurs, which could
damage the tank if it is completely full.
Do not use engine coolant (antifreeze) in your
windshield washer. It can damage your washer
system and paint.
5-46
Page 259 of 374
Brakes
Brake Fluid
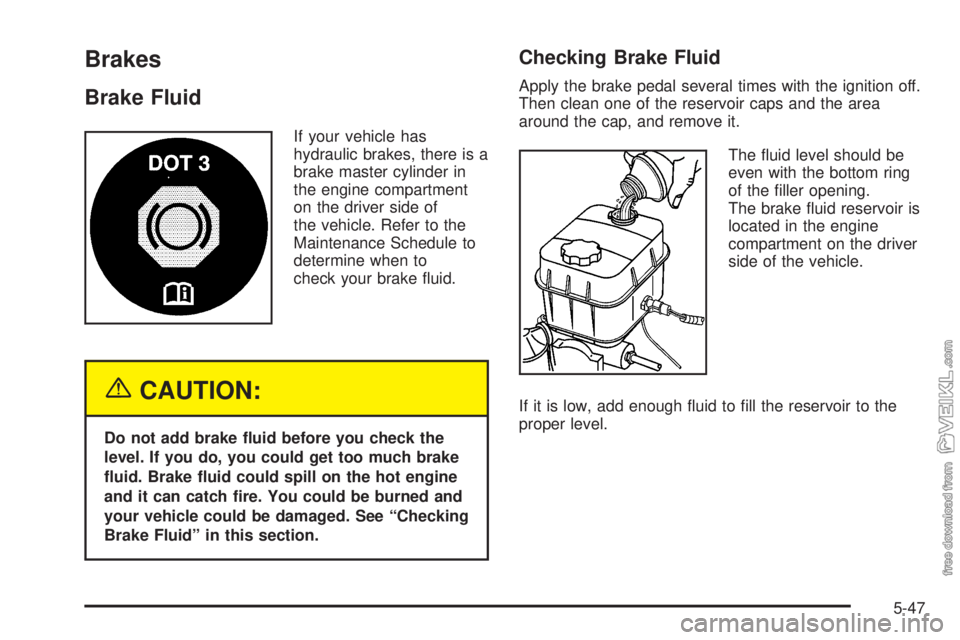
If your vehicle has
hydraulic brakes, there is a
brake master cylinder in
the engine compartment
on the driver side of
the vehicle. Refer to the
Maintenance Schedule to
determine when to
check your brake fluid.
{CAUTION:
Do not add brake �uid before you check the
level. If you do, you could get too much brake
�uid. Brake �uid could spill on the hot engine
and it can catch �re. You could be burned and
your vehicle could be damaged. See “Checking
Brake Fluid” in this section.
Checking Brake Fluid
Apply the brake pedal several times with the ignition off.
Then clean one of the reservoir caps and the area
around the cap, and remove it.
The fluid level should be
even with the bottom ring
of the filler opening.
The brake fluid reservoir is
located in the engine
compartment on the driver
side of the vehicle.
If it is low, add enough fluid to fill the reservoir to the
proper level.
5-47
Page 260 of 374
What to Add
Use the proper fluid listed in your Maintenance
Schedule. Use new brake fluid from a sealed
container only.
Always clean the brake fluid reservoir cap/cover and the
area around the cap/cover before removing it. This
will help keep dirt from entering the reservoir.
{CAUTION:
With the wrong kind of �uid in your brake
system, your brakes may not work well, or they
may not even work at all. This could cause a
crash. Always use the proper brake �uid.Notice:
Using the wrong �uid can badly damage brake
system parts. For example, just a few drops of
mineral-based oil, such as engine oil, in your
brake system can damage brake system
parts so badly that they will have to be replaced.
Do not let someone put in the wrong kind of
�uid, and do not use DOT-5 silicone brake �uid.
If you spill brake �uid on your vehicle’s painted
surfaces, the paint �nish can be damaged. Be
careful not to spill brake �uid on your vehicle. If
you do, wash it off immediately. SeeAppearance
Care on page 5-79.
5-48
Page 263 of 374
Electric Air Compressor
Your vehicle may have an electric air compressor. This
compressor is used to run options that require
pressurized air, such as air horn, air seat, 7.8L engine
exhaust restrictor, or 7.8L engine exhaust brake.
The air compressor is used when vehicles are not
equipped with an air brake system.
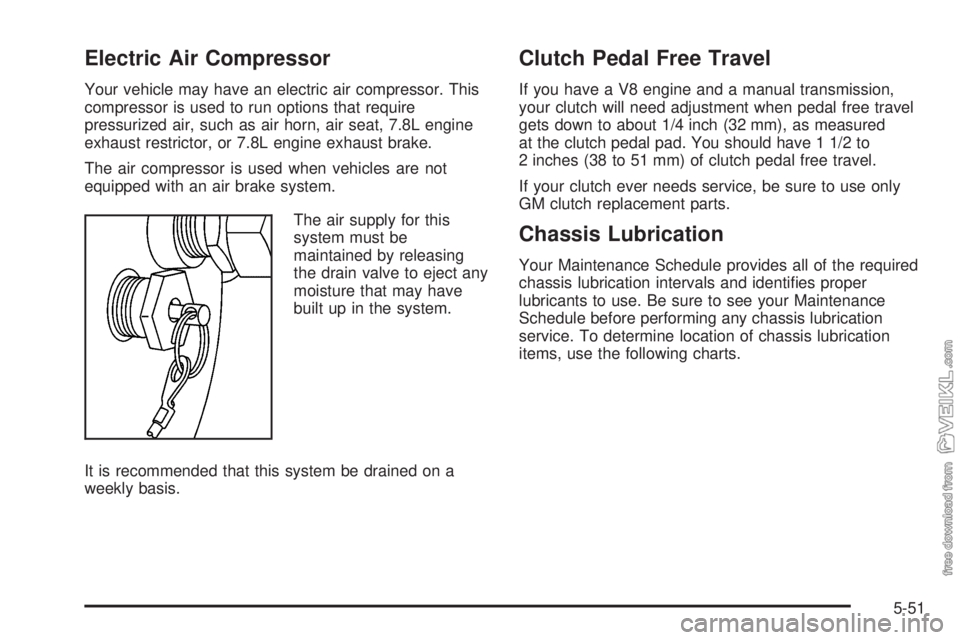
The air supply for this
system must be
maintained by releasing
the drain valve to eject any
moisture that may have
built up in the system.
It is recommended that this system be drained on a
weekly basis.
Clutch Pedal Free Travel
If you have a V8 engine and a manual transmission,
your clutch will need adjustment when pedal free travel
gets down to about 1/4 inch (32 mm), as measured
at the clutch pedal pad. You should have 1 1/2 to
2 inches (38 to 51 mm) of clutch pedal free travel.
If your clutch ever needs service, be sure to use only
GM clutch replacement parts.
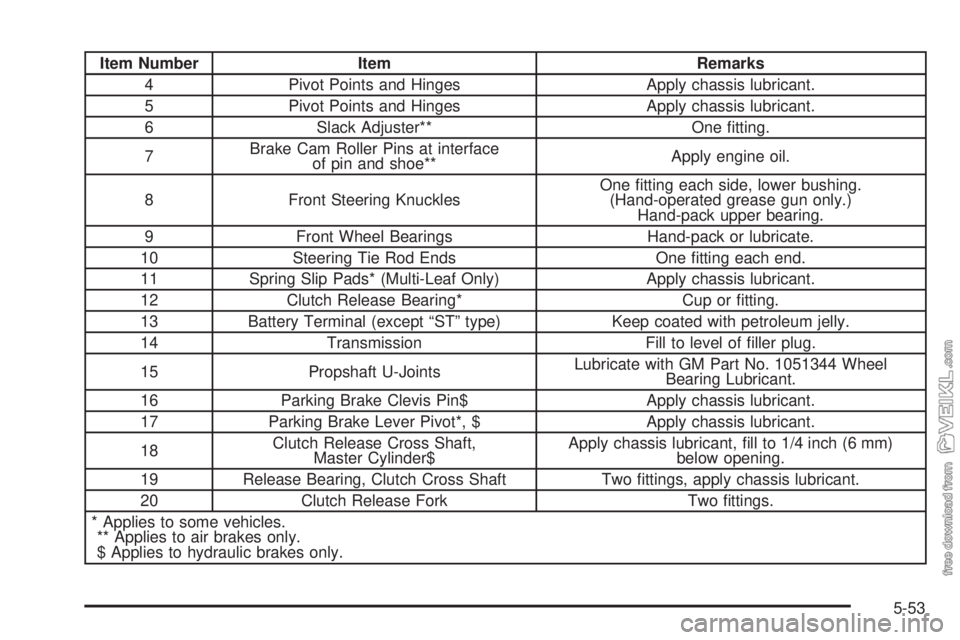
Chassis Lubrication
Your Maintenance Schedule provides all of the required
chassis lubrication intervals and identifies proper
lubricants to use. Be sure to see your Maintenance
Schedule before performing any chassis lubrication
service. To determine location of chassis lubrication
items, use the following charts.
5-51
Page 265 of 374
Item Number Item Remarks
4 Pivot Points and Hinges Apply chassis lubricant.
5 Pivot Points and Hinges Apply chassis lubricant.
6 Slack Adjuster** One fitting.
7Brake Cam Roller Pins at interface
of pin and shoe**Apply engine oil.
8 Front Steering KnucklesOne fitting each side, lower bushing.
(Hand-operated grease gun only.)
Hand-pack upper bearing.
9 Front Wheel Bearings Hand-pack or lubricate.
10 Steering Tie Rod Ends One fitting each end.
11 Spring Slip Pads* (Multi-Leaf Only) Apply chassis lubricant.
12 Clutch Release Bearing* Cup or fitting.
13 Battery Terminal (except “ST” type) Keep coated with petroleum jelly.
14 Transmission Fill to level of filler plug.
15 Propshaft U-JointsLubricate with GM Part No. 1051344 Wheel
Bearing Lubricant.
16 Parking Brake Clevis Pin$ Apply chassis lubricant.
17 Parking Brake Lever Pivot*, $ Apply chassis lubricant.
18Clutch Release Cross Shaft,
Master Cylinder$Apply chassis lubricant, fill to 1/4 inch (6 mm)
below opening.
19 Release Bearing, Clutch Cross Shaft Two fittings, apply chassis lubricant.
20 Clutch Release Fork Two fittings.
* Applies to some vehicles.
** Applies to air brakes only.
$ Applies to hydraulic brakes only.
5-53
Page 266 of 374
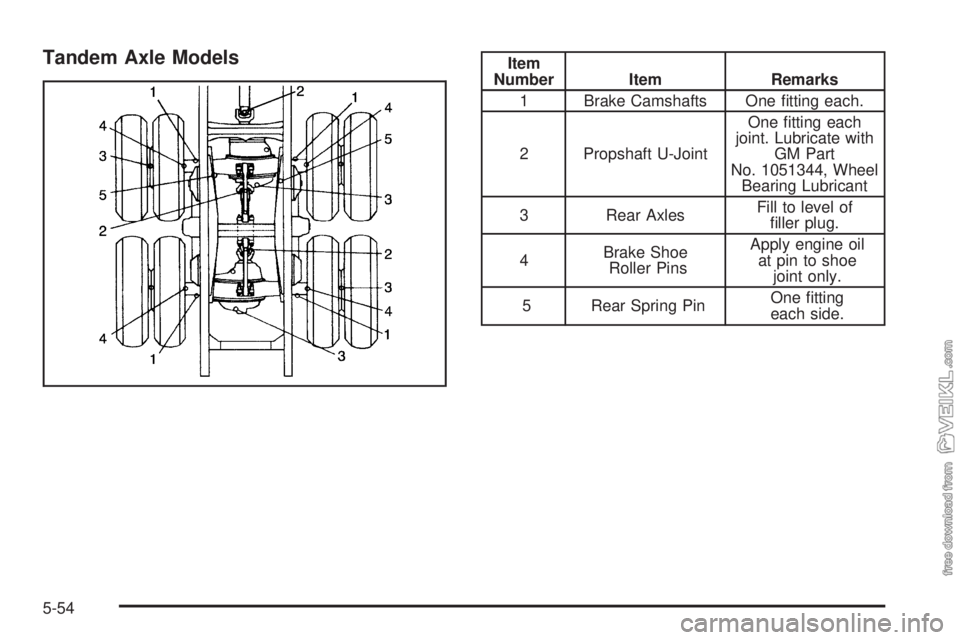
Tandem Axle ModelsItem
Number Item Remarks
1 Brake Camshafts One fitting each.
2 Propshaft U-JointOne fitting each
joint. Lubricate with
GM Part
No. 1051344, Wheel
Bearing Lubricant
3 Rear AxlesFill to level of
filler plug.
4Brake Shoe
Roller PinsApply engine oil
at pin to shoe
joint only.
5 Rear Spring PinOne fitting
each side.
5-54