air filter CHEVROLET KODIAK 2009 Owners Manual
[x] Cancel search | Manufacturer: CHEVROLET, Model Year: 2009, Model line: KODIAK, Model: CHEVROLET KODIAK 2009Pages: 376, PDF Size: 5.39 MB
Page 65 of 376
Keys...............................................................2-2
Remote Keyless Entry (RKE) System................2-3
Remote Keyless Entry (RKE) System
Operation...................................................2-4
Doors and Locks.............................................2-6
Door Locks....................................................2-6
Power Door Locks..........................................2-7
Windows.........................................................2-8
Manual Windows............................................2-9
Power Windows.............................................2-9
Sliding Rear Window.......................................2-9
Sun Visors....................................................2-9
Starting and Operating Your Vehicle................2-10
New Vehicle Break-In....................................2-10
Ignition Positions..........................................2-11
Engine Starter Over-Crank Protection..............2-12
Starting the Gasoline Engine..........................2-12
Starting the Diesel Engine..............................2-14
Engine Alarm and Automatic Shutdown............2-18
Idle Shutdown..............................................2-19
High Idle System..........................................2-20
Exhaust Restrictor (Engine Warm-Up)..............2-22
Engine Checks Before Operating....................2-23
Engine Coolant Heater..................................2-25Diesel Engine Exhaust Brake.........................2-26
Automatic Transmission Operation...................2-27
Manual Transmission Operation......................2-28
Power Take-Off (PTO)...................................2-30
Four-Wheel Drive..........................................2-30
Parking.......................................................2-35
Two-Speed Rear Axle...................................2-36
Parking Brake (With Hydraulic Brakes).............2-38
Parking Brake (With Air Brakes)......................2-41
Parking Brake Burnish Procedure....................2-43
Air Suspension
.............................................2-44
Parking Over Things That Burn.......................2-44
Engine Exhaust............................................2-45
Diesel Particulate Filter..................................2-46
Running the Vehicle While Parked..................2-50
Mirrors...........................................................2-51
Manual Rearview Mirror.................................2-51
Outside Manual Mirrors..................................2-51
Outside Power Mirrors...................................2-51
Outside Convex Mirrors.................................2-52
Outside Heated Mirrors..................................2-52
Storage Areas................................................2-53
Center Console Storage.................................2-53
Section 2 Features and Controls
2-1
Page 110 of 376
Diesel Particulate Filter
The vehicle has a Diesel Particulate Filter (DPF) as part
of the exhaust system to reduce vehicle emissions. The
DPF requires a unique exhaust tailpipe with an exhaust
cooler. The exhaust cooler mixes air with the exhaust to
lower the temperature before it leaves the tailpipe.
The DPF, the tailpipe, or other exhaust system
components must not be altered. Inspect regularly and
clean any mud or dirt from the exhaust cooler,
especially where the exhaust cooler connects to the
tailpipe and the openings where fresh air enters
the cooler. See “Exhaust System Inspection” underAt
Least Twice a Year on page 6-27.
The DPF will clean itself as part of normal operation.
Several factors including fuel consumed, hours of engine
operation and miles driven are monitored by the Engine
Control Module (ECM). The self cleaning occurs
approximately once per tank of fuel.
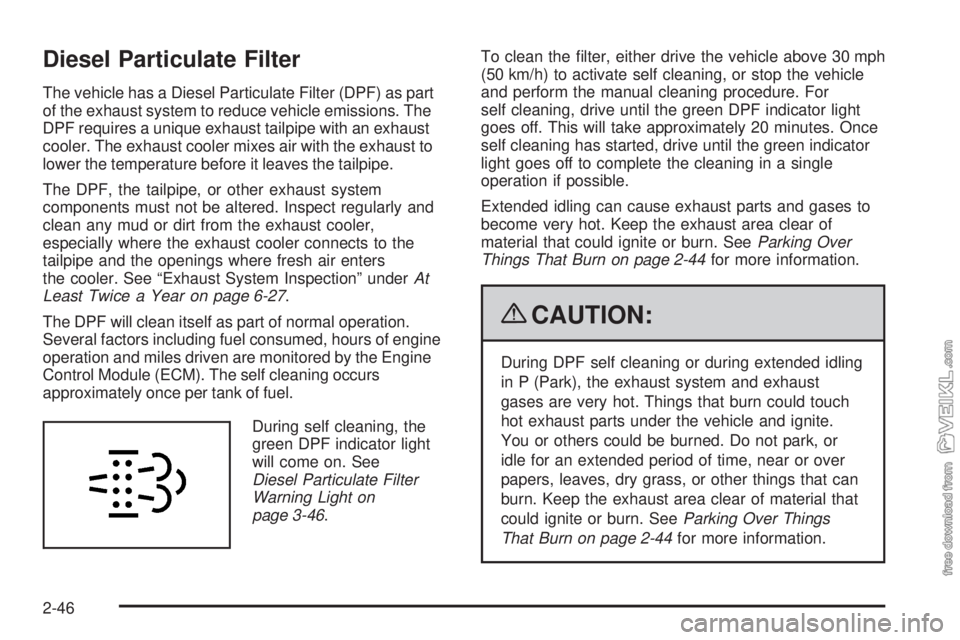
During self cleaning, the
green DPF indicator light
will come on. See
Diesel Particulate Filter
Warning Light on
page 3-46.To clean the filter, either drive the vehicle above 30 mph
(50 km/h) to activate self cleaning, or stop the vehicle
and perform the manual cleaning procedure. For
self cleaning, drive until the green DPF indicator light
goes off. This will take approximately 20 minutes. Once
self cleaning has started, drive until the green indicator
light goes off to complete the cleaning in a single
operation if possible.
Extended idling can cause exhaust parts and gases to
become very hot. Keep the exhaust area clear of
material that could ignite or burn. SeeParking Over
Things That Burn on page 2-44for more information.
{CAUTION:
During DPF self cleaning or during extended idling
in P (Park), the exhaust system and exhaust
gases are very hot. Things that burn could touch
hot exhaust parts under the vehicle and ignite.
You or others could be burned. Do not park, or
idle for an extended period of time, near or over
papers, leaves, dry grass, or other things that can
burn. Keep the exhaust area clear of material that
could ignite or burn. SeeParking Over Things
That Burn on page 2-44for more information.
2-46
Page 120 of 376
Low Coolant Warning Light............................3-35
Wait to Start Light........................................3-35
Malfunction Indicator Lamp.............................3-36
Oil Pressure Gage........................................3-38
Low Oil Level Light.......................................3-39
Change Engine Oil Light................................3-39
Engine Overspeed Warning Light....................3-40
Engine Shutdown Warning Light.....................3-40
Transmission Temperature Gage.....................3-40
Exhaust Brake Indicator Light.........................3-41
Differential Lock Indicator Light.......................3-41
Reduced Engine Power Light.........................3-42
Highbeam On Light.......................................3-42
Daytime Running Lamps (DRL)
Indicator Light...........................................3-42
Low Washer Fluid Warning Light.....................3-43
Power Take-Off Light (PTO)...........................3-43Check Gages Warning Light...........................3-43
Fuel Gage...................................................3-44
Water in Fuel Warning Light...........................3-45
Change Fuel Filter Warning Light....................3-45
Diesel Particulate Filter Warning Light..............3-46
Air Filter Restriction Indicator..........................3-46
Air Pressure Gage........................................3-47
Hourmeter Gage...........................................3-47
Audio System(s).............................................3-48
Setting the Clock..........................................3-48
Radio(s)......................................................3-49
Theft-Deterrent Feature..................................3-57
Radio Reception...........................................3-58
Fixed Mast Antenna......................................3-58
Chime Level Adjustment................................3-58
Section 3 Instrument Panel
3-2
Page 123 of 376
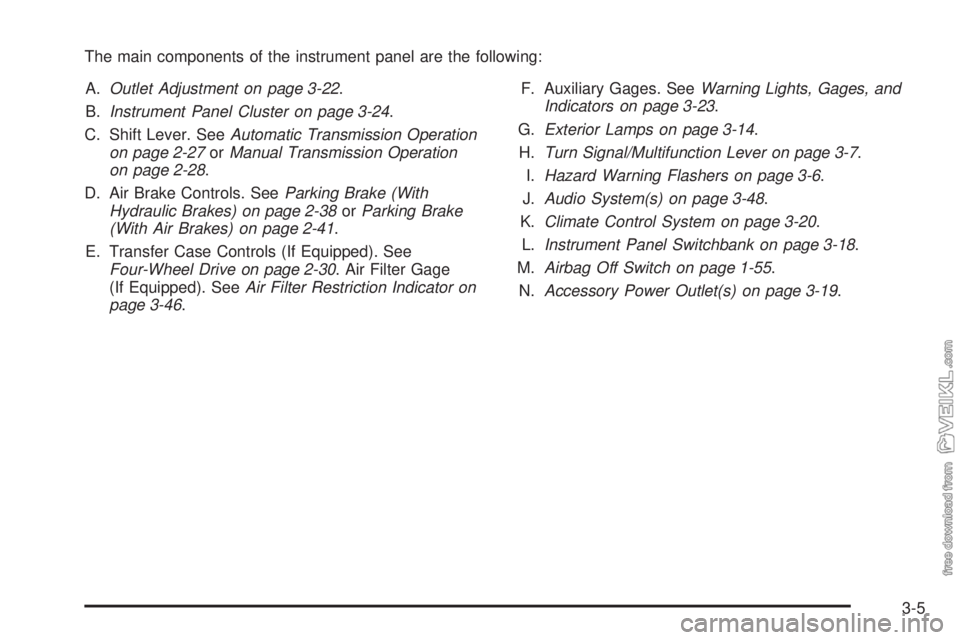
The main components of the instrument panel are the following:
A.Outlet Adjustment on page 3-22.
B.Instrument Panel Cluster on page 3-24.
C. Shift Lever. SeeAutomatic Transmission Operation
on page 2-27orManual Transmission Operation
on page 2-28.
D. Air Brake Controls. SeeParking Brake (With
Hydraulic Brakes) on page 2-38orParking Brake
(With Air Brakes) on page 2-41.
E. Transfer Case Controls (If Equipped). See
Four-Wheel Drive on page 2-30. Air Filter Gage
(If Equipped). SeeAir Filter Restriction Indicator on
page 3-46.F. Auxiliary Gages. SeeWarning Lights, Gages, and
Indicators on page 3-23.
G.Exterior Lamps on page 3-14.
H.Turn Signal/Multifunction Lever on page 3-7.
I.Hazard Warning Flashers on page 3-6.
J.Audio System(s) on page 3-48.
K.Climate Control System on page 3-20.
L.Instrument Panel Switchbank on page 3-18.
M.Airbag Off Switch on page 1-55.
N.Accessory Power Outlet(s) on page 3-19.
3-5
Page 136 of 376
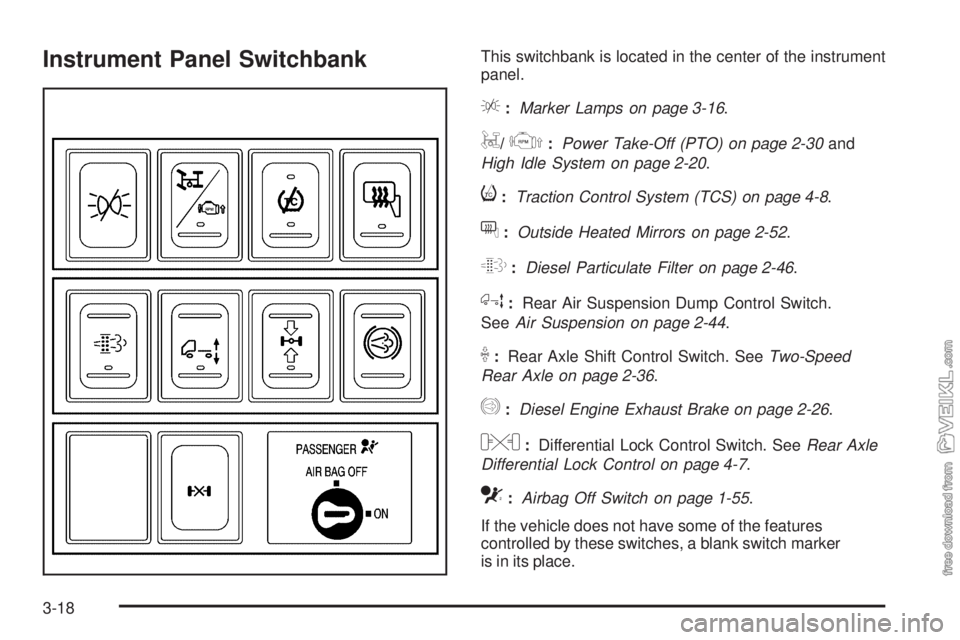
Instrument Panel SwitchbankThis switchbank is located in the center of the instrument
panel.
e:Marker Lamps on page 3-16.
g/j:Power Take-Off (PTO) on page 2-30and
High Idle System on page 2-20.
i:Traction Control System (TCS) on page 4-8.
f:Outside Heated Mirrors on page 2-52.
L:Diesel Particulate Filter on page 2-46.
h:Rear Air Suspension Dump Control Switch.
SeeAir Suspension on page 2-44.
k:Rear Axle Shift Control Switch. SeeTwo-Speed
Rear Axle on page 2-36.
q:Diesel Engine Exhaust Brake on page 2-26.
l:Differential Lock Control Switch. SeeRear Axle
Differential Lock Control on page 4-7.
c:Airbag Off Switch on page 1-55.
If the vehicle does not have some of the features
controlled by these switches, a blank switch marker
is in its place.
3-18
Page 164 of 376
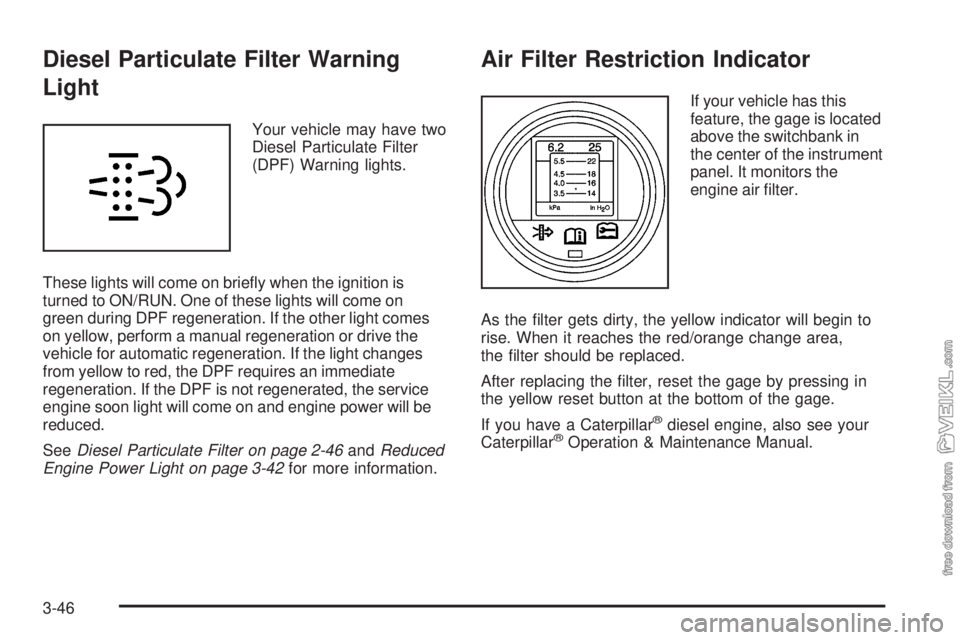
Diesel Particulate Filter Warning
Light
Your vehicle may have two
Diesel Particulate Filter
(DPF) Warning lights.
These lights will come on briefly when the ignition is
turned to ON/RUN. One of these lights will come on
green during DPF regeneration. If the other light comes
on yellow, perform a manual regeneration or drive the
vehicle for automatic regeneration. If the light changes
from yellow to red, the DPF requires an immediate
regeneration. If the DPF is not regenerated, the service
engine soon light will come on and engine power will be
reduced.
SeeDiesel Particulate Filter on page 2-46andReduced
Engine Power Light on page 3-42for more information.
Air Filter Restriction Indicator
If your vehicle has this
feature, the gage is located
above the switchbank in
the center of the instrument
panel. It monitors the
engine air filter.
As the filter gets dirty, the yellow indicator will begin to
rise. When it reaches the red/orange change area,
the filter should be replaced.
After replacing the filter, reset the gage by pressing in
the yellow reset button at the bottom of the gage.
If you have a Caterpillar
®diesel engine, also see your
Caterpillar®Operation & Maintenance Manual.
3-46
Page 203 of 376
Service............................................................5-3
Accessories and Modifications..........................5-3
California Proposition 65 Warning.....................5-4
California Perchlorate Materials Requirements.....5-4
Doing Your Own Service Work.........................5-5
Engine Fan Breakage.....................................5-6
Fuel................................................................5-6
Gasoline Octane............................................5-6
Gasoline Specifications....................................5-7
Additives.......................................................5-7
Diesel Engine Fuel.........................................5-8
What Fuel to Use...........................................5-8
Very Cold Weather Operation.........................5-11
Water in Fuel...............................................5-11
Running Out of Fuel.....................................5-17
Fuel Filter Replacement.................................5-18
Fuels in Foreign Countries.............................5-19
Filling the Tank............................................5-20
Filling a Portable Fuel Container.....................5-22
Checking Things Under the Hood....................5-22
Hood Latches...............................................5-23
Engine Oil (DURAMAX Diesel Engine).............5-24
Engine Oil (Caterpillar Diesel Engine)..............5-27
Engine Oil (Isuzu Diesel Engine).....................5-28
Engine Oil (Gasoline Engine)..........................5-32
Engine Oil Life System (Gasoline Engine)........5-35Engine Oil Life System (DURAMAX/Isuzu
Diesel Engines).........................................5-36
Engine Oil Life System (Caterpillar
Diesel Engine)..........................................5-38
Engine Air Cleaner/Filter................................5-38
Automatic Transmission Fluid.........................5-42
Manual Transmission Fluid.............................5-42
Cooling System............................................5-43
Engine Coolant (Caterpillar Diesel Engines)......5-47
Coolant Surge Tank Pressure Cap..................5-47
Engine Overheating.......................................5-48
Engine Fan Noise.........................................5-49
Power Steering Fluid.....................................5-49
Windshield Washer Fluid................................5-50
Brakes........................................................5-52
Battery........................................................5-61
Jump Starting...............................................5-62
Rear Axle.......................................................5-67
Rear Axle Shift Motor....................................5-68
Four-Wheel Drive............................................5-68
Front Axle......................................................5-69
Noise Control System.....................................5-70
Tampering with Noise Control System
Prohibited.................................................5-70
Bulb Replacement..........................................5-71
Section 5 Service and Appearance Care
5-1
Page 221 of 376
4. Install the new filter element.
5. Reinstall and tighten the filter container and
reconnect the water sensor wire to the filter.
6. Use the fuel filter priming procedure earlier in this
section to prime the fuel filter.
7. Tighten the air bleed valve by turning it clockwise
until hand-tight.
8. Start the engine and let it idle for five minutes.
Check the fuel filter and air bleed valve for leaks.
How to Reset Fuel Filter Change
Light - DURAMAX 6.6L (LMM) Engine
The engine controller calculates when to change the fuel
filter based on vehicle and fuel use. Whenever the
fuel filter is changed, reset the fuel filter light so
the engine controller can calculate when the next fuel
filter change is required. If the fuel filter is ever changed
prior to a change fuel filter light being turned on,
reset the fuel filter change light.To reset the Fuel Filter Change light:
1. Turn the ignition key to ON/RUN with the engine off
2. Fully press the accelerator and brake pedals at the
same time for 10 seconds. If the Fuel Filter Change
light flashes for 5 seconds, the system is resetting.
3. Turn the key to OFF.
If the Fuel Filter Change light comes back on when you
start the vehicle, the light has not been reset. Repeat
the procedure. SeeChange Fuel Filter Warning Light on
page 3-45for more information.
Fuels in Foreign Countries
If you plan on driving in another country outside the
United States or Canada, the proper fuel might be hard
to find. Never use leaded gasoline or any other fuel
not recommended in the previous text on fuel. Costly
repairs caused by use of improper fuel would not
be covered by the vehicle warranty.
To check the fuel availability, ask an auto club, or
contact a major oil company that does business in the
country where you will be driving.
5-19
Page 240 of 376
Engine Oil Life System (Caterpillar
Diesel Engine)
How to Reset the Engine Oil Life
System
The Engine Oil Life System calculates when to change
the engine oil and filter based on vehicle use. Whenever
the oil is changed, reset the system so it can calculate
when the next oil change is required. If a situation occurs
where the oil is changed prior to a change engine oil light
being turned on, reset the system.
To reset the Engine Oil Life System:
1. Turn the ignition key to ON/RUN with the
engine off.
2. Fully apply and hold the brake pedal while fully
pressing and releasing the accelerator pedal,
pausing slightly at each press and each release,
three times within five seconds.
3. Turn the key to OFF.
If the change engine oil light comes back on when the
vehicle is started, the Engine Oil Life System has
not reset. Repeat the procedure.
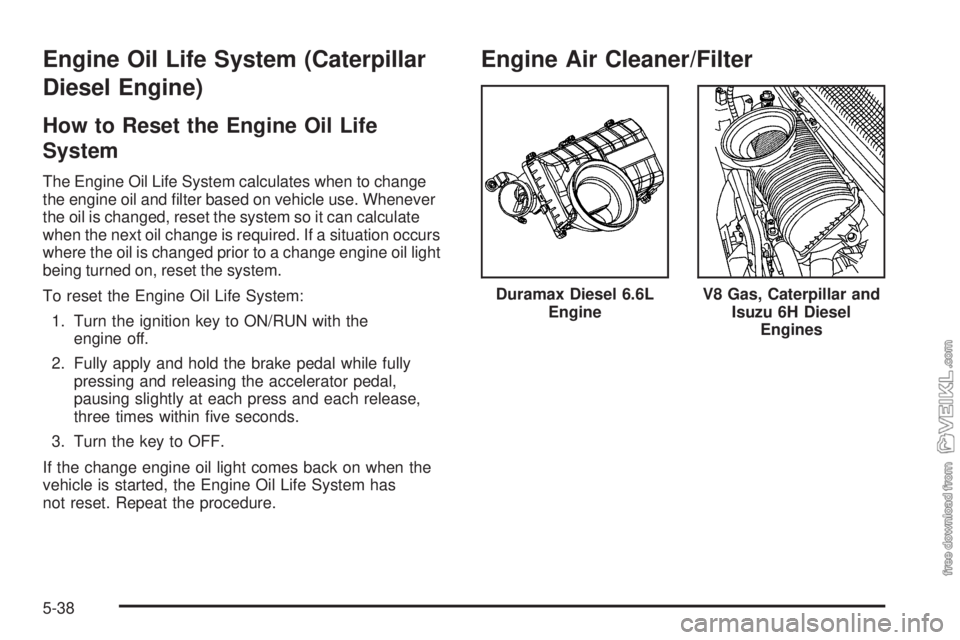
Engine Air Cleaner/Filter
Duramax Diesel 6.6L
EngineV8 Gas, Caterpillar and
Isuzu 6H Diesel
Engines
5-38
Page 241 of 376
When to Inspect the Engine Air
Cleaner/Filters
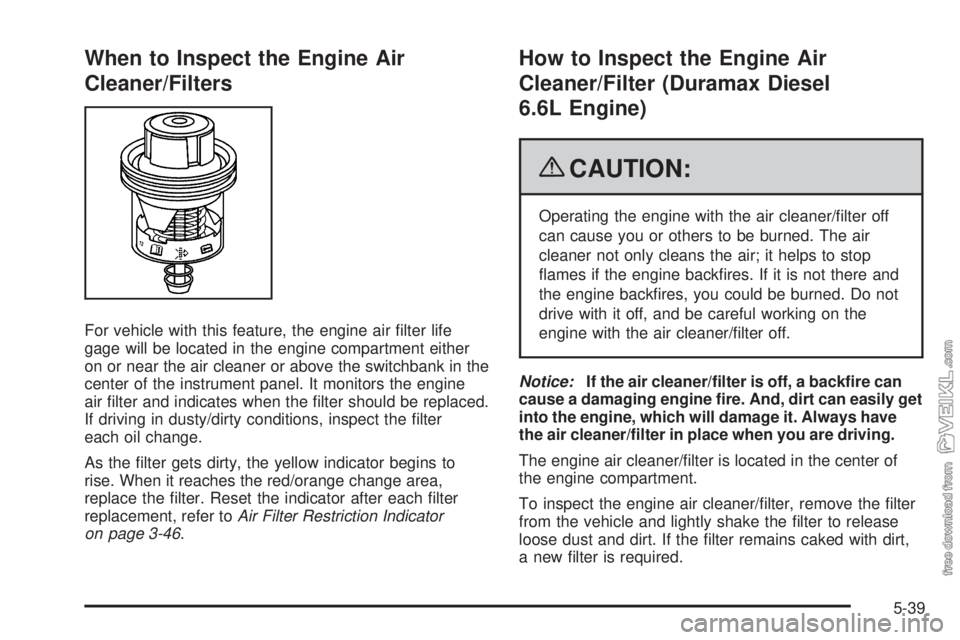
For vehicle with this feature, the engine air filter life
gage will be located in the engine compartment either
on or near the air cleaner or above the switchbank in the
center of the instrument panel. It monitors the engine
air filter and indicates when the filter should be replaced.
If driving in dusty/dirty conditions, inspect the filter
each oil change.
As the filter gets dirty, the yellow indicator begins to
rise. When it reaches the red/orange change area,
replace the filter. Reset the indicator after each filter
replacement, refer toAir Filter Restriction Indicator
on page 3-46.
How to Inspect the Engine Air
Cleaner/Filter (Duramax Diesel
6.6L Engine)
{CAUTION:
Operating the engine with the air cleaner/filter off
can cause you or others to be burned. The air
cleaner not only cleans the air; it helps to stop
flames if the engine backfires. If it is not there and
the engine backfires, you could be burned. Do not
drive with it off, and be careful working on the
engine with the air cleaner/filter off.
Notice:If the air cleaner/filter is off, a backfire can
cause a damaging engine fire. And, dirt can easily get
into the engine, which will damage it. Always have
the air cleaner/filter in place when you are driving.
The engine air cleaner/filter is located in the center of
the engine compartment.
To inspect the engine air cleaner/filter, remove the filter
from the vehicle and lightly shake the filter to release
loose dust and dirt. If the filter remains caked with dirt,
a new filter is required.
5-39