radio controls CHEVROLET KODIAK 2009 Owners Manual
[x] Cancel search | Manufacturer: CHEVROLET, Model Year: 2009, Model line: KODIAK, Model: CHEVROLET KODIAK 2009Pages: 376, PDF Size: 5.39 MB
Page 86 of 376
Exhaust Restrictor (Engine
Warm-Up)
Exhaust Restrictor
If the vehicle has a Isuzu 6H Diesel Engine, it may have
a feature called an Exhaust Restrictor (NPE), which
uses an air actuated valve in the exhaust system
to restrict exhaust gas flow which enhances the engine
and heater warm-up.
Automatic Quick Warm-Up
If the vehicle has a DURAMAX®6600 engine, it has a
feature called an Automatic Quick Warm-Up, which uses
the turbocharger to restrict the exhaust gas flow
which enhances the engine and heater warm-up.
In both systems, exhaust restrictor or automatic quick
warm-up, the cold temperature high idle feature elevates
the engines idle speed, up to 1500 rpm, and restricts
the exhaust gas flow, when outside temperatures
are below 50°F (10°C), and the engine coolant
temperature is below certain levels. This feature
enhances heater performance by raising the engine
coolant temperature faster.For all engines this feature is already turned on. The
automatic quick warm-up on the DURAMAX
®engine
can be turned off and on by doing the following
procedure:
1. Turn the ignition to ON/RUN, with the vehicle off.
2. Press the accelerator pedal to the floor and
hold it while quickly pressing and fully releasing the
brake pedal three times in less than eight seconds.
3. Release the accelerator pedal and start the engine.
The green exhaust brake/restrictor light below the
radio controls will be lit for 10 seconds.
If this feature is turned off, by doing the procedure
described previously, and then the engine is
started, the exhaust brake/restrictor light will flash
for 10 seconds and then it will turn off.
When the engine is started, it will slowly increase to the
high idle speed after a delay of a few seconds; up to
about two minutes. For this method to work properly
there must be no throttle or brake pedal faults, and the
throttle pedal must not fall below 75 percent of wide
open throttle while pressing the brake pedal.
2-22
Page 134 of 376
Marker Lamps
For vehicles with this feature, the marker and clearance
lamps can be manually blinked.
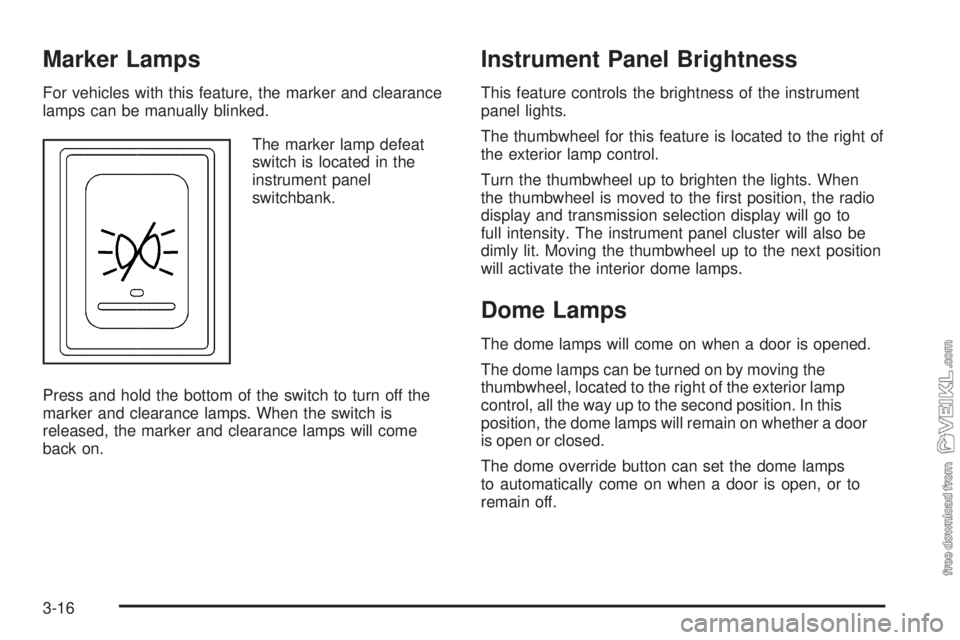
The marker lamp defeat
switch is located in the
instrument panel
switchbank.
Press and hold the bottom of the switch to turn off the
marker and clearance lamps. When the switch is
released, the marker and clearance lamps will come
back on.
Instrument Panel Brightness
This feature controls the brightness of the instrument
panel lights.
The thumbwheel for this feature is located to the right of
the exterior lamp control.
Turn the thumbwheel up to brighten the lights. When
the thumbwheel is moved to the first position, the radio
display and transmission selection display will go to
full intensity. The instrument panel cluster will also be
dimly lit. Moving the thumbwheel up to the next position
will activate the interior dome lamps.
Dome Lamps
The dome lamps will come on when a door is opened.
The dome lamps can be turned on by moving the
thumbwheel, located to the right of the exterior lamp
control, all the way up to the second position. In this
position, the dome lamps will remain on whether a door
is open or closed.
The dome override button can set the dome lamps
to automatically come on when a door is open, or to
remain off.
3-16
Page 166 of 376
Audio System(s)
If the vehicle came without a radio, the wiring provisions
for a radio and an antenna were installed at the
assembly plant, so that if you want, a radio can be
installed at the dealer/retailer.
Determine which radio the vehicle has and read the
following pages to become familiar with its features.
{CAUTION:
Taking your eyes off the road for extended periods
could cause a crash resulting in injury or death to
you or others. Do not give extended attention to
entertainment tasks while driving.
This system provides access to many audio and non
audio listings.
To minimize taking your eyes off the road while driving,
do the following while the vehicle is parked:
•Become familiar with the operation and controls of
the audio system.
•Set up the tone, speaker adjustments, and preset
radio stations.
For more information, seeDefensive Driving on
page 4-2.Notice:Contact your dealer/retailer before adding
any equipment.
Adding audio or communication equipment could
interfere with the operation of the vehicle’s engine,
radio, or other systems, and could damage them.
Follow federal rules covering mobile radio and
telephone equipment.
Notice:The chime signals related to safety belts,
parking brake, and other functions of your vehicle
operate through the radio/entertainment system.
If that equipment is replaced or additional equipment
is added to your vehicle, the chimes may not
work. Make sure that replacement or additional
equipment is compatible with your vehicle before
installing it. SeeAccessories and Modifications
on page 5-3.
Setting the Clock
Press and hold the HR (down) or MIN (up) arrow for
two seconds. Then press HR until the correct hour
displays. Press and hold MIN until the correct minute
displays. The time can be set with the ignition on or off.
3-48
Page 168 of 376
Setting Preset Stations
Up to 18 stations (six FM1, six FM2, and six AM), can
be programmed on the six numbered pushbuttons,
by performing the following steps:
1. Turn the radio on.
2. Press AM FM to select FM1, FM2, or AM.
3. Tune in the desired station.
4. Press and hold one of the six numbered
pushbuttons until a beep sounds. When that
numbered pushbutton is pressed, the station that
was set, returns.
5. Repeat Steps 2 through 4 for each pushbutton.
Setting the Tone (Bass/Treble)
AUDIO:To adjust the bass or the treble, press
and release the AUDIO button until BAS (bass) or
TRE (treble) displays. Then press and hold the
up
wor the downxarrow to increase or to
decrease. If a station is weak or has static,
decrease the treble.To adjust bass or treble to the middle position, select
BAS or TRE. Then press and hold the AUDIO button for
more than two seconds until a beep sounds. B and a
zero or T and a zero displays.
To adjust both tone controls and both speaker controls
to the middle position, first end out of audio mode
by pressing another button, causing the radio to perform
that function, or by waiting five seconds for the display
to return to the time of day. Then press and hold
the AUDIO button for more than two seconds until a
beep sounds. CEN (center) displays.
Adjusting the Speakers (Balance/Fade)
AUDIO:To adjust the balance between the right
and the left speakers, press and release the AUDIO
button until BAL (balance) displays. Then press and hold
the up
wor the downxarrow to move the sound
toward the right or the left speakers.
To adjust the fade between the front and the rear
speakers, press and release the AUDIO button until
FAD (fade) displays. Then press and hold either arrow to
move the sound toward the front or the rear speakers.
3-50
Page 169 of 376
To adjust balance or fade to the middle position, select
BAL or FAD. Then press and hold AUDIO for more than
two seconds until a beep sounds. B (balance) and a zero
or F (fade) and a zero displays.
To adjust both tone controls and both speaker controls
to the middle position, first end out of audio mode by
pressing another button, causing the radio to perform that
function, or by waiting five seconds for the display to
return to the time of day. Then press and hold the AUDIO
button for more than two seconds until a beep sounds.
CEN displays.
Fade may not be available if the vehicle is a regular cab
model.
Radio Messages
CAL (Calibration):The audio system has been
calibrated for your vehicle from the factory. If CAL
displays it means that the radio has not been configured
properly for your vehicle and must be returned to your
dealer/retailer for service.
LOC (Locked):This message displays when the
THEFTLOCK
®system has locked up. Take the vehicle
to your dealer/retailer for service.
If any error occurs repeatedly or cannot be corrected,
contact your dealer/retailer.
Playing a CD
Insert a CD partway into the slot, label side up. The
player pulls it in and the CD should begin playing.
CD displays. If you want to insert a CD with the ignition
off, first press the eject button or the RCL knob.
If you insert a CD with the radio off and the ignition on,
it starts to play.
If the ignition or radio is turned off, with a CD in the
player, it stays in the player. When the ignition or radio
is turned on, the CD starts playing where it stopped,
if it was the last selected audio source.
As each new track starts to play, the track number
displays.
The CD player can play the smaller 3 inch (8 cm) single
CDs with an adapter ring. Full-size CDs and the
smaller CDs are loaded in the same manner.
3-51
Page 172 of 376
If the CD is not playing correctly, for any other reason,
try a known good CD.
If any error occurs repeatedly or if an error cannot be
corrected, contact your dealer/retailer. If the radio
displays an error message, write it down and provide it
to your dealer/retailer when reporting the problem.
Playing a Cassette Tape
The tape player is built to work best with tapes that are
up to 30 to 45 minutes long on each side. Tapes longer
than that are so thin they might not work well in this
player. The longer side with the tape visible should face
to the right. If you hear nothing or hear a garbled sound,
the tape might not be in squarely. Press the
Z(eject)
button to remove the tape and start over.
If the ignition and the radio are off, press the eject button
or the RCL knob to insert and to begin play of a tape.
If the ignition is on and the radio is off, the tape can be
inserted and begins playing. CAS (cassette) displays
when a tape is inserted.
While the tape is playing, use the VOL, AUDIO, and
SEEK controls just as you do for the radio. The radio
displays UP if the top side of the tape is playing.
DN (Down) appears if the bottom side is playing.
The tape player plays the other side of the tape when
it reaches the end.Cassette tape adapter kits for portable CD players
works in the cassette tape player. See “CD Adapter Kits”
later for more information.
The tape bias is set automatically when a metal or
chrome tape is inserted.
If an error displays, see “Cassette Tape Messages” later
in this section.
1 PREV (Previous):The tape must have at least
three seconds of silence between each selection for
previous to work. Press this pushbutton to go to the
previous selection on the tape if the current selection
has been playing for less than three seconds. If pressed
when the current selection has been playing from
three to 13 seconds, it goes to the beginning of the
previous selection or the beginning of the current
selection, depending on the position on the tape. If
pressed when the current selection has been playing for
more than 13 seconds, it goes to the beginning of the
current selection. Pressing this pushbutton multiple times
increases the number of selections to be searched back,
up to−9. Pressing the NEXT pushbutton cancels the
selections.
3-54
Page 173 of 376
2 NEXT:The tape must have at least three seconds of
silence between each selection for next to work. Press
this pushbutton to go to the next selection on the tape.
Pressing this pushbutton multiple times in the next mode
increases the number of selections to be searched
forward. Pressing the PREV pushbutton cancels the
selections.
3 REV (Reverse):Press to quickly reverse the tape.
FR displays. The radio plays while the tape reverses.
Press it again to return to playing speed. Select stations
during reverse operation by using the TUNE or SEEK
controls or by using the scan or preset scan features.
4 FWD (Forward):Press to quickly advance the
tape. FF displays. The radio plays while the tape
advances. Press again to return to playing speed. Select
stations during forward operation by using the TUNE
or SEEK controls or by using the scan or preset
scan features.
5 SIDE:Press to play the other side of the tape.
6 RPT (Repeat):The tape must have at least three
seconds of silence between each selection for repeat to
work. Press and release to hear a selection over again.
RPT displays. Press again to turn off repeated play.
OFF displays.oSEEKp:The tape must have at least three seconds
of silence between each selection for seek to work. The
left arrow is the same as the PREV pushbutton and the
right arrow is the same as the NEXT pushbutton. If either
the left or right arrow is held or pressed more than once,
the player continues moving backward or forward through
the tape.
AM FM:Press to listen to the radio when a tape is
playing. The inactive tape remains inside the radio for
future listening.
TAPE:Press to play a cassette tape when listening to
the radio. CAS displays when a tape is loaded.
Z(Eject):Press to eject a tape. Eject can be
activated with the radio off. Cassette tapes can be
loaded with the ignition and radio off if this button is
pressed first.
3-55