manual transmission CHEVROLET KODIAK 2009 Owners Manual
[x] Cancel search | Manufacturer: CHEVROLET, Model Year: 2009, Model line: KODIAK, Model: CHEVROLET KODIAK 2009Pages: 376, PDF Size: 5.39 MB
Page 65 of 376
Keys...............................................................2-2
Remote Keyless Entry (RKE) System................2-3
Remote Keyless Entry (RKE) System
Operation...................................................2-4
Doors and Locks.............................................2-6
Door Locks....................................................2-6
Power Door Locks..........................................2-7
Windows.........................................................2-8
Manual Windows............................................2-9
Power Windows.............................................2-9
Sliding Rear Window.......................................2-9
Sun Visors....................................................2-9
Starting and Operating Your Vehicle................2-10
New Vehicle Break-In....................................2-10
Ignition Positions..........................................2-11
Engine Starter Over-Crank Protection..............2-12
Starting the Gasoline Engine..........................2-12
Starting the Diesel Engine..............................2-14
Engine Alarm and Automatic Shutdown............2-18
Idle Shutdown..............................................2-19
High Idle System..........................................2-20
Exhaust Restrictor (Engine Warm-Up)..............2-22
Engine Checks Before Operating....................2-23
Engine Coolant Heater..................................2-25Diesel Engine Exhaust Brake.........................2-26
Automatic Transmission Operation...................2-27
Manual Transmission Operation......................2-28
Power Take-Off (PTO)...................................2-30
Four-Wheel Drive..........................................2-30
Parking.......................................................2-35
Two-Speed Rear Axle...................................2-36
Parking Brake (With Hydraulic Brakes).............2-38
Parking Brake (With Air Brakes)......................2-41
Parking Brake Burnish Procedure....................2-43
Air Suspension
.............................................2-44
Parking Over Things That Burn.......................2-44
Engine Exhaust............................................2-45
Diesel Particulate Filter..................................2-46
Running the Vehicle While Parked..................2-50
Mirrors...........................................................2-51
Manual Rearview Mirror.................................2-51
Outside Manual Mirrors..................................2-51
Outside Power Mirrors...................................2-51
Outside Convex Mirrors.................................2-52
Outside Heated Mirrors..................................2-52
Storage Areas................................................2-53
Center Console Storage.................................2-53
Section 2 Features and Controls
2-1
Page 74 of 376
Starting and Operating Your
Vehicle
New Vehicle Break-In
Notice:The vehicle does not need an elaborate
break-in. But it will perform better in the long run if
you follow these guidelines:
•Let the engine warm up before you operate your
vehicle under load.
•Keep your speed at 55 mph (88 km/h) or less for
the first 500 miles (805 km).
•Do not drive at any one speed, fast or slow, for
the first 500 miles (805 km). Do not make
full-throttle starts.
•Avoid making hard stops for the first 200 miles
(322 km) or so. During this time the new brake
linings are not yet broken in. Hard stops
with new linings can mean premature wear and
earlier replacement. Follow this breaking-in
guideline every time you get new brake linings.
•Use the lowest gear you can when you start a
loaded vehicle in motion and when going up
hills to avoid overloading the engine.
•Check and adjust engine and transmission fluid
levels often and be sure tires are properly
inflated for the load you are carrying.
•When new, parking brake linings have not yet
been broken in. When linings are new, it is
possible that the vehicle could move while the
parking brake is applied. Before using the
parking brake on grades, follow the parking
brake burnish procedure. SeeParking Brake
Burnish Procedure on page 2-43.
•If you have a Caterpillar®diesel engine, see the
Caterpillar®Diesel Engine Operation and
Maintenance Manual.
2-10
Page 76 of 376
Engine Starter Over-Crank
Protection
The vehicle may have an engine starter over-crank
protection system. If the starter motor overheats and
shuts off due to over-cranking, the motor must cool down
before it will reset and allow starter operation. It can take
up to six minutes before the starter will work again.
Starting the Gasoline Engine
The 8th digit of the Vehicle Identification Number (VIN)
shows the code letter for the engine. Use this number
to verify the type of engine in the vehicle. SeeVehicle
Identification Number (VIN) on page 5-94. Follow
the proper steps to start the engine.
To start a diesel engine, seeStarting the Diesel Engine
on page 2-14.
Automatic Transmission
Set the parking brake and move the shifter to N (Neutral)
or P (Park), if so equipped. The engine will not start in
any other position.
Manual Transmission
Set the parking brake, shift to N (Neutral) and hold the
clutch pedal to the floor while starting the engine.
Starter Motor Operation
•The starter motor will disengage if you release the
key or the engine reaches a predetermined engine
speed.
•To prevent overheating, the starter motor will
disengage after continuously operating for
15 seconds. You must release the key from the
start position to re-engage the starter.
•The starter motor will not engage if the engine is
already running.
•The starter motor will disengage if, after
two seconds, the starter pinion gear does not
engage the flywheel or there is no engine rpm
signal from the engine speed sensor.
2-12
Page 78 of 376
Moisture will condense in a fuel tank that is almost
empty if the engine has not run for a while, even just
overnight under some conditions. So, it is always best to
refuel the vehicle at the end of each run.
Starting the Diesel Engine
The vehicle’s diesel engine starts differently than a
gasoline engine. Read the following pages to learn how
to start, restart, warm-up, and stop the diesel engine.
The information applies to Caterpillar
®Diesel Engine,
6.6L DURAMAX®Diesel Engine, Isuzu 6H Diesel
Engine, unless otherwise noted.
If you have a Caterpillar
®Diesel Engine, also refer to
the Caterpillar®Diesel Engine Operation & Maintenance
Manual for the starting procedure.
Automatic Transmission
Move the shifter to P (Park) or N (Neutral). The engine
will not start in any other position. To restart the
engine when the vehicle is already moving, use
N (Neutral) only.
Notice:Do not try to shift to P (Park) if the
vehicle is moving. If you do, you could damage
the transmission. Shift to P (Park) only when
the vehicle is stopped.
Manual Transmission
Move the shift lever to N (Neutral) and hold the clutch
pedal to the floor while starting the engine. The vehicle
will not start if the clutch pedal is not all the way down.
Starting the Engine
1. Turn your ignition key to ON/RUN.
Observe the wait to start light. SeeWait to Start
Light on page 3-35. This light may not come
on if the engine is hot.
If you have a Caterpillar
®diesel engine, see your
Caterpillar®Diesel Engine Operation & Maintenance
Manual for proper wait to start light operation.
2. As soon as the wait to start light goes off,
immediately turn the ignition key to START.
When the engine starts, let go of the key.
If the vehicle is equipped with a DURAMAX
®
6600 Diesel Engine, it has a fast warm-up glow
plug system. The wait to start light will illuminate for
a much shorter time than most diesel engines,
due to the rapid heating of the glow plugs.
Notice:Holding the key in START for longer than
15 seconds at a time will cause the battery to
be drained much sooner. And the excessive heat
can damage the starter motor.
2-14
Page 80 of 376
Cold Weather Starting (Caterpillar®
Diesel)
Because the diesel engine uses compression ignition, it
is harder to start in cold weather than a gasoline engine.
The air intake heater, use of the proper engine oil,
optional engine coolant heater and optional ether
injection system help cold weather starting. See the
Caterpillar
®Diesel Engine Operation & Maintenance
Manual for more information.
Restarting the Diesel Engine While
Moving (Automatic Transmission)
If you have to restart the engine while the vehicle is
moving, shift to N (Neutral).
Stopping the Diesel Engine
1. Apply the parking brake. SeeParking Brake (With
Hydraulic Brakes) on page 2-38orParking Brake
(With Air Brakes) on page 2-41for parking
brake apply procedure.
2. Shift into N (Neutral) for a manual transmission or
P (Park) for an automatic transmission.3. Turn the ignition key to OFF.
If the vehicle has a two-speed axle, seeTwo-Speed
Rear Axle on page 2-36.
If you have a Caterpillar
®diesel engine, see the
Caterpillar®Diesel Engine Operation & Maintenance
Manual for additional information.
Diesel Engine Warm-Up
Several factors affect how quickly the diesel engine
warms up. These can include outside temperature,
engine load, idle time and the vehicle’s option content.
The vehicle may be equipped with some features
that can help the engine reach operating temperature
sooner. Some of these features are discussed below.
Also, remember that an automatic transmission
adds heat to the cooling system through the heat
exchanger in the radiator. Because of this, vehicles
equipped with automatic transmissions are often able to
retain engine coolant heat better than manual
transmission vehicles.
See the Caterpillar
®Operation & Maintenance manual
for additional diesel engine warm-up information.
2-16
Page 85 of 376
This system can be used to increase the engine idle
speed whenever the following conditions are met:
•The brake pedal is not pressed.
•The vehicle is at a complete stop for vehicles with
diesel engines. The vehicle must not be moving
and the accelerator must not be pressed for vehicles
with gasoline engines.
•If the vehicle has manual transmission the clutch
pedal is not pressed or, if the vehicle has the
automatic transmission it is in N (Neutral) or
P (Park).
The manual high idle feature is activated by pressing
the switch on the instrument panel. When the switch is
pressed again, or any of the previous conditions are
not met, manual high idle will be deactivated.
The manual high idle has been preset at the factory.
Your dealer/retailer may change the setting to fit
your needs.
For vehicles with Caterpillar
®diesel engines, the high
idle switch can be used to set any desired high idle
speed.To set a new temporary engine idle speed do the
following:
1. Make sure all of the previously described conditions
are met.
2. Press the accelerator pedal to the desired engine
speed.
3. Momentarily press the manual high idle switch.
The temporary high idle speed will be set. This new high
idle rpm level will be remembered by the system until
either the ignition is turned to OFF or a new high
idle speed is set.
Automatic High Idle System
The automatic high idle feature will engage whenever
you start the vehicle and the engine is below the preset
operating temperature. This will help decrease engine
warm-up time.
On vehicles that have the Caterpillar
®diesel engine you
may have an exhaust restrictor that will operate in
High Idle mode. The exhaust brake switch must be on
for this feature to operate. SeeDiesel Engine Exhaust
Brake on page 2-26for more information.
Idle speed will then return to normal when the engine
reaches the preset operating temperature or has
been operating for at least 10 minutes.
2-21
Page 87 of 376
The engine idle speed will return to normal once the
following conditions are met:
•Once engine coolant temperature reaches about
150°F (65°C).
•The intake temperature reaches a certain level.
The high idle speed will be temporarily interrupted and
the engine speed will return to normal if any of the
following conditions occur:
•The brake pedal is applied.
•The accelerator pedal is pressed.
•The automatic transmission is shifted out of
P (Park) or N (Neutral).
•The clutch pedal on the manual transmission is
pressed.
•Vehicle speed is detected.
Once these conditions no longer exist, the engine idle
speed will slowly increase to high idle after the
normal delay, if the conditions for engine coolant
temperature and air intake temperature are still met.
Engine Checks Before Operating
When you have started the engine, let it run for
20 to 30 seconds before you put a load on the engine.
But do not leave the vehicle while the engine is running.
Avoid unnecessary idling of diesel engine equipped
vehicles.
If the engine idles too long, the temperature of the
engine coolant will fall below the normal operating
range. Low engine operating temperature causes
several conditions which affect engine operation and
reduce engine life.
The engine should be permitted to go through a
warm-up period. Operate the vehicle at a minimum of
600 rpm during the warm-up period. During this
period and during operation, the following observations
should be made.
2-23
Page 91 of 376
Automatic Transmission Operation
If the vehicle has an Allison®five-speed or six-speed
automatic transmission, you will also find an Allison®
Transmission Operator’s Manual in the vehicle which
goes into more detail. On the headliner, in front of and
above the driver, or in some other place near the driver,
you will see a label that describes important operating
facts about the automatic transmission in the vehicle.
Make sure you follow the instructions on this label.
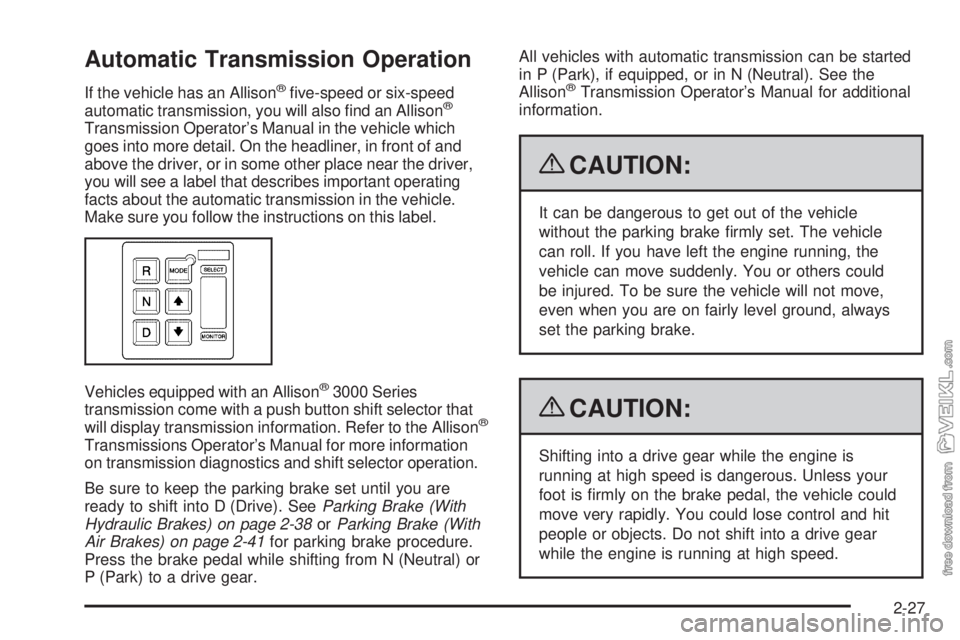
Vehicles equipped with an Allison
®3000 Series
transmission come with a push button shift selector that
will display transmission information. Refer to the Allison
®
Transmissions Operator’s Manual for more information
on transmission diagnostics and shift selector operation.
Be sure to keep the parking brake set until you are
ready to shift into D (Drive). SeeParking Brake (With
Hydraulic Brakes) on page 2-38orParking Brake (With
Air Brakes) on page 2-41for parking brake procedure.
Press the brake pedal while shifting from N (Neutral) or
P (Park) to a drive gear.All vehicles with automatic transmission can be started
in P (Park), if equipped, or in N (Neutral). See the
Allison
®Transmission Operator’s Manual for additional
information.
{CAUTION:
It can be dangerous to get out of the vehicle
without the parking brake firmly set. The vehicle
can roll. If you have left the engine running, the
vehicle can move suddenly. You or others could
be injured. To be sure the vehicle will not move,
even when you are on fairly level ground, always
set the parking brake.
{CAUTION:
Shifting into a drive gear while the engine is
running at high speed is dangerous. Unless your
foot is firmly on the brake pedal, the vehicle could
move very rapidly. You could lose control and hit
people or objects. Do not shift into a drive gear
while the engine is running at high speed.
2-27
Page 92 of 376
Overdrive Defeat
If your vehicle has this feature, you can select not to
shift up to fifth gear. This is useful when towing or under
a heavy load.
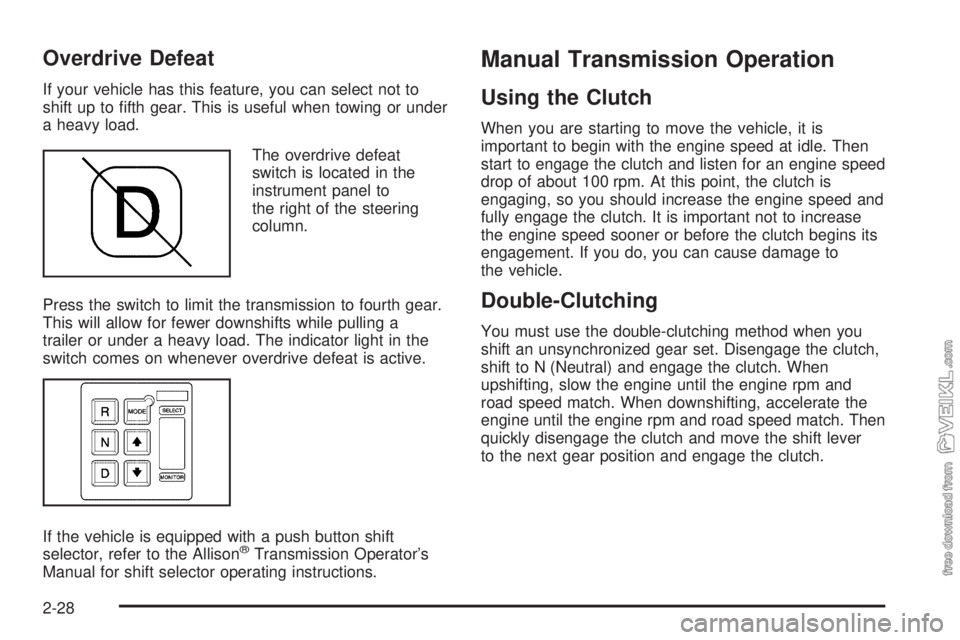
The overdrive defeat
switch is located in the
instrument panel to
the right of the steering
column.
Press the switch to limit the transmission to fourth gear.
This will allow for fewer downshifts while pulling a
trailer or under a heavy load. The indicator light in the
switch comes on whenever overdrive defeat is active.
If the vehicle is equipped with a push button shift
selector, refer to the Allison
®Transmission Operator’s
Manual for shift selector operating instructions.
Manual Transmission Operation
Using the Clutch
When you are starting to move the vehicle, it is
important to begin with the engine speed at idle. Then
start to engage the clutch and listen for an engine speed
drop of about 100 rpm. At this point, the clutch is
engaging, so you should increase the engine speed and
fully engage the clutch. It is important not to increase
the engine speed sooner or before the clutch begins its
engagement. If you do, you can cause damage to
the vehicle.
Double-Clutching
You must use the double-clutching method when you
shift an unsynchronized gear set. Disengage the clutch,
shift to N (Neutral) and engage the clutch. When
upshifting, slow the engine until the engine rpm and
road speed match. When downshifting, accelerate the
engine until the engine rpm and road speed match. Then
quickly disengage the clutch and move the shift lever
to the next gear position and engage the clutch.
2-28
Page 93 of 376
Eaton®Fuller®Five and Six-Speed
Transmissions and TTC Spicer
Seven-Speed Transmissions
These transmissions have gears that automatically
synchronize when you shift up or down (except 1 (First)
gear on the five-speed and seven-speed transmission
which is unsynchronized). Choose the gear that will
maintain the road speed you want while keeping
the engine above two-thirds of the governed speed.
When the engine speed drops below two-thirds of the
governed speed, shift into the next lower gear before
your engine begins to lug. When you shift down, be sure
to double-clutch if required.
Eaton®Fuller®Nine and Ten-Speed
Non-Synchronized Manual
Transmissions
If the vehicle has one of these transmissions the engine
rpm and road speed must match when upshifting and
downshifting. The label above the windshield will tell you
the operating basics you need to know.
The following are driving tips.
•Always choose an initial starting gear suitable for
the load and terrain.
•Always use double-clutching procedures when
shifting.
•Never move the range shift lever to the LO speed
gear position after HI range preselection, or
anytime the transmission is in the HI range.
•Never move the range knob or lever with the shift
lever in N (Neutral) while the vehicle is moving.
•Never make a range shift while moving in
R (Reverse).
Clutch Brake (Vehicles with
Non-Synchronized Transmission)
A clutch brake is used to stop transmission input shaft
rotation so that 1 (First) or R (Reverse) gear selection
can be initiated when the vehicle is at a standstill
and the engine is idling.
Press the clutch pedal all the way down to the floorboard
to apply the clutch brake.
When using the clutch brake, disengage the clutch pedal
and shift the transmission into either the initial starting
gear or R (Reverse). If the tooth-butting occurs between
the clutching teeth, re-engage the clutch while applying
light pressure to the shift lever. This will provide for a
smooth shift into either 1 (First) or R (Reverse) gear.
Notice:Using the clutch brake for shifting into any
gear other than 1 (First) or R (Reverse) may cause
premature wear of the clutch brake and make gear
shift effort more difficult. Do not use the clutch brake
for shifting after engaging 1 (First) or R (Reverse).
2-29