fuel CHEVROLET KODIAK 2009 Owners Manual
[x] Cancel search | Manufacturer: CHEVROLET, Model Year: 2009, Model line: KODIAK, Model: CHEVROLET KODIAK 2009Pages: 376, PDF Size: 5.39 MB
Page 1 of 376
Seats and Restraint System............................. 1-1
Front Seats
............................................... 1-2
Rear Seats
..............................................1-10
Safety Belts
.............................................1-11
Child Restraints
.......................................1-28
Airbag System
.........................................1-48
Restraint System Check
............................1-59
Features and Controls..................................... 2-1
Keys
........................................................ 2-2
Doors and Locks
....................................... 2-6
Windows
.................................................. 2-8
Starting and Operating Your Vehicle
...........2-10
Mirrors
....................................................2-51
Storage Areas
.........................................2-53
Instrument Panel............................................. 3-1
Instrument Panel Overview
.......................... 3-4
Climate Controls
......................................3-20
Warning Lights, Gages, and Indicators
........3-23
Audio System(s)
.......................................3-48
Driving Your Vehicle....................................... 4-1
Your Driving, the Road, and the Vehicle
....... 4-2
Towing
...................................................4-23Service and Appearance Care.......................... 5-1
Service
..................................................... 5-3
Fuel
......................................................... 5-6
Checking Things Under the Hood
...............5-22
Rear Axle
...............................................5-67
Four-Wheel Drive
.....................................5-68
Front Axle
...............................................5-69
Noise Control System
...............................5-70
Bulb Replacement
....................................5-71
Windshield Wiper Blade Replacement
.........5-71
Other Service Items
..................................5-72
Tires
......................................................5-76
Appearance Care
.....................................5-87
Vehicle Identification
.................................5-94
Electrical System
......................................5-95
Capacities and Specifications
...................5-102
Normal Maintenance Replacement Parts
....5-108
Maintenance Schedule..................................... 6-1
Maintenance Schedule
................................ 6-2
Customer Assistance Information.................... 7-1
Customer Assistance and Information
........... 7-2
Reporting Safety Defects
............................ 7-9
Vehicle Data Recording and Privacy
...........7-11
Index................................................................ 1
2009 Chevrolet Kodiak Owner ManualM
Page 4 of 376
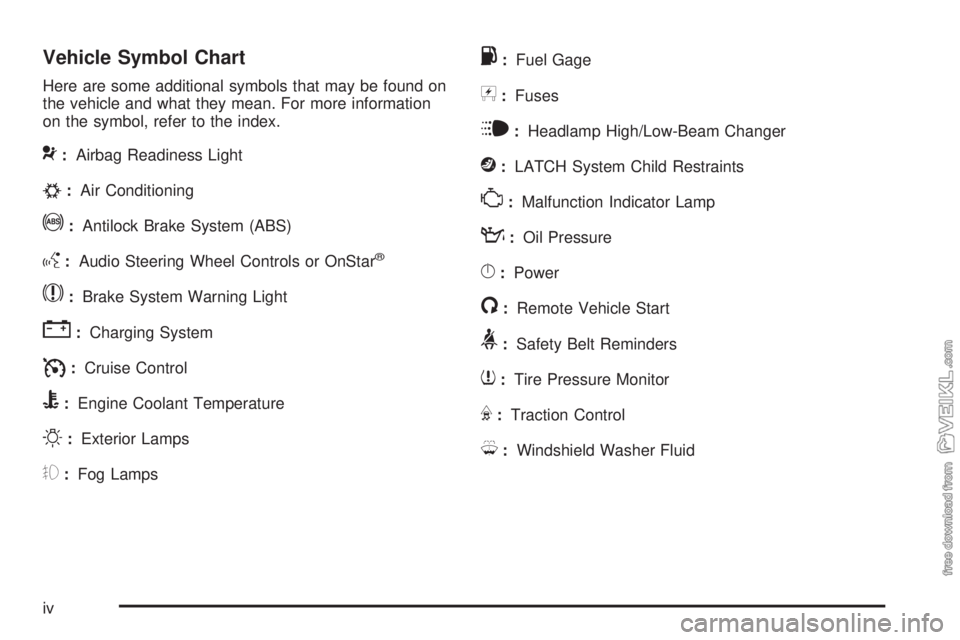
Vehicle Symbol Chart
Here are some additional symbols that may be found on
the vehicle and what they mean. For more information
on the symbol, refer to the index.
9:Airbag Readiness Light
#:Air Conditioning
!:Antilock Brake System (ABS)
g:Audio Steering Wheel Controls or OnStar®
$:Brake System Warning Light
":Charging System
I:Cruise Control
B:Engine Coolant Temperature
O:Exterior Lamps
#:Fog Lamps
.:Fuel Gage
+:Fuses
i:Headlamp High/Low-Beam Changer
j:LATCH System Child Restraints
*:Malfunction Indicator Lamp
::Oil Pressure
}:Power
/:Remote Vehicle Start
>:Safety Belt Reminders
7:Tire Pressure Monitor
F:Traction Control
M:Windshield Washer Fluid
iv
Page 78 of 376
Moisture will condense in a fuel tank that is almost
empty if the engine has not run for a while, even just
overnight under some conditions. So, it is always best to
refuel the vehicle at the end of each run.
Starting the Diesel Engine
The vehicle’s diesel engine starts differently than a
gasoline engine. Read the following pages to learn how
to start, restart, warm-up, and stop the diesel engine.
The information applies to Caterpillar
®Diesel Engine,
6.6L DURAMAX®Diesel Engine, Isuzu 6H Diesel
Engine, unless otherwise noted.
If you have a Caterpillar
®Diesel Engine, also refer to
the Caterpillar®Diesel Engine Operation & Maintenance
Manual for the starting procedure.
Automatic Transmission
Move the shifter to P (Park) or N (Neutral). The engine
will not start in any other position. To restart the
engine when the vehicle is already moving, use
N (Neutral) only.
Notice:Do not try to shift to P (Park) if the
vehicle is moving. If you do, you could damage
the transmission. Shift to P (Park) only when
the vehicle is stopped.
Manual Transmission
Move the shift lever to N (Neutral) and hold the clutch
pedal to the floor while starting the engine. The vehicle
will not start if the clutch pedal is not all the way down.
Starting the Engine
1. Turn your ignition key to ON/RUN.
Observe the wait to start light. SeeWait to Start
Light on page 3-35. This light may not come
on if the engine is hot.
If you have a Caterpillar
®diesel engine, see your
Caterpillar®Diesel Engine Operation & Maintenance
Manual for proper wait to start light operation.
2. As soon as the wait to start light goes off,
immediately turn the ignition key to START.
When the engine starts, let go of the key.
If the vehicle is equipped with a DURAMAX
®
6600 Diesel Engine, it has a fast warm-up glow
plug system. The wait to start light will illuminate for
a much shorter time than most diesel engines,
due to the rapid heating of the glow plugs.
Notice:Holding the key in START for longer than
15 seconds at a time will cause the battery to
be drained much sooner. And the excessive heat
can damage the starter motor.
2-14
Page 79 of 376
Notice:If the wait to start light stays on after
starting the vehicle, the vehicle may not run
properly. Have the vehicle serviced right away.
3. If the engine does not start after 15 seconds
of cranking, turn the ignition key to OFF. Wait one
minute for the starter to cool, then try the same
steps again.
If you are trying to start the engine after you have run
out of fuel, seeRunning Out of Fuel on page 5-17.
When the engine is cold, let it run for a few minutes
before you move the vehicle. This lets oil pressure build
up. The engine will sound louder when it is cold.
Notice:If you are not in an idling vehicle and the
engine overheats, you would not be there to see the
overheated engine indication. This could damage
the vehicle. Do not let the engine run when you are
not in the vehicle.
Cold Weather Starting
If the vehicle has the 6.6L DURAMAX®Diesel Engine or
the Isuzu 6H Diesel Engine, the following notice applies:
Notice:The diesel engine has an electric air intake
heater system which reduces white smoke and
helps start the engine in cold weather. Do not spray
starting fluid into the air intake where it can
contact the heater elements.If you do not have the GM Automatic Ether Injection
System, do not use starting fluid or you could
damage the engine. If you have the GM system, use
only GM approved starting fluid that has been tested
to establish compatibility with the air inlet heater
system.
The following tips will help with engine starting in cold
weather.
•Use the recommended engine oil when the outside
temperature drops below freezing. SeeEngine Oil
(DURAMAX Diesel Engine) on page 5-24or
Engine Oil (Caterpillar Diesel Engine) on page 5-27
orEngine Oil (Isuzu Diesel Engine) on page 5-28
orEngine Oil (Gasoline Engine) on page 5-32.
When the outside temperature drops below
0°F (−18°C), use of the optional engine coolant
heater is recommended.
•If you experience longer cranking times, notice an
unusual amount of exhaust smoke or are at
higher altitudes (over 7,000 ft. or 2 135 m), you may
use the optional engine coolant heater. See
Engine Coolant Heater on page 2-25.
•SeeWhat Fuel to Use on page 5-8for information
on what fuel to use in cold weather.
2-15
Page 81 of 376
If the Diesel Engine Will Not Start
If you have run out of fuel, seeRunning Out of Fuel on
page 5-17.
If you are not out of fuel, and the engine will not start,
do this:
Turn the ignition key to ON/RUN. Immediately after the
wait to start light goes off, turn the ignition key to START.
If the light does not go off, wait a few seconds, then try
starting the engine again. And, see your dealer/retailer
as soon as you can for a starting system check.
If the light comes on and then goes off and you know
the batteries are charged, but the engine still will
not start, the vehicle needs service.
If the light does not come on when the engine is cold,
the vehicle needs service.If the batteries do not have enough charge to start the
engine, seeBattery on page 5-61.
Be sure you have the right oil for the engine, and that
you have changed the oil at the proper times. If you use
the wrong oil, the engine may be harder to start.
Be sure you are using the proper fuel for existing
weather conditions. SeeWhat Fuel to Use on page 5-8.
If the engine starts, runs a short time, then stops, the
vehicle needs service.
{CAUTION:
Do not use gasoline or starting aids, such as
ether, in the air intake. They could damage the
engine. There could also be a fire, which could
cause serious personal injury.
2-17
Page 89 of 376
Engine Coolant Heater
The engine coolant heater can provide easier starting
and better fuel economy during engine warm-up in cold
weather conditions at or below 0°F (−18°C). Vehicles
with an engine coolant heater should be plugged
in at least four hours before starting.
To Use the Engine Coolant Heater
1. Turn off the engine.
2. Find the plug-in outlet located under the driver door.
3. Plug it into a normal, grounded 110-volt AC
outlet.
{CAUTION:
Plugging the cord into an ungrounded outlet could
cause an electrical shock. Also, the wrong kind of
extension cord could overheat and cause a fire.
You could be seriously injured. Plug the cord into
a properly grounded three-prong 110-volt AC
outlet. If the cord will not reach, use a heavy-duty
three-prong extension cord rated for at least
15 amps.
4. Before starting the engine, be sure to unplug and
store the cord as it was before to keep it away
from moving engine parts, and prevent damage.
The length of time the heater should remain plugged in
depends on several factors. Ask a dealer/retailer in
the area where you will be parking the vehicle for the
best advice on this.
2-25
Page 96 of 376
Recommended Transfer Case Settings
Driving ConditionsTransfer Case Settings
2m4m4nN
Normal YES
Severe YES
Extreme YES
Vehicle in Tow* YES
*SeeTowing Your Vehicle on page 4-23for further
information.
2
m(Two-Wheel High):This setting is for driving in most
street and highway situations. The transfer case does
not drive the front axle in two-wheel drive. The front-axle
spins if the front wheel hubs are locked. Be sure to
unlock the hubs to achieve the best fuel economy.
4
m(Four-Wheel High):Use Four-Wheel High when you
need extra traction, such as on snowy or icy roads or in
most off-road situations. Be sure the front wheel hubs are
locked when you want to drive in Four-Wheel High.
4
n(Four-Wheel Low):This setting sends maximum
power to all four wheels. You might choose Four-Wheel
Low if you are driving off-road in deep sand, deep mud,
and climbing or descending steep hills. Be sure the front
wheel hubs are locked when you want to drive in
Four-Wheel Low.
{CAUTION:
Shifting the transfer case to Neutral can cause the
vehicle to roll even if the transmission is in
P (Park). You or someone else could be injured. If
you are going to leave the vehicle, set the parking
brake and shift the transmission to P (Park) and
make sure the transfer case is in a drive gear.
Notice:If the vehicle has an Allison
®transmission
and you try to put the transmission in P (Park)
while the transfer case is in Four-Wheel Low, the
transmission might not go into P (Park) and
could damage the vehicle. When parking the vehicle,
make sure the transfer case is in Two-Wheel High
or Four-Wheel High.
N (Neutral):Shift the vehicle’s transfer case to
N (Neutral) only when towing the vehicle.
2-32
Page 100 of 376
Parking a Vehicle With the Two-Speed
Rear Axle
1. With the engine running, shift the two-speed rear
axle into low. To be sure it is in low, you will need
to move the vehicle in gear just a little.
2. Hold the brake pedal down.
3. Apply the parking brake. SeeParking Brake (With
Hydraulic Brakes) on page 2-38orParking Brake
(With Air Brakes) on page 2-41for parking
brake apply procedure.
4. Shift the transmission to N (Neutral) for manual
transmission or P (Park) for automatic transmission.
Two-Speed Rear Axle
The Two-Speed rear axle lets the driver select Low
Range and High Range. Low Range provides good
starting torque and pulling power. When selecting High
Range the axle allows for higher road speed and
fuel economy.For better performance during off-road or under a heavy
load, shift the axle into Low Range and then operate
the transmission normally.
For better performance on the highway, shift the axle to
High Range and operate the transmission normally.
High or Low Range can be used when additional shifts
between transmission gears is needed while driving
on grades and for better fuel economy.
Notice:Driving in Low Range above 50 mph
(80.5 kph) will damage driveline components. Drive
below 50 mph (80.5 kph) in Low Range.
If the vehicle has this feature, there is a label on the
headliner above the windshield or in another place near
the driver that shows how to use it. Be sure to follow
the directions carefully.
2-36
Page 110 of 376
Diesel Particulate Filter
The vehicle has a Diesel Particulate Filter (DPF) as part
of the exhaust system to reduce vehicle emissions. The
DPF requires a unique exhaust tailpipe with an exhaust
cooler. The exhaust cooler mixes air with the exhaust to
lower the temperature before it leaves the tailpipe.
The DPF, the tailpipe, or other exhaust system
components must not be altered. Inspect regularly and
clean any mud or dirt from the exhaust cooler,
especially where the exhaust cooler connects to the
tailpipe and the openings where fresh air enters
the cooler. See “Exhaust System Inspection” underAt
Least Twice a Year on page 6-27.
The DPF will clean itself as part of normal operation.
Several factors including fuel consumed, hours of engine
operation and miles driven are monitored by the Engine
Control Module (ECM). The self cleaning occurs
approximately once per tank of fuel.
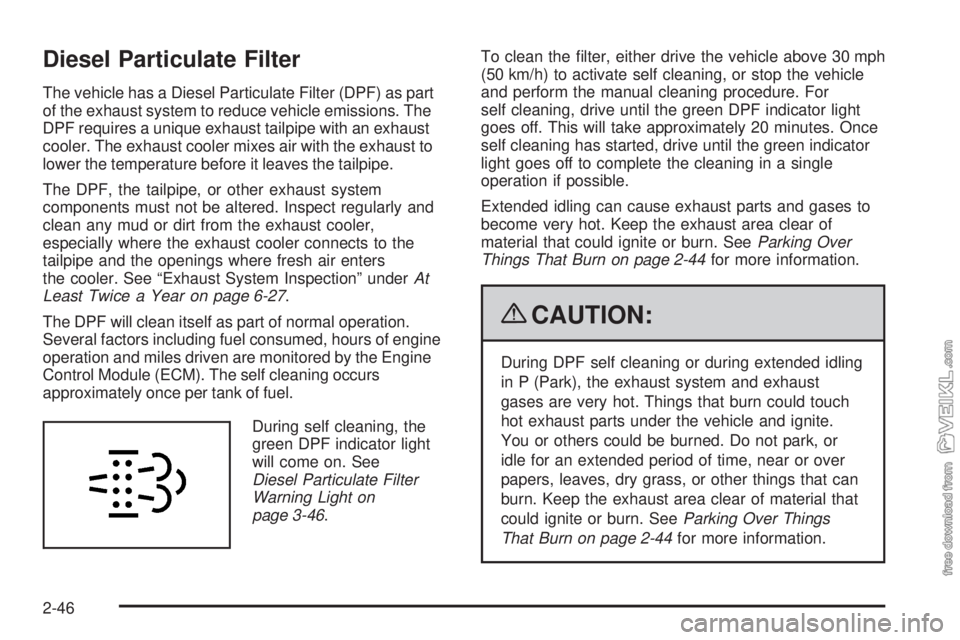
During self cleaning, the
green DPF indicator light
will come on. See
Diesel Particulate Filter
Warning Light on
page 3-46.To clean the filter, either drive the vehicle above 30 mph
(50 km/h) to activate self cleaning, or stop the vehicle
and perform the manual cleaning procedure. For
self cleaning, drive until the green DPF indicator light
goes off. This will take approximately 20 minutes. Once
self cleaning has started, drive until the green indicator
light goes off to complete the cleaning in a single
operation if possible.
Extended idling can cause exhaust parts and gases to
become very hot. Keep the exhaust area clear of
material that could ignite or burn. SeeParking Over
Things That Burn on page 2-44for more information.
{CAUTION:
During DPF self cleaning or during extended idling
in P (Park), the exhaust system and exhaust
gases are very hot. Things that burn could touch
hot exhaust parts under the vehicle and ignite.
You or others could be burned. Do not park, or
idle for an extended period of time, near or over
papers, leaves, dry grass, or other things that can
burn. Keep the exhaust area clear of material that
could ignite or burn. SeeParking Over Things
That Burn on page 2-44for more information.
2-46
Page 111 of 376
Notice:Extended idle should be avoided because
the DPF system is not capable of self cleaning at
idle. During extended idle operation, monitor the
instrument panel telltale lights and Driver Information
Center for messages and take appropriate indicated
action. Continued idling with the warning light/
message on could cause irreversible damage to the
DPF requiring repair and possible replacement that
might not be covered by the vehicle warranty.
When the yellow DPF indicator comes on, the filter is
dirty and needs cleaning. You will also notice a change
in the exhaust sound and engine idle speed. This is
normal. If you continue to drive and the exhaust filter is
not cleaned as required, the DPF indicator will change
from yellow to red. Continuing to drive the vehicle
with the red indicator can cause filter damage.
Vehicles with DPF have specific fuel and engine oil
requirements. SeeWhat Fuel to Use on page 5-8and
Engine Oil (DURAMAX Diesel Engine) on page 5-24
orEngine Oil (Caterpillar Diesel Engine) on page 5-27or
Engine Oil (Isuzu Diesel Engine) on page 5-28or
Engine Oil (Gasoline Engine) on page 5-32for more
information on those requirements.Notice:Permanent damage can occur to the DPF
or related components if the required Ultra Low
Sulfur Diesel (15 ppm sulfur maximum) or low ash
CJ-4 engine oil is not used. This damage would
not be covered by the vehicle warranty.
For vehicles with Power Take-Off (PTO), monitor the
instrument panel cluster for lights related to the DPF.
All engines consume some amount of engine oil. Ash
is the by-product of engine oil consumption. The ash will
become trapped in the DPF over the life of the vehicle.
Eventually, the buildup of ash will restrict the exhaust
gases and the DPF will need to be cleaned or replaced.
SeeAccessories and Modifications on page 5-3for
important information if you are considering adding
accessories or modifying the vehicle.
2-47