radio controls CHEVROLET MALIBU 2004 5.G Owners Manual
[x] Cancel search | Manufacturer: CHEVROLET, Model Year: 2004, Model line: MALIBU, Model: CHEVROLET MALIBU 2004 5.GPages: 426, PDF Size: 3.98 MB
Page 93 of 426
To use your adjustable throttle and pedal feature, do the
following:
The adjustable pedal feature is meant to be used with
the adjustable seat and adjustable steering wheel
controls to reach a safe and comfortable position.
1. Adjust your seat to a comfortable position where
you can comfortably reach other controls such as
the radio and climate controls.
2. Adjust the throttle and brake pedals to reach a
comfortable and safe operating position.
3. Adjust the steering wheel to a safe operating
position.Engine Coolant Heater
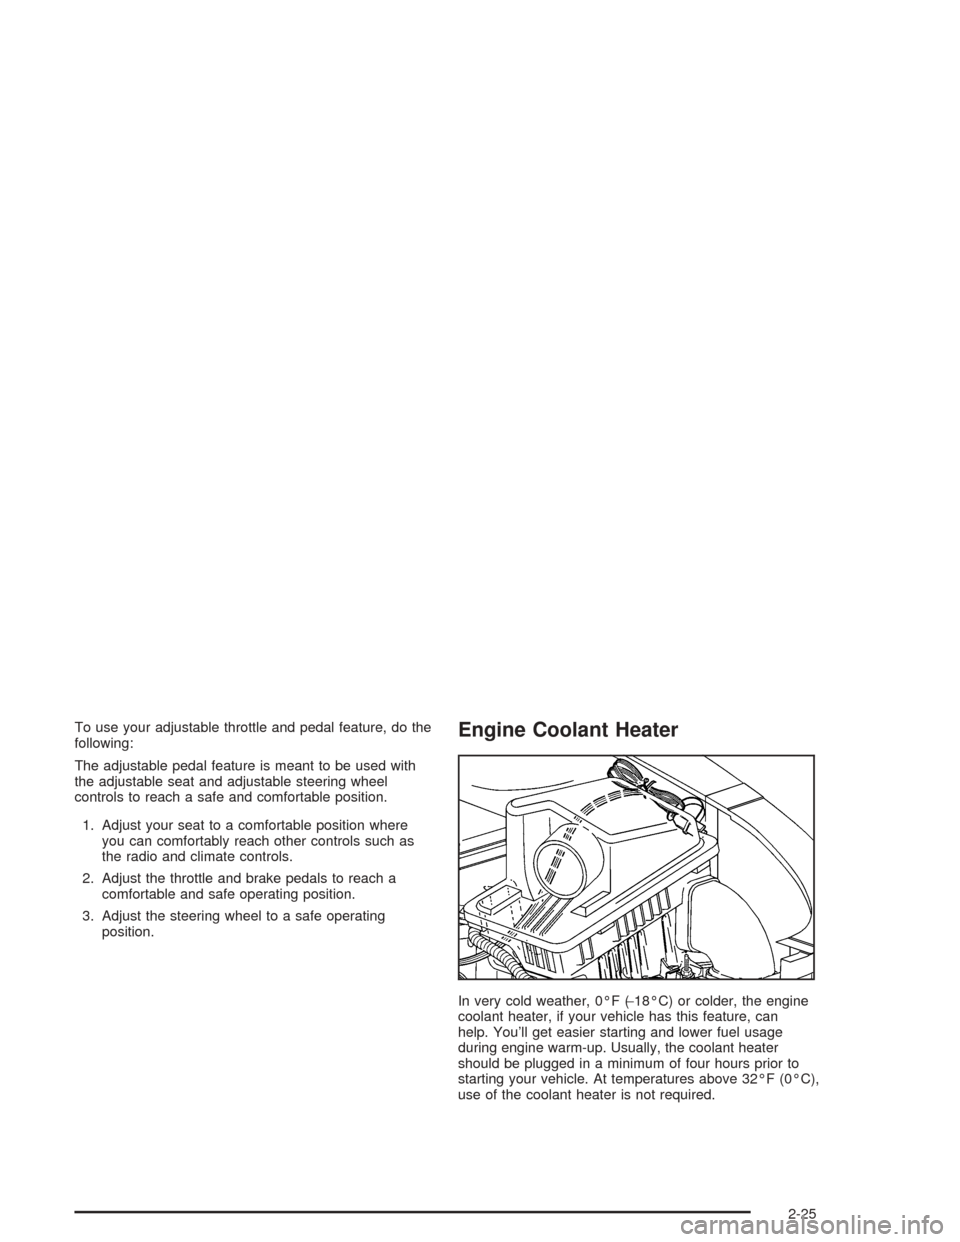
In very cold weather, 0°F (−18°C) or colder, the engine
coolant heater, if your vehicle has this feature, can
help. You’ll get easier starting and lower fuel usage
during engine warm-up. Usually, the coolant heater
should be plugged in a minimum of four hours prior to
starting your vehicle. At temperatures above 32°F (0°C),
use of the coolant heater is not required.
2-25
Page 117 of 426
Instrument Panel Overview...............................3-4
Hazard Warning Flashers................................3-6
Other Warning Devices...................................3-7
Horn.............................................................3-7
Tilt Wheel.....................................................3-7
Turn Signal/Multifunction Lever.........................3-8
Exterior Lamps.............................................3-14
Interior Lamps..............................................3-19
Accessory Power Outlets...............................3-20
Climate Controls............................................3-21
Climate Control System.................................3-21
Automatic Climate Control System...................3-25
Outlet Adjustment.........................................3-30
Warning Lights, Gages, and Indicators............3-31
Instrument Panel Cluster................................3-32
Speedometer and Odometer...........................3-33
Tachometer.................................................3-33
Safety Belt Reminder Light.............................3-34
Air Bag Readiness Light................................3-34
Charging System Light..................................3-35
Brake System Warning Light..........................3-36
Anti-Lock Brake System
Warning Light...........................................3-37
Enhanced Traction System
Warning Light...........................................3-37
Enhanced Traction System Active Light............3-38Engine Coolant Temperature Warning Light......3-38
Engine Coolant Temperature Gage..................3-39
Malfunction Indicator Lamp.............................3-39
Oil Pressure Light.........................................3-42
Security Light...............................................3-43
Cruise Control Light......................................3-43
Service Vehicle Soon Light............................3-44
Fuel Gage...................................................3-44
Driver Information Center (DIC).......................3-45
DIC Operation and Displays...........................3-46
DIC Warnings and Messages.........................3-50
Audio System(s).............................................3-52
Setting the Time for Radios without Radio
Data Systems (RDS)..................................3-52
Setting the Time for Radios with Radio Data
Systems (RDS).........................................3-53
Radio with CD (Base Level)...........................3-53
Radio with CD (Up Level)..............................3-58
Radio with Cassette and CD..........................3-69
Radio with Six-Disc CD.................................3-82
Rear Seat Entertainment System....................3-96
Rear Seat Audio (RSA)
(Without Entertainment System).................3-111
Rear Seat Audio (RSA)
(With Entertainment System).....................3-113
Theft-Deterrent Feature................................3-115
Section 3 Instrument Panel
3-1
Page 118 of 426
Audio Steering Wheel Controls......................3-115
DVD Distortion............................................3-116
Radio Reception.........................................3-116
Care of Your Cassette Tape Player...............3-117
Care of Your CDs and DVDs........................3-118
Care of Your CD and DVD Player.................3-118Cleaning Your DVD Player...........................3-118
Cleaning the Video Screen...........................3-118
Fixed Mast Antenna (MAXX Only).................3-118
Backglass Antenna (Sedan Only)..................3-119
XM™ Satellite Radio Antenna System............3-119
Section 3 Instrument Panel
3-2
Page 168 of 426
Audio System(s)
Notice:Before you add any sound equipment to
your vehicle — like a tape player, CB radio, mobile
telephone or two-way radio — be sure you can add
what you want. If you can, it’s very important to do it
properly. Added sound equipment may interfere with
the operation of your vehicle’s engine, radio or other
systems, and even damage them. Your vehicle’s
systems may interfere with the operation of sound
equipment that has been added improperly.
So, before adding sound equipment, check with
your dealer and be sure to check federal rules
covering mobile radio and telephone units.
Your audio system has been designed to operate easily
and to give years of listening pleasure. You will get
the most enjoyment out of it if you acquaint yourself with
it rst. Figure out which radio you have in your vehicle,
nd out what your audio system can do and how to
operate all of its controls to be sure you’re getting the
most out of the advanced engineering that went into it.Your vehicle has a feature called Retained Accessory
Power (RAP). With RAP, you can play your audio
system even after the ignition is turned off. See
“Retained Accessory Power (RAP)” underIgnition
Positions on page 2-22.
Setting the Time for Radios without
Radio Data Systems (RDS)
To set the hour, press the clock button. The clock icon
will appear on the display and the hour number will ash
on the display. Then turn the ADJ knob to increase or to
decrease. To set the minutes, press the clock button
again. The minute numbers will ash on the display.
Then turn the ADJ knob to increase or to decrease.
The time may be set with the ignition on or off.
3-52
Page 171 of 426
Setting the Tone (Bass/Treble)
TONE /P/Q(Bass/Treble):To adjust the bass or the
treble, press and release the tone button repeatedly
until BASS or TREB appears on the display. Then turn
the ADJ knob to increase or to decrease. If a station
is weak or noisy, you may want to decrease the treble.
To adjust bass or treble to the middle position, select
BASS or TREB. Then press and hold the tone button for
more than two seconds. You will hear a beep and the
level will be adjusted to the middle position.
To adjust the tone controls to the middle position, rst
end out of tone by pressing another button, causing the
radio to perform that function, or by waiting ve
seconds for the display to return to the default display.
Then press and hold the tone button for more than
two seconds until you hear a beep. ALL CENTERED
will appear on the display.
Adjusting the Speakers (Balance/Fade)
BAL/FADE /S(Balance/Fade):To adjust the
balance between the right and the left speakers, press
and release the balance and fade button until BAL
appears on the display. Then turn the ADJ knob to move
the sound toward the right or the left speakers.
To adjust the fade between the front and the rear
speakers, press and release the balance and fade
button until FADE appears on the display. Then turn
the ADJ knob to move the sound toward the front or the
rear speakers.
To adjust balance or fade to the middle position, select
BAL or FADE. Then press and hold the balance and fade
button for more than two seconds. You will hear a beep
and the level will be adjusted to the middle position.
To adjust the speaker controls to the middle position,
rst end out of balance and fade by pressing another
button, causing the radio to perform that function, or by
waiting ve seconds for the display to return to the default
display. Then press and hold the balance and fade
button for more than two seconds until you hear a beep.
ALL CENTERED will appear on the display.
3-55
Page 177 of 426
Setting Preset Stations
The six numbered pushbuttons let you return to
your favorite stations. You can set up to 30 stations
(six FM1, six FM2, and six AM, six XM1 and six XM2
(48 contiguous US states, if equipped) by performing
the following steps:
1. Turn the radio on.
2. Press BAND to select FM1, FM2, or AM,
or XM1 or XM2.
3. Tune in the desired station.
4. Press AUTO TONE or AUTO EQ to select the
equalization.
5. Press and hold one of the six numbered pushbuttons
until you hear a beep. Whenever you press that
numbered pushbutton, the station you set will return
and the equalization that you selected will be
automatically stored for that pushbutton.
6. Repeat the steps for each pushbutton.
Setting the Tone
(Bass/Midrange/Treble)
TONE /P/Q(Bass/Treble):Press and release this
button until BASS, MID, or TREB appears on the
display. Turn the ADJ knob to increase or to decrease.
The display will show the bass, mid, or treble level.
If a station is weak or noisy, you may want to decrease
the treble.
To adjust bass, midrange, or treble to the middle
position, select BASS, MID, or TREB. Then press and
hold the tone button for more than two seconds. You will
hear one beep and the tone control will be adjusted to
the middle position.
To adjust all tone controls to the middle position, press
and hold the tone button when no tone control is
displayed. ALL CENTERED will appear on the display
and you will hear a beep. The bass, midrange, and
treble will be adjusted to the middle position.
3-61
Page 188 of 426
Setting Preset Stations
The six numbered pushbuttons let you return to
your favorite stations. You can set up to 30 stations
(six FM1, six FM2, and six AM, six XM1 and six XM2
(48 contiguous US states, if equipped) by performing
the following steps:
1. Turn the radio on.
2. Press BAND to select FM1, FM2, or AM,
or XM1 or XM2.
3. Tune in the desired station.
4. Press AUTO TONE or AUTO EQ to select the
equalization.
5. Press and hold one of the six numbered
pushbuttons until you hear a beep. Whenever you
press that numbered pushbutton, the station
you set will return and the equalization that you
selected will be automatically stored for that
pushbutton.
6. Repeat the steps for each pushbutton.
Setting the Tone
(Bass/Midrange/Treble)
TONE /P/Q(Bass/Treble):Press and release this
button until BASS, MID, or TREB appears on the
display. Turn the ADJ knob to increase or to decrease.
The display will show the bass, mid, or treble level.
If a station is weak or noisy, you may want to decrease
the treble.
To adjust bass, midrange, or treble to the middle
position, select BASS, MID, or TREB. Then press and
hold the tone button for more than two seconds. You will
hear one beep and the tone control will be adjusted to
the middle position.
To adjust all tone controls to the middle position, press
and hold the tone button when no tone control is
displayed. ALL CENTERED will appear on the display
and you will hear a beep. The bass, midrange, and
treble will be adjusted to the middle position.
3-72
Page 201 of 426
Setting Preset Stations
The six numbered pushbuttons let you return to
your favorite stations. You can set up to 30 stations
(six FM1, six FM2, and six AM, six XM1 and six XM2
(48 contiguous US states, if equipped) by performing
the following steps:
1. Turn the radio on.
2. Press BAND to select FM1, FM2, or AM,
or XM1 or XM2.
3. Tune in the desired station.
4. Press AUTO TONE or AUTO EQ to select
the equalization.
5. Press and hold one of the six numbered pushbuttons
until you hear a beep. Whenever you press that
numbered pushbutton, the station you set will return
and the equalization that you selected will be
automatically stored for that pushbutton.
6. Repeat the steps for each pushbutton.
Setting the Tone
(Bass/Midrange/Treble)
TONE /P/Q(Bass/Treble):Press and release this
button until BASS, MID, or TREB appears on the display.
Turn the ADJ knob to increase or to decrease. The
display will show the bass, mid, or treble level. If a station
is weak or noisy, you may want to decrease the treble.
To adjust bass, midrange, or treble to the middle position,
select BASS, MID, or TREB. Then press and hold the
tone button for more than two seconds. You will hear one
beep and the tone control will be adjusted to the middle
position.
To adjust all tone controls to the middle position,
press and hold the tone button when no tone control is
displayed. ALL CENTERED will appear on the display
and you will hear a beep. The bass, midrange, and treble
will be adjusted to the middle position.
3-85
Page 227 of 426
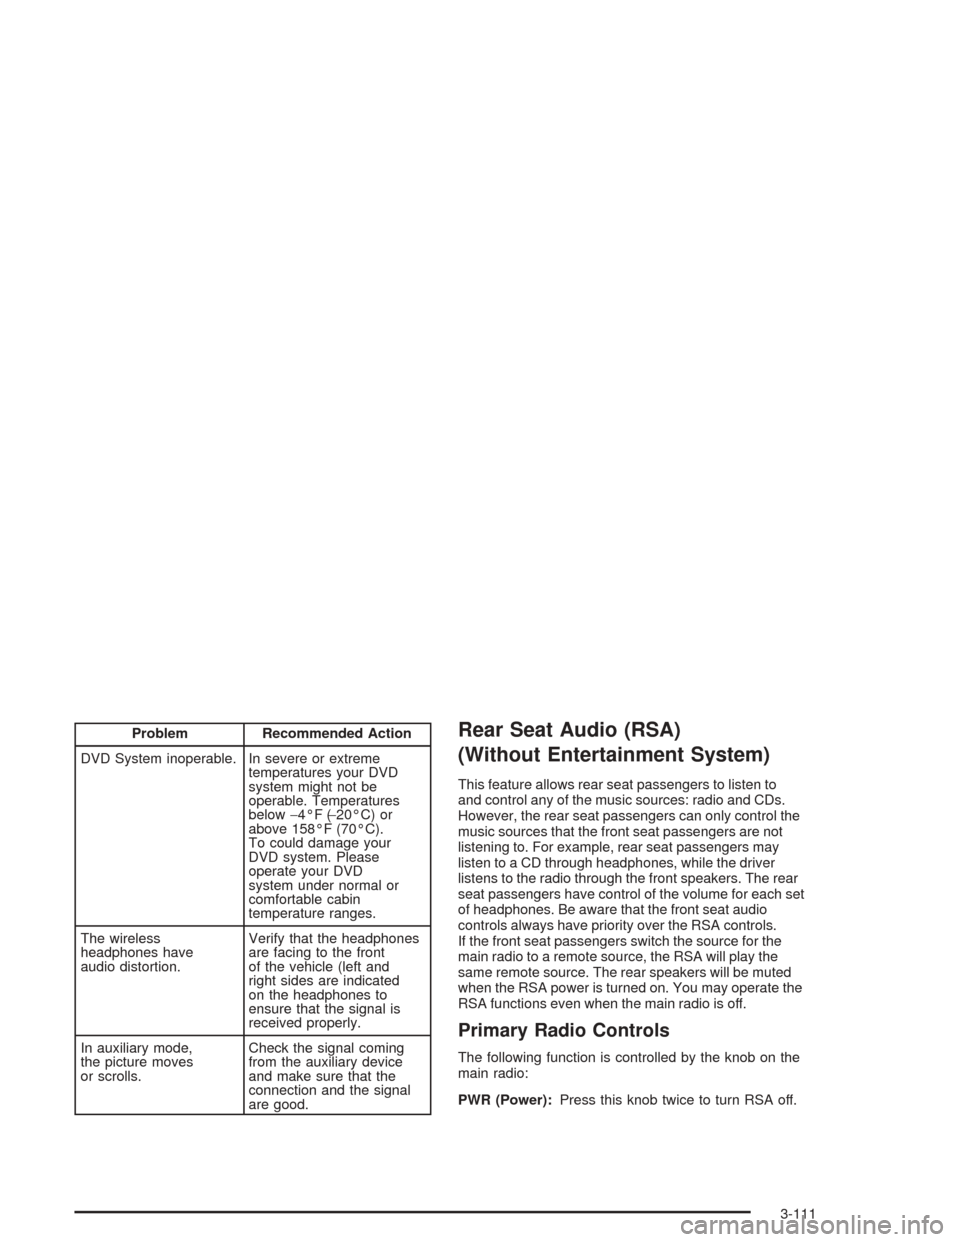
Problem Recommended Action
DVD System inoperable. In severe or extreme
temperatures your DVD
system might not be
operable. Temperatures
below−4°F (−20°C) or
above 158°F (70°C).
To could damage your
DVD system. Please
operate your DVD
system under normal or
comfortable cabin
temperature ranges.
The wireless
headphones have
audio distortion.Verify that the headphones
are facing to the front
of the vehicle (left and
right sides are indicated
on the headphones to
ensure that the signal is
received properly.
In auxiliary mode,
the picture moves
or scrolls.Check the signal coming
from the auxiliary device
and make sure that the
connection and the signal
are good.Rear Seat Audio (RSA)
(Without Entertainment System)
This feature allows rear seat passengers to listen to
and control any of the music sources: radio and CDs.
However, the rear seat passengers can only control the
music sources that the front seat passengers are not
listening to. For example, rear seat passengers may
listen to a CD through headphones, while the driver
listens to the radio through the front speakers. The rear
seat passengers have control of the volume for each set
of headphones. Be aware that the front seat audio
controls always have priority over the RSA controls.
If the front seat passengers switch the source for the
main radio to a remote source, the RSA will play the
same remote source. The rear speakers will be muted
when the RSA power is turned on. You may operate the
RSA functions even when the main radio is off.
Primary Radio Controls
The following function is controlled by the knob on the
main radio:
PWR (Power):Press this knob twice to turn RSA off.
3-111
Page 228 of 426
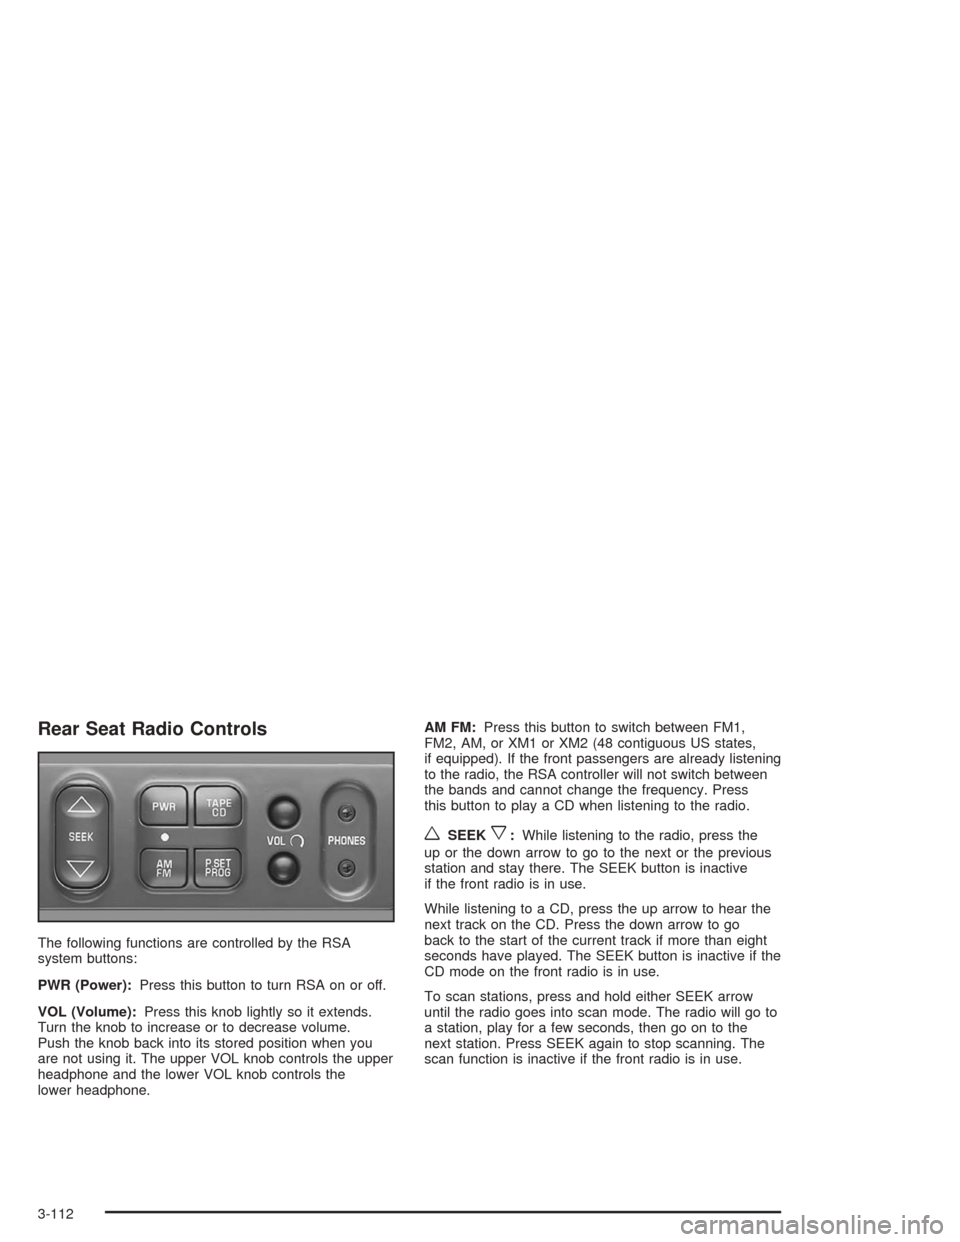
Rear Seat Radio Controls
The following functions are controlled by the RSA
system buttons:
PWR (Power):Press this button to turn RSA on or off.
VOL (Volume):Press this knob lightly so it extends.
Turn the knob to increase or to decrease volume.
Push the knob back into its stored position when you
are not using it. The upper VOL knob controls the upper
headphone and the lower VOL knob controls the
lower headphone.AM FM:Press this button to switch between FM1,
FM2, AM, or XM1 or XM2 (48 contiguous US states,
if equipped). If the front passengers are already listening
to the radio, the RSA controller will not switch between
the bands and cannot change the frequency. Press
this button to play a CD when listening to the radio.
wSEEKx:While listening to the radio, press the
up or the down arrow to go to the next or the previous
station and stay there. The SEEK button is inactive
if the front radio is in use.
While listening to a CD, press the up arrow to hear the
next track on the CD. Press the down arrow to go
back to the start of the current track if more than eight
seconds have played. The SEEK button is inactive if the
CD mode on the front radio is in use.
To scan stations, press and hold either SEEK arrow
until the radio goes into scan mode. The radio will go to
a station, play for a few seconds, then go on to the
next station. Press SEEK again to stop scanning. The
scan function is inactive if the front radio is in use.
3-112