ignition CHEVROLET MALIBU 2005 5.G Workshop Manual
[x] Cancel search | Manufacturer: CHEVROLET, Model Year: 2005, Model line: MALIBU, Model: CHEVROLET MALIBU 2005 5.GPages: 434, PDF Size: 2.61 MB
Page 206 of 434
Radio Data System (RDS)
The audio system has a Radio Data System (RDS).
RDS features are available for use only on FM stations
that broadcast RDS information.
With RDS, the radio can do the following:
Seek to stations broadcasting the selected type of
programming
Receive announcements concerning local and
national emergencies
Display messages from radio stations
Seek to stations with traffic announcements.
This system relies upon receiving specic information
from these stations and will only work when the
information is available. In rare cases, a radio station
may broadcast incorrect information that will cause
the radio features to work improperly. If this happens,
contact the radio station.
While the radio is tuned to an RDS station, the station
name or call letters will appear on the display instead of
the frequency. RDS stations may also provide the
time of day, a program type (PTY) for current
programming, and the name of the program being
broadcast.
XM™ Satellite Radio Service
XM™ is a satellite radio service that is based in
the 48 contiguous Untied States. XM™ offers
100 coast-to-coast channels including music, news,
sports, talk, and children’s programming. XM™ provides
digital quality audio and text information that includes
song title and artist name. A service fee is required
in order to receive the XM™ service. For more
information, contact XM™ at www.xmradio.com or
call 1-800-852-XMXM (9696).
Playing the Radio
O
(Power):Press this knob to turn the system on
and off.
u(Volume):Turn this knob to increase or to
decrease the volume.
DISP (Display):Press this knob to switch the display
between time and temperature or radio station frequency
and temperature. When the ignition is off, push this
knob to display the time.
For RDS, press the DISP knob to change what appears
on the display while using RDS. The display options
are station name, RDS station frequency, PTY, and the
name of the program (if available).
3-76
Page 214 of 434
Playing a Cassette Tape
The tape player is built to work best with tapes that are
up to 30 to 45 minutes long on each side. Tapes
longer than that are so thin they may not work well in
this player. The longer side of the tape visible should
face to the right. If you hear nothing or hear a garbled
sound, the tape may not be in squarely. Press the
eject button to remove the tape and start over.
If the ignition and radio are off, press the eject button or
the RCL knob to insert and to begin play of a tape. If
the ignition is on and the radio is off, the tape can
be inserted and will begin playing.
While the tape is playing, use the volume and seek
buttons just as you do for the radio. The display
will show TP and an arrow showing which side of the
tape is playing. The tape player will play the other side
of the tape when it reaches the end.
If you want to insert a tape while the ignition is off, rst
press the eject button located to the left of the tape
slot or the DISP knob.
Cassette tape adapter kits for portable CD players will
work in the cassette tape player. See “CD Adapter Kits”
later for more information.
The tape bias is set automatically when a metal or
chrome tape is inserted.If an error appears on the display, see “Cassette Tape
Messages” later in this section.
s(Reverse):Press this button to quickly reverse the
tape. Press it again to return to playing speed. The
radio will play the last selected station while the tape
reverses. Select stations during reverse operation
by turning the ADJ knob.
\(Fast Forward):Press this button to quickly
advance the tape. Press it again to return to playing
speed. The radio will play the last selected station while
the tape advances. Select stations during fast forward
operation by turning the ADJ knob.
qL(Change Side):Press this pushbutton to play the
other side of the tape.
xSEEKw:The tape must have at least three
seconds of silence between each selection for seek to
work. Press the down arrow to go to the previous
selection on the tape if the current selection has been
playing for less than three seconds. If pressed when the
current selection has been playing from 3 to 13 seconds,
it will go to the beginning of the previous selection or
the beginning of the current selection, depending upon
the position on the tape. If pressed when the current
selection has been playing for more than 13 seconds, it
will go to the beginning of the current selection.
3-84
Page 215 of 434
TAPE SEEK and a negative number will appear on the
display while the cassette player is in the previous mode.
Pressing the down arrow multiple times will increase the
number of selections to be searched back.
Press the up arrow to go to the next selection on the tape.
If the up arrow is pressed more than once, the player will
continue moving forward through the tape. TAPE SEEK
and a positive number will appear on the display.
BAND:Press this button to listen to the radio when a
cassette tape or CD is playing. The inactive tape or CD
will remain safely inside the radio for future listening.
SRCE (Source):Press this button to play a tape, CD,
or a remote device (if installed) when listening to the
radio. The inactive tape or CD will remain safely inside
the radio for future listening.
EJECT /
Z(Eject):Press this button, located to the
left of the cassette tape slot, to eject a tape. Eject
may be activated with the radio off. Cassette tapes may
be loaded with the ignition and radio off if this button
is pressed rst.
Cassette Tape Messages
If an error occurs while trying to play a cassette tape, it
could be for one of the following reasons:
TIGHT TAPE:This message is displayed when the
tape is tight and the player cannot turn the tape hubs.
Remove the tape. Hold the tape with the open end down
and try to turn the right hub counterclockwise with a
pencil. Turn the tape over and repeat. If the hubs do not
turn easily, the tape may be damaged and should not
be used in the player. Try a new tape to make sure the
player is working properly.
BROKEN TAPE:If this message appears on the radio
display, the tape will not play because of one of the
following:
The tape is broken. Try a new tape.
The tape is wrapped around the tape head. Attempt
to get the cassette out. Try a new tape.
CLEAN TAPE:If this message appears on the display,
the cassette tape player needs to be cleaned. It will
still play tapes, but it should be cleaned as soon
as possible to prevent damage to the tapes and player.
SeeCare of the Cassette Tape Player on page 3-123.
If any error occurs repeatedly or if an error cannot
be corrected, contact your GM dealer. If the radio
displays an error message, write it down and provide it
to your GM dealer when reporting the problem.
3-85
Page 216 of 434
CD Adapter Kits
It is possible to use a portable CD player with your
cassette tape player after disabling the tight/loose tape
sensing feature on the tape player.
To disable the feature, use the following steps:
1. Turn the ignition on.
2. Turn the radio off.
3. Press and hold the SRCE button. READY will
appear on the display and ash the cassette
symbol.
4. Insert the adapter into the cassette slot. It will
power up the radio and begin playing.
The override feature will remain active until the eject
button is pressed.
Playing a CD
Insert a CD partway into the slot, label side up. The
player will pull it in and the CD should begin playing.
If you want to insert a CD with the ignition off, rst press
the eject button or the DISP knob.
If the ignition or radio is turned off with the CD in the
player, it will stay in the player. When the ignition
or radio is turned on, the CD will start playing where it
stopped, if it was the last selected audio source.When a CD is inserted, the CD symbol will appear on
the display. As each new track starts to play, the
track number will appear on the display.
The CD player can play the smaller 3 inch (8 cm) single
CDs with an adapter ring. Full-size CDs and the
smaller CDs are loaded in the same manner.
If playing a CD-R the sound quality may be reduced
due to CD-R quality, the method of recording, the quality
of the music that has been recorded, and the way the
CD-R has been handled. There may be an increase
in skipping, difficulty in nding tracks, and/or difficulty in
loading and ejecting. If these problems occur try a
known good CD.
Do not add paper labels to CDs, they could get caught
in the CD player.
If an error appears on the display, see “CD Messages”
later in this section.s(Reverse):Press and hold this pushbutton to
reverse quickly within a track. You will hear sound at a
reduced volume. Release this button to play the passage.
The elapsed time of the track will appear on the display.
\(Fast Forward):Press and hold this pushbutton to
advance quickly within a track. You will hear sound
at a reduced volume. Release this button to play
the passage. The elapsed time of the track will appear
on the display.
3-86
Page 217 of 434
RPT (Repeat):Press this button once to hear a track
over again. REPEAT ON and RPT will appear on
the display. The current track will continue to repeat.
Press RPT again to turn off repeat play. REPEAT OFF
will appear on the display and RPT will disappear
from the display.
RDM (Random):Press this button to hear the tracks in
random, rather than sequential, order. T#, RANDOM,
and RDM will appear on the display. T and the
track number will appear on the display when each
track starts to play. Press RDM again to turn off random
play. RANDOM OFF will appear on the display and
RDM will disappear from the display.
xSEEKw:Press the down arrow to go to the start
of the current track if it has been playing for more
than eight seconds. If this arrow is pressed more than
once, the player will continue moving backward
through the CD.
Press the up arrow to go to the start of the next track.
If this arrow is pressed more than once, the player
will continue moving forward through the CD.
If either arrow is held for more than two seconds, the
CD will enter CD scan mode and the CD will play
the rst 10 seconds of each track. Press either arrow
again to stop scanning.DISP (Display):Press this knob to see how long the
current track has been playing. T, the track number, and
the elapsed time of the track will appear on the
display. To change the default on the display, time or
elapsed time, press the knob until you see the display
you want, then hold the knob for two seconds. The radio
will produce one beep and the selected display will
now be the default. Pressing this button will also display
text on commercially recorded CDs (if available).
AUTO TONE/AUTO EQ (Automatic Equalization):
Press this button to select the desired equalization
setting while playing a CD. The equalization will
be recalled whenever a CD is played. For more
information, see AUTO TONE/AUTO EQ listed
previously in this section.
BAND:Press this button to listen to the radio when a
cassette tape or CD is playing. The inactive tape or CD
will remain safely inside the radio for future listening.
SRCE (Source):Press this button to play a tape, CD,
or a remote device (if installed) when listening to the
radio. The inactive tape or CD will remain safely inside
the radio for future listening.
EJECT /
Z(Eject):Press this button, located to the
left of the CD slot, to eject a CD. Eject may be
activated with either the ignition or radio off. CDs may
be loaded with the ignition and radio off if this button
is pressed rst.
3-87
Page 219 of 434
Radio Data System (RDS)
The audio system has a Radio Data System (RDS).
RDS features are available for use only on FM stations
that broadcast RDS information.
With RDS, the radio can do the following:
Seek to stations broadcasting the selected type of
programming
Receive announcements concerning local and
national emergencies
Display messages from radio stations
Seek to stations with traffic announcements
This system relies upon receiving specic information
from these stations and will only work when the
information is available. In rare cases, a radio station
may broadcast incorrect information that will cause
the radio features to work improperly. If this happens,
contact the radio station.
While the radio is tuned to an RDS station, the station
name or call letters will appear on the display instead of
the frequency. RDS stations may also provide the
time of day, a program type (PTY) for current
programming, and the name of the program being
broadcast.
XM™ Satellite Radio Service
XM™ is a satellite radio service that is based in the
48 contiguous United States. XM™ offers
100 coast-to-coast channels including music, news,
sports, talk, and children’s programming. XM™ provides
digital quality audio and text information that includes
song title and artist name. A service fee is required
in order to receive the XM™ service. For more
information, contact XM™ at www.xmradio.com or
call 1-800-852-XMXM (9696).
Playing the Radio
O
(Power):Press this knob to turn the system on
and off.
u(Volume):Turn this knob to increase or to
decrease the volume.
DISP (Display):Press this knob to switch the display
between time and temperature or radio station frequency
and temperature. When the ignition is off, press this
knob to display the time.
For RDS, press the DISP knob to change what appears
on the display while using RDS. The display options
are station name, RDS station frequency, PTY, and the
name of the program (if available).
3-89
Page 227 of 434
Playing a CD
If the ignition or radio is turned off, with a CD in the
player, it will stay in the player. When the ignition
or radio is turned on, the CD will start playing where it
stopped, if it was the last selected audio source.
When a CD is inserted, the CD symbol will appear on
the CD. As each new track starts to play, the track
number will appear on the display.
The CD player can play the smaller 3 inch (8 cm) single
CDs with an adapter ring. Full-size CDs and the
smaller CDs are loaded in the same manner.
If playing a CD-R the sound quality may be reduced
due to CD-R quality, the method of recording, the quality
of the music that has been recorded, and the way the
CD-R has been handled. There may be an increase
in skipping, difficulty in nding tracks, and/or difficulty in
loading and ejecting. If these problems occur try a
known good CD.
Do not add paper labels to CDs, they could get caught
in the CD player.Notice:If you add any label to a CD, insert more
than one CD into the slot at a time, or attempt
to play scratched or damaged CDs, you could
damage the CD player. When using the CD player,
use only CDs in good condition without any
label, load one CD at a time, and keep the CD player
and the loading slot free of foreign materials,
liquids, and debris.
If an error appears on the display, see “CD Messages”
later in this section.
LOAD:Press the LOAD button to load CDs into the CD
player. This CD player will hold up to six CDs.
To insert one CD, do the following:
1. Turn the ignition on.
2. Press and release the LOAD button.
3. Wait for INSERT CD to ash on the display.
4. Load a CD. Insert the CD partway into the slot,
label side up. The player will pull the CD in.
3-97
Page 228 of 434
To insert multiple CDs, do the following:
1. Turn the ignition on.
2. Press and hold the LOAD button for two seconds.
You will hear a beep and MULTI LOAD CD, then
INSERT CD and the number will appear on the
display.
3. Once INSERT CD and the number appears on the
display, load a CD. Insert the CD partway into the
slot, label side up. The player will pull the CD in.
Once the CD is loaded, INSERT CD and the number
will appear on the display again. Once INSERT CD
and the number appear on the display again, you can
load another CD. The CD player takes up to six CDs.
Do not try to load more than six.
To load more than one CD but less than six, complete
Steps 1 through 3. When nished loading CDs, the
radio will begin to play the last CD loaded.
If more than one CD has been loaded, a number for
each CD will be displayed and the currently selected slot
number will be underlined.EJECT/Z:To eject a single CD press this button.
The radio will display EJECTING CD # and the single CD
symbol will ash until the CD is ready to be removed.
When the CD is ready to be removed it will eject part way
from the radio and the display will change to a ashing
REMOVE CD # with the single CD symbol ashing until
the CD is removed. If the CD is not removed within
25 seconds the radio will pull it back in.
To eject multiple CDs, press and hold the eject button
until you hear a beep and EJECTING ALL CDS appears
on the display with the single CD symbol ashing. The
CD symbol will ash until a CD is ready to be removed.
When the CD is ready to be removed it will eject part way
from the radio and the display will change to a ashing
REMOVE CD # with the single CD symbol ashing until
the CD is removed. If the CD is not removed within
25 seconds the radio will pull it back in. After the CD is
removed the radio will repeat the previous actions until all
of the CDs have been removed or a CD is pulled back in.
3-98
Page 245 of 434
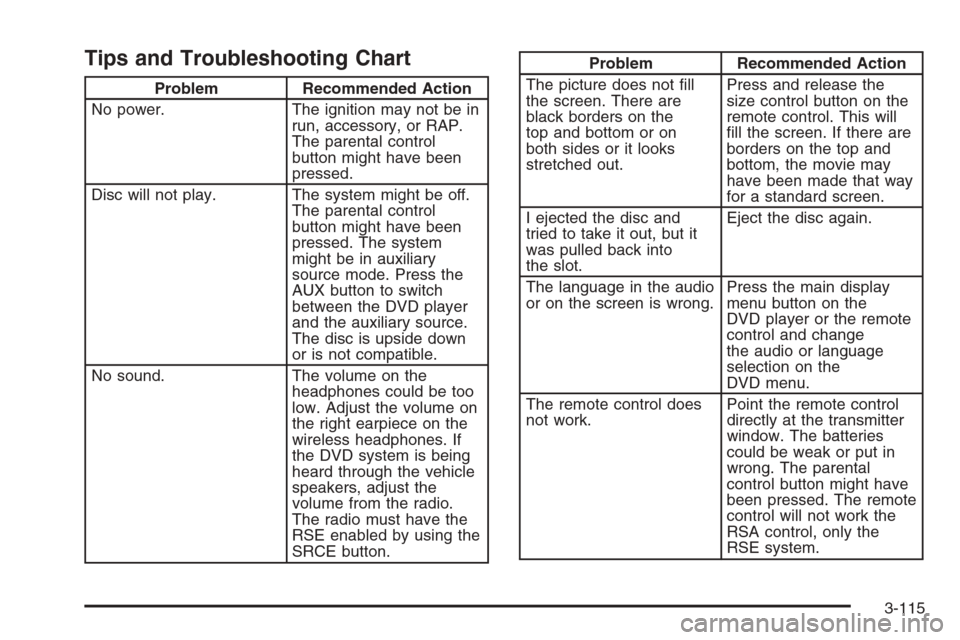
Tips and Troubleshooting Chart
Problem Recommended Action
No power. The ignition may not be in
run, accessory, or RAP.
The parental control
button might have been
pressed.
Disc will not play. The system might be off.
The parental control
button might have been
pressed. The system
might be in auxiliary
source mode. Press the
AUX button to switch
between the DVD player
and the auxiliary source.
The disc is upside down
or is not compatible.
No sound. The volume on the
headphones could be too
low. Adjust the volume on
the right earpiece on the
wireless headphones. If
the DVD system is being
heard through the vehicle
speakers, adjust the
volume from the radio.
The radio must have the
RSE enabled by using the
SRCE button.
Problem Recommended Action
The picture does not ll
the screen. There are
black borders on the
top and bottom or on
both sides or it looks
stretched out.Press and release the
size control button on the
remote control. This will
ll the screen. If there are
borders on the top and
bottom, the movie may
have been made that way
for a standard screen.
I ejected the disc and
tried to take it out, but it
was pulled back into
the slot.Eject the disc again.
The language in the audio
or on the screen is wrong.Press the main display
menu button on the
DVD player or the remote
control and change
the audio or language
selection on the
DVD menu.
The remote control does
not work.Point the remote control
directly at the transmitter
window. The batteries
could be weak or put in
wrong. The parental
control button might have
been pressed. The remote
control will not work the
RSA control, only the
RSE system.
3-115
Page 255 of 434
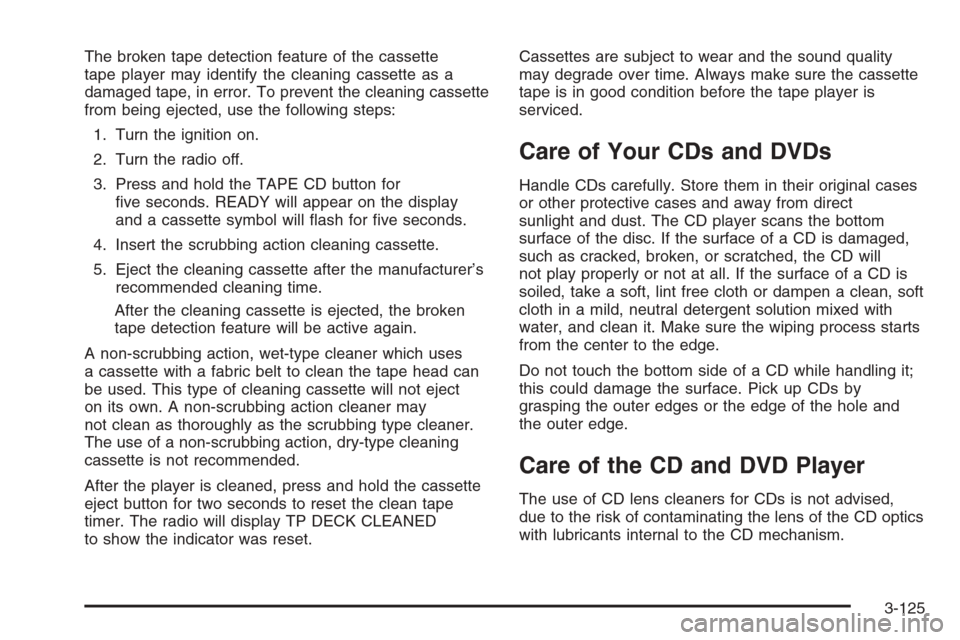
The broken tape detection feature of the cassette
tape player may identify the cleaning cassette as a
damaged tape, in error. To prevent the cleaning cassette
from being ejected, use the following steps:
1. Turn the ignition on.
2. Turn the radio off.
3. Press and hold the TAPE CD button for
ve seconds. READY will appear on the display
and a cassette symbol will ash for ve seconds.
4. Insert the scrubbing action cleaning cassette.
5. Eject the cleaning cassette after the manufacturer’s
recommended cleaning time.
After the cleaning cassette is ejected, the broken
tape detection feature will be active again.
A non-scrubbing action, wet-type cleaner which uses
a cassette with a fabric belt to clean the tape head can
be used. This type of cleaning cassette will not eject
on its own. A non-scrubbing action cleaner may
not clean as thoroughly as the scrubbing type cleaner.
The use of a non-scrubbing action, dry-type cleaning
cassette is not recommended.
After the player is cleaned, press and hold the cassette
eject button for two seconds to reset the clean tape
timer. The radio will display TP DECK CLEANED
to show the indicator was reset.Cassettes are subject to wear and the sound quality
may degrade over time. Always make sure the cassette
tape is in good condition before the tape player is
serviced.
Care of Your CDs and DVDs
Handle CDs carefully. Store them in their original cases
or other protective cases and away from direct
sunlight and dust. The CD player scans the bottom
surface of the disc. If the surface of a CD is damaged,
such as cracked, broken, or scratched, the CD will
not play properly or not at all. If the surface of a CD is
soiled, take a soft, lint free cloth or dampen a clean, soft
cloth in a mild, neutral detergent solution mixed with
water, and clean it. Make sure the wiping process starts
from the center to the edge.
Do not touch the bottom side of a CD while handling it;
this could damage the surface. Pick up CDs by
grasping the outer edges or the edge of the hole and
the outer edge.
Care of the CD and DVD Player
The use of CD lens cleaners for CDs is not advised,
due to the risk of contaminating the lens of the CD optics
with lubricants internal to the CD mechanism.
3-125