change time CHEVROLET MALIBU 2006 6.G Owners Manual
[x] Cancel search | Manufacturer: CHEVROLET, Model Year: 2006, Model line: MALIBU, Model: CHEVROLET MALIBU 2006 6.GPages: 442, PDF Size: 2.61 MB
Page 2 of 442
GENERAL MOTORS, GM, the GM Emblem,
CHEVROLET, the CHEVROLET Emblem, the MALIBU
Emblem, and the name MALIBU are registered
trademarks; and the name MALIBU MAXX is a
trademark of General Motors Corporation.
This manual includes the latest information at the time
it was printed. We reserve the right to make changes
after that time without further notice. For vehicles
�rst sold in Canada, substitute the name “General
Motors of Canada Limited” for Chevrolet Motor Division
whenever it appears in this manual.
Keep this manual in the vehicle, so it will be there if it
is needed while you are on the road. If the vehicle
is sold, leave this manual in the vehicle.
Canadian Owners
A French language copy of this manual can be obtained
from your dealer or from:
Helm, Incorporated
P.O. Box 07130
Detroit, MI 48207
How to Use This Manual
Many people read the owner manual from beginning to
end when they �rst receive their new vehicle. If this
is done, it can help you learn about the features
and controls for the vehicle. Pictures and words work
together in the owner manual to explain things.
Index
A good place to quickly locate information about the
vehicle is the Index in the back of the manual. It is
an alphabetical list of what is in the manual and
the page number where it can be found.
Litho in U.S.A.
Part No. 06MALIBU B Second Printing
©2005 General Motors Corporation. All Rights Reserved.
ii
Page 83 of 442
Remote Keyless Entry System
If the vehicle has the keyless entry system, it operates
on a radio frequency subject to Federal Communications
Commission (FCC) Rules and with Industry Canada.
This device complies with Part 15 of the FCC Rules.
Operation is subject to the following two conditions:
1. This device may not cause interference.
2. This device must accept any interference received,
including interference that may cause undesired
operation of the device.
This device complies with RSS-210 of Industry Canada.
Operation is subject to the following two conditions:
1. This device may not cause interference.
2. This device must accept any interference received,
including interference that may cause undesired
operation of the device.
Changes or modi�cations to this system by other than
an authorized service facility could void authorization to
use this equipment.At times you may notice a decrease in range. This is
normal for any remote keyless entry system. If the
transmitter does not work or if you have to stand closer
to your vehicle for the transmitter to work, try this:
Check the distance. You may be too far from your
vehicle. You may need to stand closer during
rainy or snowy weather.
Check the location. Other vehicles or objects may
be blocking the signal. Take a few steps to the
left or right, hold the transmitter higher, and
try again.
Check to determine if battery replacement is
necessary. See “Battery Replacement” under
Remote Keyless Entry System Operation on
page 2-6.
If you are still having trouble, see your dealer or
a quali�ed technician for service.
2-5
Page 86 of 442
Battery Replacement
Under normal use, the battery in your remote keyless
entry transmitter should last about four years.
You can tell the battery is weak if the transmitter will not
work at the normal range in any location. If you have
to get close to your vehicle before the transmitter works,
it is probably time to change the battery.
The KEY FOB BATT LOW message in the vehicle’s
DIC will display if the remote keyless entry transmitter
battery is low.
Notice:When replacing the battery, use care not to
touch any of the circuitry. Static from your body
transferred to these surfaces may damage the
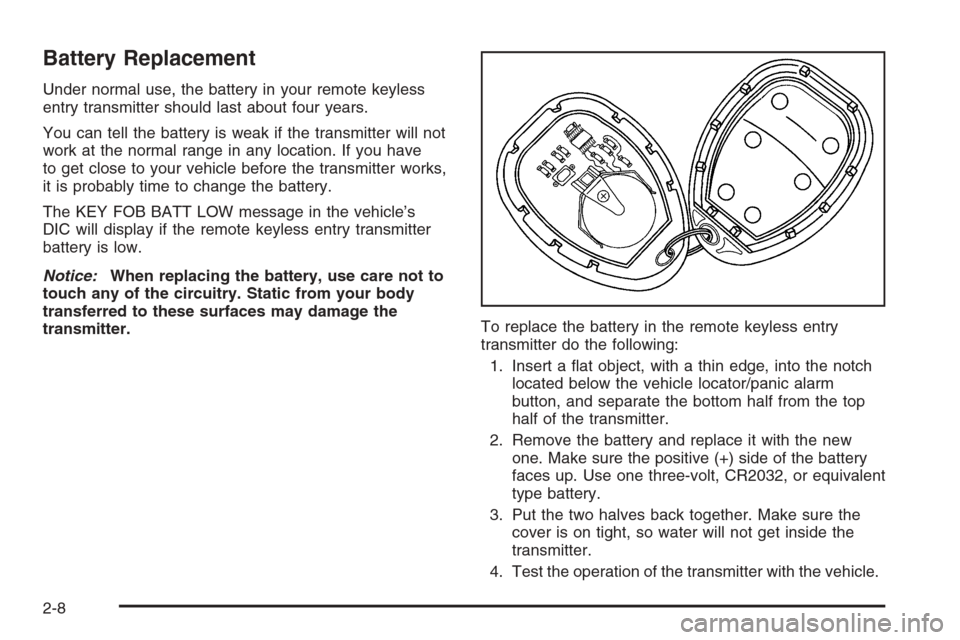
transmitter.To replace the battery in the remote keyless entry
transmitter do the following:
1. Insert a �at object, with a thin edge, into the notch
located below the vehicle locator/panic alarm
button, and separate the bottom half from the top
half of the transmitter.
2. Remove the battery and replace it with the new
one. Make sure the positive (+) side of the battery
faces up. Use one three-volt, CR2032, or equivalent
type battery.
3. Put the two halves back together. Make sure the
cover is on tight, so water will not get inside the
transmitter.
4. Test the operation of the transmitter with the vehicle.
2-8
Page 116 of 442
Mirrors
Manual Rearview Mirror
This mirror can be adjusted two ways. First, to adjust
the angle of the mirror, move the mirror to a position
that allows you to see out of the back window. To adjust
the height of the mirror, adjust the arm that connects
the mirror to the windshield.
To reduce glare from lights behind you, move the lever
toward you to the night position.
Manual Rearview Mirror with
OnStar
®
If your vehicle has this feature, this mirror has a knob
located at the bottom of the mirror. It is used to change
the mirror from day to night position. To reduce glare
from headlamps behind you while driving at night,
rotate the knob clockwise. For daytime driving, turn
the knob counterclockwise.
There are also three OnStar
®buttons located at the
bottom of the mirror face. See your dealer for more
information on the system and how to subscribe
to OnStar
®. SeeOnStar®System on page 2-44for
more information about the services OnStar®provides.
Automatic Dimming Rearview Mirror
with OnStar
®
Your vehicle may have an automatic dimming rearview
mirror with OnStar®. This feature enables the mirror
to sense nighttime glare from vehicle headlamps from
behind and automatically dim to reduce the glare to
a safe level.
The automatic dimming feature turns on each time the
vehicle is started. Press the OFF button once and
the green indicator light located to the left of the button
will go out indicating the feature is off. To turn the
feature back on, press and release the AUTO button
and the green indicator light will come on.
There are also three OnStar
®buttons located at
the bottom of the mirror face. See your dealer for
information on the system and how to subscribe
to OnStar
®. SeeOnStar®System on page 2-44for
more information about the services OnStar®provides.
2-38
Page 133 of 442
Instrument Panel Overview...............................3-4
Hazard Warning Flashers................................3-6
Other Warning Devices...................................3-6
Horn .............................................................3-6
Tilt and Telescopic Steering Wheel...................3-6
Turn Signal/Multifunction Lever.........................3-7
Turn and Lane-Change Signals........................3-8
Headlamp High/Low-Beam Changer..................3-8
Flash-to-Pass.................................................3-8
Windshield Wipers..........................................3-9
Windshield Washer.......................................3-10
Rear Window Wiper/Washer (MAXX Model)......3-10
Cruise Control..............................................3-11
Exterior Lamps.............................................3-14
Headlamps on Reminder................................3-16
Headlamps Off in PARK (P)...........................3-16
Delayed Headlamps......................................3-16
Daytime Running Lamps (DRL).......................3-16
Automatic Headlamp System..........................3-17
Fog Lamps ..................................................3-18
Instrument Panel Brightness...........................3-19
Dome Lamp .................................................3-19
Entry/Exit Lighting.........................................3-19Parade Dimming...........................................3-19
Front Reading Lamps....................................3-20
Rear Reading Lamps....................................3-20
Trunk Lamp.................................................3-20
Cargo Lamp.................................................3-20
Battery Run-Down Protection..........................3-20
Accessory Power Outlet(s).............................3-21
Cigarette Lighter...........................................3-22
Climate Controls............................................3-22
Climate Control System.................................3-22
Automatic Climate Control System...................3-27
Outlet Adjustment.........................................3-31
Warning Lights, Gages, and Indicators............3-32
Instrument Panel Cluster................................3-33
Speedometer and Odometer...........................3-34
Trip Odometer..............................................3-34
Tachometer.................................................3-34
Safety Belt Reminder Light.............................3-34
Airbag Readiness Light..................................3-35
Charging System Light..................................3-36
Brake System Warning Light..........................3-36
Anti-Lock Brake System Warning Light.............3-37
Section 3 Instrument Panel
3-1
Page 143 of 442
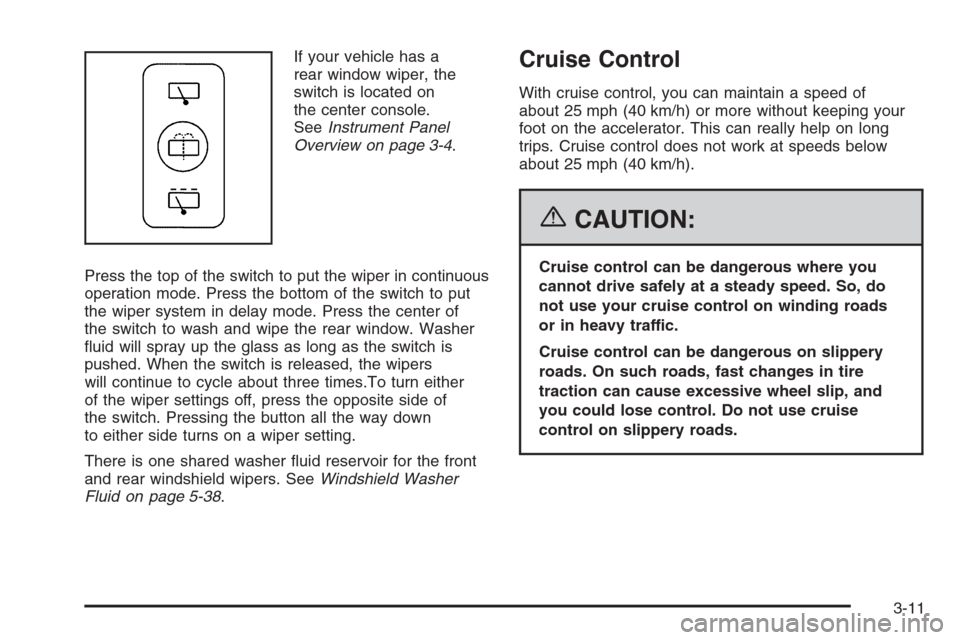
If your vehicle has a
rear window wiper, the
switch is located on
the center console.
SeeInstrument Panel
Overview on page 3-4.
Press the top of the switch to put the wiper in continuous
operation mode. Press the bottom of the switch to put
the wiper system in delay mode. Press the center of
the switch to wash and wipe the rear window. Washer
�uid will spray up the glass as long as the switch is
pushed. When the switch is released, the wipers
will continue to cycle about three times.To turn either
of the wiper settings off, press the opposite side of
the switch. Pressing the button all the way down
to either side turns on a wiper setting.
There is one shared washer �uid reservoir for the front
and rear windshield wipers. SeeWindshield Washer
Fluid on page 5-38.Cruise Control
With cruise control, you can maintain a speed of
about 25 mph (40 km/h) or more without keeping your
foot on the accelerator. This can really help on long
trips. Cruise control does not work at speeds below
about 25 mph (40 km/h).
{CAUTION:
Cruise control can be dangerous where you
cannot drive safely at a steady speed. So, do
not use your cruise control on winding roads
or in heavy traffic.
Cruise control can be dangerous on slippery
roads. On such roads, fast changes in tire
traction can cause excessive wheel slip, and
you could lose control. Do not use cruise
control on slippery roads.
3-11
Page 150 of 442
There is a delay in the transition between the daytime
and nighttime operation of the automatic lamp control
system so that driving under bridges or bright overhead
street lights does not affect the system. The automatic
lamp control system will only be affected when the light
sensor sees a change in lighting lasting longer than
this delay.
If you start your vehicle in a dark garage, the automatic
lamp system will come on immediately. Once you
leave the garage, it will take about one minute for
the automatic lamp system to change to DRL if it is light
outside. During that delay, your instrument panel
cluster may not be as bright as usual. Make sure your
instrument panel brightness control is in the full
bright position. SeeInstrument Panel Brightness on
page 3-19.
To idle your vehicle with the system off, turn the
ignition on and turn the exterior light switch to the
off/on position. For Canadian vehicles, the transaxle
must stay in PARK (P) for this function.
As with any vehicle, you should turn on the regular
headlamps when you need them.Fog Lamps
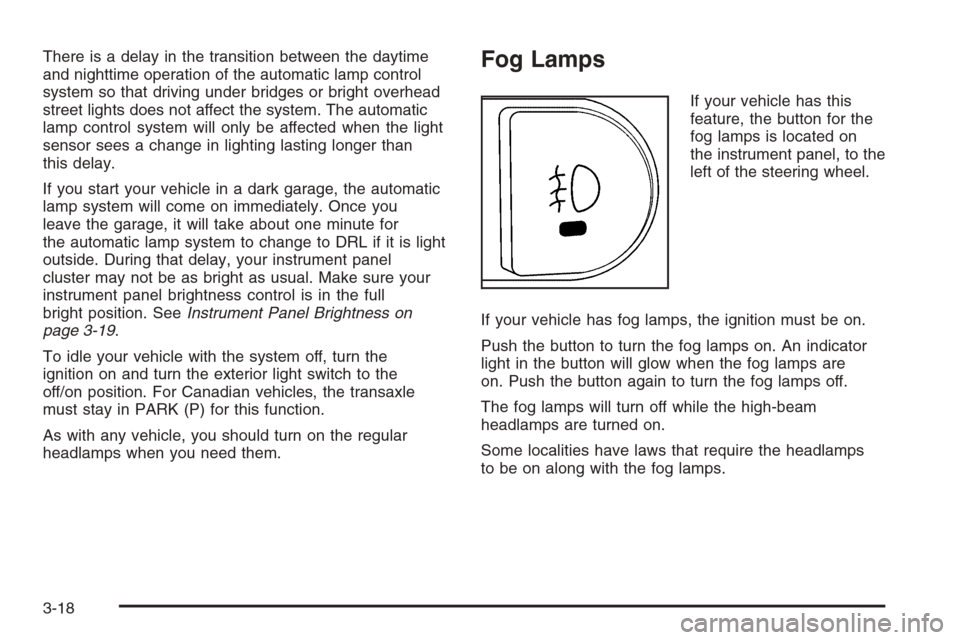
If your vehicle has this
feature, the button for the
fog lamps is located on
the instrument panel, to the
left of the steering wheel.
If your vehicle has fog lamps, the ignition must be on.
Push the button to turn the fog lamps on. An indicator
light in the button will glow when the fog lamps are
on. Push the button again to turn the fog lamps off.
The fog lamps will turn off while the high-beam
headlamps are turned on.
Some localities have laws that require the headlamps
to be on along with the fog lamps.
3-18
Page 155 of 442
To change the air delivery settings, turn the right knob
to select one of the following:
H(Vent):This mode directs air to the instrument
panel outlets.
)(Bi-Level):This mode directs half of the air to
the instrument panel outlets, and the remaining air to
the �oor outlets. Some air may be directed toward
the side windows.
6(Floor):This mode directs most of the air to the
�oor outlets with some air directed to the side window
outlets and windshield.
:(Outside Air):Press the right side of this button
to turn the outside air mode on. When this mode is
selected, air from outside the vehicle will circulate
throughout your vehicle. When the button is pressed,
an indicator light will come on to let you know that
it is activated. The outside air mode can be used
with all modes, but it cannot be used with the
recirculation mode. Pressing this button will cancel
the recirculation mode.
?(Recirculation):Press the left side of the button
to turn the recirculation mode on. When recirculation
mode is selected, the air inside the vehicle will be
recirculated through the climate control system and
the vehicle, not from outside your vehicle. This mode
is helpful when you are trying to limit odors from
entering your vehicle and for maximum air conditioning
performance in hot weather. When the button is
pressed, an indicator light above the button will come
on to let you know that it is activated. The recirculation
indicator light will blink three times if you try to use
recirculation in a mode that it can not be used in.
Only use this mode when it is needed for comfort,
since window fogging will rapidly occur if the air
conditioning compressor is not engaged.
Pressing this button will cancel the outside air mode.
When you switch to the defog or defrost modes
the system will automatically move from recirculation
to outside air. When the vehicle or fan is turned off
and back on, the system will default to outside air
automatically. Only use recirculation mode when it is
needed for comfort, since window fogging may occur.
3-23
Page 180 of 442
Information Mode
INFO/4(Information):Press this button to scroll
through the vehicle information mode displays in
the following order:
TRIP A
TRIP B
FUEL RANGE (Fuel Range Until Empty)
ECON (Average Fuel Economy)
AV SPEED (Average Vehicle Speed)
OIL LIFE (Engine Oil Life System)
TRIP A or TRIP B:Press the information button
until TRIP A or TRIP B is displayed. This shows the
current distance traveled since the last reset for each
trip odometer in either miles (mi) or kilometers (km).
Both odometers can be used at the same time. Each trip
odometer can be reset to zero separately by pressing
and holding the enter button for a few seconds while
the desired trip odometer is displayed.
FUEL RANGE:Press the information button until
FUEL RANGE is displayed. This shows the remaining
distance you can drive without refueling. It is based
on fuel economy and the fuel remaining in the tank.The fuel economy data used to determine fuel range is an
average of recent driving conditions. As your driving
conditions change, this data is gradually updated. Fuel
range cannot be reset.
ECON (Economy):Press the information button until
ECON is displayed. Average fuel economy is how
many miles per gallon (mpg) or liters per 100 kilometers
(L/100 km) your vehicle is getting based on current
and past driving conditions.
Press and hold the enter button while ECON is
displayed to reset the average fuel economy. Average
fuel economy will then be calculated starting from
that point. If the average fuel economy is not reset, it
will be continually updated each time you drive.
AV (Average) SPEED:Press the information button
until AV SPEED is displayed. This shows the vehicle’s
average speed in miles per hour (mph) or kilometers per
hour (km/h).
Press and hold the enter button while AV SPEED is
displayed to reset the average vehicle speed.
OIL LIFE:Press the information button until OIL LIFE is
displayed. The engine oil life system shows an
estimate of the oil’s remaining useful life. It will show
100% when the system is reset after an oil change.
It will alert you to change your oil on a schedule
consistent with your driving conditions.
3-48
Page 181 of 442
Always reset the engine oil life system after an oil
change. SeeEngine Oil Life System on page 5-20.
In addition to the engine oil life system monitoring the oil
life, additional maintenance is recommended in the
Maintenance Schedule in this manual. SeeScheduled
Maintenance on page 6-4andEngine Oil on page 5-17.
Personalization
MENU:Press this button while the vehicle is in ON
to scroll through each of the personalization options
in the following order. If the vehicle is moving faster
than 2 mph (3 km/h), the personalization menu options
are not available, except for the UNITS option. All of
the personalization options may not be available
on your vehicle. Only the options available will be
displayed on your DIC.
Units Selection (English/Metric)
Oil Life Reset
Remote Start Capability
Horn Chirp During Remote Keyless Entry Locking
Horn Chirp During Remote Keyless Entry Unlocking
Exterior Light Flash During Remote Keyless
Entry Locking or Unlocking
Delayed Locking
Automatic Vehicle Unlocking: Speci�c Doors
Automatic Vehicle Unlocking: When Key is Off or
When Shift To Park
Exterior Perimeter Lighting During Remote Keyless
Entry Unlock
Select Language: (English, French, Spanish or
German)
When the desired option is reached, press the enter
button to toggle between the modes of that option.
To make a selection, press the MENU button again.
If no selection is made within 10 seconds, the display
will revert back to the previous information displayed.
The MENU mode is exited when the information button
is pressed, a 10 second time period has elapsed,
the ignition is turned to OFF, or the end of the MENU
list is reached.
SeeDIC Vehicle Personalization on page 3-52for
more information on the personalization options.
Enter
ENTER/r(Enter):Press this button to reset certain
functions and to turn off or acknowledge messages
on the DIC display. This button also toggles through
the options available in each personalization menu.
3-49