check oil CHEVROLET MALIBU 2006 6.G Owners Manual
[x] Cancel search | Manufacturer: CHEVROLET, Model Year: 2006, Model line: MALIBU, Model: CHEVROLET MALIBU 2006 6.GPages: 442, PDF Size: 2.61 MB
Page 88 of 442
4. To manually shut off a remote start, do any of the
following. The parking lamps will turn off.
Aim the remote keyless entry transmitter at the
vehicle, and press the remote start button.
Turn on the hazard warning �ashers.
Turn the ignition switch to ON and then to OFF.
If only one remote start procedure has been done, since
last driving the vehicle or resetting the remote start
system, the engine may be started again remotely by
following the remote start procedure a second time.
If the remote start procedure is used again before the
�rst 10 minute time frame has ended, the �rst 10 minutes
will immediately expire and the second 10 minute time
frame will start.
The remote vehicle start feature will not operate if
any of the following occur:
The remote start system is disabled through
the DIC.
The vehicle’s key is in the ignition.
The vehicle’s hood is open.
The hazard warning �ashers are on.
The check engine light is on. SeeMalfunction
Indicator Lamp on page 3-41.
The engine coolant temperature is too high.
The oil pressure is low.
Two remote vehicle starts have already been
provided.
Vehicles that have the remote vehicle start feature
are shipped from the factory with the remote vehicle
start system enabled. The system may be enabled
or disabled through the DIC. See “REMOTE START”
underDIC Vehicle Personalization on page 3-52
for additional information.
Remote Start Ready
If your vehicle does not have the remote vehicle start
feature, it will have the remote start ready feature. This
feature allows your dealer to add the manufacturer’s
remote vehicle start feature.
If the keyless entry transmitter has a plus (+) symbol
on the back cover, your vehicle has the remote
start ready feature. You can lock or unlock your
vehicle from approximately 197 feet (60 m) away.
See your dealer if you would like to add the
manufacturer’s remote vehicle start feature to
your vehicle.
2-10
Page 176 of 442
Oil Pressure Light
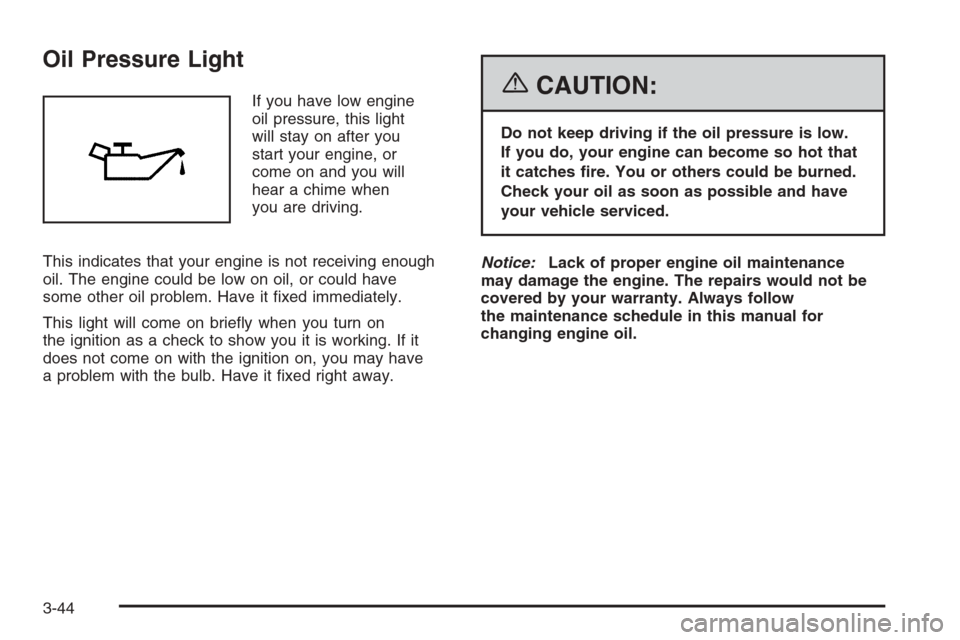
If you have low engine
oil pressure, this light
will stay on after you
start your engine, or
come on and you will
hear a chime when
you are driving.
This indicates that your engine is not receiving enough
oil. The engine could be low on oil, or could have
some other oil problem. Have it �xed immediately.
This light will come on brie�y when you turn on
the ignition as a check to show you it is working. If it
does not come on with the ignition on, you may have
a problem with the bulb. Have it �xed right away.{CAUTION:
Do not keep driving if the oil pressure is low.
If you do, your engine can become so hot that
it catches �re. You or others could be burned.
Check your oil as soon as possible and have
your vehicle serviced.
Notice:Lack of proper engine oil maintenance
may damage the engine. The repairs would not be
covered by your warranty. Always follow
the maintenance schedule in this manual for
changing engine oil.
3-44
Page 182 of 442
DIC Warnings and Messages
These messages will appear if there is a problem
detected in one of your vehicle’s systems.
Any message will clear when the vehicle’s condition
is no longer present. To acknowledge a message and
clear it from the display, press any of the three DIC
buttons. The warning message will come back on
the next time the vehicle is turned off and back on
if the condition is still present. With most messages,
a warning chime will sound when the message is
displayed. Your vehicle may have other warning
messages.
AUTO (Automatic) LIGHTS OFF:This message will
display if the automatic headlamp system is disabled
with the headlamp switch.
AUTO (Automatic) LIGHTS ON:This message will
display if the automatic headlamp system is enabled
with the headlamp switch.
BRAKE FLUID:This message will display to inform the
driver that the brake �uid level is low while the ignition
is in ON. Have the brake system serviced by your
GM dealer as soon as possible.CHANGE OIL SOON:This message will display when
the life of the engine oil has expired and it should be
changed.
When you acknowledge the CHANGE OIL SOON
message by clearing it from the display, you still must
reset the engine oil life system separately. SeeEngine
Oil Life System on page 5-20,Engine Oil on page 5-17,
andScheduled Maintenance on page 6-4for more
information.
CHECK GAS CAP:This message will display if the
gas cap has not been fully tightened. You should
recheck your gas cap to make sure that it is on properly.
A few driving trips with the cap properly installed
should turn the message off.
DOOR AJAR:This message will display if one or more
of the vehicle’s doors are not closed properly. When
this message displays, you should make sure that the
door is closed completely.
ENGINE DISABLED:This message will display if the
starting of the engine is disabled. Have your vehicle
serviced immediately by your GM dealer.
3-50
Page 191 of 442
The CD player can play the smaller 3 inch (8 cm)
single CDs with an adapter ring. Full-size CDs and
the smaller CDs are loaded in the same manner.
If playing a CD-R, the sound quality may be reduced
due to CD-R quality, the method of recording, the quality
of the music that has been recorded, and the way the
CD-R has been handled. There may be an increase
in skipping, difficulty in �nding tracks, and/or difficulty in
loading and ejecting. If these problems occur, check
the bottom surface of the CD. If the surface of the CD
is damaged, such as cracked, broken, or scratched,
the CD will not play properly. If the surface of the CD is
soiled, seeCare of Your CDs and DVDs on page 3-107
for more information.
If there is no apparent damage, try a known good CD.
Do not add any label to a CD, it could get caught in the
CD player. If a CD is recorded on a personal computer
and a description label is needed, try labeling the top
of the recorded CD with a marking pen instead.
Notice:If you add any label to a CD, insert more
than one CD into the slot at a time, or attempt to play
scratched or damaged CDs, you could damage the
CD player. When using the CD player, use only CDs
in good condition without any label, load one CD at a
time, and keep the CD player and the loading slot free
of foreign materials, liquids, and debris.If an error appears on the display, see “CD Messages”
later in this section.
1
s(Reverse):Press and hold this pushbutton to
reverse quickly within a track. You will hear sound at
a reduced volume. Release this pushbutton to play the
passage. The elapsed time of the track will appear
on the display.
2
\(Fast Forward):Press and hold this pushbutton
to advance quickly within a track. You will hear
sound at a reduced volume. Release this pushbutton to
play the passage. The elapsed time of the track will
appear on the display.
3 RPT (Repeat):Press this pushbutton once to hear a
track over again. REPEAT ON and RPT will appear
on the display. The current track will continue to repeat.
Press RPT again to turn off repeat play. REPEAT
OFF will appear on the display and RPT will disappear
from the display.
4 RDM (Random):Press this pushbutton to hear
the tracks in random, rather than sequential, order.
T#, RANDOM, and RDM will appear on the display.
Press RDM again to turn off random play. RANDOM
OFF will appear on the display and RDM will disappear
from the display.
3-59
Page 201 of 442
Playing a CD
Insert a CD partway into the slot, label side up. The
player will pull it in and the CD should begin playing.
If you want to insert a CD with the ignition off, �rst press
the eject button or the DISP knob.
As each new track starts to play, the track number will
appear on the display.
If the ignition or radio is turned off with a CD in the
player, it will stay in the player. When the ignition
or radio is turned on, the CD will start playing, where
it stopped, if it was the last selected audio source.
The CD player can play the smaller 3 inch (8 cm)
single CDs with an adapter ring. Full-size CDs and the
smaller CDs are loaded in the same manner.
If playing a CD-R, the sound quality may be reduced
due to CD-R quality, the method of recording, the quality
of the music that has been recorded, and the way the
CD-R has been handled. There may be an increase
in skipping, difficulty in �nding tracks, and/or difficulty in
loading and ejecting. If these problems occur, check
the bottom surface of the CD. If the surface of the CD
is damaged, such as cracked, broken, or scratched,
the CD will not play properly. If the surface of the CD is
soiled, seeCare of Your CDs and DVDs on page 3-107
for more information.If there is no apparent damage, try a known good CD.
Do not add any label to a CD, it could get caught in the
CD player. If a CD is recorded on a personal computer
and a description label is needed, try labeling the top
of the recorded CD with a marking pen instead.
Notice:If you add any label to a CD, insert more
than one CD into the slot at a time, or attempt
to play scratched or damaged CDs, you could
damage the CD player. When using the CD player,
use only CDs in good condition without any
label, load one CD at a time, and keep the CD player
and the loading slot free of foreign materials,
liquids, and debris.
If an error appears on the display, see “CD Messages”
later in this section.
s(Reverse):Press and hold this pushbutton to
reverse quickly within a track. You will hear sound at
a reduced volume. Release the button to play the
passage. The elapsed time of the track will appear on
the display.
\(Fast Forward):Press and hold this pushbutton
to advance quickly within a track. You will hear sound
at a reduced volume. Release the button to play
the passage. The elapsed time of the track will appear
on the display.
3-69
Page 212 of 442
Playing a CD
If the ignition or radio is turned off, with a CD in the
player, it will stay in the player. When the ignition
or radio is turned on, the CD will start playing where
it stopped, if it was the last selected audio source.
When a CD is inserted, the CD symbol will appear on
the CD. As each new track starts to play, the track
number will appear on the display.
The CD player can play the smaller 3 inch (8 cm)
single CDs with an adapter ring. Full-size CDs and
the smaller CDs are loaded in the same manner.
If playing a CD-R, the sound quality may be reduced
due to CD-R quality, the method of recording, the quality
of the music that has been recorded, and the way the
CD-R has been handled. There may be an increase
in skipping, difficulty in �nding tracks, and/or difficulty in
loading and ejecting. If these problems occur, check
the bottom surface of the CD. If the surface of the CD
is damaged, such as cracked, broken, or scratched, the
CD will not play properly. If the surface of the CD is
soiled, seeCare of Your CDs and DVDs on page 3-107
for more information.If there is no apparent damage, try a known good CD.
Do not add any label to a CD, it could get caught in the
CD player. If a CD is recorded on a personal computer
and a description label is needed, try labeling the top of
the recorded CD with a marking pen instead.
Notice:If you add any label to a CD, insert more
than one CD into the slot at a time, or attempt
to play scratched or damaged CDs, you could
damage the CD player. When using the CD player,
use only CDs in good condition without any
label, load one CD at a time, and keep the CD player
and the loading slot free of foreign materials,
liquids, and debris.
If an error appears on the display, see “CD Messages”
later in this section.
LOAD:Press the LOAD button to load CDs into the
CD player. This CD player will hold up to six CDs.
To insert one CD, do the following:
1. Turn the ignition on.
2. Press and release the LOAD button.
3. Wait for INSERT CD to �ash on the display.
4. Load a CD. Insert the CD partway into the slot,
label side up. The player will pull the CD in.
3-80
Page 258 of 442
Competitive Driving (SS Only)
See your warranty book before using your vehicle for
competitive driving. After reviewing your warranty book,
please see the GM Performance Parts website or
catalog for parts and equipment required for
competitive driving.
Notice:If you use your vehicle for racing or other
competitive driving, the engine may use more
oil than it would with normal use. Low oil levels can
damage the engine. Be sure to check the oil level
often during racing or other competitive driving and
keep the level at or near the upper mark that
shows the proper operating range on the engine oil
dipstick. For information on how to add oil, see
Engine Oil on page 5-17.
Driving at Night
Night driving is more dangerous than day driving.
One reason is that some drivers are likely to be
impaired — by alcohol or drugs, with night vision
problems, or by fatigue.
Here are some tips on night driving.
Drive defensively.
Do not drink and drive.
Adjust the inside rearview mirror to reduce the glare
from headlamps behind you.
Since you cannot see as well, you may need to
slow down and keep more space between you
and other vehicles.
Slow down, especially on higher speed roads. Your
vehicle’s headlamps can light up only so much
road ahead.
In remote areas, watch for animals.
If you are tired, pull off the road in a safe place
and rest.
4-18
Page 264 of 442
Expect to move slightly slower at night.
When you want to leave the freeway, move to the
proper lane well in advance. If you miss your exit, do
not, under any circumstances, stop and back up. Drive
on to the next exit.
The exit ramp can be curved, sometimes quite sharply.
The exit speed is usually posted. Reduce your speed
according to your speedometer, not to your sense
of motion. After driving for any distance at higher
speeds, you may tend to think you are going slower
than you actually are.
Before Leaving on a Long Trip
Make sure you are ready. Try to be well rested. If you
must start when you are not fresh — such as after
a day’s work — do not plan to make too many miles
that �rst part of the journey. Wear comfortable clothing
and shoes you can easily drive in.
Is your vehicle ready for a long trip? If you keep it
serviced and maintained, it is ready to go. If it needs
service, have it done before starting out. Of course,
you will �nd experienced and able service experts in
GM dealerships all across North America. They will be
ready and willing to help if you need it.Here are some things you can check before a trip:
Windshield Washer Fluid:Is the reservoir full? Are
all windows clean inside and outside?
Wiper Blades:Are they in good shape?
Fuel, Engine Oil, Other Fluids:Have you checked
all levels?
Lamps:Are they all working? Are the lenses clean?
Tires:They are vitally important to a safe,
trouble-free trip. Is the tread good enough for
long-distance driving? Are the tires all in�ated to the
recommended pressure?
Weather Forecasts:What is the weather outlook
along your route? Should you delay your trip a
short time to avoid a major storm system?
Maps:Do you have up-to-date maps?
4-24
Page 288 of 442
When You Are Ready to Leave After
Parking on a Hill
1. Apply your regular brakes and hold the pedal down
while you:
start your engine,
shift into a gear, and
release the parking brake.
2. Let up on the brake pedal.
3. Drive slowly until the trailer is clear of the chocks.
4. Stop and have someone pick up and store the
chocks.
Maintenance When Trailer Towing
Your vehicle will need service more often when you’re
pulling a trailer. Things that are especially important
in trailer operation are automatic transaxle �uid (don’t
over�ll), engine oil, drive belt, cooling system and brake
system. Each of these is covered in this manual, and
the Index will help you �nd them quickly. If you’re
trailering, it’s a good idea to review this information
before you start your trip.
Check periodically to see that all hitch nuts and bolts
are tight.
Engine Cooling When Trailer Towing
Your cooling system may temporarily overheat during
severe operating conditions. SeeEngine Overheating
on page 5-29.
4-48
Page 289 of 442
Service............................................................5-3
Accessories and Modi�cations..........................5-3
California Proposition 65 Warning.....................5-3
Doing Your Own Service Work.........................5-4
Adding Equipment to the Outside of Your
Vehicle......................................................5-5
Fuel................................................................5-5
Gasoline Octane............................................5-5
Gasoline Speci�cations....................................5-5
California Fuel...............................................5-6
Additives.......................................................5-6
Fuels in Foreign Countries...............................5-7
Filling the Tank..............................................5-8
Filling a Portable Fuel Container.....................5-10
Checking Things Under the Hood....................5-10
Hood Release..............................................5-11
Engine Compartment Overview.......................5-12
Engine Oil...................................................5-17
Engine Oil Life System..................................5-20
Engine Air Cleaner/Filter................................5-22
Automatic Transaxle Fluid
(2.2L L4 and 3.5L V6 Engines)...................5-23
Automatic Transaxle Fluid
(3.9L V6 Engine).......................................5-24
Engine Coolant.............................................5-26
Coolant Surge Tank Pressure Cap..................5-29Engine Overheating.......................................5-29
Overheated Engine Protection Operating Mode
(3.5L V6 and 3.9L V6 Engines)...................5-31
Cooling System............................................5-32
Power Steering Fluid (3.9L V6 Engine)............5-36
Windshield Washer Fluid................................5-38
Brakes........................................................5-39
Battery........................................................5-42
Jump Starting...............................................5-43
Bulb Replacement..........................................5-47
Halogen Bulbs..............................................5-47
Headlamps, Front Turn Signal, and
Parking Lamps..........................................5-48
Taillamps, Turn Signal, Stoplamps and
Back-up Lamps.........................................5-50
Replacement Bulbs.......................................5-51
Windshield Wiper Blade Replacement..............5-52
Tires..............................................................5-54
Tire Sidewall Labeling...................................5-56
Tire Terminology and De�nitions.....................5-58
In�ation - Tire Pressure.................................5-61
Tire Inspection and Rotation...........................5-63
When It Is Time for New Tires.......................5-64
Buying New Tires.........................................5-64
Different Size Tires and Wheels......................5-66
Uniform Tire Quality Grading..........................5-66
Section 5 Service and Appearance Care
5-1