ignition CHEVROLET MALIBU 2011 7.G Manual PDF
[x] Cancel search | Manufacturer: CHEVROLET, Model Year: 2011, Model line: MALIBU, Model: CHEVROLET MALIBU 2011 7.GPages: 382, PDF Size: 5.81 MB
Page 293 of 382
Black plate (51,1)Chevrolet Malibu Owner Manual - 2011
Vehicle Care 10-51
time, for about five seconds to
start the TPMS learn mode. The
horn sounds twice indicating the
TPMS receiver is ready and in
learn mode.
4. Start with the driver side front tire. The driver side front turn
signal also comes on to indicate
that corner's sensor is ready to
be learned.
5. Remove the valve cap from the tire's valve stem. Activate the
TPMS sensor by increasing or
decreasing the tire's air pressure
for about eight seconds. The
horn chirp, can take up to
30 seconds to sound. It chirps
one time and then all the turn
signals flash one time to confirm
the sensor identification code
has been matched to the tire/
wheel position. 6. The passenger side front turn
signal comes on to indicate that
corner sensor is ready to be
learned. Proceed to the
passenger side front tire and
repeat the procedure in Step 5.
7. The passenger side rear turn signal comes on to indicate that
corner sensor is ready to be
learned. Proceed to the
passenger side rear tire and
repeat the procedure in Step 5.
8. The driver side rear turn signal comes on to indicate that corner
sensor is ready to be learned.
Proceed to the driver side rear
tire, and repeat the procedure in
Step 5.
9. After hearing the single horn chirp for the driver side rear tire,
two additional horn chirps sound
to indicate the tire learning
process is done. Turn the
ignition switch to LOCK/OFF. If no tires are learned after
entering the TPMS learn mode,
or if communication with the
receiver stops, or if the time limit
has expired, turn the ignition
switch to LOCK/OFF and start
over beginning with Step 2.
10. Set all four tires to the recommended air pressure
level as indicated on the Tire
and Loading Information label.
11. Put the valve caps back on the valve stems.
Tire Inspection
We recommend that you
regularly inspect your vehicle's
tires, including the spare tire,
if the vehicle has one, for signs
of wear or damage at least once
a month.
Page 321 of 382
Black plate (79,1)Chevrolet Malibu Owner Manual - 2011
Vehicle Care 10-79
Notice:Ignoring these steps
could result in costly damage to
the vehicle that would not be
covered by the warranty.
Trying to start the vehicle by
pushing or pulling it will not
work, and it could damage the
vehicle.
1. Check the other vehicle. It must
have a 12-volt battery with a
negative ground system.
Notice: If the other vehicle's
system is not a 12-volt system
with a negative ground, both
vehicles can be damaged. Only
use vehicles with 12-volt systems
with negative grounds to jump
start your vehicle. 2. Get the vehicles close enough
so the jumper cables can reach,
but be sure the vehicles are not
touching each other. If they are,
it could cause a ground
connection you do not want. You
would not be able to start your
vehicle, and the bad grounding
could damage the electrical
systems.
To avoid the possibility of the
vehicles rolling, set the parking
brake firmly on both vehicles
involved in the jump start
procedure. Put an automatic
transmission in P (Park) or a
manual transmission in
N (Neutral) before setting the
parking brake. Notice:
If you leave the radio or
other accessories on during the
jump starting procedure, they
could be damaged. The repairs
would not be covered by the
warranty. Always turn off the
radio and other accessories when
jump starting the vehicle.
3. Turn off the ignition on both
vehicles. Unplug unnecessary
accessories plugged into the
cigarette lighter or the accessory
power outlet. Turn off the radio
and all lamps that are not
needed. This will avoid sparks
and help save both batteries.
And it could save the radio!
Page 326 of 382
Black plate (84,1)Chevrolet Malibu Owner Manual - 2011
10-84 Vehicle Care
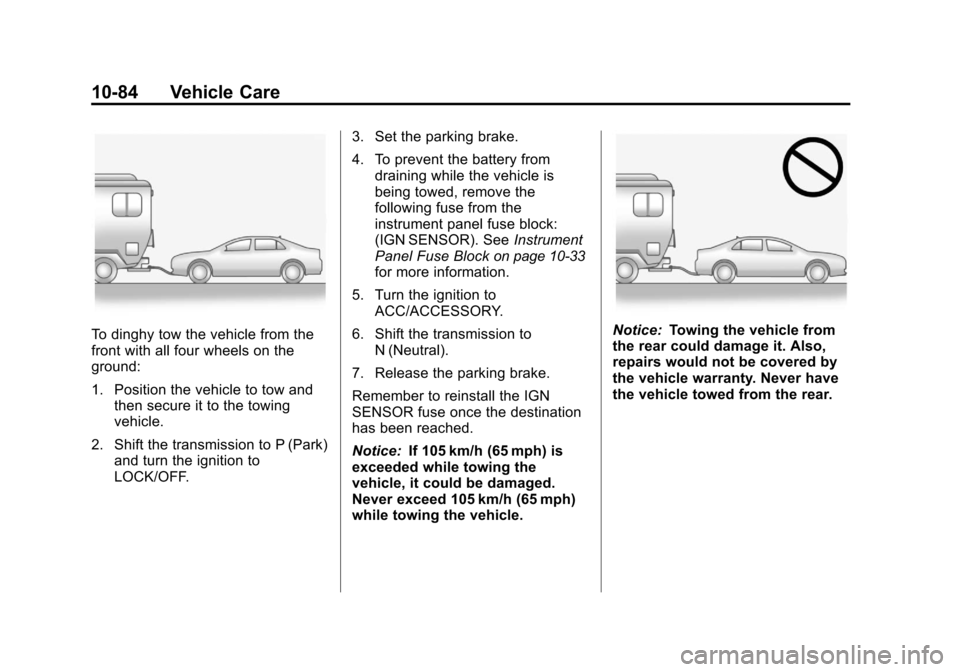
To dinghy tow the vehicle from the
front with all four wheels on the
ground:
1. Position the vehicle to tow andthen secure it to the towing
vehicle.
2. Shift the transmission to P (Park) and turn the ignition to
LOCK/OFF. 3. Set the parking brake.
4. To prevent the battery from
draining while the vehicle is
being towed, remove the
following fuse from the
instrument panel fuse block:
(IGN SENSOR). See Instrument
Panel Fuse Block
on page 10‑33for more information.
5. Turn the ignition to ACC/ACCESSORY.
6. Shift the transmission to N (Neutral).
7. Release the parking brake.
Remember to reinstall the IGN
SENSOR fuse once the destination
has been reached.
Notice: If 105 km/h (65 mph) is
exceeded while towing the
vehicle, it could be damaged.
Never exceed 105 km/h (65 mph)
while towing the vehicle.
Notice: Towing the vehicle from
the rear could damage it. Also,
repairs would not be covered by
the vehicle warranty. Never have
the vehicle towed from the rear.
Page 327 of 382
Black plate (85,1)Chevrolet Malibu Owner Manual - 2011
Vehicle Care 10-85
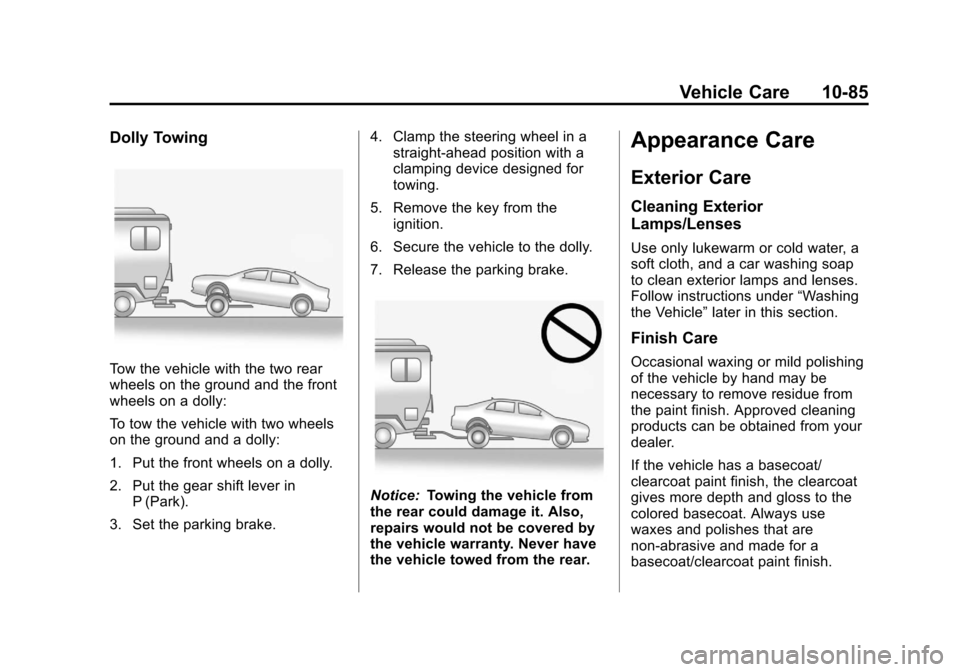
Dolly Towing
Tow the vehicle with the two rear
wheels on the ground and the front
wheels on a dolly:
To tow the vehicle with two wheels
on the ground and a dolly:
1. Put the front wheels on a dolly.
2. Put the gear shift lever inP (Park).
3. Set the parking brake. 4. Clamp the steering wheel in a
straight-ahead position with a
clamping device designed for
towing.
5. Remove the key from the ignition.
6. Secure the vehicle to the dolly.
7. Release the parking brake.
Notice: Towing the vehicle from
the rear could damage it. Also,
repairs would not be covered by
the vehicle warranty. Never have
the vehicle towed from the rear.
Appearance Care
Exterior Care
Cleaning Exterior
Lamps/Lenses
Use only lukewarm or cold water, a
soft cloth, and a car washing soap
to clean exterior lamps and lenses.
Follow instructions under “Washing
the Vehicle” later in this section.
Finish Care
Occasional waxing or mild polishing
of the vehicle by hand may be
necessary to remove residue from
the paint finish. Approved cleaning
products can be obtained from your
dealer.
If the vehicle has a basecoat/
clearcoat paint finish, the clearcoat
gives more depth and gloss to the
colored basecoat. Always use
waxes and polishes that are
non-abrasive and made for a
basecoat/clearcoat paint finish.
Page 340 of 382
Black plate (4,1)Chevrolet Malibu Owner Manual - 2011
11-4 Service and Maintenance
.Steering and suspension
inspection. Visual inspection for
damaged, loose, or missing
parts or signs of wear.
.Body hinges and latches, key
lock cylinders, folding seat
hardware, and rear compartment
hinges lubrication. See
Recommended Fluids and
Lubricants
on page 11‑6. More
frequent lubrication may be
required when the vehicle is
exposed to a corrosive
environment. Applying silicone
grease on weatherstrips with a
clean cloth makes them last
longer, seal better, and not stick
or squeak.
.Restraint system component
check. See Safety System
Check on page 3‑22.
.Fuel system inspection for
damage or leaks.
.Exhaust system and nearby heat
shields inspection for loose or
damaged components.
Additional Required Services
Every 12 000 km/7,500 Miles
.Rotate tires. Tires should be
rotated every 12 000 km/
7,500 miles. See Tire Rotation
on page 10‑52.
At Each Fuel Stop
.Engine oil level check. See
Engine Oil on page 10‑9.
.Engine coolant level check. See
Engine Coolant on page 10‑16.
.Windshield washer fluid level
check. See Washer Fluidon
page 10‑22.
Once a Month
.Tire inflation check. See Tire
Pressure on page 10‑45.
.Tire wear inspection. See Tire
Inspection on page 10‑51.
.Sunroof track and seal
inspection, if equipped. See
Sunroof on page 2‑19. Once a Year
.See
Starter Switch Checkon
page 10‑25.
.See Automatic Transmission
Shift Lock Control Function
Check on page 10‑26.
.See Ignition Transmission Lock
Check on page 10‑26.
.See Park Brake and P (Park)
Mechanism Checkon
page 10‑26.
.Accelerator pedal check for
damage, high effort, or binding.
Replace if needed.
.If the vehicle has a Tire Sealant
and Compressor Kit, check the
sealant expiration date printed
on the instruction label of the kit.
See Tire Sealant and
Compressor Kit on page 10‑61.
.Underbody flushing service.
Page 369 of 382
Black plate (17,1)Chevrolet Malibu Owner Manual - 2011
Customer Information 13-17
GM will not access this data or
share it with others except: with the
consent of the vehicle owner or,
if the vehicle is leased, with the
consent of the lessee; in response
to an official request by police or
similar government office; as part of
GM's defense of litigation through
the discovery process; or, as
required by law. Data that GM
collects or receives may also be
used for GM research needs or may
be made available to others for
research purposes, where a need is
shown and the data is not tied to a
specific vehicle or vehicle owner.
OnStar®
If your vehicle is equipped with an
active OnStar system, that system
may also record data in crash or
near crash‐like situations. The
OnStar Terms and Conditions
provides information on data
collection and use and is available
in the OnStar glove box kit, at
www.onstar.com (U.S.) orwww.onstar.ca (Canada), or by
pressing the
Qbutton and
speaking to an advisor.
Navigation System
If the vehicle has a navigation
system, use of the system may
result in the storage of destinations,
addresses, telephone numbers, and
other trip information. Refer to the
navigation system operating manual
for information on stored data and
for deletion instructions.
Radio Frequency
Identification (RFID)
RFID technology is used in some
vehicles for functions such as tire
pressure monitoring and ignition
system security, as well as in
connection with conveniences
such as key fobs for remote door
locking/unlocking and starting, and
in-vehicle transmitters for garage
door openers. RFID technology in
GM vehicles does not use or record personal information or link with any
other GM system containing
personal information.
Radio Frequency
Statement
This vehicle has systems that
operate on a radio frequency that
comply with Part 15 of the Federal
Communications Commission (FCC)
rules and with Industry Canada
Standards RSS‐210/220/310.
Operation is subject to the following
two conditions:
1. The device may not cause
interference.
2. The device must accept any interference received, including
interference that may cause
undesired operation of the
device.
Changes or modifications to any of
these systems by other than an
authorized service facility could void
authorization to use this equipment.
Page 372 of 382

Black plate (2,1)Chevrolet Malibu Owner Manual - 2011
i-2 INDEX
B
Battery . . . . . . . . . . . . . . . . . . . . . . . 10-25Jump Starting . . . . . . . . . . . . . . . 10-78
Load Management . . . . . . . . . . . . . 6-6
Power Protection . . . . . . . . . . . . . . 6-7
Blade Replacement, Wiper . . . 10-27
Bluetooth . . . . . . . . . . . . . . . . . . . . . . 7-23
Brakes . . . . . . . . . . . . . . . . . . . . . . . . 10-22 Antilock . . . . . . . . . . . . . . . . . . . . . . . 9-28
Assist . . . . . . . . . . . . . . . . . . . . . . . . . 9-30
Fluid . . . . . . . . . . . . . . . . . . . . . . . . 10-23
Parking . . . . . . . . . . . . . . . . . . . . . . . 9-29
System Messages . . . . . . . . . . . . 5-27
Braking . . . . . . . . . . . . . . . . . . . . . . . . . 9-3
Break-In, New Vehicle . . . . . . . . . 9-17
Bulb Replacement . . . . . . . . . . . . 10-29 Fog Lamps . . . . . . . . . . . . . . . . . . . . 6-5
Halogen Bulbs . . . . . . . . . . . . . . 10-28
Headlamp Aiming . . . . . . . . . . . 10-27
Headlamps . . . . . . . . . . . . . . . . . 10-28
License Plate Lamps . . . . . . . 10-29
Taillamps, Turn Signaland Stoplamps . . . . . . . . . . . . 10-28
Buying New Tires . . . . . . . . . . . . . 10-54
C
Calibration . . . . . . . . . . . . . . . . . . . . . . 5-5
California Fuel Requirements . . . . . . . . . . . 9-38
Perchlorate MaterialsRequirements . . . . . . . . . . . . . . . 10-3
Warning . . . . . . . . . . . . . . . . . . . . . . 10-3
Canadian Vehicle Owners . . . . . . . . iii
Capacities and Specifications . . . . . . . . . . . . . . . . 12-2
Carbon Monoxide
Engine Exhaust . . . . . . . . . . . . . . . 9-24
Trunk . . . . . . . . . . . . . . . . . . . . . . . . . 2-10
Winter Driving . . . . . . . . . . . . . . . . . 9-9
Cautions, Danger, and Warnings . . . . . . . . . . . . . . . . . . . . . . . . iv
CD Player . . . . . . . . . . . . . . . . . . . . . 7-14
Center Console Storage . . . . . . . . 4-2
Chains, Tire . . . . . . . . . . . . . . . . . . 10-59
Charging System Light . . . . . . . . 5-15
Check Engine Light . . . . . . . . . . . . . . . . . . 5-16
IgnitionTransmission Lock . . . . . . . . 10-26 Child Restraints
Infants and Young
Children . . . . . . . . . . . . . . . . . . . . . 3-40
Lower Anchors and Tethers for Children . . . . . . . . . 3-47
Older Children . . . . . . . . . . . . . . . . 3-38
Securing . . . . . . . . . . . . . . . . 3-54, 3-57
Systems . . . . . . . . . . . . . . . . . . . . . . 3-43
Where to Put the Restraint . . . 3-45
Cleaning Exterior Care . . . . . . . . . . . . . . . 10-85
Interior Care . . . . . . . . . . . . . . . . 10-89
Climate Control Systems . . . . . . . 8-1 Automatic . . . . . . . . . . . . . . . . . . . . . . 8-5
Clock . . . . . . . . . . . . . . . . . . . . . . . . . . . 5-6
Cluster, IP . . . . . . . . . . . . . . . . . . . . . 5-10
Collision Damage Repair . . . . . 13-11
Compact Spare Tire . . . . . . . . . . 10-77
Compass . . . . . . . . . . . . . . . . . . . . . . . 5-5
Compressor Kit, Tire Sealant . . . . . . . . . . . . . . . . . . . . . . 10-61
Control of a Vehicle . . . . . . . . . . . . . 9-3
Convenience Net . . . . . . . . . . . . . . . 4-2
Convex Mirrors . . . . . . . . . . . . . . . . 2-14
Page 376 of 382

Black plate (6,1)Chevrolet Malibu Owner Manual - 2011
i-6 INDEX
I
Ignition Positions . . . . . . . . . . . . . . 9-18
Ignition Transmission LockCheck . . . . . . . . . . . . . . . . . . . . . . . 10-26
Immobilizer . . . . . . . . . . . . . . . . . . . . 2-13
Infants and Young Children, Restraints . . . . . . . . . . . . . . . . . . . . 3-40
Instrument Cluster . . . . . . . . . . . . . 5-10
Instrument Panel Storage Area . . . . . . . . . . . . . . . . . . 4-1
Introduction . . . . . . . . . . . . . . . . . . .iii, 7-1
J
Jump Starting . . . . . . . . . . . . . . . . . 10-78
K
Key and Lock Messages . . . . . . . 5-28
Keyless Entry
Remote (RKE) System . . . . . . . . 2-3
Keyless Entry System . . . . . . . . . . 2-2
Keys . . . . . . . . . . . . . . . . . . . . . . . . . . . . 2-2
L
Labeling, Tire Sidewall . . . . . . . . 10-40
Lamp Messages . . . . . . . . . . . . . . . 5-28
Lamps
Daytime Running (DRL) . . . . . . . 6-3
Dome . . . . . . . . . . . . . . . . . . . . . . . . . . 6-5
Exterior Controls . . . . . . . . . . . . . . . 6-1
Exterior Lamps OffReminder . . . . . . . . . . . . . . . . . . . . 6-2
License Plate . . . . . . . . . . . . . . . 10-29
Malfunction Indicator . . . . . . . . . 5-16
Reading . . . . . . . . . . . . . . . . . . . . . . . 6-5
Lap-Shoulder Belt . . . . . . . . . . . . . 3-17
LATCH System Replacing Parts After aCrash . . . . . . . . . . . . . . . . . . . . . . . 3-54
Latch, Lower Anchors and Tethers for Children . . . . . . . . . . 3-47
Lighting Entry/Exit . . . . . . . . . . . . . . . . . . . . . . 6-6
Illumination Control . . . . . . . . . . . . 6-5
Parade Dimming . . . . . . . . . . . . . . . 6-6 Lights
Airbag Readiness . . . . . . . . . . . . . 5-14
Antilock Brake System
(ABS) Warning . . . . . . . . . . . . . . 5-19
Charging System . . . . . . . . . . . . . 5-15
Cruise Control . . . . . . . . . . . . . . . . 5-23
Engine Coolant Temperature Warning . . . . . . . 5-20
Engine Oil Pressure . . . . . . . . . . 5-22
Flash-to-Pass . . . . . . . . . . . . . . . . . . 6-3
High-Beam On . . . . . . . . . . . . . . . . 5-23
High/Low Beam Changer . . . . . . 6-2
Safety Belt Reminders . . . . . . . . 5-13
Security . . . . . . . . . . . . . . . . . . . . . . 5-22
Tire Pressure . . . . . . . . . . . . . . . . . 5-21
Locks
Automatic Door . . . . . . . . . . . . . . . . 2-9
Delayed Locking . . . . . . . . . . . . . . . 2-8
Door . . . . . . . . . . . . . . . . . . . . . . . . . . . 2-7
Lockout Protection . . . . . . . . . . . . . 2-9
Power Door . . . . . . . . . . . . . . . . . . . . 2-8
Safety . . . . . . . . . . . . . . . . . . . . . . . . . 2-9
Loss of Control . . . . . . . . . . . . . . . . . 9-6
Low-Profile Tires . . . . . . . . . . . . . . 10-39