automatic transmission CHEVROLET MALIBU 2011 7.G Owners Manual
[x] Cancel search | Manufacturer: CHEVROLET, Model Year: 2011, Model line: MALIBU, Model: CHEVROLET MALIBU 2011 7.GPages: 382, PDF Size: 5.81 MB
Page 1 of 382

Black plate (1,1)Chevrolet Malibu Owner Manual - 2011
2011 Chevrolet Malibu Owner ManualM
In Brief. . . . . . . . . . . . . . . . . . . . . . . . 1-1
Instrument Panel . . . . . . . . . . . . . . 1-2
Initial Drive Information . . . . . . . . 1-4
Vehicle Features . . . . . . . . . . . . . 1-14
Performance and Maintenance . . . . . . . . . . . . . . . . 1-18
Keys, Doors and Windows . . . 2-1
Keys and Locks . . . . . . . . . . . . . . . 2-2
Doors . . . . . . . . . . . . . . . . . . . . . . . . 2-10
Vehicle Security . . . . . . . . . . . . . . 2-12
Exterior Mirrors . . . . . . . . . . . . . . . 2-14
Interior Mirrors . . . . . . . . . . . . . . . . 2-15
Windows . . . . . . . . . . . . . . . . . . . . . 2-16
Roof . . . . . . . . . . . . . . . . . . . . . . . . . . 2-19
Seats and Restraints . . . . . . . . . 3-1
Head Restraints . . . . . . . . . . . . . . . 3-2
Front Seats . . . . . . . . . . . . . . . . . . . . 3-3
Rear Seats . . . . . . . . . . . . . . . . . . . . 3-7
Safety Belts . . . . . . . . . . . . . . . . . . . . 3-8
Airbag System . . . . . . . . . . . . . . . . 3-23
Child Restraints . . . . . . . . . . . . . . 3-38 Storage
. . . . . . . . . . . . . . . . . . . . . . . 4-1
Storage Compartments . . . . . . . . 4-1
Additional Storage Features . . . 4-2
Instruments and Controls . . . . 5-1
Controls . . . . . . . . . . . . . . . . . . . . . . . 5-2
Warning Lights, Gauges, and
Indicators . . . . . . . . . . . . . . . . . . . . 5-9
Information Displays . . . . . . . . . . 5-23
Vehicle Messages . . . . . . . . . . . . 5-26
Vehicle Personalization . . . . . . . 5-31
Lighting . . . . . . . . . . . . . . . . . . . . . . . 6-1
Exterior Lighting . . . . . . . . . . . . . . . 6-1
Interior Lighting . . . . . . . . . . . . . . . . 6-5
Lighting Features . . . . . . . . . . . . . . 6-6
Infotainment System . . . . . . . . . 7-1
Introduction . . . . . . . . . . . . . . . . . . . . 7-1
Radio . . . . . . . . . . . . . . . . . . . . . . . . . . 7-6
Audio Players . . . . . . . . . . . . . . . . 7-14
Phone . . . . . . . . . . . . . . . . . . . . . . . . 7-23 Climate Controls
. . . . . . . . . . . . . 8-1
Climate Control Systems . . . . . . 8-1
Air Vents . . . . . . . . . . . . . . . . . . . . . . . 8-9
Driving and Operating . . . . . . . . 9-1
Driving Information . . . . . . . . . . . . . 9-2
Starting and Operating . . . . . . . 9-17
Engine Exhaust . . . . . . . . . . . . . . 9-24
Automatic Transmission . . . . . . 9-25
Brakes . . . . . . . . . . . . . . . . . . . . . . . 9-28
Ride Control Systems . . . . . . . . 9-30
Cruise Control . . . . . . . . . . . . . . . . 9-34
Fuel . . . . . . . . . . . . . . . . . . . . . . . . . . 9-37
Towing . . . . . . . . . . . . . . . . . . . . . . . 9-43
Conversions and Add-Ons . . . 9-48
Vehicle Care . . . . . . . . . . . . . . . . . 10-1
General Information . . . . . . . . . . 10-2
Vehicle Checks . . . . . . . . . . . . . . . 10-4
Headlamp Aiming . . . . . . . . . . . 10-27
Bulb Replacement . . . . . . . . . . 10-28
Electrical System . . . . . . . . . . . . 10-30
Wheels and Tires . . . . . . . . . . . 10-38
Jump Starting . . . . . . . . . . . . . . . 10-78
Towing . . . . . . . . . . . . . . . . . . . . . . 10-83
Appearance Care . . . . . . . . . . . 10-85
Page 9 of 382

Black plate (3,1)Chevrolet Malibu Owner Manual - 2011
In Brief 1-3
A.Air Vents on page 8‑9.
B. Turn and Lane‐Change Lever. See Turn and Lane-Change
Signals on page 6‑4.
C. Instrument Cluster
on
page 5‑10.
D. Windshield Wiper/Washer
on
page 5‑4.
E. Instrument Panel Storage
on
page 4‑1.
F. AM-FM Radio on page 7‑6.
G. Instrument Panel Illumination
Control
on page 6‑5.
H. Driver Compartment Storage. See Front Storage
on
page 4‑2. I. Hood Release. See
Hood
on
page 10‑5.
J. Cruise Control
on page 9‑34.
Driver Information Center (DIC)
Buttons. See Driver Information
Center (DIC) on page 5‑23.
K. Data Link Connector (DLC). See Malfunction Indicator Lamp
on page 5‑16.
L. Steering Wheel Adjustment
on
page 5‑2.
M. Horn on page 5‑3.
N. Steering Wheel Controls
on
page 5‑2(If Equipped).
O. Ignition Positions on page 9‑18. P.
Climate Control Systems
on
page 8‑1(If Equipped).
Automatic Climate Control
System
on page 8‑5(If Equipped) .
Q. Hazard Warning Flashers
on
page 6‑4.
R. Shift Lever. See Automatic
Transmission
on page 9‑25.
S. Front Storage
on page 4‑2.
Power Outlets on page 5‑7.
T. Passenger Sensing System
on
page 3‑31.
U. Traction Control System (TCS)
on page 9‑30.
V. Glove Box on page 4‑1.
Page 19 of 382
Black plate (13,1)Chevrolet Malibu Owner Manual - 2011
In Brief 1-13
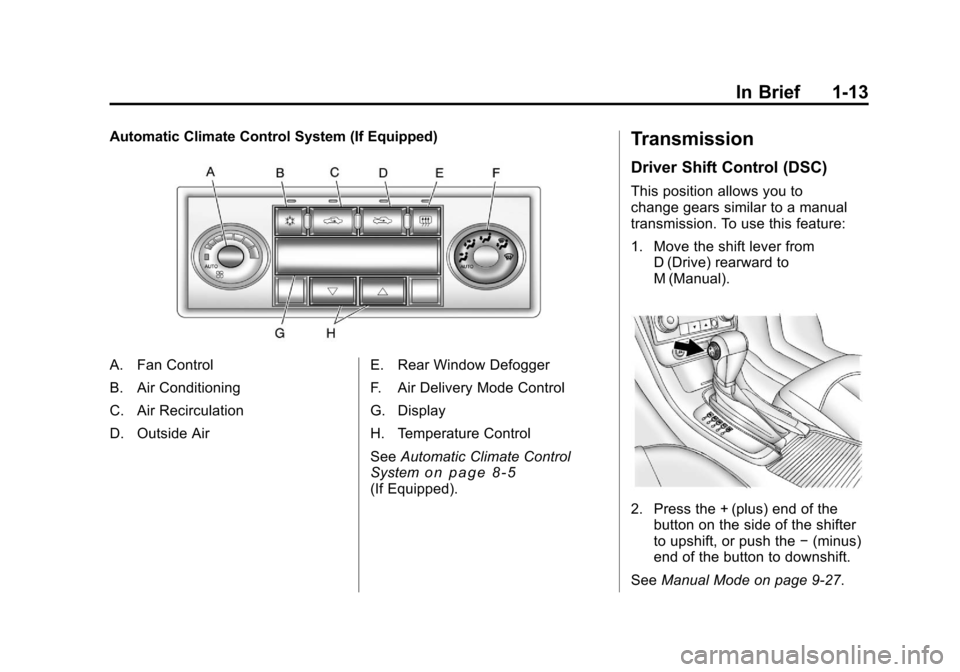
Automatic Climate Control System (If Equipped)
A. Fan Control
B. Air Conditioning
C. Air Recirculation
D. Outside AirE. Rear Window Defogger
F. Air Delivery Mode Control
G. Display
H. Temperature Control
See
Automatic Climate Control
System
on page 8‑5(If Equipped).
Transmission
Driver Shift Control (DSC)
This position allows you to
change gears similar to a manual
transmission. To use this feature:
1. Move the shift lever from D (Drive) rearward to
M (Manual).
2. Press the + (plus) end of thebutton on the side of the shifter
to upshift, or push the −(minus)
end of the button to downshift.
See Manual Mode on page 9‑27.
Page 150 of 382
Black plate (4,1)Chevrolet Malibu Owner Manual - 2011
6-4 Lighting
If the vehicle is started in a dark
garage, the automatic headlamp
system comes on immediately.
Once the vehicle leaves the garage,
it takes about one minute for the
automatic headlamp system to
change to DRL if it is light outside.
During that delay, the instrument
panel cluster may not be as bright
as usual. Make sure the instrument
panel brightness control is in the full
bright position. SeeInstrument
Panel Illumination Control
on
page 6‑5.
To idle the vehicle with the
automatic headlamp system off, turn
the ignition on and set the exterior
light switch to the off/on position.
For vehicles first sold in Canada,
the transmission must stay in
P (Park) for this function.
The regular headlamps should be
used when needed.
Delayed Headlamps
The delayed headlamps feature
keeps the headlamps on for
20 seconds after the key is turned to
LOCK/OFF, then the headlamps
automatically turn off.
To override the 20 second delayed
headlamp feature while it is active
turn the turn signal/multifunction
lever up one position and then back
to AUTO.
Hazard Warning Flashers
|
(Hazard Warning Flasher):
Press this button located on the
instrument panel, to make the front
and rear turn signal lamps flash on
and off. This warns others that you
are having trouble.
Press
|again to turn the
flashers off.
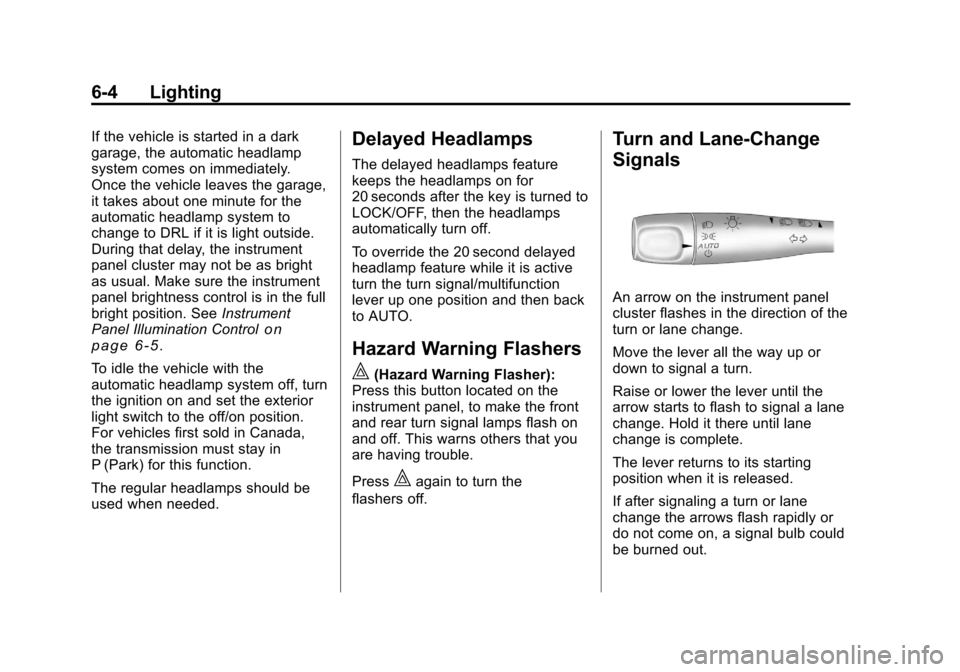
Turn and Lane-Change
Signals
An arrow on the instrument panel
cluster flashes in the direction of the
turn or lane change.
Move the lever all the way up or
down to signal a turn.
Raise or lower the lever until the
arrow starts to flash to signal a lane
change. Hold it there until lane
change is complete.
The lever returns to its starting
position when it is released.
If after signaling a turn or lane
change the arrows flash rapidly or
do not come on, a signal bulb could
be burned out.
Page 195 of 382
Black plate (1,1)Chevrolet Malibu Owner Manual - 2011
Driving and Operating 9-1
Driving and
Operating
Driving Information
Defensive Driving . . . . . . . . . . . . . 9-2
Drunk Driving . . . . . . . . . . . . . . . . . 9-2
Control of a Vehicle . . . . . . . . . . . 9-3
Braking . . . . . . . . . . . . . . . . . . . . . . . 9-3
Steering . . . . . . . . . . . . . . . . . . . . . . . 9-4
Off-Road Recovery . . . . . . . . . . . . 9-5
Loss of Control . . . . . . . . . . . . . . . . 9-6
Driving on Wet Roads . . . . . . . . . 9-7
Highway Hypnosis . . . . . . . . . . . . 9-8
Hill and Mountain Roads . . . . . . 9-8
Winter Driving . . . . . . . . . . . . . . . . . 9-9
If the Vehicle is Stuck . . . . . . . . 9-11
Vehicle Load Limits . . . . . . . . . . 9-12
Starting and Operating
New Vehicle Break-In . . . . . . . . 9-17
Ignition Positions . . . . . . . . . . . . 9-18
Retained AccessoryPower (RAP) . . . . . . . . . . . . . . . 9-19
Starting the Engine . . . . . . . . . . 9-20
Engine Heater . . . . . . . . . . . . . . . 9-21 Shifting Into Park . . . . . . . . . . . . 9-22
Shifting Out of Park . . . . . . . . . . 9-23
Parking Over Things
That Burn . . . . . . . . . . . . . . . . . . 9-24
Engine Exhaust
Engine Exhaust . . . . . . . . . . . . . . 9-24
Running the Vehicle WhileParked . . . . . . . . . . . . . . . . . . . . . 9-25
Automatic Transmission
Automatic Transmission . . . . . 9-25
Manual Mode . . . . . . . . . . . . . . . . 9-27
Brakes
Antilock BrakeSystem (ABS) . . . . . . . . . . . . . . 9-28
Parking Brake . . . . . . . . . . . . . . . 9-29
Brake Assist . . . . . . . . . . . . . . . . . 9-30
Ride Control Systems
Traction Control System (TCS) . . . . . . . . . . . . . . 9-30
Electronic Stability Control (ESC) . . . . . . . . . . . . . . 9-32
Cruise Control
Cruise Control . . . . . . . . . . . . . . . 9-34
Fuel
Fuel . . . . . . . . . . . . . . . . . . . . . . . . . 9-37
Recommended Fuel . . . . . . . . . 9-38
Gasoline Specifications . . . . . . 9-38
California FuelRequirements . . . . . . . . . . . . . . 9-38
Fuels in Foreign Countries . . . 9-38
Fuel Additives . . . . . . . . . . . . . . . 9-39
Fuel E85 (85% Ethanol) . . . . . 9-40
Filling the Tank . . . . . . . . . . . . . . 9-41
Filling a Portable Fuel Container . . . . . . . . . . . . . . . . . . . 9-42
Towing
General TowingInformation . . . . . . . . . . . . . . . . . 9-43
Driving Characteristics and Towing Tips . . . . . . . . . . . . . . . . 9-43
Trailer Towing . . . . . . . . . . . . . . . . 9-46
Towing Equipment . . . . . . . . . . . 9-48
Conversions and Add-Ons
Add-On Electrical Equipment . . . . . . . . . . . . . . . . . 9-48
Page 212 of 382
Black plate (18,1)Chevrolet Malibu Owner Manual - 2011
9-18 Driving and Operating
Ignition Positions
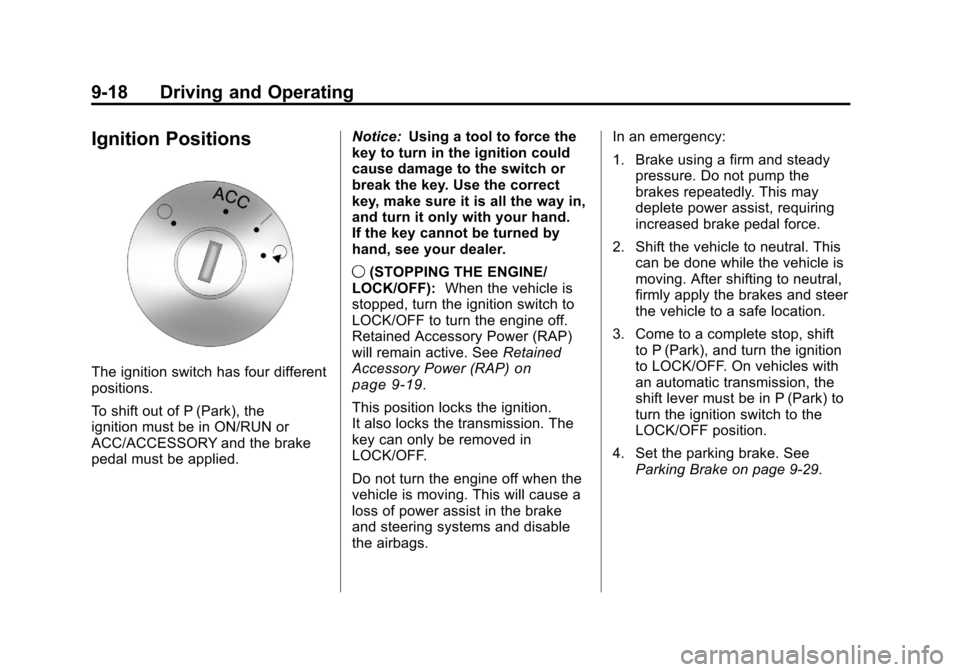
The ignition switch has four different
positions.
To shift out of P (Park), the
ignition must be in ON/RUN or
ACC/ACCESSORY and the brake
pedal must be applied.Notice:
Using a tool to force the
key to turn in the ignition could
cause damage to the switch or
break the key. Use the correct
key, make sure it is all the way in,
and turn it only with your hand.
If the key cannot be turned by
hand, see your dealer.
9 (STOPPING THE ENGINE/
LOCK/OFF): When the vehicle is
stopped, turn the ignition switch to
LOCK/OFF to turn the engine off.
Retained Accessory Power (RAP)
will remain active. See Retained
Accessory Power (RAP)on
page 9‑19.
This position locks the ignition.
It also locks the transmission. The
key can only be removed in
LOCK/OFF.
Do not turn the engine off when the
vehicle is moving. This will cause a
loss of power assist in the brake
and steering systems and disable
the airbags. In an emergency:
1. Brake using a firm and steady
pressure. Do not pump the
brakes repeatedly. This may
deplete power assist, requiring
increased brake pedal force.
2. Shift the vehicle to neutral. This can be done while the vehicle is
moving. After shifting to neutral,
firmly apply the brakes and steer
the vehicle to a safe location.
3. Come to a complete stop, shift to P (Park), and turn the ignition
to LOCK/OFF. On vehicles with
an automatic transmission, the
shift lever must be in P (Park) to
turn the ignition switch to the
LOCK/OFF position.
4. Set the parking brake. See Parking Brake on page 9‑29.
Page 219 of 382
Black plate (25,1)Chevrolet Malibu Owner Manual - 2011
Driving and Operating 9-25
Running the Vehicle
While Parked
It is better not to park with the
engine running. But if you ever have
to, here are some things to know.
{WARNING
Idling a vehicle in an enclosed
area with poor ventilation is
dangerous. Engine exhaust may
enter the vehicle. Engine exhaust
contains Carbon Monoxide (CO)
which cannot be seen or smelled.
It can cause unconsciousness
and even death. Never run the
engine in an enclosed area that
has no fresh air ventilation. For
more information, seeEngine
Exhaust on page 9‑24.
{WARNING
It can be dangerous to get out of
the vehicle if the automatic
transmission shift lever is not fully
in P (Park) with the parking brake
firmly set. The vehicle can roll. Do
not leave the vehicle when the
engine is running unless you
have to. If you have left the
engine running, the vehicle can
move suddenly. You or others
could be injured. To be sure the
vehicle will not move, even when
you are on fairly level ground,
always set the parking brake and
move the shift lever to P (Park).
Follow the proper steps to be sure
the vehicle will not move. See
Shifting Into Park on page 9‑22.
If parking on a hill and pulling a
trailer, see Driving Characteristics
and Towing Tips on page 9‑43.
Automatic
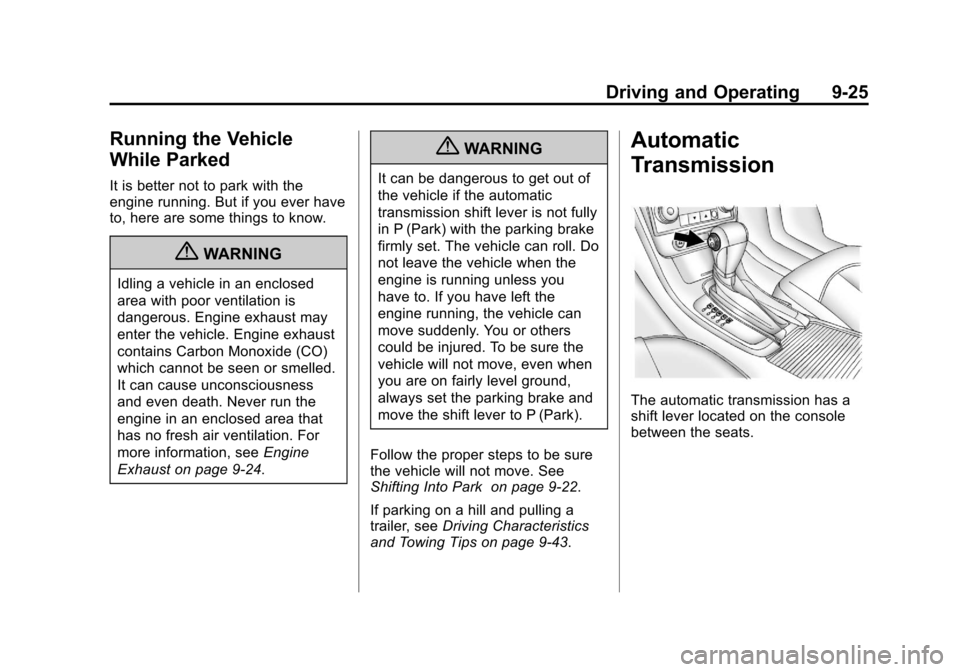
Transmission
The automatic transmission has a
shift lever located on the console
between the seats.
Page 220 of 382
Black plate (26,1)Chevrolet Malibu Owner Manual - 2011
9-26 Driving and Operating
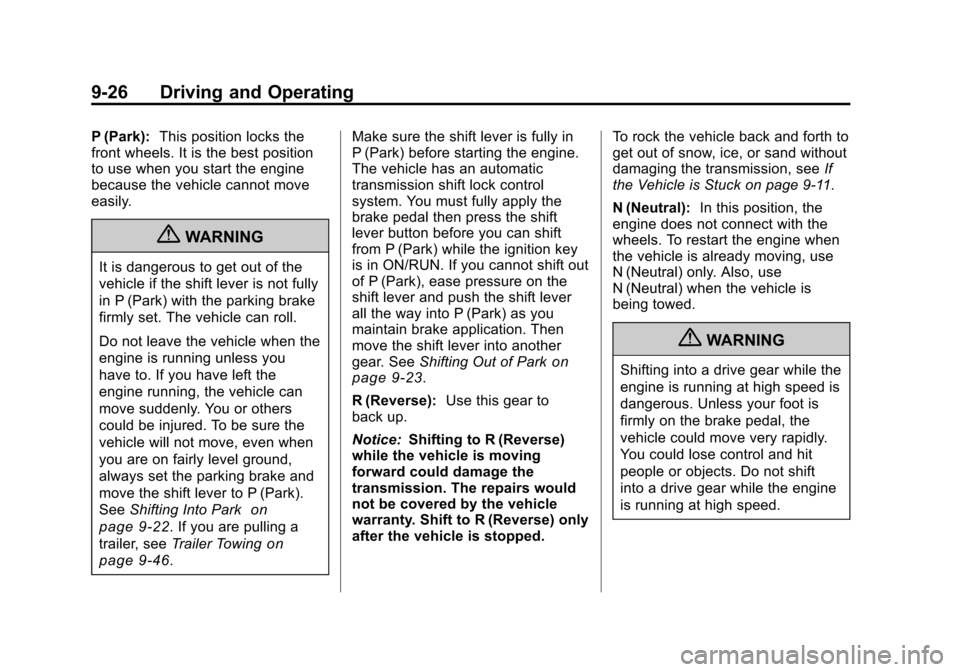
P (Park):This position locks the
front wheels. It is the best position
to use when you start the engine
because the vehicle cannot move
easily.
{WARNING
It is dangerous to get out of the
vehicle if the shift lever is not fully
in P (Park) with the parking brake
firmly set. The vehicle can roll.
Do not leave the vehicle when the
engine is running unless you
have to. If you have left the
engine running, the vehicle can
move suddenly. You or others
could be injured. To be sure the
vehicle will not move, even when
you are on fairly level ground,
always set the parking brake and
move the shift lever to P (Park).
See Shifting Into Park
on
page 9‑22
. If you are pulling a
trailer, see Trailer Towing
on
page 9‑46
. Make sure the shift lever is fully in
P (Park) before starting the engine.
The vehicle has an automatic
transmission shift lock control
system. You must fully apply the
brake pedal then press the shift
lever button before you can shift
from P (Park) while the ignition key
is in ON/RUN. If you cannot shift out
of P (Park), ease pressure on the
shift lever and push the shift lever
all the way into P (Park) as you
maintain brake application. Then
move the shift lever into another
gear. See
Shifting Out of Park
on
page 9‑23.
R (Reverse): Use this gear to
back up.
Notice: Shifting to R (Reverse)
while the vehicle is moving
forward could damage the
transmission. The repairs would
not be covered by the vehicle
warranty. Shift to R (Reverse) only
after the vehicle is stopped. To rock the vehicle back and forth to
get out of snow, ice, or sand without
damaging the transmission, see
If
the Vehicle is Stuck on page 9‑11.
N (Neutral): In this position, the
engine does not connect with the
wheels. To restart the engine when
the vehicle is already moving, use
N (Neutral) only. Also, use
N (Neutral) when the vehicle is
being towed.
{WARNING
Shifting into a drive gear while the
engine is running at high speed is
dangerous. Unless your foot is
firmly on the brake pedal, the
vehicle could move very rapidly.
You could lose control and hit
people or objects. Do not shift
into a drive gear while the engine
is running at high speed.
Page 221 of 382
Black plate (27,1)Chevrolet Malibu Owner Manual - 2011
Driving and Operating 9-27
Notice:Shifting out of P (Park) or
N (Neutral) with the engine
running at high speed may
damage the transmission. The
repairs would not be covered by
the vehicle warranty. Be sure the
engine is not running at high
speed when shifting the vehicle.
D (Drive): This position is for
normal driving. It provides the best
fuel economy. If you need more
power for passing, and you are:
.Going less than 56 km/h
(35 mph), push the accelerator
pedal about halfway down.
.Going about 56 km/h (35 mph) or
more, push the accelerator all
the way down.
M (Manual Mode): This position,
allows you to change gears similar
to a manual transmission. If the
vehicle has this feature, see Driver
Shift Control (DSC).
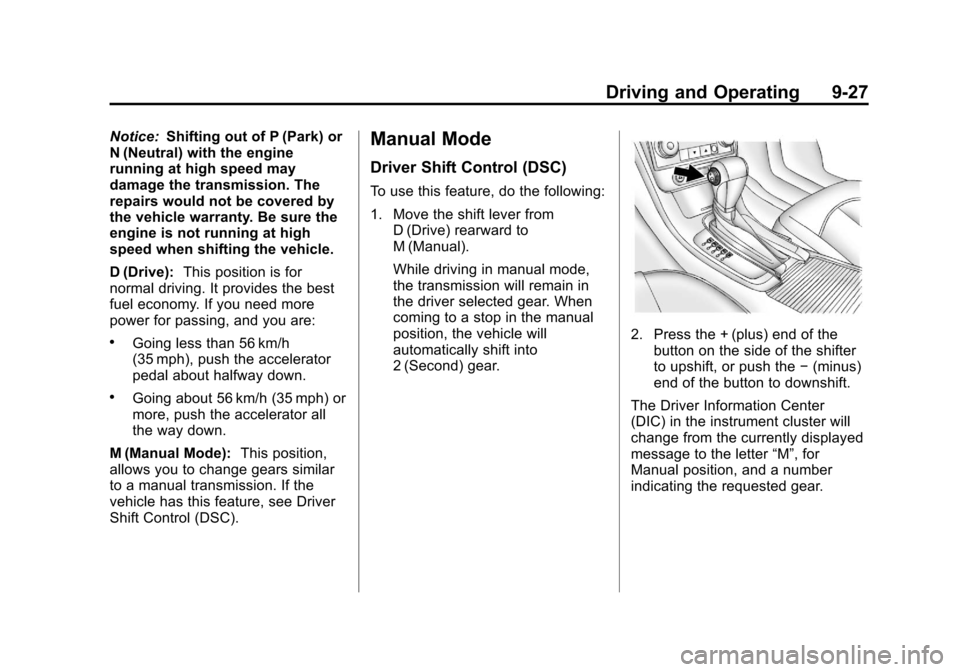
Manual Mode
Driver Shift Control (DSC)
To use this feature, do the following:
1. Move the shift lever from
D (Drive) rearward to
M (Manual).
While driving in manual mode,
the transmission will remain in
the driver selected gear. When
coming to a stop in the manual
position, the vehicle will
automatically shift into
2 (Second) gear.
2. Press the + (plus) end of thebutton on the side of the shifter
to upshift, or push the −(minus)
end of the button to downshift.
The Driver Information Center
(DIC) in the instrument cluster will
change from the currently displayed
message to the letter “M”, for
Manual position, and a number
indicating the requested gear.
Page 222 of 382
Black plate (28,1)Chevrolet Malibu Owner Manual - 2011
9-28 Driving and Operating
While using the DSC feature the
transmission will have firmer shifting
and sportier performance. You can
use this for sport driving or when
climbing hills to stay in gear longer
or to downshift for more power or
engine braking.
The transmission will only allow you
to shift into gears appropriate for the
vehicle speed and engine
revolutions per minute (RPM):
.The transmission will not
automatically shift to the next
higher gear if the vehicle speed
or engine RPM is too low.
.The transmission will not allow
shifting to the next lower gear if
the vehicle speed or engine
RPM is too high. Second or Third Gear Start
Feature
When accelerating the vehicle from
a stop in snowy and icy conditions,
you may want to shift the gear
select tap switch into Second or
Third gear. A higher gear allows you
to gain more traction on slippery
surfaces.
With the DSC feature, the vehicle
can be set to pull away in Second or
Third gear.
1. Move the shift lever from
D (Drive) into the
M (Manual Mode).
2. With the vehicle stopped, press (+) end of the button to
select Second or Third gear. The
vehicle will start from a stop
position in Second or Third gear.
3. Once moving select the desired drive gear.
Brakes
Antilock Brake
System (ABS)
This vehicle has the Antilock Brake
System (ABS), an advanced
electronic braking system that helps
prevent a braking skid.
When the engine is started and the
vehicle begins to drive away, ABS
checks itself. A momentary motor or
clicking noise might be heard while
this test is going on, and it might
even be noticed that the brake
pedal moves a little. This is normal.
If there is a problem with ABS, this
warning light stays on. See Antilock
Brake System (ABS) Warning Light
on page 5‑19.