start stop button CHEVROLET MALIBU 2013 8.G User Guide
[x] Cancel search | Manufacturer: CHEVROLET, Model Year: 2013, Model line: MALIBU, Model: CHEVROLET MALIBU 2013 8.GPages: 436, PDF Size: 7.43 MB
Page 242 of 436
Black plate (26,1)Chevrolet Malibu Owner Manual - 2013 - CRC - 6/6/12
9-26 Driving and Operating
Automatic
Transmission
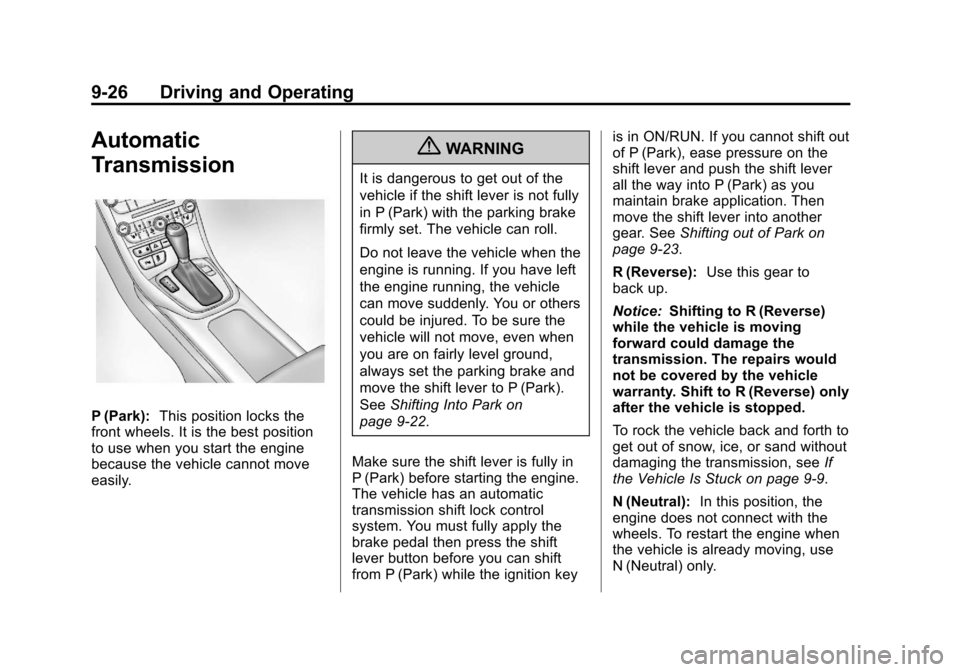
P (Park):This position locks the
front wheels. It is the best position
to use when you start the engine
because the vehicle cannot move
easily.
{WARNING
It is dangerous to get out of the
vehicle if the shift lever is not fully
in P (Park) with the parking brake
firmly set. The vehicle can roll.
Do not leave the vehicle when the
engine is running. If you have left
the engine running, the vehicle
can move suddenly. You or others
could be injured. To be sure the
vehicle will not move, even when
you are on fairly level ground,
always set the parking brake and
move the shift lever to P (Park).
See Shifting Into Park on
page 9‑22.
Make sure the shift lever is fully in
P (Park) before starting the engine.
The vehicle has an automatic
transmission shift lock control
system. You must fully apply the
brake pedal then press the shift
lever button before you can shift
from P (Park) while the ignition key is in ON/RUN. If you cannot shift out
of P (Park), ease pressure on the
shift lever and push the shift lever
all the way into P (Park) as you
maintain brake application. Then
move the shift lever into another
gear. See
Shifting out of Park on
page 9‑23.
R (Reverse): Use this gear to
back up.
Notice: Shifting to R (Reverse)
while the vehicle is moving
forward could damage the
transmission. The repairs would
not be covered by the vehicle
warranty. Shift to R (Reverse) only
after the vehicle is stopped.
To rock the vehicle back and forth to
get out of snow, ice, or sand without
damaging the transmission, see If
the Vehicle Is Stuck on page 9‑9.
N (Neutral): In this position, the
engine does not connect with the
wheels. To restart the engine when
the vehicle is already moving, use
N (Neutral) only.
Page 244 of 436
Black plate (28,1)Chevrolet Malibu Owner Manual - 2013 - CRC - 6/6/12
9-28 Driving and Operating
While using the DSC feature the
transmission will have firmer shifting
and sportier performance. You can
use this for sport driving or when
climbing hills to stay in gear longer
or to downshift for more power or
engine braking.
The transmission will only allow
you to shift into gears appropriate
for the vehicle speed and engine
revolutions per minute (rpm):
.The transmission will not allow
shifting to the next higher gear if
the vehicle speed or engine rpm
is too low.
.The transmission will not allow
shifting to the next lower gear if
the vehicle speed or engine rpm
is too high.Second Gear Start Feature
When accelerating the vehicle
from a stop in snowy and icy
conditions, you may want to shift
into 2 (Second) gear. A higher gear
allows you to gain more traction on
slippery surfaces.
With the DSC feature, the vehicle
can be set to pull away in
2 (Second) gear.
1. Move the shift lever from
D (Drive) to M (Manual Mode).
2. With the vehicle stopped, press the (+) end of the button to
select 2 (Second) gear. The
vehicle will start from a stop
position in 2 (Second) gear.
3. Once moving, select the desired drive gear.
Brakes
Antilock Brake
System (ABS)
This vehicle has the Antilock Brake
System (ABS), an advanced
electronic braking system that helps
prevent a braking skid.
When the engine is started and the
vehicle begins to drive away, ABS
checks itself. A momentary motor or
clicking noise might be heard while
this test is going on, and it might
even be noticed that the brake
pedal moves a little. This is normal.
If there is a problem with ABS, this
warning light stays on. See Antilock
Brake System (ABS) Warning Light
on page 5‑18.
Page 324 of 436
Black plate (58,1)Chevrolet Malibu Owner Manual - 2013 - CRC - 6/6/12
10-58 Vehicle Care
The TPMS sensor matching
process is:
1. Set the parking brake.
2. Turn the ignition to ON/RUN withthe engine off or place the
vehicle power mode in ON/RUN/
START. See Ignition Positions
(Key Access) on page 9‑14 or
Ignition Positions (Keyless
Access) on page 9‑16.
3. Use the MENU button to select the Vehicle Information Menu in
the Driver Information
Center (DIC).
4. Use the thumbwheel to scroll to the Tire Pressure Menu Item
screen.
5. Press the SET/CLR button to begin the sensor matching
process.
A message asking if the process
should begin should appear. 6. Press the SET/CLR button again
to confirm the selection.
The horn sounds twice to signal
the receiver is in relearn mode
and the TIRE LEARNING
ACTIVE message displays on
the DIC screen.
7. Start with the driver side front tire.
8. Place the relearn tool against the tire sidewall, near the valve
stem. Then press the button to
activate the TPMS sensor.
A horn chirp confirms that the
sensor identification code has
been matched to this tire and
wheel position.
9. Proceed to the passenger side front tire, and repeat the
procedure in Step 8.
10. Proceed to the passenger side rear tire, and repeat the
procedure in Step 8. 11. Proceed to the driver side rear
tire, and repeat the procedure
in Step 8. The horn sounds two
times to indicate the sensor
identification code has been
matched to the driver side rear
tire, and the TPMS sensor
matching process is no longer
active. The TIRE LEARNING
ACTIVE message on the DIC
display screen goes off.
12. Turn the ignition to LOCK/OFF or press STOP to turn the
ignition off.
13. Set all four tires to the recommended air pressure
level as indicated on the Tire
and Loading Information label.
Tire Inspection
We recommend that the tires,
including the spare tire, if the
vehicle has one, be inspected
for signs of wear or damage at
least once a month.
Page 356 of 436
Black plate (90,1)Chevrolet Malibu Owner Manual - 2013 - CRC - 6/6/12
10-90 Vehicle Care
Stop as soon as possible and check
that the spare tire is correctly
inflated after being installed on the
vehicle. The compact spare tire is
designed for temporary use only.
The vehicle will perform differently
with the spare tire installed and it is
recommended that the vehicle
speed be limited to 80 km/h
(50 mph). To conserve the tread of
the spare tire, have the standard tire
repaired or replaced as soon as
convenient and return the spare tire
to the storage area.Notice:
When the compact spare
is installed, do not take the
vehicle through an automatic
car wash with guide rails. The
compact spare can get caught on
the rails which can damage the
tire, wheel, and other parts of the
vehicle.
Do not use the compact spare on
other vehicles.
Do not mix the compact spare tire or
wheel with other wheels or tires.
They will not fit. Keep the spare tire
and its wheel together.
Notice: Tire chains will not fit
the compact spare. Using them
can damage the vehicle and the
chains. Do not use tire chains on
the compact spare.Jump Starting
Jump Starting (On-board
with eAssist Only)
If the vehicle fails to crank, it may
be jump started by using the eAssist
battery to charge the 12-volt battery.
Use the following procedure to
activate the on-board jump start
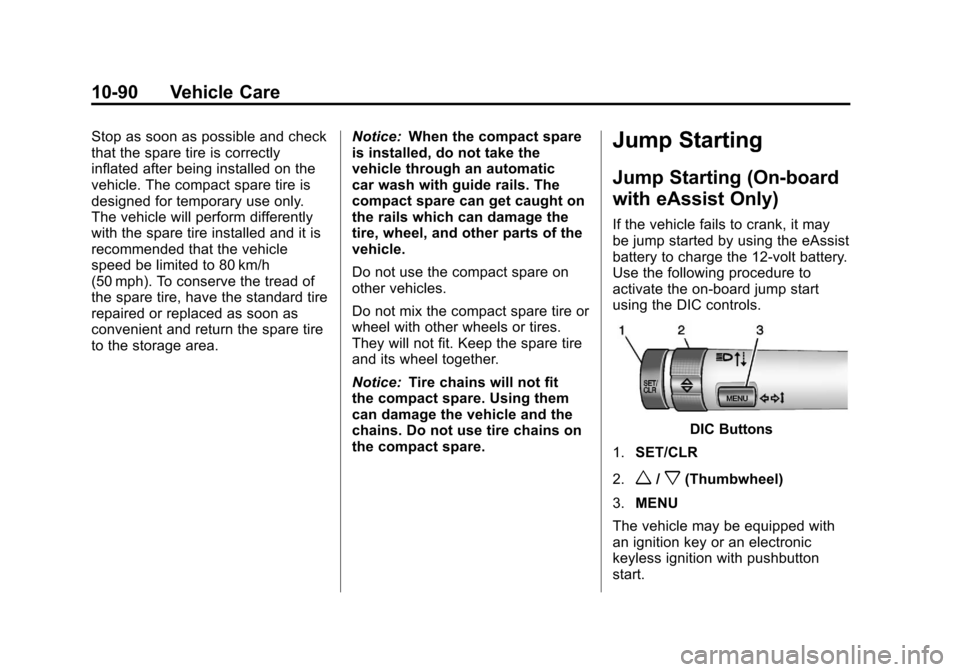
using the DIC controls.
DIC Buttons
1. SET/CLR
2.
w/x(Thumbwheel)
3. MENU
The vehicle may be equipped with
an ignition key or an electronic
keyless ignition with pushbutton
start.
Page 357 of 436
Black plate (91,1)Chevrolet Malibu Owner Manual - 2013 - CRC - 6/6/12
Vehicle Care 10-91
Key Access
Place the ignition key in the ON/
RUN position and proceed as
follows:
1. Press MENU (3) on the turnsignal lever until Vehicle
Information Menu is displayed.
Use
w/x(Thumbwheel) (2) to
scroll through the menu items
until Jump Start is displayed.
2. Press SET/CLR (1) to activate the jump start.
3. The system will then ask for confirmation. If yes is selected,
the jump start will begin and the
display will show JUMP START
ACTIVE WAIT TO START.
4. When the jump start is complete, the display will show JUMP
START COMPLETE ATTEMPT
START. Keyless Access
With the brake pedal not applied,
press and hold the ENGINE
START/STOP button for more than
five seconds. This will place the
vehicle in the Service Only Mode.
Proceed as follows:
1. Press MENU (3) on the turn
signal lever until Vehicle
Information Menu is displayed.
Use
w/x(Thumbwheel) (2) to
scroll through the menu items
until Jump Start is displayed.
2. Press SET/CLR (1) to activate the jump start.
3. The system will then ask for confirmation. If yes is selected,
the jump start will begin and the
display will show JUMP START
ACTIVE WAIT TO START.
4. When the jump start is complete, the display will show JUMP
START COMPLETE ATTEMPT
START. If the vehicle is started, the
on-board jump start function will
be automatically disabled. If the
vehicle cranks but does not start,
the procedure may be repeated
again. If the vehicle start is still
unsuccessful, the jump start can be
attempted using the following jump
starting procedure under
“Jump
Starting (with or without eAssist).”
On-board jump starting may be
unavailable due to the 12-volt
battery charge level, the eAssist
battery charge level, power
capability, or an issue with the
eAssist system. In these cases, the
display will not be available because
of the power issue, or the DIC will
display JUMP START DISABLED
SEE OWNERS MANUAL.