start stop button CHEVROLET MALIBU 2013 8.G Owners Manual
[x] Cancel search | Manufacturer: CHEVROLET, Model Year: 2013, Model line: MALIBU, Model: CHEVROLET MALIBU 2013 8.GPages: 436, PDF Size: 7.43 MB
Page 31 of 436
Black plate (25,1)Chevrolet Malibu Owner Manual - 2013 - CRC - 6/6/12
In Brief 1-25
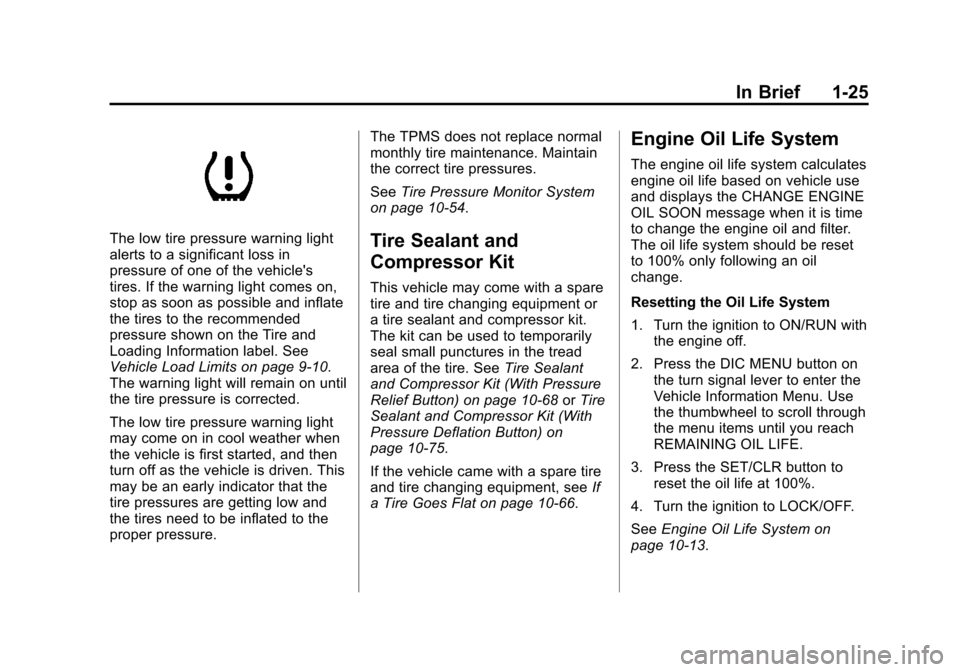
The low tire pressure warning light
alerts to a significant loss in
pressure of one of the vehicle's
tires. If the warning light comes on,
stop as soon as possible and inflate
the tires to the recommended
pressure shown on the Tire and
Loading Information label. See
Vehicle Load Limits on page 9‑10.
The warning light will remain on until
the tire pressure is corrected.
The low tire pressure warning light
may come on in cool weather when
the vehicle is first started, and then
turn off as the vehicle is driven. This
may be an early indicator that the
tire pressures are getting low and
the tires need to be inflated to the
proper pressure.The TPMS does not replace normal
monthly tire maintenance. Maintain
the correct tire pressures.
See
Tire Pressure Monitor System
on page 10‑54.Tire Sealant and
Compressor Kit
This vehicle may come with a spare
tire and tire changing equipment or
a tire sealant and compressor kit.
The kit can be used to temporarily
seal small punctures in the tread
area of the tire. See Tire Sealant
and Compressor Kit (With Pressure
Relief Button) on page 10‑68 orTire
Sealant and Compressor Kit (With
Pressure Deflation Button) on
page 10‑75.
If the vehicle came with a spare tire
and tire changing equipment, see If
a Tire Goes Flat on page 10‑66.
Engine Oil Life System
The engine oil life system calculates
engine oil life based on vehicle use
and displays the CHANGE ENGINE
OIL SOON message when it is time
to change the engine oil and filter.
The oil life system should be reset
to 100% only following an oil
change.
Resetting the Oil Life System
1. Turn the ignition to ON/RUN with the engine off.
2. Press the DIC MENU button on the turn signal lever to enter the
Vehicle Information Menu. Use
the thumbwheel to scroll through
the menu items until you reach
REMAINING OIL LIFE.
3. Press the SET/CLR button to reset the oil life at 100%.
4. Turn the ignition to LOCK/OFF.
See Engine Oil Life System on
page 10‑13.
Page 37 of 436
Black plate (5,1)Chevrolet Malibu Owner Manual - 2013 - CRC - 6/6/12
Keys, Doors, and Windows 2-5
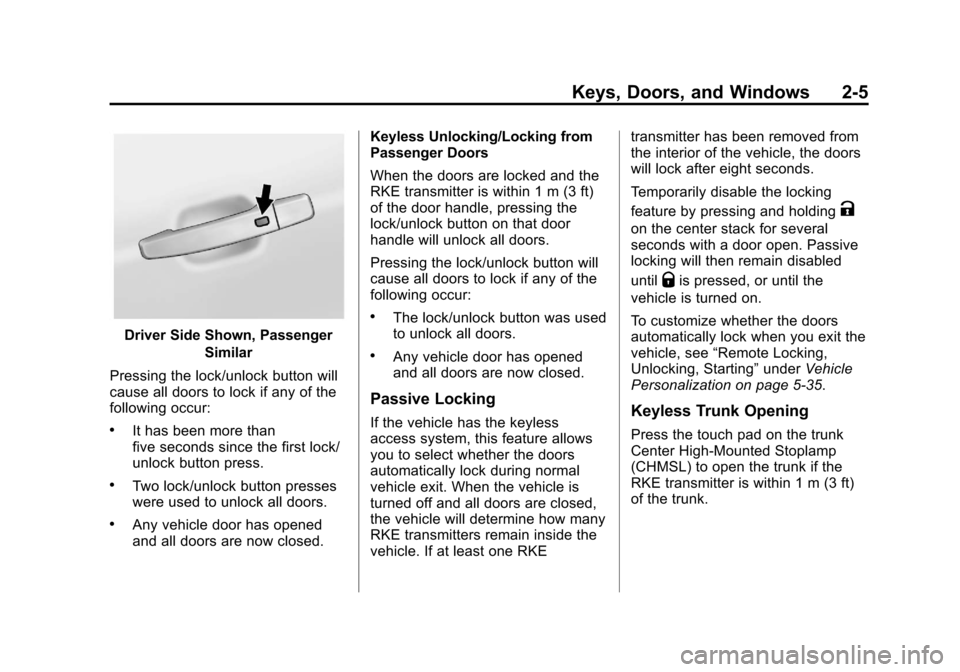
Driver Side Shown, PassengerSimilar
Pressing the lock/unlock button will
cause all doors to lock if any of the
following occur:
.It has been more than
five seconds since the first lock/
unlock button press.
.Two lock/unlock button presses
were used to unlock all doors.
.Any vehicle door has opened
and all doors are now closed. Keyless Unlocking/Locking from
Passenger Doors
When the doors are locked and the
RKE transmitter is within 1 m (3 ft)
of the door handle, pressing the
lock/unlock button on that door
handle will unlock all doors.
Pressing the lock/unlock button will
cause all doors to lock if any of the
following occur:
.The lock/unlock button was used
to unlock all doors.
.Any vehicle door has opened
and all doors are now closed.
Passive Locking
If the vehicle has the keyless
access system, this feature allows
you to select whether the doors
automatically lock during normal
vehicle exit. When the vehicle is
turned off and all doors are closed,
the vehicle will determine how many
RKE transmitters remain inside the
vehicle. If at least one RKE transmitter has been removed from
the interior of the vehicle, the doors
will lock after eight seconds.
Temporarily disable the locking
feature by pressing and holding
K
on the center stack for several
seconds with a door open. Passive
locking will then remain disabled
until
Qis pressed, or until the
vehicle is turned on.
To customize whether the doors
automatically lock when you exit the
vehicle, see “Remote Locking,
Unlocking, Starting” underVehicle
Personalization on page 5‑35.
Keyless Trunk Opening
Press the touch pad on the trunk
Center High-Mounted Stoplamp
(CHMSL) to open the trunk if the
RKE transmitter is within 1 m (3 ft)
of the trunk.
Page 58 of 436
Black plate (6,1)Chevrolet Malibu Owner Manual - 2013 - CRC - 6/6/12
3-6 Seats and Restraints
Memory Seats
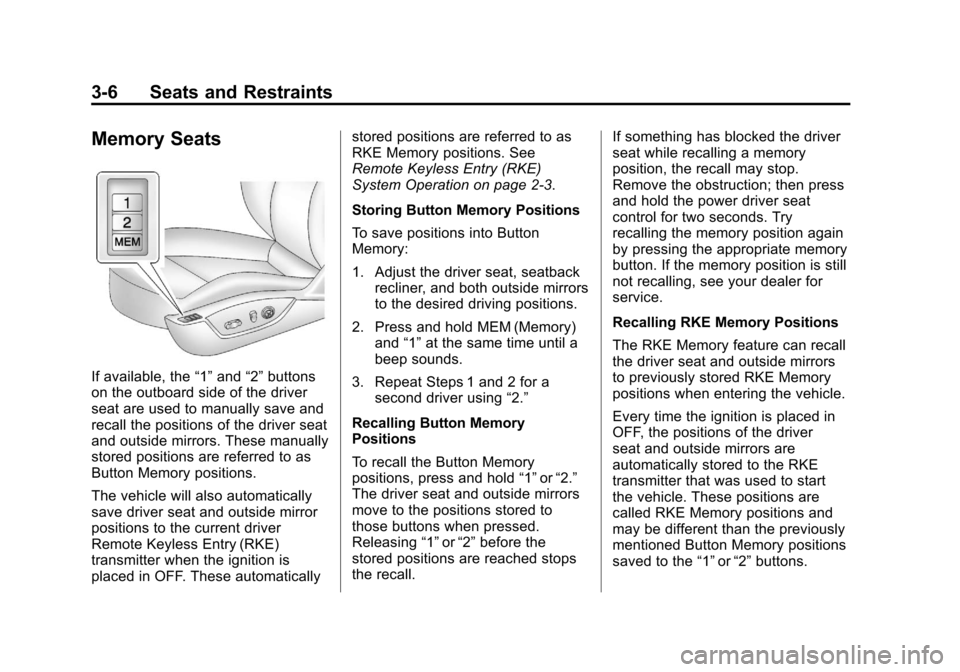
If available, the“1”and “2”buttons
on the outboard side of the driver
seat are used to manually save and
recall the positions of the driver seat
and outside mirrors. These manually
stored positions are referred to as
Button Memory positions.
The vehicle will also automatically
save driver seat and outside mirror
positions to the current driver
Remote Keyless Entry (RKE)
transmitter when the ignition is
placed in OFF. These automatically stored positions are referred to as
RKE Memory positions. See
Remote Keyless Entry (RKE)
System Operation on page 2‑3.
Storing Button Memory Positions
To save positions into Button
Memory:
1. Adjust the driver seat, seatback
recliner, and both outside mirrors
to the desired driving positions.
2. Press and hold MEM (Memory) and “1”at the same time until a
beep sounds.
3. Repeat Steps 1 and 2 for a second driver using “2.”
Recalling Button Memory
Positions
To recall the Button Memory
positions, press and hold “1”or“2.”
The driver seat and outside mirrors
move to the positions stored to
those buttons when pressed.
Releasing “1”or“2” before the
stored positions are reached stops
the recall. If something has blocked the driver
seat while recalling a memory
position, the recall may stop.
Remove the obstruction; then press
and hold the power driver seat
control for two seconds. Try
recalling the memory position again
by pressing the appropriate memory
button. If the memory position is still
not recalling, see your dealer for
service.
Recalling RKE Memory Positions
The RKE Memory feature can recall
the driver seat and outside mirrors
to previously stored RKE Memory
positions when entering the vehicle.
Every time the ignition is placed in
OFF, the positions of the driver
seat and outside mirrors are
automatically stored to the RKE
transmitter that was used to start
the vehicle. These positions are
called RKE Memory positions and
may be different than the previously
mentioned Button Memory positions
saved to the
“1”or“2” buttons.
Page 141 of 436
Black plate (33,1)Chevrolet Malibu Owner Manual - 2013 - CRC - 6/6/12
Instruments and Controls 5-33
Starting the Vehicle
Messages
JUMP START ACTIVE WAIT TO
START
This message displays while
performing an on-board jump start
of the vehicle. See“Jump Starting
(On-board with eAssist Only).”
JUMP START COMPLETE
ATTEMPT START
This message displays while
performing an on-board jump start
of the vehicle. See “Jump Starting
(On-board with eAssist Only).”
JUMP START DISABLED SEE
OWNERS MANUAL
This message displays if there is a
problem with the on-board jump
start system, or the 12 volt battery is
too low to perform an on-board jump
start. Try using jumper cables and
performing a normal jump start. Take the vehicle to your dealer for
service to if this message continues
to be displayed.
Tire Messages
TIRE PRESSURE LOW ADD
AIR TO TIRE
On vehicles with the Tire Pressure
Monitor System (TPMS), this
message displays when the
pressure in one or more of the
vehicle's tires is low.
The low tire pressure warning light
will also come on. See
Tire
Pressure Light on page 5‑21.
If a tire pressure message appears
on the DIC, stop as soon as you
can. Inflate the tires by adding air
until the tire pressure is equal to the
values shown on the Tire and
Loading Information label. See Tires
on page 10‑44, Vehicle Load Limits
on page 9‑10, and Tire Pressure on
page 10‑52. You can receive more than one tire
pressure message at a time. To
read the other messages that may
have been sent at the same time,
press the SET/CLR button. The DIC
also shows the tire pressure values.
See
Driver Information Center (DIC)
on page 5‑24.SERVICE TIRE MONITOR
SYSTEM
This message displays if there is a
problem with the Tire Pressure
Monitor System (TPMS). See Tire
Pressure Monitor Operation on
page 10‑55.
TIRE LEARNING ACTIVE
This message displays when the
system is learning new tires. See
Tire Pressure Monitor Operation on
page 10‑55.
Page 192 of 436
Black plate (32,1)Chevrolet Malibu Owner Manual - 2013 - CRC - 6/6/12
7-32 Infotainment System
©SEEK (Previous/Reverse):
1. Press to seek to the beginning of the current or previous track.
If the track has been playing for
less than five seconds, the
previous track plays. If playing
longer than five seconds, the
current track restarts.
2. Press and hold to reverse quickly through playback.
3. Release to return to playing speed. Elapsed time displays.
SEEK
¨(Next/Forward):
1. Press to seek to the next track.
2. Press and hold to advance quickly through playback.
Release to return to playing
speed. Elapsed time displays.
USB Menu
Press any of the following buttons
on the USB Menu:
Shuffle Songs: Press to play the
tracks randomly. Press again to stop
shuffle. Playlists:
Press to view the
playlists stored on the USB. Select
a playlist to view the list of all songs
in that playlist. There might be a
delay before the list displays. Select
a song from the list to begin
playback.
Artists: Press to view the list of
artists stored on the USB. Select an
artist name to view a list of all
albums by the artist. There might be
a delay before the list displays. To
select a song, touch All Songs then
select a song or touch an album and
select a song from the list to begin
playback.
Albums: Press to view the albums
on the USB. Select the album to
view a list of all songs on the album.
There might be a delay before the
list displays. Select a song from the
list to begin playback.
Song Titles: Press to display a list
of all songs on the USB. Songs are
displayed as stored on the disc. There might be a delay before the
list displays. To begin playback,
select a song from the list.
Genres:
Press to view the genres
on the USB. Select a genre to view
a list of all songs of that genre.
Select a song from the list to begin
playback.
Folders: Press to open a folder list
to access the files within the folder
structure.
File System and Naming
The song titles, artists, albums, and
genres are taken from the file's ID3
tag and are only displayed if present
in the tag. If a song title is not
present in the ID3 tag, the radio
displays the file name as the
track name.
Page 211 of 436

Black plate (5,1)Chevrolet Malibu Owner Manual - 2013 - CRC - 6/6/12
Climate Controls 8-5
[(Floor):Air is directed to the
floor outlets.
-(Defog): Air is directed to the
windshield and floor outlets to clear
the windows of fog or moisture.
0(Defrost): Press to clear the
windshield of fog or frost more
quickly. Air is directed to the
windshield and side window outlets.
For best results, clear all snow and
ice from the windshield before
defrosting.
#(Air Conditioning (For
Non-eAssist Vehicles)): Press to
turn the air conditioning on or off.
If the fan is turned off or the outside
temperature falls below freezing, the
air conditioner will not run and the
indicator light turns off.
Press AUTO to return to automatic
operation and the air conditioner
runs as needed. When the indicator
light is on, the air conditioner runs
automatically to cool the air inside
the vehicle or to dry the air needed
to defog the windshield faster.
#(Comfort/Eco Air Conditioning
(For eAssist Vehicles)): Press to
cycle between the off, comfort, and
economy air conditioning modes.
The indicator will be lit in comfort
and economy modes and turns off
when there is no A/C function. If the
fan is turned off or the outside
temperature falls below freezing, the
air conditioner will not run and the
indicator light turns off.
For eco a/c, press
#. The indicator
will turn green. This setting
balances fuel economy and air
conditioning comfort. In warm
weather conditions, auto stops may
occur more frequently and the
vehicle interior may be warmer as
compared to the comfort air
conditioning. This setting allows
higher humidity inside the vehicle
and window fogging before the
engine restarts. Pressing the
0button during an
auto stop will restart the engine to
prevent window fogging. To reach
comfort levels quickly during an
auto stop, the engine will restart if
the air conditioner is off and AUTO
or
#is selected.
If temperature controls are adjusted
cooler by more than 1°C (1°F)
during an auto stop, the engine will
restart to ensure that comfort is
reached.
For comfort a/c, press
#again.
The indicator will turn amber.
Pressing this button cancels
automatic air conditioning and turns
off the air conditioner. Press AUTO
to return to automatic operation
and the air conditioner runs
automatically as needed. When
the indicator light is on, the air
conditioner runs automatically to
cool the air inside the vehicle or to
dry the air needed to defog the
windshield faster.
Page 232 of 436
Black plate (16,1)Chevrolet Malibu Owner Manual - 2013 - CRC - 6/6/12
9-16 Driving and Operating
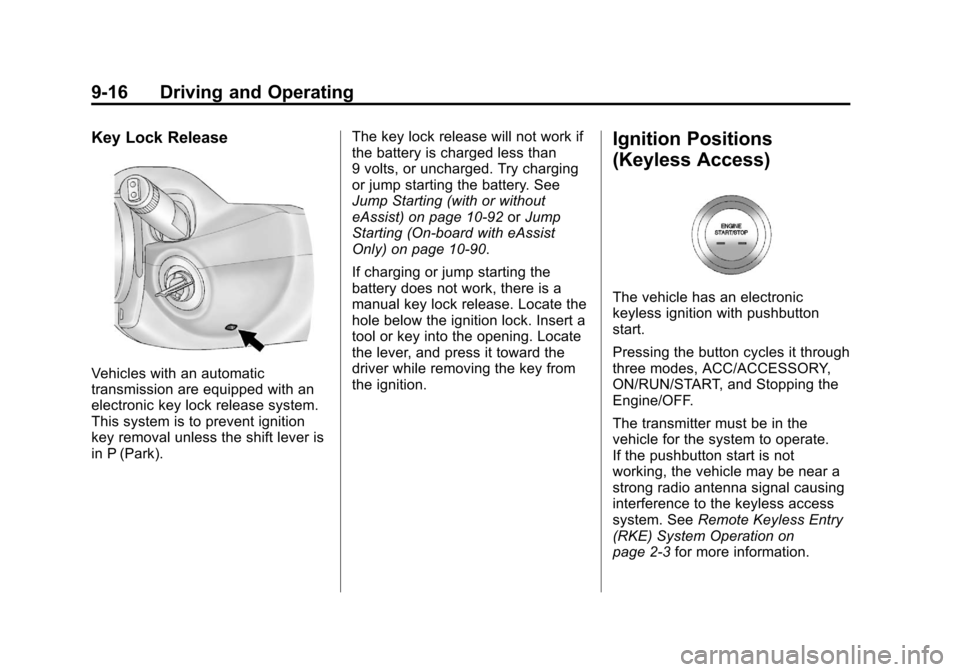
Key Lock Release
Vehicles with an automatic
transmission are equipped with an
electronic key lock release system.
This system is to prevent ignition
key removal unless the shift lever is
in P (Park).The key lock release will not work if
the battery is charged less than
9 volts, or uncharged. Try charging
or jump starting the battery. See
Jump Starting (with or without
eAssist) on page 10‑92
orJump
Starting (On-board with eAssist
Only) on page 10‑90.
If charging or jump starting the
battery does not work, there is a
manual key lock release. Locate the
hole below the ignition lock. Insert a
tool or key into the opening. Locate
the lever, and press it toward the
driver while removing the key from
the ignition.
Ignition Positions
(Keyless Access)
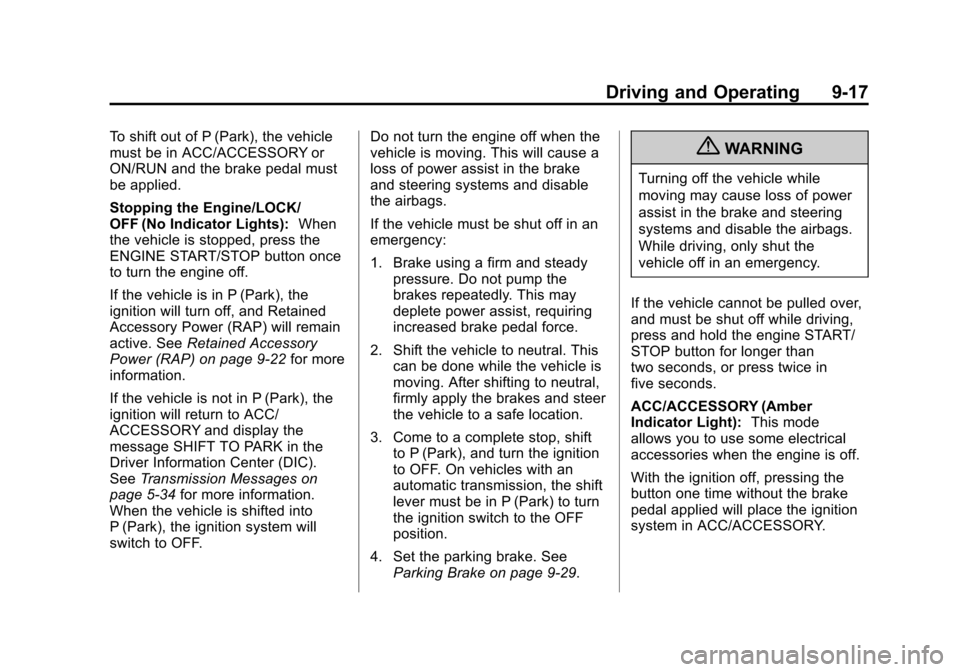
The vehicle has an electronic
keyless ignition with pushbutton
start.
Pressing the button cycles it through
three modes, ACC/ACCESSORY,
ON/RUN/START, and Stopping the
Engine/OFF.
The transmitter must be in the
vehicle for the system to operate.
If the pushbutton start is not
working, the vehicle may be near a
strong radio antenna signal causing
interference to the keyless access
system. See Remote Keyless Entry
(RKE) System Operation on
page 2‑3 for more information.
Page 233 of 436
Black plate (17,1)Chevrolet Malibu Owner Manual - 2013 - CRC - 6/6/12
Driving and Operating 9-17
To shift out of P (Park), the vehicle
must be in ACC/ACCESSORY or
ON/RUN and the brake pedal must
be applied.
Stopping the Engine/LOCK/
OFF (No Indicator Lights):When
the vehicle is stopped, press the
ENGINE START/STOP button once
to turn the engine off.
If the vehicle is in P (Park), the
ignition will turn off, and Retained
Accessory Power (RAP) will remain
active. See Retained Accessory
Power (RAP) on page 9‑22 for more
information.
If the vehicle is not in P (Park), the
ignition will return to ACC/
ACCESSORY and display the
message SHIFT TO PARK in the
Driver Information Center (DIC).
See Transmission Messages on
page 5‑34 for more information.
When the vehicle is shifted into
P (Park), the ignition system will
switch to OFF. Do not turn the engine off when the
vehicle is moving. This will cause a
loss of power assist in the brake
and steering systems and disable
the airbags.
If the vehicle must be shut off in an
emergency:
1. Brake using a firm and steady
pressure. Do not pump the
brakes repeatedly. This may
deplete power assist, requiring
increased brake pedal force.
2. Shift the vehicle to neutral. This can be done while the vehicle is
moving. After shifting to neutral,
firmly apply the brakes and steer
the vehicle to a safe location.
3. Come to a complete stop, shift to P (Park), and turn the ignition
to OFF. On vehicles with an
automatic transmission, the shift
lever must be in P (Park) to turn
the ignition switch to the OFF
position.
4. Set the parking brake. See Parking Brake on page 9‑29.{WARNING
Turning off the vehicle while
moving may cause loss of power
assist in the brake and steering
systems and disable the airbags.
While driving, only shut the
vehicle off in an emergency.
If the vehicle cannot be pulled over,
and must be shut off while driving,
press and hold the engine START/
STOP button for longer than
two seconds, or press twice in
five seconds.
ACC/ACCESSORY (Amber
Indicator Light): This mode
allows you to use some electrical
accessories when the engine is off.
With the ignition off, pressing the
button one time without the brake
pedal applied will place the ignition
system in ACC/ACCESSORY.
Page 234 of 436
Black plate (18,1)Chevrolet Malibu Owner Manual - 2013 - CRC - 6/6/12
9-18 Driving and Operating
The ignition will switch from ACC/
ACCESSORY to OFF after
five minutes to prevent battery
run down.
ON/RUN/START (Green Indicator
Light):This mode is for driving and
starting. With the ignition off, and
the brake pedal applied, pressing
the button once will place the
ignition system in ON/RUN/START.
Once engine cranking begins,
release the button. Engine cranking
will continue until the engine starts.
See Starting the Engine on
page 9‑18 for more information. The
ignition will then remain in ON/RUN.
Service Only Mode
This power mode is available for
service and diagnostics, and to
verify the proper operation of the
malfunction indicator lamp as may
be required for emission inspection
purposes. With the vehicle off, and
the brake pedal not applied,
pressing and holding the button for
more than five seconds will place
the vehicle in Service Only Mode. The instruments and audio systems
will operate as they do in ON/RUN,
but the vehicle will not be able to be
driven. The engine will not start in
Service Only Mode. Push the button
again to turn the vehicle off.
Starting the Engine
Move the shift lever to P (Park) or
N (Neutral). The engine will not start
in any other position. To restart the
engine when the vehicle is already
moving, use N (Neutral) only.
Notice:
Do not try to shift to
P (Park) if the vehicle is moving.
If you do, you could damage the
transmission. Shift to P (Park)
only when the vehicle is stopped.
Notice: If you add electrical parts
or accessories, you could change
the way the engine operates. Any
resulting damage would not be
covered by the vehicle warranty.
See Add-On Electrical Equipment
on page 9‑50. Starting Procedure
1. With your foot off the accelerator
pedal, turn the ignition key to
START. When the engine starts,
let go of the ignition.
The idle speed will go down as
your engine gets warm. Do not
race the engine immediately
after starting it. Operate the
engine and transmission gently
to allow the oil to warm up and
lubricate all moving parts.
The vehicle has a
Computer-Controlled Cranking
System. This feature assists in
starting the engine and protects
components. If the ignition key is
turned to the START position,
and then released when the
engine begins cranking, the
engine will continue cranking for
a few seconds or until the
vehicle starts. If the engine does
not start and the key is held in
START for many seconds,
cranking will be stopped after
15 seconds to prevent cranking
Page 235 of 436
Black plate (19,1)Chevrolet Malibu Owner Manual - 2013 - CRC - 6/6/12
Driving and Operating 9-19
motor damage. To prevent gear
damage, this system also
prevents cranking if the engine
is already running. Engine
cranking can be stopped by
turning the ignition switch to
ACC/ACCESSORY or
LOCK/OFF.
Notice: Cranking the engine for
long periods of time, by returning
the key to the START position
immediately after cranking has
ended, can overheat and damage
the cranking motor, and drain the
battery. Wait at least 15 seconds
between each try, to let the
cranking motor cool down.
2. If the engine does not start after five to 10 seconds, especially in
very cold weather (below −18°C
or 0°F), it could be flooded with
too much gasoline. Try pushing
the accelerator pedal all the way
to the floor and holding it there
as you hold the key in START,
or press the START button, for
up to a maximum of 15 seconds.
Wait at least 15 seconds between each try, to allow the
cranking motor to cool down.
When the engine starts, let go of
the key or button, and the
accelerator. If the vehicle starts
briefly but then stops again, do
the same thing. This clears the
extra gasoline from the engine.
Do not race the engine
immediately after starting it.
Operate the engine and
transmission gently until the oil
warms up and lubricates all
moving parts.
eAssist Automatic Engine
Start/Stop
{WARNING
Exiting the vehicle without first
shifting into P (Park) may cause
the vehicle to move. You or others
may be injured. Because the
vehicle has the automatic engine
start/stop feature, the vehicle's
engine might seem to be shut off;
(Continued)
WARNING (CONTINUED)
however, once the brake pedal is
released, the engine will start up
again.
Shift to P (Park) and turn the
ignition to LOCK/OFF, before
exiting the vehicle.
eAssist vehicles have an automatic
engine start/stop feature. After the
engine is started and has reached
operating temperature, the auto
stop feature may cause the engine
to turn off when the brakes are
applied and the vehicle comes to a
complete stop. The vehicle may
remain in auto stop for up to
two minutes. When the brake is
released or the accelerator pedal
applied, the engine will restart. The
engine will continue to run until the
next auto stop.