phone CHEVROLET MALIBU 2013 8.G Owners Manual
[x] Cancel search | Manufacturer: CHEVROLET, Model Year: 2013, Model line: MALIBU, Model: CHEVROLET MALIBU 2013 8.GPages: 436, PDF Size: 7.43 MB
Page 1 of 436

Black plate (1,1)Chevrolet Malibu Owner Manual - 2013 - CRC - 6/6/12
2013 Chevrolet Malibu Owner ManualM
In Brief. . . . . . . . . . . . . . . . . . . . . . . . 1-1
Instrument Panel . . . . . . . . . . . . . . 1-2
Initial Drive Information . . . . . . . . 1-4
Vehicle Features . . . . . . . . . . . . . 1-17
eAssist Features . . . . . . . . . . . . . 1-22
Performance and
Maintenance . . . . . . . . . . . . . . . . 1-24
Keys, Doors, and Windows . . . . . . . . . . . . . . . . . . . . 2-1
Keys and Locks . . . . . . . . . . . . . . . 2-2
Doors . . . . . . . . . . . . . . . . . . . . . . . . . 2-11
Vehicle Security . . . . . . . . . . . . . . 2-13
Exterior Mirrors . . . . . . . . . . . . . . . 2-15
Interior Mirrors . . . . . . . . . . . . . . . . 2-16
Windows . . . . . . . . . . . . . . . . . . . . . 2-17
Roof . . . . . . . . . . . . . . . . . . . . . . . . . . 2-19
Seats and Restraints . . . . . . . . . 3-1
Head Restraints . . . . . . . . . . . . . . . 3-2
Front Seats . . . . . . . . . . . . . . . . . . . . 3-3
Rear Seats . . . . . . . . . . . . . . . . . . . . 3-9
Safety Belts . . . . . . . . . . . . . . . . . . 3-11
Airbag System . . . . . . . . . . . . . . . . 3-19
Child Restraints . . . . . . . . . . . . . . 3-32 Storage
. . . . . . . . . . . . . . . . . . . . . . . 4-1
Storage Compartments . . . . . . . . 4-1
Additional Storage Features . . . 4-3
Instruments and Controls . . . . 5-1
Controls . . . . . . . . . . . . . . . . . . . . . . . 5-2
Warning Lights, Gauges, and
Indicators . . . . . . . . . . . . . . . . . . . . 5-7
Information Displays . . . . . . . . . . 5-24
Vehicle Messages . . . . . . . . . . . . 5-28
Vehicle Personalization . . . . . . . 5-35
Universal Remote System . . . . 5-40
Lighting . . . . . . . . . . . . . . . . . . . . . . . 6-1
Exterior Lighting . . . . . . . . . . . . . . . 6-1
Interior Lighting . . . . . . . . . . . . . . . . 6-5
Lighting Features . . . . . . . . . . . . . . 6-6
Infotainment System . . . . . . . . . 7-1
Introduction . . . . . . . . . . . . . . . . . . . . 7-1
Radio . . . . . . . . . . . . . . . . . . . . . . . . . 7-14
Audio Players . . . . . . . . . . . . . . . . 7-22
Phone . . . . . . . . . . . . . . . . . . . . . . . . 7-35 Climate Controls
. . . . . . . . . . . . . 8-1
Climate Control Systems . . . . . . 8-1
Air Vents . . . . . . . . . . . . . . . . . . . . . . . 8-7
Maintenance . . . . . . . . . . . . . . . . . . . 8-8
Driving and Operating . . . . . . . . 9-1
Driving Information . . . . . . . . . . . . . 9-2
Starting and Operating . . . . . . . 9-14
Engine Exhaust . . . . . . . . . . . . . . 9-25
Automatic Transmission . . . . . . 9-26
Brakes . . . . . . . . . . . . . . . . . . . . . . . 9-28
Ride Control Systems . . . . . . . . 9-32
Cruise Control . . . . . . . . . . . . . . . . 9-34
Object Detection Systems . . . . 9-37
Fuel . . . . . . . . . . . . . . . . . . . . . . . . . . 9-44
Towing . . . . . . . . . . . . . . . . . . . . . . . 9-50
Conversions and Add-Ons . . . 9-50
Vehicle Care . . . . . . . . . . . . . . . . . 10-1
General Information . . . . . . . . . . 10-2
Vehicle Checks . . . . . . . . . . . . . . . 10-4
Headlamp Aiming . . . . . . . . . . . 10-28
Bulb Replacement . . . . . . . . . . 10-28
Electrical System . . . . . . . . . . . . 10-37
Page 23 of 436
Black plate (17,1)Chevrolet Malibu Owner Manual - 2013 - CRC - 6/6/12
In Brief 1-17
Vehicle Features
Radio(s)
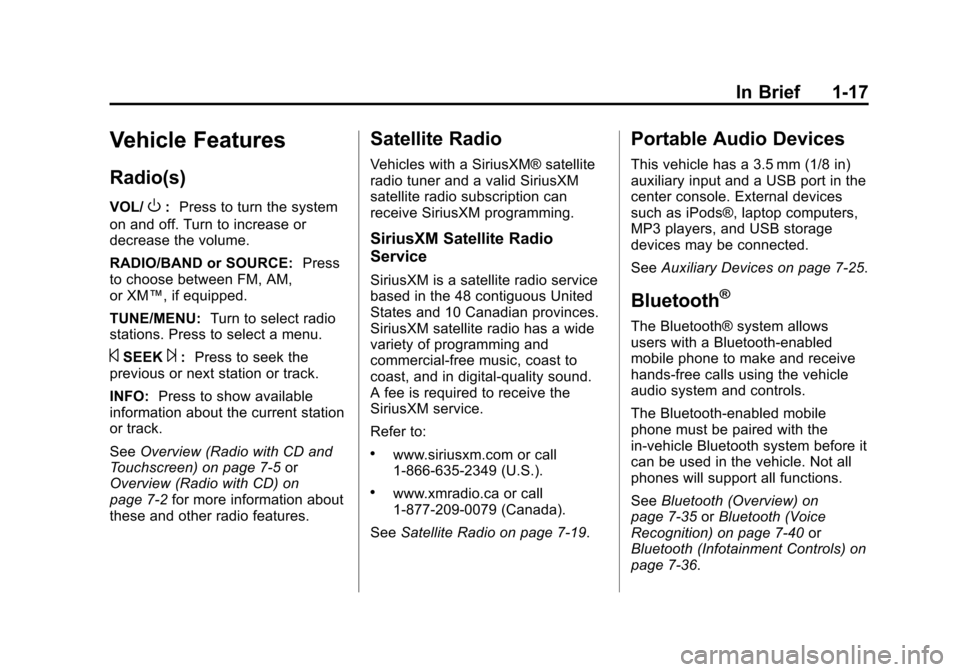
VOL/O:Press to turn the system
on and off. Turn to increase or
decrease the volume.
RADIO/BAND or SOURCE: Press
to choose between FM, AM,
or XM™, if equipped.
TUNE/MENU: Turn to select radio
stations. Press to select a menu.
©SEEK¨: Press to seek the
previous or next station or track.
INFO: Press to show available
information about the current station
or track.
See Overview (Radio with CD and
Touchscreen) on page 7‑5 or
Overview (Radio with CD) on
page 7‑2 for more information about
these and other radio features.
Satellite Radio
Vehicles with a SiriusXM® satellite
radio tuner and a valid SiriusXM
satellite radio subscription can
receive SiriusXM programming.
SiriusXM Satellite Radio
Service
SiriusXM is a satellite radio service
based in the 48 contiguous United
States and 10 Canadian provinces.
SiriusXM satellite radio has a wide
variety of programming and
commercial-free music, coast to
coast, and in digital-quality sound.
A fee is required to receive the
SiriusXM service.
Refer to:
.www.siriusxm.com or call
1-866-635-2349 (U.S.).
.www.xmradio.ca or call
1-877-209-0079 (Canada).
See Satellite Radio on page 7‑19.
Portable Audio Devices
This vehicle has a 3.5 mm (1/8 in)
auxiliary input and a USB port in the
center console. External devices
such as iPods®, laptop computers,
MP3 players, and USB storage
devices may be connected.
SeeAuxiliary Devices on page 7‑25.
Bluetooth®
The Bluetooth® system allows
users with a Bluetooth-enabled
mobile phone to make and receive
hands-free calls using the vehicle
audio system and controls.
The Bluetooth-enabled mobile
phone must be paired with the
in-vehicle Bluetooth system before it
can be used in the vehicle. Not all
phones will support all functions.
SeeBluetooth (Overview) on
page 7‑35 orBluetooth (Voice
Recognition) on page 7‑40 or
Bluetooth (Infotainment Controls) on
page 7‑36.
Page 24 of 436
Black plate (18,1)Chevrolet Malibu Owner Manual - 2013 - CRC - 6/6/12
1-18 In Brief
Steering Wheel Controls
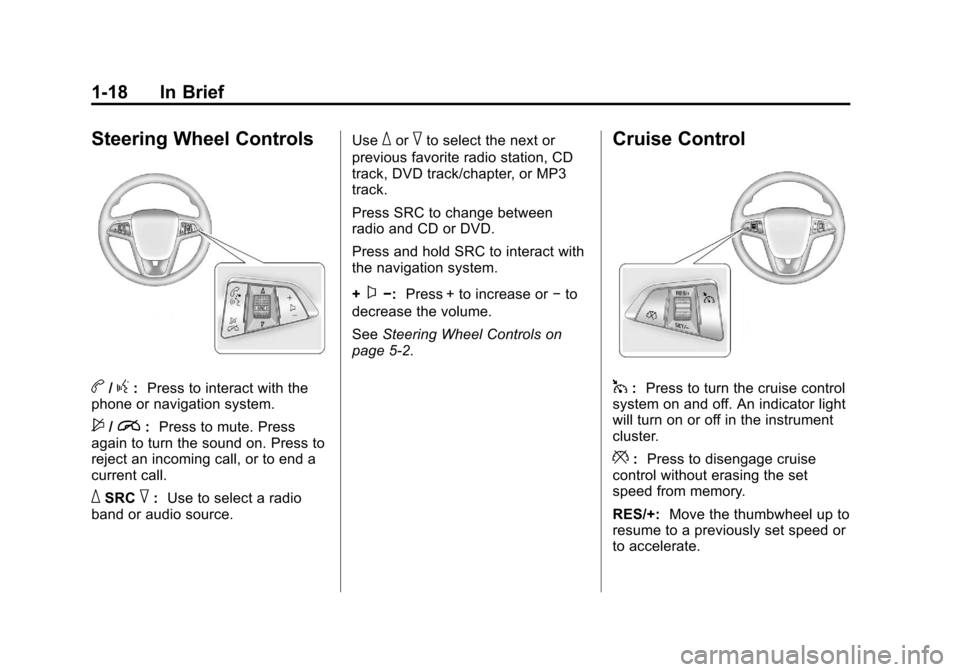
b/g:Press to interact with the
phone or navigation system.
$/i: Press to mute. Press
again to turn the sound on. Press to
reject an incoming call, or to end a
current call.
_SRC^: Use to select a radio
band or audio source. Use
_or^to select the next or
previous favorite radio station, CD
track, DVD track/chapter, or MP3
track.
Press SRC to change between
radio and CD or DVD.
Press and hold SRC to interact with
the navigation system.
+
x−: Press + to increase or −to
decrease the volume.
See Steering Wheel Controls on
page 5‑2.
Cruise Control
1: Press to turn the cruise control
system on and off. An indicator light
will turn on or off in the instrument
cluster.
*: Press to disengage cruise
control without erasing the set
speed from memory.
RES/+: Move the thumbwheel up to
resume to a previously set speed or
to accelerate.
Page 25 of 436
Black plate (19,1)Chevrolet Malibu Owner Manual - 2013 - CRC - 6/6/12
In Brief 1-19
SET/−:Move the thumbwheel down
to set a speed and activate cruise
control or to make the vehicle
decelerate.
See Cruise Control on page 9‑34.
Infotainment System
See the infotainment manual for
information on the radio, audio
players, phone, navigation system,
and voice or speech recognition.
It also includes information on
settings and downloadable
applications (if equipped).
Driver Information
Center (DIC)
The DIC display is in the center of
the instrument cluster. It shows the
status of many vehicle systems. The
controls for the DIC are on the turn
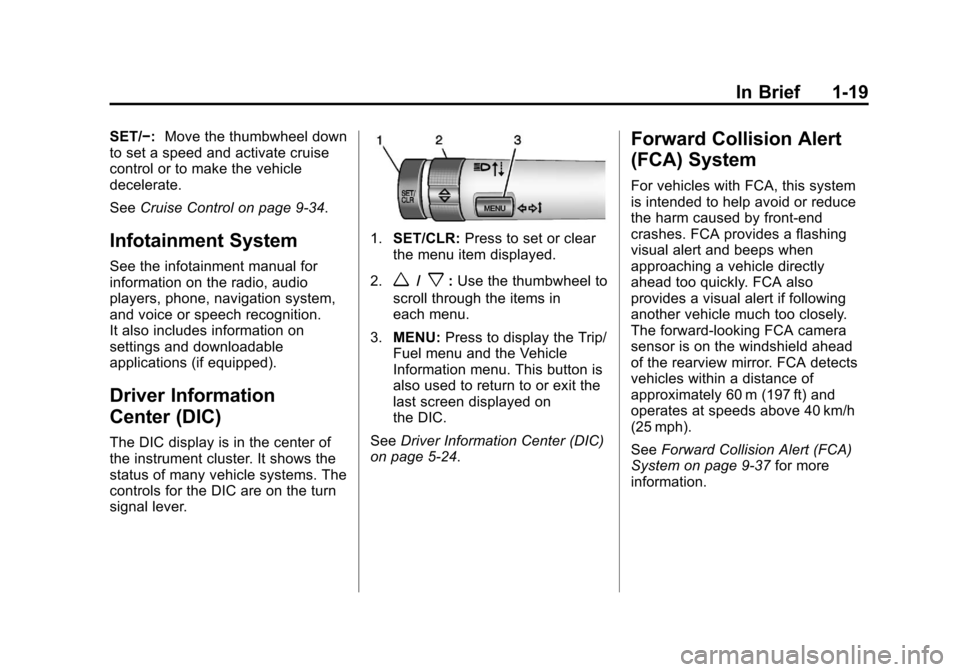
signal lever.
1.SET/CLR: Press to set or clear
the menu item displayed.
2.
w/x: Use the thumbwheel to
scroll through the items in
each menu.
3. MENU: Press to display the Trip/
Fuel menu and the Vehicle
Information menu. This button is
also used to return to or exit the
last screen displayed on
the DIC.
See Driver Information Center (DIC)
on page 5‑24.
Forward Collision Alert
(FCA) System
For vehicles with FCA, this system
is intended to help avoid or reduce
the harm caused by front-end
crashes. FCA provides a flashing
visual alert and beeps when
approaching a vehicle directly
ahead too quickly. FCA also
provides a visual alert if following
another vehicle much too closely.
The forward-looking FCA camera
sensor is on the windshield ahead
of the rearview mirror. FCA detects
vehicles within a distance of
approximately 60 m (197 ft) and
operates at speeds above 40 km/h
(25 mph).
See Forward Collision Alert (FCA)
System on page 9‑37 for more
information.
Page 26 of 436
Black plate (20,1)Chevrolet Malibu Owner Manual - 2013 - CRC - 6/6/12
1-20 In Brief
Lane Departure
Warning (LDW)
For vehicles with LDW, it is intended
to help avoid unintentional lane
departures. It may provide a
warning if the vehicle is crossing a
lane without using a turn signal.
LDW uses a camera sensor to
detect the lane markings. It only
operates at speeds of 56 km
(35 mph) or greater.
The LDW indicator,
@, appears
green if a lane marking is detected.
It changes to amber, flashes, and
sounds three beeps if the vehicle
crosses a detected lane marking
without using the turn signal.
To turn LDW on and off, press
@on
the center stack, forward of the shift
lever. The control indicator will light
when LDW is on.
See Lane Departure Warning (LDW)
on page 9‑43.
Rear Vision
Camera (RVC)
If available, the rear vision camera
displays a view of the area behind
the vehicle when the vehicle is
shifted into R (Reverse). The
display will appear on the radio
screen.
To clean the camera lens above the
license plate, rinse it with water and
wipe it with a soft cloth.
See Rear Vision Camera (RVC) on
page 9‑40.
Ultrasonic Parking Assist
If available, this system uses
sensors on the rear bumper to
assist with parking and avoiding
objects while in R (Reverse).
It operates at speeds less than
8 km/h (5 mph). URPA uses audible
beeps to provide distance and
system information. Keep the sensors on the vehicle's
rear bumper clean to ensure proper
operation.
See
Ultrasonic Parking Assist on
page 9‑39.
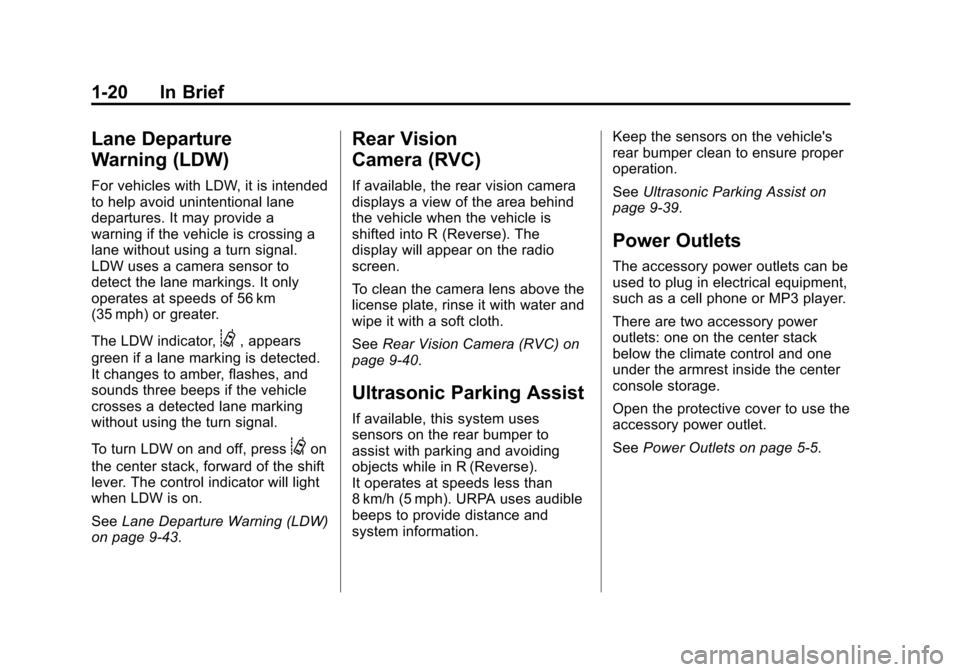
Power Outlets
The accessory power outlets can be
used to plug in electrical equipment,
such as a cell phone or MP3 player.
There are two accessory power
outlets: one on the center stack
below the climate control and one
under the armrest inside the center
console storage.
Open the protective cover to use the
accessory power outlet.
See Power Outlets on page 5‑5.
Page 113 of 436
Black plate (5,1)Chevrolet Malibu Owner Manual - 2013 - CRC - 6/6/12
Instruments and Controls 5-5
Clock
The infotainment system controls
are used to access the time and
date settings through the menu
system. The clock menu can only
be used with the radio on while in
ON/RUN or ACC/ACCESSORY.
SeeOverview (Radio with CD and
Touchscreen) on page 7‑5 or
Overview (Radio with CD) on
page 7‑2 for information about how
to use the menu system. For
vehicles with a navigation system,
see the separate navigation manual.
Setting the Clock (Radio
with CD)
To set the time:
1. Press the CONFIG button and select Time Settings.
2. Select Set Time.
3. Turn the TUNE/MENU knob to adjust the highlighted number.
4. Press the TUNE/MENU knob to select the next number. 5. To save the time and return to
the Time Settings menu, press
the BACK
/button at any time
or press the TUNE/MENU knob
after adjusting the minutes.
Setting the 12/24 Hour Format
1. Press the CONFIG button and select Time Settings.
2. Highlight 12/24 Hour Format.
3. Press the TUNE/MENU knob to select the 12 hour or 24 hour
display format.
Setting the Clock (Radio with
CD and Touchscreen)
To set the time:
1. Press the CONFIG button toenter the menu options. Turn the
TUNE/MENU knob to scroll
through the available setup
features. Press the TUNE/MENU
knob or press the Time screen
button to display other options
within that feature. 2. Press + or
−to increase or
decrease the Hours and Minutes
displayed on the clock.
12/24 HR Format: Press the 12 HR
screen button for standard time;
press the 24 HR screen button for
military time.
Day + or Day −:Press the Day +
or Day −display buttons to increase
or decrease the day.
Display: Press Display to turn the
display of the time on the screen on
or off.
Power Outlets
The accessory power outlets can be
used to plug in electrical equipment,
such as a cell phone or MP3 player.
There are two accessory power
outlets: one on the center stack
below the climate control system,
and one under the armrest inside
the center console storage.
Page 114 of 436
Black plate (6,1)Chevrolet Malibu Owner Manual - 2013 - CRC - 6/6/12
5-6 Instruments and Controls
The outlet is powered when the
ignition is in ON/RUN or ACC/
ACCESSORY, or until the driver
door is opened within 10 minutes of
turning off the vehicle. SeeRetained
Accessory Power (RAP) on
page 9‑22.
Open the protective cover to use the
accessory power outlet.
Certain electrical accessories may
not be compatible with the
accessory power outlets and could
overload vehicle or adapter fuses.
If there is a problem, see your
dealer.
When adding electrical equipment,
be sure to follow the installation
instructions included with the
equipment. See Add-On Electrical
Equipment on page 9‑50.
Notice: Hanging heavy
equipment from the power outlet
can cause damage not covered
by the vehicle warranty. The
power outlets are designed for
accessory power plugs only, such
as cell phone charge cords.Power Outlet 120 Volt
Alternating Current
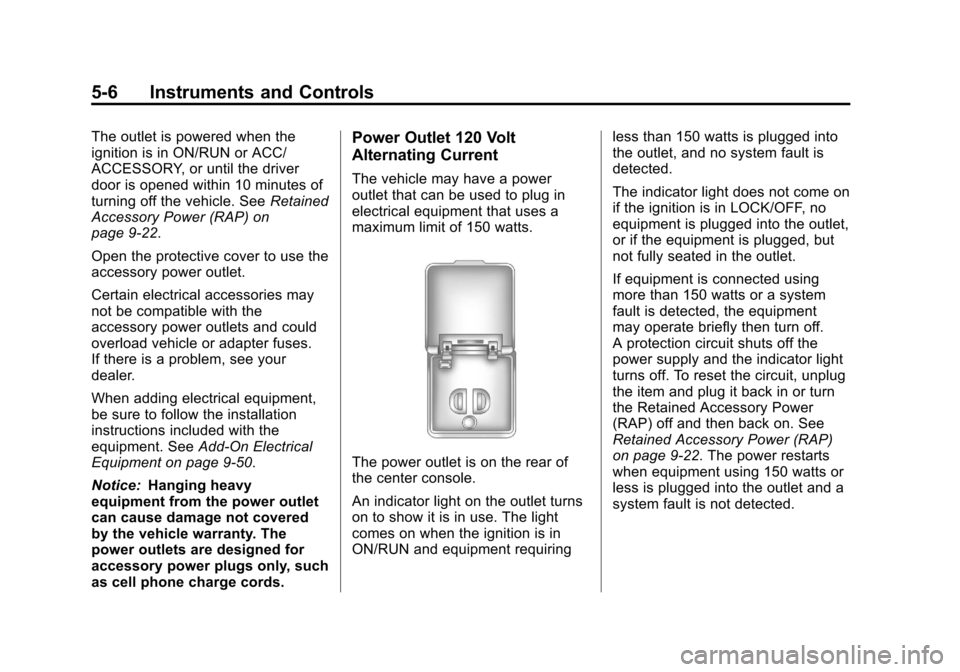
The vehicle may have a power
outlet that can be used to plug in
electrical equipment that uses a
maximum limit of 150 watts.
The power outlet is on the rear of
the center console.
An indicator light on the outlet turns
on to show it is in use. The light
comes on when the ignition is in
ON/RUN and equipment requiring less than 150 watts is plugged into
the outlet, and no system fault is
detected.
The indicator light does not come on
if the ignition is in LOCK/OFF, no
equipment is plugged into the outlet,
or if the equipment is plugged, but
not fully seated in the outlet.
If equipment is connected using
more than 150 watts or a system
fault is detected, the equipment
may operate briefly then turn off.
A protection circuit shuts off the
power supply and the indicator light
turns off. To reset the circuit, unplug
the item and plug it back in or turn
the Retained Accessory Power
(RAP) off and then back on. See
Retained Accessory Power (RAP)
on page 9‑22. The power restarts
when equipment using 150 watts or
less is plugged into the outlet and a
system fault is not detected.
Page 151 of 436
Black plate (43,1)Chevrolet Malibu Owner Manual - 2013 - CRC - 6/6/12
Instruments and Controls 5-43
If you live in Canada, or you are
having difficulty programming a gate
operator or garage door opener by
using the“Programming the
Universal Remote System”
procedures, regardless of where
you live, replace Step 2 under
“Programming the Universal Remote
System” with the following:
Continue to press and hold the
Universal Remote system button
while you press and release every
two seconds (cycle) the hand-held
transmitter button until the
frequency signal has been
successfully accepted by the
Universal Remote system. The
Universal Remote system indicator
light will flash slowly at first and then
rapidly. Proceed with Step 3 under
“Programming the Universal Remote
System” to complete.Universal Remote System
Operation
Using the Universal Remote
System
Press and hold the appropriate
Universal Remote system button for
at least half of a second. The
indicator light will come on while the
signal is being transmitted.
Erasing Universal Remote
System Buttons
All programmed buttons should be
erased when the vehicle is sold or
the lease ends.
To erase all programmed buttons on
the Universal Remote system
device:
1. Press and hold down the two
outside buttons until the
indicator light begins to flash.
This should take about
10 seconds.
2. Release both buttons.
Reprogramming a Single
Universal Remote System
Button
To reprogram any of the three
Universal Remote system buttons:
1. Press and hold the desired Universal Remote system
button. Do not release the
button.
2. The indicator light will begin to flash after 20 seconds. Without
releasing the button, proceed
with Step 1 under “Programming
the Universal Remote System.”
If you have questions or need help
programming the Universal Remote
system, call 1-800-355-3515 or go
to www.homelink.com. You may
also call the customer assistance
phone number under Customer
Assistance Offices (U.S. and
Canada) on page 13‑5 orCustomer
Assistance Offices (Mexico) on
page 13‑5.
Page 161 of 436
Black plate (1,1)Chevrolet Malibu Owner Manual - 2013 - CRC - 6/6/12
Infotainment System 7-1
Infotainment
System
Introduction
Infotainment . . . . . . . . . . . . . . . . . . . 7-1
Theft-Deterrent Feature . . . . . . . 7-2
Overview (Radio with CD) . . . . . 7-2
Overview (Radio with CD andTouchscreen) . . . . . . . . . . . . . . . . 7-5
Operation . . . . . . . . . . . . . . . . . . . . . 7-9
Radio
AM-FM Radio . . . . . . . . . . . . . . . . 7-14
Satellite Radio . . . . . . . . . . . . . . . 7-19
Radio Reception . . . . . . . . . . . . . 7-20
Backglass Antenna . . . . . . . . . . 7-21
Satellite Radio Antenna . . . . . . 7-21
Audio Players
CD Player . . . . . . . . . . . . . . . . . . . 7-22
MP3 . . . . . . . . . . . . . . . . . . . . . . . . . 7-24
Auxiliary Devices . . . . . . . . . . . . 7-25
Phone
Bluetooth (Overview) . . . . . . . . 7-35
Bluetooth (Infotainment Controls) . . . . . . . . . . . . . . . . . . . 7-36
Bluetooth (Voice Recognition) . . . . . . . . . . . . . . . 7-40
Introduction
Infotainment
Determine which radio the vehicle
has. For radios without connectivity,
read the following pages to become
familiar with its features. For radios
with connectivity, see the
infotainment manual.
{WARNING
Taking your eyes off the road for
extended periods could cause a
crash resulting in injury or death
to you or others. Do not give
extended attention to infotainment
tasks while driving.
This system provides access to
many audio and non-audio listings.
Page 162 of 436
Black plate (2,1)Chevrolet Malibu Owner Manual - 2013 - CRC - 6/6/12
7-2 Infotainment System
To minimize taking your eyes off the
road while driving, do the following
while the vehicle is parked:
.Become familiar with the
operation and controls of the
audio system.
.Set up the tone, speaker
adjustments, and preset radio
stations.
See Defensive Driving on page 9‑2.
Notice: Contact your dealer
before adding any equipment.
Adding audio or communication
equipment could interfere with
the operation of the engine, radio,
or other systems, and could
damage them. Follow federal
rules covering mobile radio and
telephone equipment. Notice:
The chime signals related
to safety belts, parking brake, and
other functions of your vehicle
operate through the radio/
entertainment system. If that
equipment is replaced or
additional equipment is added
to your vehicle, the chimes
may not work. Make sure that
replacement or additional
equipment is compatible with
your vehicle before installing it.
See Accessories and
Modifications on page 10‑3.
The vehicle has Retained
Accessory Power (RAP). With RAP,
the audio system can be played
even after the ignition is turned off.
See Retained Accessory Power
(RAP) on page 9‑22.
Theft-Deterrent Feature
The theft-deterrent feature works by
learning a portion of the Vehicle
Identification Number (VIN) to
the infotainment system. The
infotainment system does not
operate if it is stolen or moved to a
different vehicle.
Overview (Radio with CD)
Infotainment System Overview
Radio faceplate examples are
provided to help identify buttons and
to help understand the functions of
the radio. Find the faceplate that
best matches the vehicle for a
description.