bulb CHEVROLET MALIBU 2018 Owner's Manual
[x] Cancel search | Manufacturer: CHEVROLET, Model Year: 2018, Model line: MALIBU, Model: CHEVROLET MALIBU 2018Pages: 413, PDF Size: 5.92 MB
Page 139 of 413
Chevrolet Malibu Owner Manual (GMNA-Localizing-U.S./Canada/Mexico-
11348460) - 2018 - crc - 5/3/17
138 Instruments and Controls
.Brakes
. Ride Control Systems
. Driver Assistance Systems
. Cruise Control
. Lighting and Bulb Replacement
. Wiper/Washer Systems
. Doors and Windows
. Seat Belts
. Airbag Systems
. Engine and Transmission
. Tire Pressure
. Battery
Engine Power Messages
ENGINE/PROPULSION POWER
IS REDUCED
This message displays when the
vehicle's propulsion power is
reduced. Reduced propulsion power
can affect the vehicle's ability to
accelerate. If this message is on,
but there is no observed reduction
in performance, proceed to your
destination. The performance may be reduced the next time the vehicle
is driven. The vehicle may be driven
while this message is on, but
maximum acceleration and speed
may be reduced. Anytime this
message stays on, or displays
repeatedly, the vehicle should be
taken to your dealer for service as
soon as possible.
Vehicle Speed Messages
SPEED LIMITED TO
XXX KM/H (MPH)
This message shows that the
vehicle speed has been limited to
the speed displayed. The limited
speed is a protection for various
propulsion and vehicle systems,
such as lubrication, thermal,
suspension, Teen Driver if
equipped, or tires.
Vehicle
Personalization
Personalization Menu (Radio
without Touchscreen)
The audio system controls are used
to access the personalization
menus for customizing vehicle
features.
The following are all possible
personalization features. Depending
on the vehicle, some may not be
available.
MENU :
Turn to scroll through the
menus or setup items. Press to
enter the menus and select the
menu items.
BACK : Press to exit or return to
the previous screen or menu.
To access a menu:
1. Press MENU.
2. Turn MENU to the desired menu.
3. Press MENU to select.
Menus and functions may vary
depending on vehicle options.
Page 159 of 413
Chevrolet Malibu Owner Manual (GMNA-Localizing-U.S./Canada/Mexico-
11348460) - 2018 - crc - 5/3/17
158 Lighting
Turn and Lane-Change
Signals
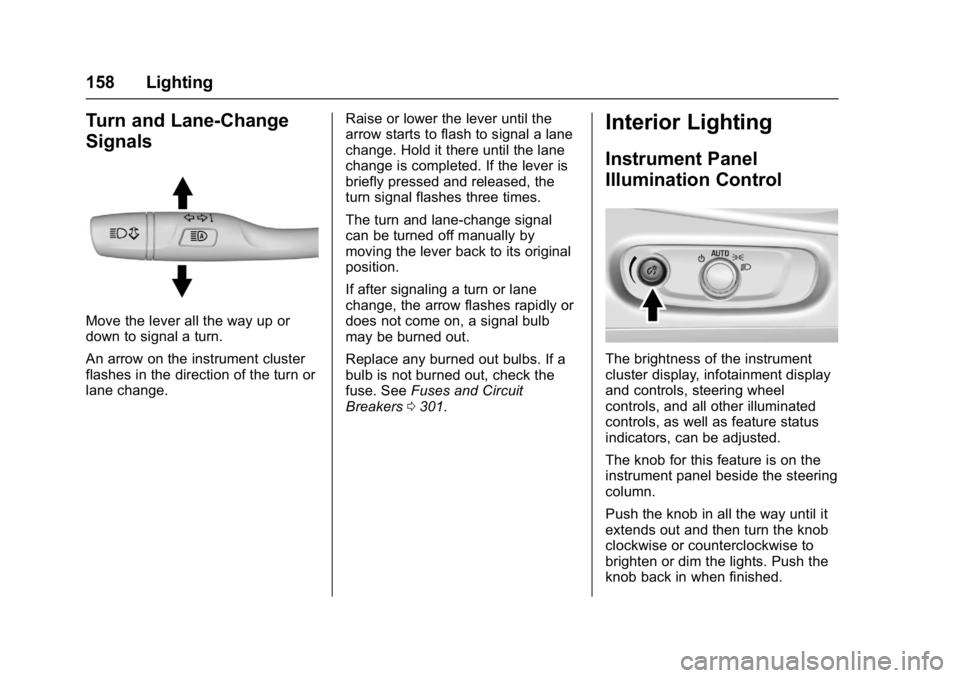
Move the lever all the way up or
down to signal a turn.
An arrow on the instrument cluster
flashes in the direction of the turn or
lane change.Raise or lower the lever until the
arrow starts to flash to signal a lane
change. Hold it there until the lane
change is completed. If the lever is
briefly pressed and released, the
turn signal flashes three times.
The turn and lane-change signal
can be turned off manually by
moving the lever back to its original
position.
If after signaling a turn or lane
change, the arrow flashes rapidly or
does not come on, a signal bulb
may be burned out.
Replace any burned out bulbs. If a
bulb is not burned out, check the
fuse. See
Fuses and Circuit
Breakers 0301.
Interior Lighting
Instrument Panel
Illumination Control
The brightness of the instrument
cluster display, infotainment display
and controls, steering wheel
controls, and all other illuminated
controls, as well as feature status
indicators, can be adjusted.
The knob for this feature is on the
instrument panel beside the steering
column.
Push the knob in all the way until it
extends out and then turn the knob
clockwise or counterclockwise to
brighten or dim the lights. Push the
knob back in when finished.
Page 264 of 413
Chevrolet Malibu Owner Manual (GMNA-Localizing-U.S./Canada/Mexico-
11348460) - 2018 - crc - 5/3/17
Driving and Operating 263
combination moving and then apply
the trailer brake controller by hand
to be sure the brakes work.
During the trip, check occasionally
to be sure that the load is secure
and the lamps and any trailer
brakes still work.
Towing with a Stability Control
System
When towing, the sound of the
stability control system might be
heard. The system is reacting to the
vehicle movement caused by the
trailer, which mainly occurs during
cornering. This is normal when
towing heavier trailers.
Following Distance
Stay at least twice as far behind the
vehicle ahead as you would when
driving the vehicle without a trailer.
This can help to avoid situations
that require heavy braking and
sudden turns.
Passing
More passing distance is needed
when towing a trailer. Because the
rig is longer, it is necessary to go
farther beyond the passed vehicle
before returning to the lane.
Backing Up
Hold the bottom of the steering
wheel with one hand. To move the
trailer to the left, move your hand to
the left. To move the trailer to the
right, move your hand to the right.
Always back up slowly and,
if possible, have someone
guide you.
Making TurnsCaution
Making very sharp turns while
trailering could cause the trailer to
come in contact with the vehicle.
The vehicle could be damaged.
Avoid making very sharp turns
while trailering. When turning with a trailer, make
wider turns than normal so the
trailer will not strike soft shoulders,
curbs, road signs, trees, or other
objects. Use the turn signal well in
advance and avoid jerky or sudden
maneuvers.
Turn Signals When Towing a
Trailer
The turn signal indicators on the
instrument cluster flash whenever
signaling a turn or lane change.
Properly hooked up, the trailer
lamps also flash, telling other
drivers the vehicle is turning,
changing lanes, or stopping.
When towing a trailer, the arrows on
the instrument cluster flash for turns
even if the bulbs on the trailer are
burned out. Check occasionally to
be sure the trailer bulbs are still
working.
Driving on Grades
Reduce speed and shift to a
lower gear before starting down a
long or steep downgrade. If the
transmission is not shifted down, the
Page 269 of 413
Chevrolet Malibu Owner Manual (GMNA-Localizing-U.S./Canada/Mexico-
11348460) - 2018 - crc - 5/3/17
268 Vehicle Care
Vehicle Care
General Information
General Information . . . . . . . . . . 269
California Proposition65 Warning . . . . . . . . . . . . . . . . . 269
California Perchlorate Materials Requirements . . . . . 270
Accessories and Modifications . . . . . . . . . . . . . . . . 270
Vehicle Checks
Doing Your OwnService Work . . . . . . . . . . . . . . . 270
Hood . . . . . . . . . . . . . . . . . . . . . . . . . 271
Engine Compartment Overview . . . . . . . . . . . . . . . . . . . . 273
Engine Oil . . . . . . . . . . . . . . . . . . . . 278
Engine Oil Life System . . . . . . . 281
Automatic Transmission Fluid . . . . . . . . . . . . . . . . . . . . . . . . 282
Engine Air Cleaner/Filter . . . . . . 282
Cooling System (Engine) . . . . . 283
Cooling System (Power Electronics) . . . . . . . . . . . . . . . . . 287
Engine Overheating . . . . . . . . . . 288
Washer Fluid . . . . . . . . . . . . . . . . . 289
Brakes . . . . . . . . . . . . . . . . . . . . . . . 289
Brake Fluid . . . . . . . . . . . . . . . . . . . 290
Battery - North America . . . . . . 291 Starter Switch Check . . . . . . . . . 293
Automatic Transmission Shift
Lock Control Function
Check . . . . . . . . . . . . . . . . . . . . . . . 293
Park Brake and P (Park)
Mechanism Check . . . . . . . . . . 294
Wiper Blade Replacement . . . . 294
Gas Strut(s) . . . . . . . . . . . . . . . . . . 295
Headlamp Aiming
Headlamp Aiming . . . . . . . . . . . . 296
Bulb Replacement
Bulb Replacement . . . . . . . . . . . . 296
Halogen Bulbs . . . . . . . . . . . . . . . . 296
LED Lighting . . . . . . . . . . . . . . . . . 296
Headlamps, Front Turn Signal, Sidemarker, and Parking
Lamps . . . . . . . . . . . . . . . . . . . . . . 297
Taillamps, Turn Signal, Stoplamps, and Back-Up
Lamps (LS and LT) . . . . . . . . . . 298
Taillamps, Turn Signal, Stoplamps, and Back-Up
Lamps (LTZ) . . . . . . . . . . . . . . . . 299
License Plate Lamp . . . . . . . . . . 300
Electrical System
High Voltage Devices and Wiring . . . . . . . . . . . . . . . . . . . . . . . 300
Electrical System Overload . . . 301
Fuses and Circuit Breakers . . . 301 Engine Compartment Fuse
Block . . . . . . . . . . . . . . . . . . . . . . . . 302
Instrument Panel Fuse Block . . . . . . . . . . . . . . . . . . . . . . . . 306
Wheels and Tires
Tires . . . . . . . . . . . . . . . . . . . . . . . . . . 308
All-Season Tires . . . . . . . . . . . . . . 309
Winter Tires . . . . . . . . . . . . . . . . . . 310
Low-Profile Tires . . . . . . . . . . . . . 310
Summer Tires . . . . . . . . . . . . . . . . 310
Tire Sidewall Labeling . . . . . . . . 311
Tire Designations . . . . . . . . . . . . . 313
Tire Terminology andDefinitions . . . . . . . . . . . . . . . . . . 314
Tire Pressure . . . . . . . . . . . . . . . . . 316
Tire Pressure for High-Speed Operation . . . . . . . . . . . . . . . . . . . 317
Tire Pressure Monitor System . . . . . . . . . . . . . . . . . . . . . . 318
Tire Pressure Monitor Operation . . . . . . . . . . . . . . . . . . . 319
Tire Inspection . . . . . . . . . . . . . . . . 322
Tire Rotation . . . . . . . . . . . . . . . . . 322
When It Is Time for New Tires . . . . . . . . . . . . . . . . . . . . . . . . 323
Buying New Tires . . . . . . . . . . . . . 324
Different Size Tires and Wheels . . . . . . . . . . . . . . . . . . . . . . 325
Uniform Tire Quality Grading . . . . . . . . . . . . . . . . . . . . . 326
Page 297 of 413
Chevrolet Malibu Owner Manual (GMNA-Localizing-U.S./Canada/Mexico-
11348460) - 2018 - crc - 5/3/17
296 Vehicle Care
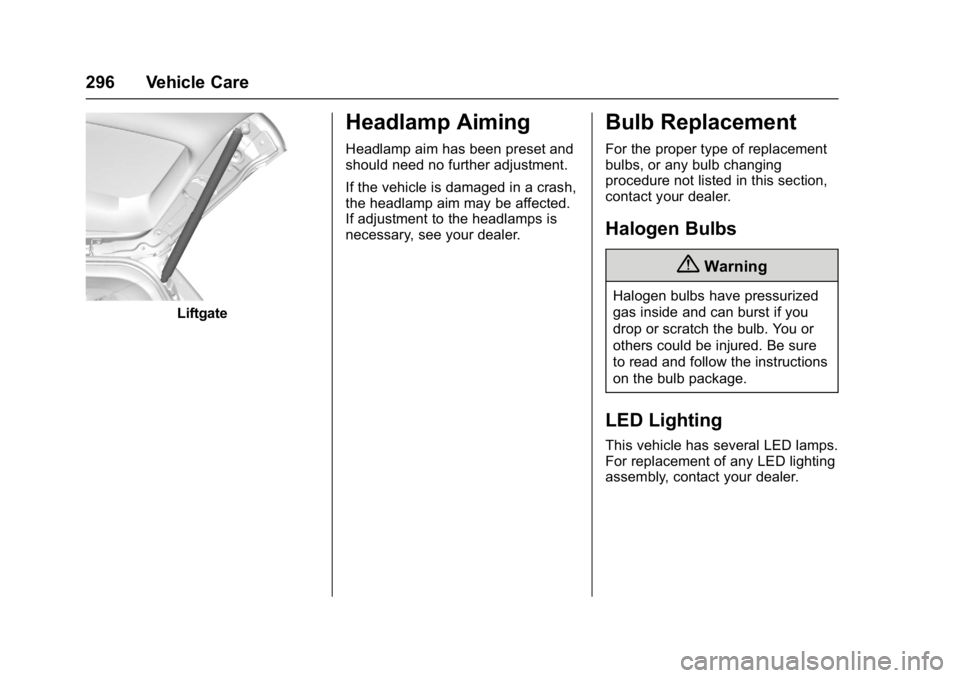
Liftgate
Headlamp Aiming
Headlamp aim has been preset and
should need no further adjustment.
If the vehicle is damaged in a crash,
the headlamp aim may be affected.
If adjustment to the headlamps is
necessary, see your dealer.
Bulb Replacement
For the proper type of replacement
bulbs, or any bulb changing
procedure not listed in this section,
contact your dealer.
Halogen Bulbs
{Warning
Halogen bulbs have pressurized
gas inside and can burst if you
drop or scratch the bulb. You or
others could be injured. Be sure
to read and follow the instructions
on the bulb package.
LED Lighting
This vehicle has several LED lamps.
For replacement of any LED lighting
assembly, contact your dealer.
Page 298 of 413
Chevrolet Malibu Owner Manual (GMNA-Localizing-U.S./Canada/Mexico-
11348460) - 2018 - crc - 5/3/17
Vehicle Care 297
Headlamps, Front Turn
Signal, Sidemarker, and
Parking Lamps
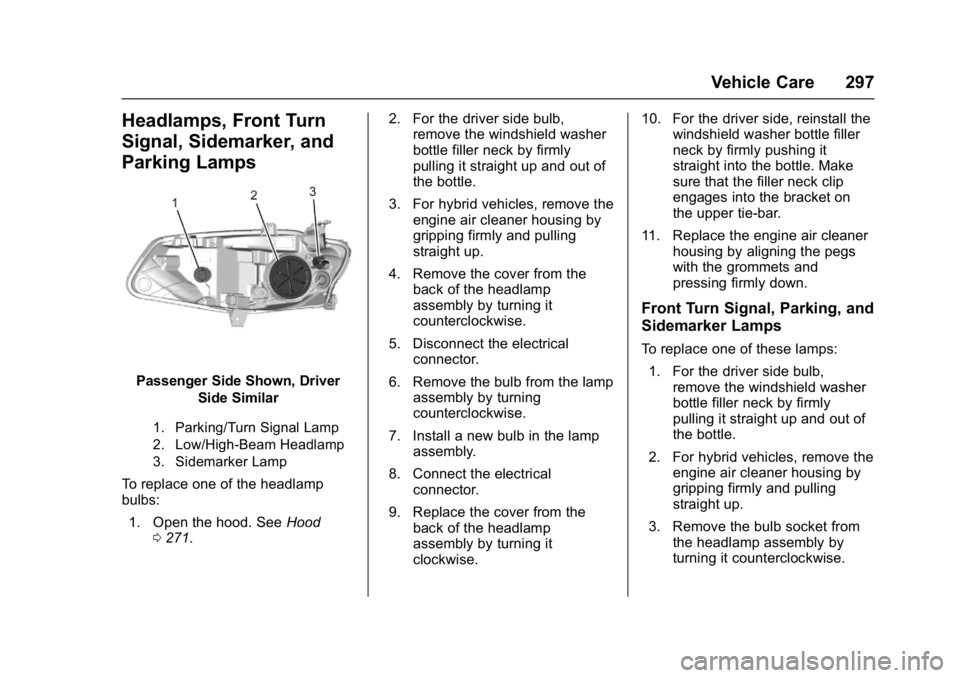
Passenger Side Shown, DriverSide Similar
1. Parking/Turn Signal Lamp
2. Low/High-Beam Headlamp
3. Sidemarker Lamp
To replace one of the headlamp
bulbs:
1. Open the hood. See Hood
0 271. 2. For the driver side bulb,
remove the windshield washer
bottle filler neck by firmly
pulling it straight up and out of
the bottle.
3. For hybrid vehicles, remove the engine air cleaner housing by
gripping firmly and pulling
straight up.
4. Remove the cover from the back of the headlamp
assembly by turning it
counterclockwise.
5. Disconnect the electrical connector.
6. Remove the bulb from the lamp assembly by turning
counterclockwise.
7. Install a new bulb in the lamp assembly.
8. Connect the electrical connector.
9. Replace the cover from the back of the headlamp
assembly by turning it
clockwise. 10. For the driver side, reinstall the
windshield washer bottle filler
neck by firmly pushing it
straight into the bottle. Make
sure that the filler neck clip
engages into the bracket on
the upper tie-bar.
11. Replace the engine air cleaner housing by aligning the pegs
with the grommets and
pressing firmly down.
Front Turn Signal, Parking, and
Sidemarker Lamps
To replace one of these lamps:
1. For the driver side bulb, remove the windshield washer
bottle filler neck by firmly
pulling it straight up and out of
the bottle.
2. For hybrid vehicles, remove the engine air cleaner housing by
gripping firmly and pulling
straight up.
3. Remove the bulb socket from the headlamp assembly by
turning it counterclockwise.
Page 299 of 413
Chevrolet Malibu Owner Manual (GMNA-Localizing-U.S./Canada/Mexico-
11348460) - 2018 - crc - 5/3/17
298 Vehicle Care
4. Remove the bulb from thesocket.
5. Replace the bulb in the bulb socket.
6. Install the bulb socket in the headlamp assembly by turning
it clockwise.
7. For the driver side, reinstall the windshield washer bottle filler
neck by firmly pushing it
straight into the bottle. Make
sure that the filler neck clip
engages into the bracket on
the upper tie-bar.
8. Replace the engine air cleaner housing by aligning the pegs
with the grommets and
pressing firmly down.Taillamps, Turn Signal,
Stoplamps, and Back-Up
Lamps (LS and LT)
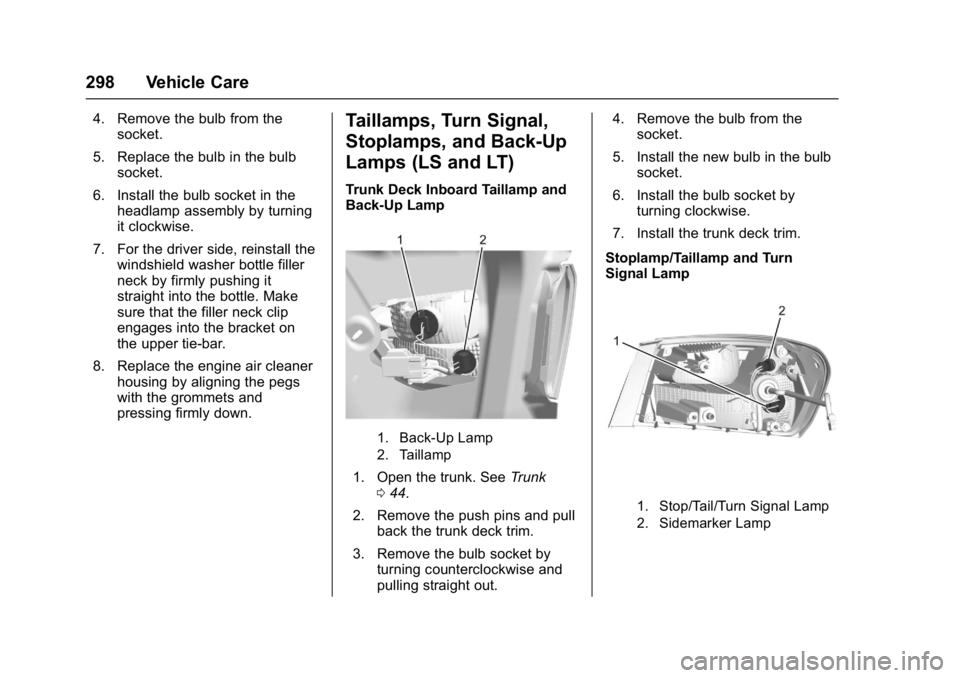
Trunk Deck Inboard Taillamp and
Back-Up Lamp
1. Back-Up Lamp
2. Taillamp
1. Open the trunk. See Trunk
0 44.
2. Remove the push pins and pull back the trunk deck trim.
3. Remove the bulb socket by turning counterclockwise and
pulling straight out. 4. Remove the bulb from the
socket.
5. Install the new bulb in the bulb socket.
6. Install the bulb socket by turning clockwise.
7. Install the trunk deck trim.
Stoplamp/Taillamp and Turn
Signal Lamp
1. Stop/Tail/Turn Signal Lamp
2. Sidemarker Lamp
Page 300 of 413
Chevrolet Malibu Owner Manual (GMNA-Localizing-U.S./Canada/Mexico-
11348460) - 2018 - crc - 5/3/17
Vehicle Care 299
Caution
Improper lamp assembly removal
and installation can cause leaks
and water intrusion which may
cause damage to the taillamp. Do
not remove the taillamp assembly
to replace a bulb. Use the trunk
opening to access the bulb.
To replace any one of these bulbs: 1. Open the trunk. See Trunk
0 44.
2. Remove the push pins and pull the trunk trim away from the
taillamp assembly.
3. Remove three hex-nuts from each stud.
4. Remove the lamp by pulling it straight back.
5. Remove the bulb socket from the taillamp assembly by
turning it counterclockwise.
6. Remove the bulb from the socket by turning the bulb
counterclockwise one-quarter
turn and pulling it straight out. 7. Install a new bulb into the
socket.
8. Install the bulb socket into the taillamp assembly by turning it
clockwise.
9. Install the trunk trim, hex nuts, and push pins.
Taillamps, Turn Signal,
Stoplamps, and Back-Up
Lamps (LTZ)
Caution
Improper lamp assembly removal
and installation can cause leaks
and water intrusion which may
cause damage to the taillamp. Do
not remove the taillamp assembly
to replace a bulb. Use the trunk
opening to access the bulb.
The stoplamp/taillamp and trunk
deck inboard taillamp are LEDs. To
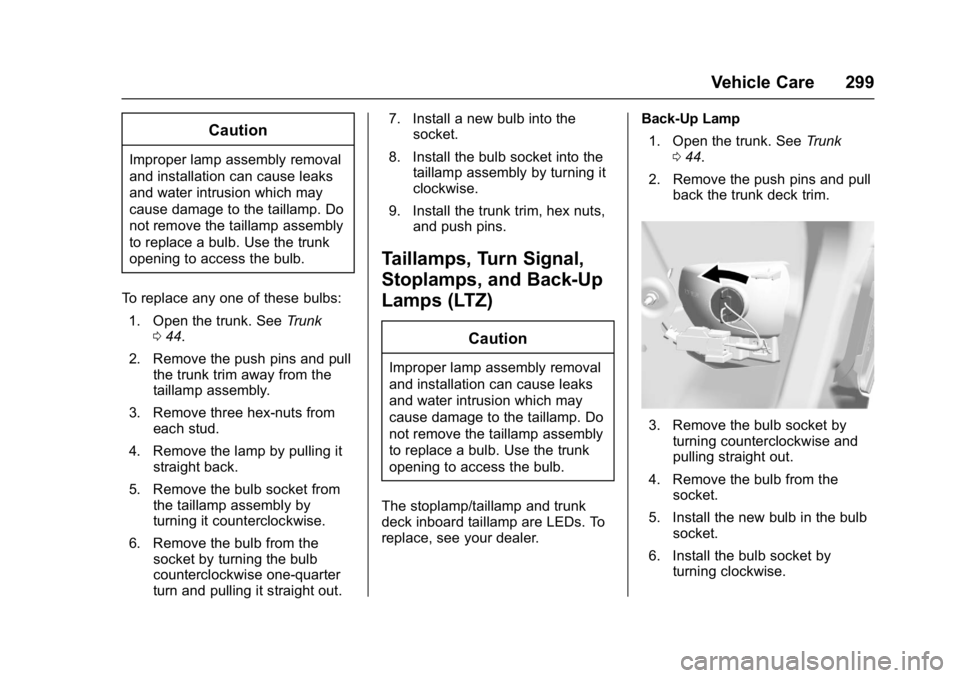
replace, see your dealer. Back-Up Lamp
1. Open the trunk. See Trunk
0 44.
2. Remove the push pins and pull back the trunk deck trim.
3. Remove the bulb socket byturning counterclockwise and
pulling straight out.
4. Remove the bulb from the socket.
5. Install the new bulb in the bulb socket.
6. Install the bulb socket by turning clockwise.
Page 301 of 413
Chevrolet Malibu Owner Manual (GMNA-Localizing-U.S./Canada/Mexico-
11348460) - 2018 - crc - 5/3/17
300 Vehicle Care
7. Install the trunk deck trim.
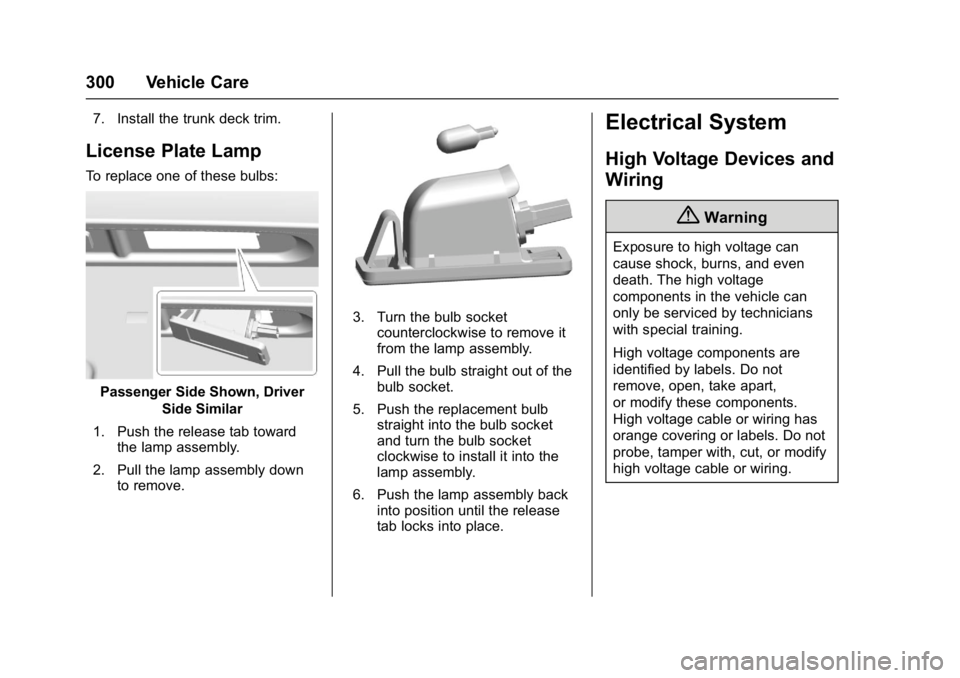
License Plate Lamp
To replace one of these bulbs:
Passenger Side Shown, DriverSide Similar
1. Push the release tab toward the lamp assembly.
2. Pull the lamp assembly down to remove.
3. Turn the bulb socketcounterclockwise to remove it
from the lamp assembly.
4. Pull the bulb straight out of the bulb socket.
5. Push the replacement bulb straight into the bulb socket
and turn the bulb socket
clockwise to install it into the
lamp assembly.
6. Push the lamp assembly back into position until the release
tab locks into place.
Electrical System
High Voltage Devices and
Wiring
{Warning
Exposure to high voltage can
cause shock, burns, and even
death. The high voltage
components in the vehicle can
only be serviced by technicians
with special training.
High voltage components are
identified by labels. Do not
remove, open, take apart,
or modify these components.
High voltage cable or wiring has
orange covering or labels. Do not
probe, tamper with, cut, or modify
high voltage cable or wiring.
Page 402 of 413

Chevrolet Malibu Owner Manual (GMNA-Localizing-U.S./Canada/Mexico-
11348460) - 2018 - crc - 5/3/17
Index 401
Appearance CareExterior . . . . . . . . . . . . . . . . . . . . . . . 349
Interior . . . . . . . . . . . . . . . . . . . . . . . . 354
Apple CarPlay and Android Auto . . . . . . . . . . . . . . . . . . 191
Armrest Rear Seat . . . . . . . . . . . . . . . . . . . . . . 65
Assistance Program, Roadside . . . . . . . . . . . . . . . . . . . . . . 379
Assistance Systems for Driving . . . . . . . . . . . . . . . . . . . . . . . . 247
Assistance Systems for Parking and Backing . . . . . . . . . . 243
Audio Theft-Deterrent Feature . . . . . . . 163
Automatic
Door Locks . . . . . . . . . . . . . . . . . . . . . 43
Forward Braking . . . . . . . . . . . . . . 249
Headlamp System . . . . . . . . . . . . 157
Transmission . . . . . . . . . . . . . . . . . 224
Transmission Fluid . . . . . . . . . . . 282
Automatic Transmission Manual Mode . . . . . . . . . . . . . . . . . 225
Shift Lock Control FunctionCheck . . . . . . . . . . . . . . . . . . . . . . . 293
Avoiding Untrusted Media Devices . . . . . . . . . . . . . . . . . . . . . . . 176B
Backglass Antenna . . . . . . . . . . . . . 175
BatteryExterior Lighting BatterySaver . . . . . . . . . . . . . . . . . . . . . . . 161
Load Management . . . . . . . . . . . . 160
Power Protection . . . . . . . . . . . . . 161
Battery - North America . . . . 291, 343
Blade Replacement, Wiper . . . . . 294
Bluetooth Overview . . . . . . . . . . . 182, 183, 187
Brake Parking, Electric . . . . . . . . . . . . . . 228
System Warning Light . . . . . . . . 124
Brakes . . . . . . . . . . . . . . . . . . . . . . . . . . 289 Antilock . . . . . . . . . . . . . . . . . . . . . . . 227
Assist . . . . . . . . . . . . . . . . . . . . . . . . . 229
Fluid . . . . . . . . . . . . . . . . . . . . . . . . . . 290
Parking . . . . . . . . . . . . . . . . . . . . . . . 227
Regenerative Braking . . . . . . . . . 230
Braking . . . . . . . . . . . . . . . . . . . . . . . . . 207 Automatic Forward . . . . . . . . . . . 249
Braking System Front Pedestrian (FPB) . . . . . . . 251
Break-In, New Vehicle . . . . . . . . . . 216
Bulb Replacement Halogen Bulbs . . . . . . . . . . . . . . . . 296
Headlamp Aiming . . . . . . . . . . . . . 296 Bulb Replacement (cont'd)
Headlamps . . . . . . . . . . . . . . . . . . . 296
Headlamps, Front Turn
Signal, Sidemarker, and
Parking Lamps . . . . . . . . . . . . . . 297
License Plate Lamps . . . . . . . . . 300
Taillamps, Turn Signal, Stoplamps, and
Back-up Lamps . . . . . . . . 298, 299
Buying New Tires . . . . . . . . . . . . . . . 324
C
Calibration . . . . . . . . . . . . . . . . . . . . . . 107
California Fuel Requirements . . . . . . . . . . . 258
Perchlorate MaterialsRequirements . . . . . . . . . . . . . . . 270
California Proposition
65 Warning . . . . . . . . . .269, 291, 343,
Back Cover
Canadian Vehicle Owners . . . . . . . . 2
Capacities and Specifications . . . . . . . . . . . . . . . . . 373
Carbon Monoxide Engine Exhaust . . . . . . . . . . . . . . . 223
Trunk . . . . . . . . . . . . . . . . . . . . . . . . . . . 44
Winter Driving . . . . . . . . . . . . . . . . .211