manual radio set CHEVROLET MALIBU LIMITED 2016 8.G Owners Manual
[x] Cancel search | Manufacturer: CHEVROLET, Model Year: 2016, Model line: MALIBU LIMITED, Model: CHEVROLET MALIBU LIMITED 2016 8.GPages: 360, PDF Size: 6.15 MB
Page 19 of 360
Chevrolet Malibu Limited Owner Manual (GMNA-Localizing-U.S/Canada-
9086425) - 2016 - crc - 7/30/15
18 In Brief
Vehicle Features
Infotainment System
See the infotainment manual for
information on the radio, audio
players, phone, navigation system,
and voice or speech recognition.
It also includes information on
settings.
Radio(s)
VOL/O:Press to turn the system
on and off. Turn to increase or
decrease the volume.
RADIO/BAND : Press to choose
between FM, AM, or SiriusXM
®,
if equipped.
TUNE/MENU : Turn to select radio
stations. Press to select a menu.
©SEEK¨: Press to seek the
previous or next station or track.
INFO : Press to show available
information about the current station
or track.
See Overview 0140.
Satellite Radio
If equipped, vehicles with a
SiriusXM®satellite radio tuner and a
valid SiriusXM satellite radio
subscription can receive SiriusXM
programming.
SiriusXM Satellite Radio
Service
SiriusXM is a satellite radio service
based in the 48 contiguous United
States and 10 Canadian provinces.
SiriusXM satellite radio has a wide
variety of programming and
commercial-free music, coast to
coast, and in digital-quality sound.
A fee is required to receive the
SiriusXM service.
Refer to:
. www.siriusxm.com or call
1-866-635-2349 (U.S.).
. www.xmradio.ca or call
1-877-209-0079 (Canada).
See Satellite Radio 0147.
Portable Audio Devices
This vehicle may have a 3.5 mm
(1/8 in) auxiliary input and a USB
port in the center console. External
devices such as iPods
®, laptop
computers, MP3 players, and USB
storage devices may be connected.
See Auxiliary Devices 0151.
Bluetooth®
The Bluetooth®system allows users
with a Bluetooth-enabled mobile
phone to make and receive
hands-free calls using the vehicle
audio system and controls.
The Bluetooth-enabled mobile
phone must be paired with the
in-vehicle Bluetooth system before it
can be used in the vehicle. Not all
phones will support all functions.
See Bluetooth (Infotainment
Controls) 0157 orBluetooth (Voice
Recognition) 0161 orBluetooth
(Overview) 0156.
Page 20 of 360
Chevrolet Malibu Limited Owner Manual (GMNA-Localizing-U.S/Canada-
9086425) - 2016 - crc - 7/30/15
In Brief 19
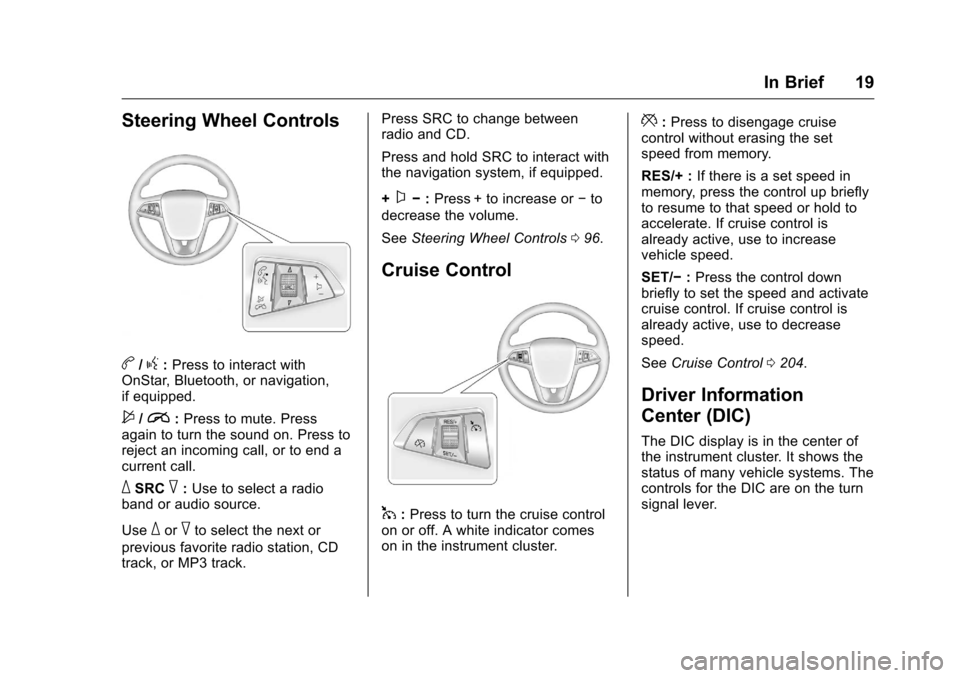
Steering Wheel Controls
b/g:Press to interact with
OnStar, Bluetooth, or navigation,
if equipped.
$/i: Press to mute. Press
again to turn the sound on. Press to
reject an incoming call, or to end a
current call.
_SRC^: Use to select a radio
band or audio source.
Use
_or^to select the next or
previous favorite radio station, CD
track, or MP3 track. Press SRC to change between
radio and CD.
Press and hold SRC to interact with
the navigation system, if equipped.
+
x−
:Press + to increase or −to
decrease the volume.
See Steering Wheel Controls 096.
Cruise Control
1:Press to turn the cruise control
on or off. A white indicator comes
on in the instrument cluster.
*: Press to disengage cruise
control without erasing the set
speed from memory.
RES/+ : If there is a set speed in
memory, press the control up briefly
to resume to that speed or hold to
accelerate. If cruise control is
already active, use to increase
vehicle speed.
SET/− :Press the control down
briefly to set the speed and activate
cruise control. If cruise control is
already active, use to decrease
speed.
See Cruise Control 0204.
Driver Information
Center (DIC)
The DIC display is in the center of
the instrument cluster. It shows the
status of many vehicle systems. The
controls for the DIC are on the turn
signal lever.
Page 41 of 360
Chevrolet Malibu Limited Owner Manual (GMNA-Localizing-U.S/Canada-
9086425) - 2016 - crc - 7/31/15
40 Keys, Doors, and Windows
.PressKon the RKE transmitter.
. Unlock the vehicle using the
Keyless Access system,
if equipped.
. Start the vehicle.
To avoid setting off the alarm by
accident:
. Lock the vehicle after all
occupants have left the vehicle
and all doors are closed.
. Always unlock a door with the
RKE transmitter or use the
Keyless Access system,
if equipped.
Unlocking the driver door with the
key will not disarm the system or
turn off the alarm.
How to Detect a Tamper
Condition
IfKis pressed on the RKE
transmitter and the horn chirps and
the lights flash three times, an alarm
occurred previously while the alarm
system was armed. If the alarm has been activated, a
message will appear on the DIC.
See
Security Messages 0120.
Immobilizer
See Radio Frequency Statement
0 335.
Immobilizer Operation
(Key Access)
This vehicle has a passive
theft-deterrent system.
The system does not have to be
manually armed or disarmed.
The vehicle is automatically
immobilized when the key is
removed from the ignition.
The system is automatically
disarmed when the vehicle is
started with the correct key. The key
uses a transponder that matches an
immobilizer control unit in the
vehicle and automatically disarms
the system. Only the correct key
starts the vehicle. The vehicle may
not start if the key is damaged.
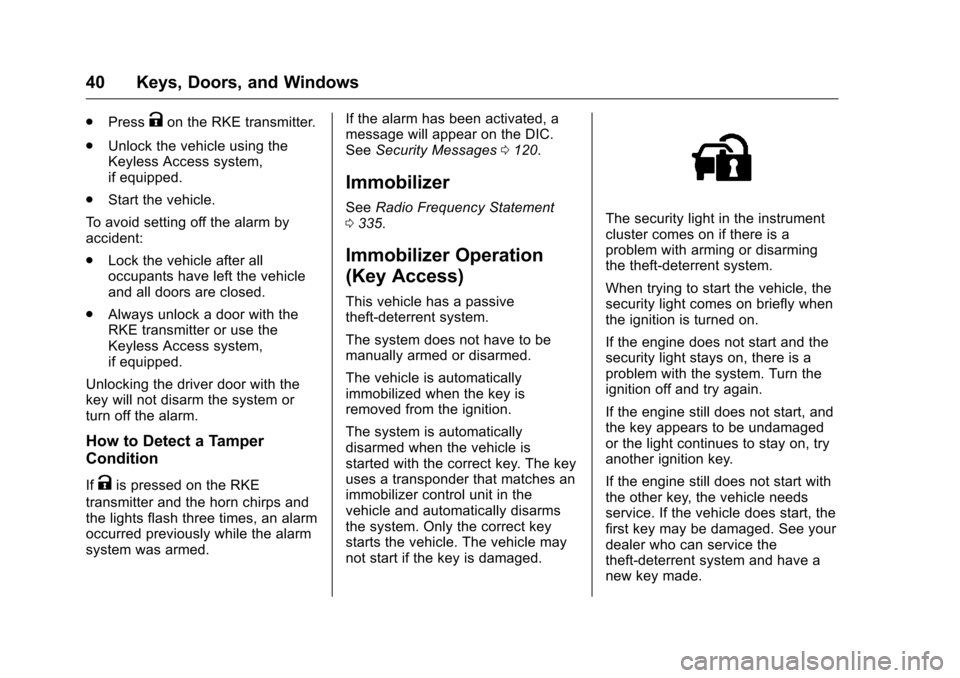
The security light in the instrument
cluster comes on if there is a
problem with arming or disarming
the theft-deterrent system.
When trying to start the vehicle, the
security light comes on briefly when
the ignition is turned on.
If the engine does not start and the
security light stays on, there is a
problem with the system. Turn the
ignition off and try again.
If the engine still does not start, and
the key appears to be undamaged
or the light continues to stay on, try
another ignition key.
If the engine still does not start with
the other key, the vehicle needs
service. If the vehicle does start, the
first key may be damaged. See your
dealer who can service the
theft-deterrent system and have a
new key made.
Page 99 of 360
Chevrolet Malibu Limited Owner Manual (GMNA-Localizing-U.S/Canada-
9086425) - 2016 - crc - 7/30/15
98 Instruments and Controls
activated. SeeWasher Fluid0239
for information on filling the
windshield washer fluid reservoir.
Clear snow and ice from the wiper
blades and windshield before using
them. If frozen to the windshield,
carefully loosen or thaw them.
Damaged blades should be
replaced. See Wiper Blade
Replacement 0244.
Heavy snow or ice can overload the
wiper motor.
Wiper Parking
If the ignition is put in OFF while the
wipers are on LO, HI, or INT, they
will immediately stop.
If the windshield wiper lever is then
moved to OFF before the driver
door is opened or within 10 minutes,
the wipers will restart and move to
the base of the windshield.
If the ignition is put in OFF while the
wipers are performing wipes due to
windshield washing, the wipers
continue to run until they reach the
base of the windshield.Compass
The vehicle may have a compass
display on the center stack. The
compass receives its heading and
other information from the Global
Positioning System (GPS) antenna,
StabiliTrak
®, and vehicle speed
information.
The compass system is designed to
operate for a certain number of
miles or degrees of turn before
needing a signal from the GPS
satellites. When the compass
display shows CAL, drive the
vehicle for a short distance in an
open area where it can receive a
GPS signal. The compass system
will automatically determine when a
GPS signal is restored and provide
a heading again. See Compass
Messages 0116 for the messages
that may be displayed for the
compass.
Clock
The infotainment system controls
are used to access the time and
date settings through the menu
system. The clock menu can only be used with the radio on while in
ON/RUN or ACC/ACCESSORY.
See
Overview 0140 for information
about how to use the menu system.
For vehicles with a navigation
system, see the navigation manual.
Setting the Clock (Radio
with CD)
To set the time:
1. Press the CONFIG button and select Time Settings.
2. Select Set Time.
3. Turn the TUNE/MENU knob to adjust the highlighted number.
4. Press the TUNE/MENU knob to select the next number.
5. To save the time and return to the Time Settings menu, press
the BACK
/button at any time
or press the TUNE/MENU knob
after adjusting the minutes.
Setting the 12/24 Hour Format 1. Press the CONFIG button and select Time Settings.
2. Highlight 12/24 Hour Format.
Page 100 of 360
Chevrolet Malibu Limited Owner Manual (GMNA-Localizing-U.S/Canada-
9086425) - 2016 - crc - 7/30/15
Instruments and Controls 99
3. Press the TUNE/MENU knob toselect the 12 hour or 24 hour
display format.
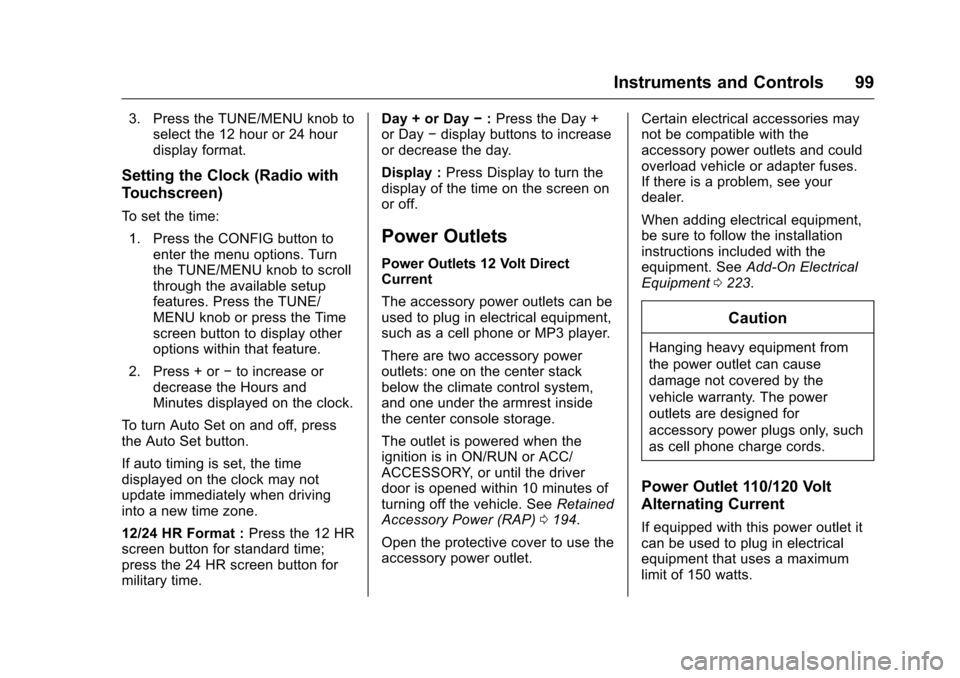
Setting the Clock (Radio with
Touchscreen)
To set the time:
1. Press the CONFIG button to enter the menu options. Turn
the TUNE/MENU knob to scroll
through the available setup
features. Press the TUNE/
MENU knob or press the Time
screen button to display other
options within that feature.
2. Press + or −to increase or
decrease the Hours and
Minutes displayed on the clock.
To turn Auto Set on and off, press
the Auto Set button.
If auto timing is set, the time
displayed on the clock may not
update immediately when driving
into a new time zone.
12/24 HR Format : Press the 12 HR
screen button for standard time;
press the 24 HR screen button for
military time. Day + or Day
−:Press the Day +
or Day −display buttons to increase
or decrease the day.
Display : Press Display to turn the
display of the time on the screen on
or off.
Power Outlets
Power Outlets 12 Volt Direct
Current
The accessory power outlets can be
used to plug in electrical equipment,
such as a cell phone or MP3 player.
There are two accessory power
outlets: one on the center stack
below the climate control system,
and one under the armrest inside
the center console storage.
The outlet is powered when the
ignition is in ON/RUN or ACC/
ACCESSORY, or until the driver
door is opened within 10 minutes of
turning off the vehicle. See Retained
Accessory Power (RAP) 0194.
Open the protective cover to use the
accessory power outlet. Certain electrical accessories may
not be compatible with the
accessory power outlets and could
overload vehicle or adapter fuses.
If there is a problem, see your
dealer.
When adding electrical equipment,
be sure to follow the installation
instructions included with the
equipment. See
Add-On Electrical
Equipment 0223.
Caution
Hanging heavy equipment from
the power outlet can cause
damage not covered by the
vehicle warranty. The power
outlets are designed for
accessory power plugs only, such
as cell phone charge cords.
Power Outlet 110/120 Volt
Alternating Current
If equipped with this power outlet it
can be used to plug in electrical
equipment that uses a maximum
limit of 150 watts.
Page 114 of 360
Chevrolet Malibu Limited Owner Manual (GMNA-Localizing-U.S/Canada-
9086425) - 2016 - crc - 7/30/15
Instruments and Controls 113
detected. SeeVehicle Messages
0 115. All messages appear in the
DIC display in the center of the
instrument cluster.
The vehicle may also have features
that can be customized through the
controls on the radio. See Vehicle
Personalization 0122.
DIC Operation and Displays
The DIC has different displays,
which can be accessed by using the
DIC buttons on the turn signal lever
to the left of the steering wheel. The
DIC displays trip, fuel, vehicle
system information, and warning
messages if a system problem is
detected.
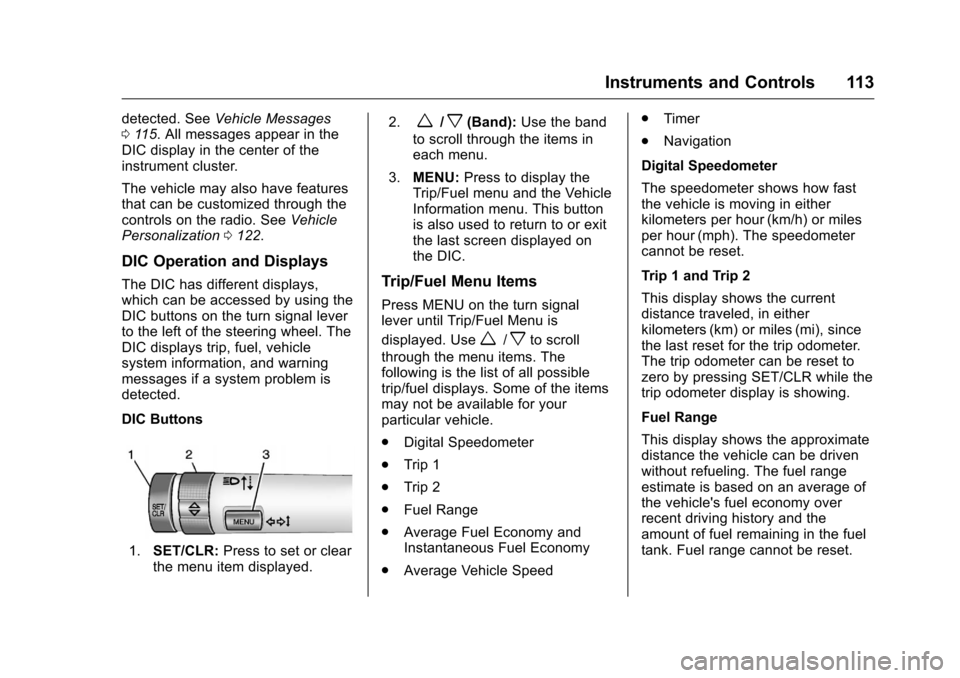
DIC Buttons
1. SET/CLR: Press to set or clear
the menu item displayed. 2.
w/x(Band):
Use the band
to scroll through the items in
each menu.
3. MENU: Press to display the
Trip/Fuel menu and the Vehicle
Information menu. This button
is also used to return to or exit
the last screen displayed on
the DIC.
Trip/Fuel Menu Items
Press MENU on the turn signal
lever until Trip/Fuel Menu is
displayed. Use
w/xto scroll
through the menu items. The
following is the list of all possible
trip/fuel displays. Some of the items
may not be available for your
particular vehicle.
. Digital Speedometer
. Trip 1
. Trip 2
. Fuel Range
. Average Fuel Economy and
Instantaneous Fuel Economy
. Average Vehicle Speed .
Timer
. Navigation
Digital Speedometer
The speedometer shows how fast
the vehicle is moving in either
kilometers per hour (km/h) or miles
per hour (mph). The speedometer
cannot be reset.
Trip 1 and Trip 2
This display shows the current
distance traveled, in either
kilometers (km) or miles (mi), since
the last reset for the trip odometer.
The trip odometer can be reset to
zero by pressing SET/CLR while the
trip odometer display is showing.
Fuel Range
This display shows the approximate
distance the vehicle can be driven
without refueling. The fuel range
estimate is based on an average of
the vehicle's fuel economy over
recent driving history and the
amount of fuel remaining in the fuel
tank. Fuel range cannot be reset.
Page 123 of 360
Chevrolet Malibu Limited Owner Manual (GMNA-Localizing-U.S/Canada-
9086425) - 2016 - crc - 7/30/15
122 Instruments and Controls
Vehicle
Personalization
Use the audio system controls to
access the personalization menus
for customizing vehicle features.
The following are all possible
personalization features. Depending
on the vehicle, some may not be
available.
Infotainment System Audio
System Controls
Using the Faceplate
TUNE/MENU Knob
.Press to enter, select, or activate
a highlighted menu option.
. Turn to highlight a menu option.
. Press to enable or disable a
system setting.
}BACK
. Press to exit a menu.
. Press to return to a previous
screen.
Using the Touch Screen
Press a screen feature to: .
View more feature options.
. Enable or disable the feature.
w:Press to scroll up.
x:Press to scroll down.
Back : Press to return to the
previous menu.
To access the
personalization menu:
1. Press Config on the Home page on the infotainment
system display or CONFIG on
the faceplate.
2. Select the desired feature to display a list of available
options.
3. Select the desired feature setting.
Personalization Menus
The following list of menu items may
be available:
. Languages
. Time and Date
. Radio Settings
. Phone Settings .
Navigation Settings
. Display Settings
. Vehicle Settings
Each menu is detailed in the
following information.
Languages
Select Languages, then select from
the available language(s).
Time and Date
Manually set the time and date. See
Clock 098.
Radio Settings
Select and the following may
display:
.
Auto Volume
. Gracenote Options
. XM Channel Art
. Max Startup Volume
. Number of Favorites Pages
. XM Categories
. Software Versions Menu
Page 125 of 360
Chevrolet Malibu Limited Owner Manual (GMNA-Localizing-U.S/Canada-
9086425) - 2016 - crc - 7/30/15
124 Instruments and Controls
Display Settings
Press and the following may
display:
.Home Page Menu
. Rear Camera Options
. Display Off
. Map Settings
Home Page Menu
Select and the following may
display:
. Customize
. Sort
. Restore Home Page Defaults
Customize
This feature allows the selection of
what icons will be on the first
Home Page.
Select and follow the screen
prompts.
Sort
This feature allows the icons on the
Home Page to be moved. Select and follow the screen
prompts.
Restore Home Page Defaults
This feature will restore the Home
Page to the factory settings.
Select and follow the screen
prompts.
Rear Camera Options
Select and the following may
display:
.
Symbols
. Guiding Lines
Symbols
Select to turn the rear camera
symbols on or off. See Rear Vision
Camera (RVC) 0206.
Guiding Lines
Select to turn the rear camera
guiding lines on or off. See Rear
Vision Camera (RVC) 0206. Display Off
Press to turn the display off. The
display will return when any radio
buttons are pressed or the screen is
touched (if equipped).
Map Settings
See
“Map Settings” in“Configure
Menu” in the infotainment manual.
Vehicle Settings
Select and the following may
display:
.
Climate and Air Quality
. Comfort and Convenience
. Collision/Detection Systems
. Lighting
. Power Door Locks
. Remote Lock/Unlock/Start
. Return to Factory Settings?
Climate and Air Quality
Select and the following may
display:
.
Auto Fan Speed
. Remote Start Heated Seats
Page 129 of 360
Chevrolet Malibu Limited Owner Manual (GMNA-Localizing-U.S/Canada-
9086425) - 2016 - crc - 7/30/15
128 Instruments and Controls
or Off. Press TUNE/MENU to
confirm and go back to the
last menu.
Passive Door Unlock
This allows selection of which doors
are unlocked by pressing the button
on the outside door handle.
Press TUNE/MENU when Passive
Door Unlock is highlighted. Turn the
TUNE/MENU knob to select All
Doors or Driver Door. Press TUNE/
MENU to confirm and go back to the
last menu.
Passive Door Lock
This allows for turning Passive
Locking off, on, or on with feedback.Press TUNE/MENU when Passive
Door Lock is highlighted. Turn the
TUNE/MENU knob to select Off, On,
or On with Active Horn Chirp. Press
TUNE/MENU to confirm and go
back to the last menu.
Return to Factory Settings?
Select Return to Factory Settings?
for the option to return all vehicle
personalization to the default
settings. Turn the TUNE/MENU
knob to select Yes or No. Press
TUNE/MENU to confirm and go
back to the last menu.
Universal Remote
System
See
Radio Frequency Statement
0 335.
Universal Remote System
Programming
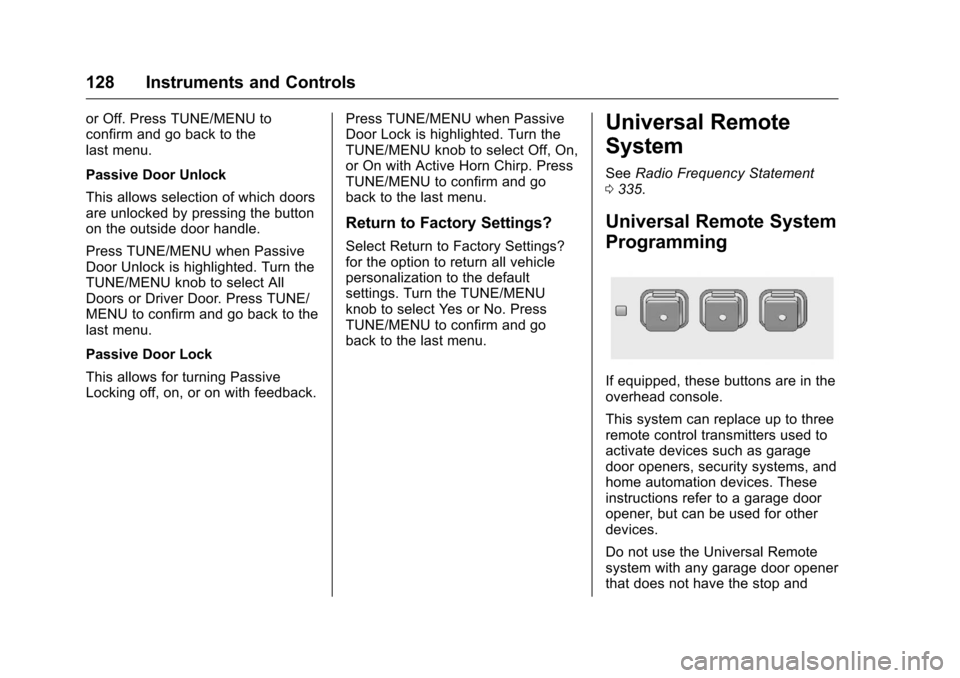
If equipped, these buttons are in the
overhead console.
This system can replace up to three
remote control transmitters used to
activate devices such as garage
door openers, security systems, and
home automation devices. These
instructions refer to a garage door
opener, but can be used for other
devices.
Do not use the Universal Remote
system with any garage door opener
that does not have the stop and
Page 140 of 360
Chevrolet Malibu Limited Owner Manual (GMNA-Localizing-U.S/Canada-
9086425) - 2016 - crc - 7/30/15
Infotainment System 139
Infotainment
System
Introduction
Infotainment . . . . . . . . . . . . . . . . . . 139
Theft-Deterrent Feature . . . . . . 140
Overview . . . . . . . . . . . . . . . . . . . . . 140
Operation . . . . . . . . . . . . . . . . . . . . . 142
Radio
AM-FM Radio . . . . . . . . . . . . . . . . 146
Satellite Radio . . . . . . . . . . . . . . . . 147
Radio Reception . . . . . . . . . . . . . . 148
Backglass Antenna . . . . . . . . . . . 149
Multi-Band Antenna . . . . . . . . . . 149
Audio Players
CD Player . . . . . . . . . . . . . . . . . . . . 150
Auxiliary Devices . . . . . . . . . . . . . 151
Phone
Bluetooth (Overview) . . . . . . . . . 156
Bluetooth (InfotainmentControls) . . . . . . . . . . . . . . . . . . . . 157
Bluetooth (Voice Recognition) . . . . . . . . . . . . . . . . 161
Introduction
Infotainment
Base radio information is included in
this manual. See the infotainment
manual for information on other
available infotainment systems.
Read the following pages to
become familiar with these features.
{Warning
Taking your eyes off the road for
too long or too often while using
any infotainment feature can
cause a crash. You or others
could be injured or killed. Do not
give extended attention to
infotainment tasks while driving.
Limit your glances at the vehicle
displays and focus your attention
on driving. Use voice commands
whenever possible.
The infotainment system has built-in
features intended to help avoid
distraction by disabling some
functions when driving. These functions may gray out when they
are unavailable. Many infotainment
features are also available through
the instrument cluster and steering
wheel controls.
Before driving:
.
Become familiar with the
operation, faceplate buttons, and
screen buttons.
. Set up the audio by presetting
favorite stations, setting the
tone, and adjusting the
speakers.
. Set up phone numbers in
advance so they can be called
easily by pressing a single
button or by using a single voice
command if equipped with
Bluetooth phone capability.
See Defensive Driving 0177.
To play the infotainment system with
the ignition off, see Retained
Accessory Power (RAP) 0194.