low oil pressure CHEVROLET MONTE CARLO 1973 2.G Owners Manual
[x] Cancel search | Manufacturer: CHEVROLET, Model Year: 1973, Model line: MONTE CARLO, Model: CHEVROLET MONTE CARLO 1973 2.GPages: 86, PDF Size: 33.46 MB
Page 14 of 86
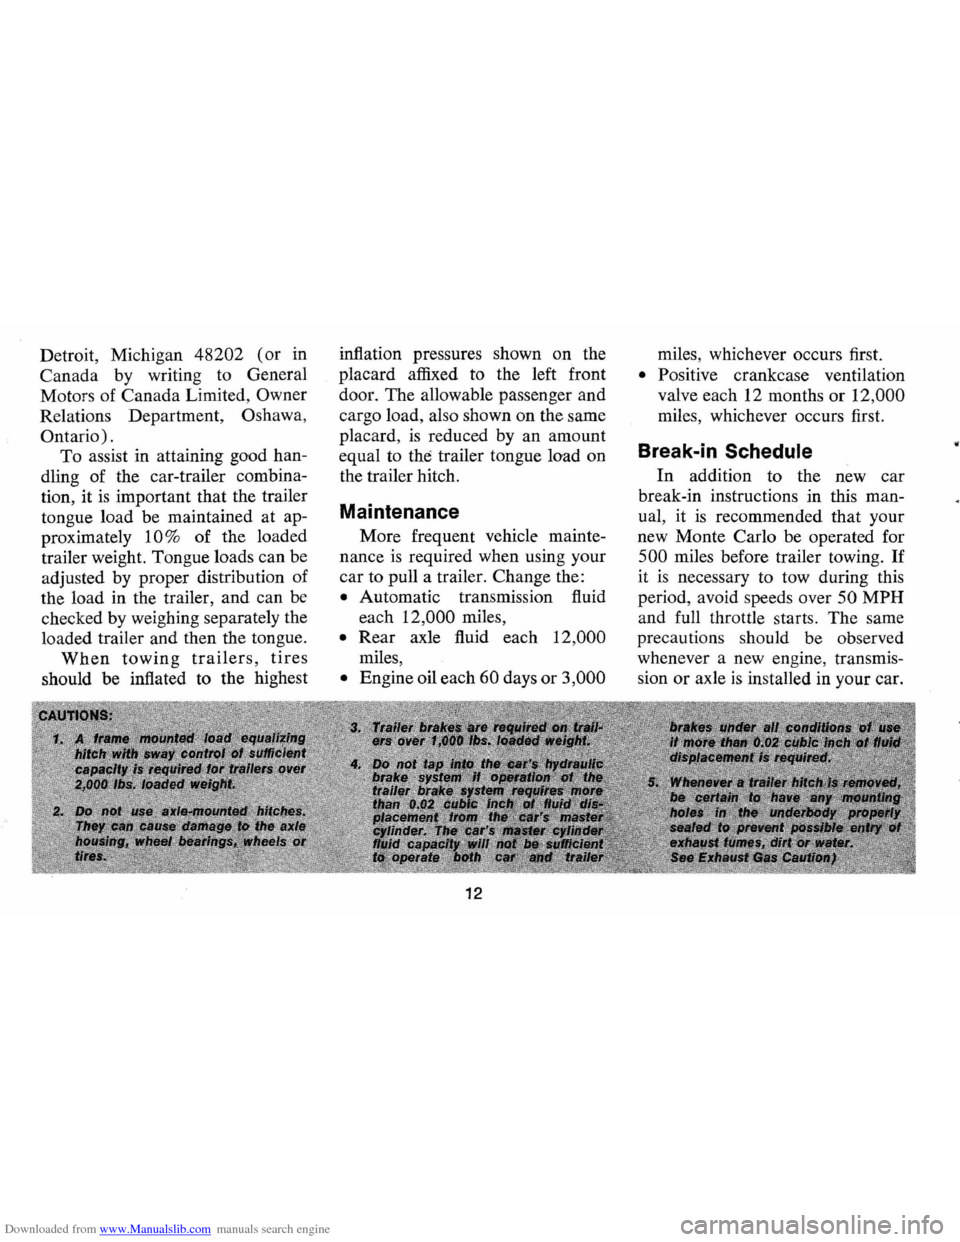
Downloaded from www.Manualslib.com manuals search engine Detroit, Michigan 48202 (or in
Canada by writing to General
Moto rs of Canada Limited,
Owner
Relations Department , Oshawa,
Ontario) .
To assist in attaining good han
dling of the car-trailer combina
tion, it
is important that the trailer
tongue load be maintained at ap
proximately
10% of the loaded
trailer weight. Tongue loads can be
adjusted by proper distribution of
the load in the trailer, and can be
checked by weighing separately the
loaded trailer and then the tongue.
When towing trailers, tires
should be inflated to the highest inflation
pressures shown on the
placard affixed to the left front
door . The allowable passenger and
cargo load, also shown on the same
placard ,
is reduced by an amount
equal to
the trailer tongue load on
the trailer hitch.
Maintenance
More frequent vehicle mainte
nance
is required when using your
car to pull a trailer. Change the:
• Automatic transmission fluid
each
12 ,000 miles ,
• Rear axle fluid each 12,000
miles,
• Engine oil each 60 days or 3,000
12
miles , whichever occurs first.
• Positive crankcase ventilation
valve each 12 months or
12,000
miles, whichever occurs first.
Break-in Schedule
In addition to the new ca r
break-in instructions in this man
ual, it
is recommended that your
new Monte Carlo be operated for
500 miles before trailer towing. If
it is necessary to tow during this
period , avoid speeds over
50 MPH
and full throttle starts. The same
precautions should be observed
whenever a new engine, transmis
sion or axle
is installed in your car.
Page 28 of 86
Downloaded from www.Manualslib.com manuals search engine Instruments
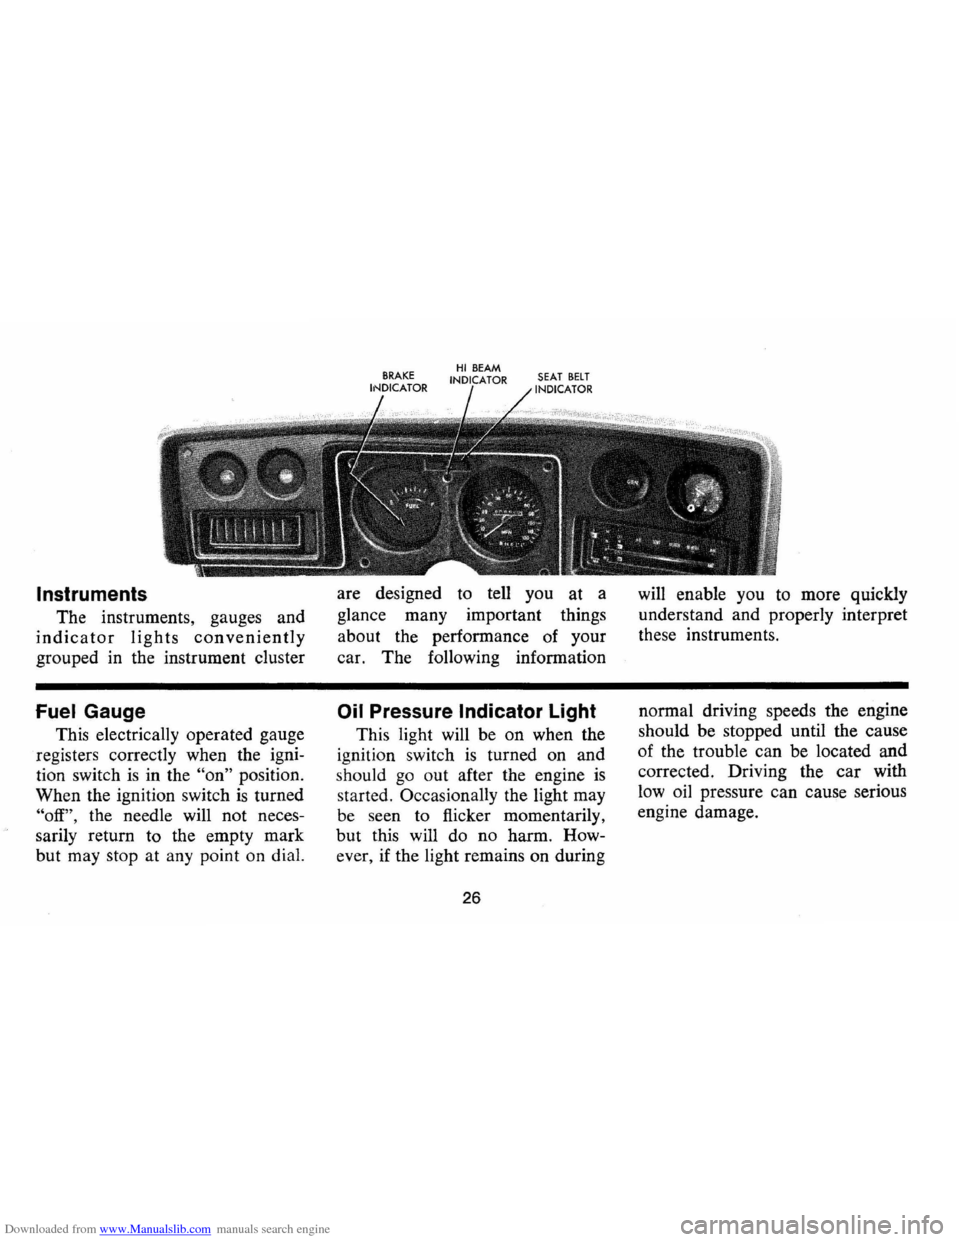
The instruments, gauges and
indicator lights conveniently
grouped in the instrument cluster
Fuel Gauge
This electrically operated gauge
registers correctly when the igni
tion switch
is in the "on" position.
When the ignition switch
is turned
"off", the needle will not neces
sarily return to the empty mark
but may stop at any point on dial. are
designed to tell you at a
glance many important things
about the performance of your
car. The foIlowing information
Oil Pressure Indicator Light
This light will be on when the
ignition switch
is turned on and
s hould
go out after the engine is
started. OccasionaIly the light may
be seen to flicker momentarily,
but this will do no harm. How
ever , if the light remains on during
26
will enable you to more quickly
understand and properly interpret
these instruments .
normal driving speeds the engine
should be stopped until the cause
of the trouble ca n be located and
corrected. Driving the
car with
low oil pressure can cause serious
engine damage.
Page 31 of 86
Downloaded from www.Manualslib.com manuals search engine _ '\' ' 2
1
5 , / '/ ,
[ e /~
O'v RPM !lOa -"-50
Optional Instrument and
Gauges
Tachometer
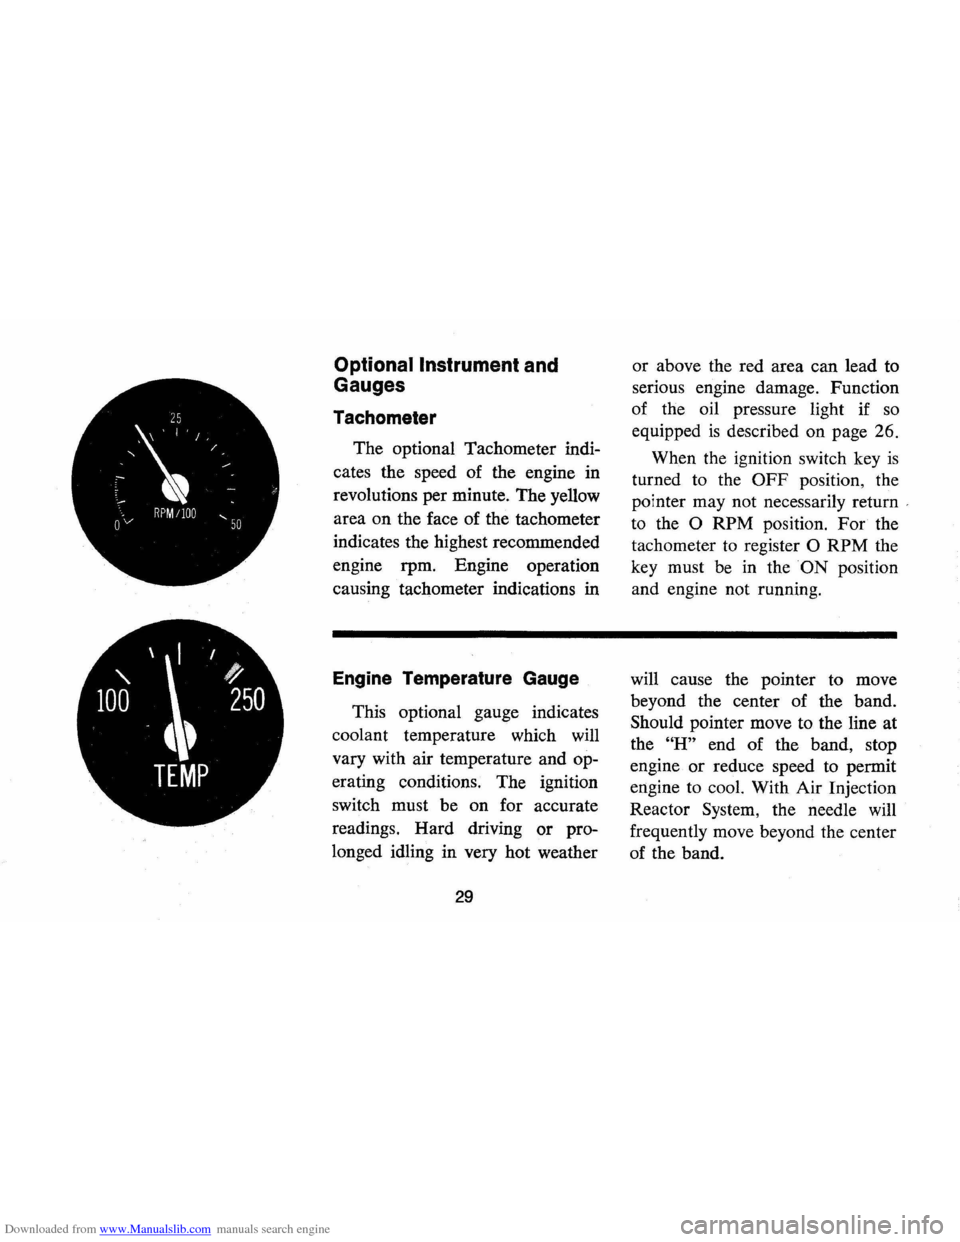
The optional Tachometer indi
cates the speed of the engine in
revolutions per minute. The yellow
area on the face of the tachometer
indicates the highest recommended
engine rpm. Engine operation
causing tachometer indications in
Engine Temperature Gauge
This optional gauge indicates
coolant temperature which will
vary with air temperature and op
erating conditions. The ignition
switch must be on for accurate
readings. Hard driving
or pro
longed idling in very hot weather
29
or above the red area can lead to
serious engine damage. Function
of the oil pressure light if
so
equipped is described on page 26.
When the ignition switch key
is
turned to the OFF position, the
pointer may not necessarily return
'
to the 0 RPM position. For the
tachometer
to register 0 RPM the
key must be in the
ON position
and engine not running.
will cause the pointer to move
beyond the center of the band.
Should pointer move to the line at
the
"H" end of the band, stop
engine
or reduce speed to permit
engine to cool. With Air Injection
Reactor System, the needle will
frequently move beyond the center
of the band.
Page 32 of 86
Downloaded from www.Manualslib.com manuals search engine I I
' /
D C
4 t '
AMPS
Oil Pressure Gauge
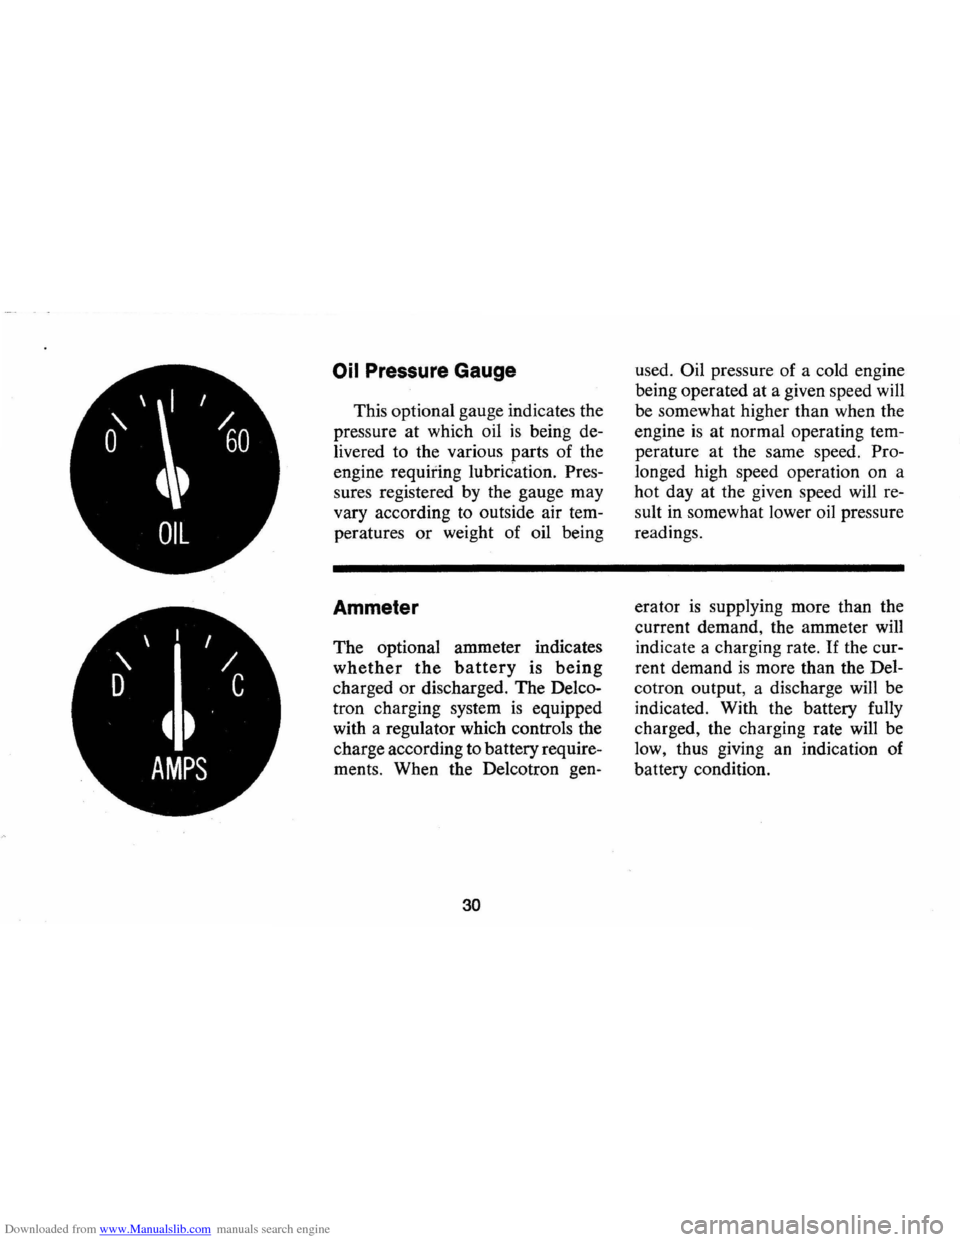
This optional gauge indicates the
pressure at which oil
is being de
livered to the various parts of the
engine
requiting lubriCation. Pres
sures registered by the gauge may
vary according to outside air tem
peratures
or weight of oil being
Ammeter
The optional ammeter indicates
whether the battery is being
charged or discharged. The Delco
tron charging system
is equipped
with a regulator which controls the
charge according to battery require
ments . When the Delcotron gen-
30
used. Oil pressure of a cold engine
being operated at a given speed will
be somewhat higher than when the
engine
is at normal operating tem
perature at the same speed. Pro
longed high speed operation on a
hot day at the given speed will re
sult in somewhat lower oil pressure
readings.
era tor
is supplying more than the
current demand, the ammeter
will
indicate a charging rate. If the cur
rent demand
is more than the Del
cotron output, a discharge will be
indicated. With the battery fully
charged, the charging rate will be
low, thus giving an indication of
battery condition.
Page 49 of 86
Downloaded from www.Manualslib.com manuals search engine Cleaning Fabrics with
Cleaning
Fluid
This type of cleaner should be
used for cleaning stains containing
grease, oil or fats. Excess stain
should be gently scraped off with
a clean dull knife or scraper.
Use
very little cleaner, light pressure,
and clean cloths (preferably cheese
cloth). Cleaning action with
cloth should be from outside of
stain towards center and constantly
changing to a clean section of
cloth. When stain
is cleaned from
fabric, immediately wipe
area
briskly with a clean absorbent
towel or cheese cloth to help dry
area and prevent a cleaning ring.
If ring forms, immediately clean
entire area or panel section of the
trim assembly.
NOTE: Sometimes a difficult spot
may require a second application
of cleaning fluid followed immedi
ately by a soft brush to completely
remove the spot.
Cleaning Fabrics with
Detergent Foam Cleaners
This type of cleaner is excellent
for cleaning general soilage from
fabrics and for cleaning a panel
section where a minor cleaning
ring may be left from spot clean
ing. Vacuum area to remove ex
cess loose dirt. Always clean at
least a full trim panel or section
of trim. Mask adjacent trim along
stitch or weld lines. Mix detergent
type foam cleaners in strict ac
cordance with directions on label
of container.
Use foam only on a
clean sponge or soft bristle brush
-Do not wet fabric excessively or
47
rub harshly with brush. Wipe clean
with a slightly damp absorbent
towel or cloth. Immediately after
cleaning fabric, dry fabric with a
dry towel or hair dryer. Rewipe
fabric with dry absorbent towel or
cloth to restore luster of the trim
and to eliminate any dried residue.
Seat Belt Care
• Clean only with mild soap solu
tion and lukewarm water.
• Do not bleach or dye belts since
this may severely weaken belts.
Removal of Specific Stains
Candy-Chocolate, use cloth soak
ed in lukewarm water; other than
chocolate, use very hot water. Dry.
If necessary, clean lightly with
fabric cleaning fluid.
Chewing Gum-Harden gum with
ice cube and scrape off with dull
knife. Moisten with fabric cleaning
fluid and scrape again,
Page 53 of 86
Downloaded from www.Manualslib.com manuals search engine leaded or low-lead gasolines are
not available, gasolines containing
more than 0.5 grams per gallon
may be used.
In states using the Gasoline Per
formance and Information
System
of fuel designation, unleaded or
low-lead fuels having an anti-knock
designation of
"2" or higher are
recommended.
Gas Cap-The fuel tank filler cap
has a new two-step removal and
installation procedure plus a
pressure-vacuum safety relief.
valve. It is equipped with a double
set of locking tangs.
To remove:
• Rotate cap one-half tum coun
terclockwise to clear the first set
of tangs from the slots inside
the filler neck.
This, will allow
any residual pressure to escape.
• Pull the cap outward and rotate
one-quarter
tum counterclock
wise to clear second set of tangs
and remove the cap.
• To install, reverse this pro
cedure.
NOTE: If this cap requires a re
placement, only a cap with these
same features should be used. Fail
ure to use the correct cap can
result in a serious malfunction of
the system. Correct replacement
caps may be obtained from
your
authorized Chevrolet Dealer.
Engine Oil and Filter
Recommendations
• Use only SE engine oil.
• Change oil each 4 months or
6,000 miles. If more than 6,000
miles are driven in a 4-month
period, change oil each
6,000
miles.
• Change oil each 2 months or
3,000 miles, whichever occurs
51
first, under the following con
ditions:
- driving in dusty conditions
- trailer pulling
- extensive idling
- short-trip operation
at freez-
ing temperatures (engine not
thoroughly warmed-up).
• Operation in dust storms may
require an immediate oil change.
• Replace the oil filter at the first
oil change, and every second oil
change thereafter.
AC oil filters
provide excellent engine pro
tection.
See your Chevrolet dealer for
advice
on the frequency of oil and
filter changes under unusual driv
ing conditions.
The above recommendations
apply to the first change as well as
subsequent oil changes. The oil
change interval for your Monte
Carlo engine
is based on the use of
Page 55 of 86
Downloaded from www.Manualslib.com manuals search engine drain back in the crankcase. To
check the level, remove the oil
gauge rod (dip stick), wipe
it
clean and reinsert it firmly for an
accurate reading. The oil gauge
rod is marked "FULL" and
"ADD." The oil level should be
maintained in the safety margin,
neither going above the
"FULL"
line nor below the "ADD" line.
Reseat the gauge firmly after tak
ing the reading.
Supplemental Engine Oil
Additives
The regular use of supplemental
additives
is specifically not recom
mended and will increase operat
ing costs. However, supplemental
additives are available that can
effectively and economically solve
certain specific problems without
causing other difficulties. For
example, if higher detergency is
required to reduce varnish and
sludge deposits resulting from some unusual
operational difficulty, a
thoroughly tested and approved
additive
- "Super Engine Oil Sup
plement " -
is available at your
Chevrolet dealer.
In the event of
an operational problem, consult
your dealer for advice before using
supplemental additives.
Drive Belts
Every 6,000 miles or 4 months
-inspect drive belts for wear,
fraying, cracking, and tension.
Belts which are in poor condition
should be replaced immediately.
Check tension by applying
moderate thumb pressure midway
between pulleys.
If the center-to
center distance · between pulleys
is
13 to 16 inches, the belt should
deflect
1/2 inch. If the center-to
center distance
is 7 to 10 inches ,
the belt should deflect
~ inch.
Loose belts should be retensioned
to give the correct deflection.
It
is recommended that belts be
53
replaced every 24 months or 24,000
miles, whichever occurs first.
Flame Arrester -Every 12,000
miles-Clean the arrester (located
in the base of the air cleaner) with
kerose:le or a suitable solvent. Dry
with compressed air.
Air Cleaner
Rear
Axle
Standard-Every 4 months or
6,000 miles, whichever occurs first,
check lubricant level and add lubri
cant, if necessary, to
fill to level of
filler plug hole.
Use SAE 80 or
SAE 90 GL-5 Gear Lubricant.
(For vehicles normally operated in
Canada use
SAE 80 GL-5 Gear
Lubricant.)
Positraction -Drain and refill
after
12,000 miles. Then maintain
Page 60 of 86
Downloaded from www.Manualslib.com manuals search engine and in the radiator at least as fre
quently
as engine oil changes.
NOTE: Do not remove radiator
cap when coolant
is hot and under
pressure.
Level should be at the
"FULL
COLD"
mark on the recovery tank
and at the bottom of the radiator
filler neck when the system
is cold.
During normal warm weather op
eration the coolant should be at
the
"FULL HOT" mark on the re
covery tank.
If the recovery tank is
empty or coolant is below the
"FULL COLD" mark the radiator
level should be checked and cool
ant added to the radiator and re
covery tank
as needed. Use a 50/50
mixture of high-quality ethylene gly
col antifreeze and water for coolant
additions.
If regular additions are
required see your dealer for a cool
ing system check.
NOTE: If recommended quaIily
antifreeze is used, supplemental in
hibitors or additives claiming to
provide increased capability are
not necessary. They may be detri
mental
to the efficient operation of
the system, and represent an un
necessary operating expense.
Every year, the cooling system
should be serviced
as follows:
1 . Wash radiator cap and filler
neck with clean water.
2. Check coolant for proper
level and freeze protection.
3. Pressure test system and radi
ator cap for proper pressure
holding capacity (15 psi).
If
replacement of cap is re
quired, use the special AC
cap designed for coolant re
covery systems, specified for
your car model.
4. Tighten hose clamps and in
spect all hoses. Replace hoses
58
whenever swollen, checked or
otherwise deteriorated.
5. Clean frontal area of radiator
core and air conditioning
condenser.
Every two years or
24,000 miles,
whichever first occurs, the cooling
system should be flushed and re
filled using the following recom
mended procedure:
1. Run engine, with radiator cap
removed, until normal operat
ing temperature
is reached
and upper radiator hose
is hot
(indicates thermostat
is open.)
2. Stop engine and open radiator
drain valve to drain coolant.
(To speed this operation, the
drain plugs in the block can
also be removed.)
Page 62 of 86
Downloaded from www.Manualslib.com manuals search engine • Maintain cooling system freeze
protection at
.;...200 F or below
to ensure protection against
corrosion and loss of coolant
from boiling , even though freez
ing temperatures are not
ex
pected.
• Add ethylene glycol base cool
ant that meets GM Specification
1899-M when coolant additions
are required because of coolant
loss or to provide additional
protection against freezing at
temperatures lower than
_200 F
(_320 F in Canada).
NOTE: Alcohol or methanol base
coolants or plain water are not
recommended for your Monte
Carlo at any time.
Radiator Pressure Cap
The radiator cap, a 15 lb. pres
sure type, must be installed tightly,
otherwise coolant may be lost and
damage to engine may result from
overheating. Radiator pressure caps
should be checked periodically for
proper operation.
If replacement is
required specify AC.
Thermostat
The cooling system is protected
and controlled by a thermostat in
stalled in the engine coolant outlet
to maintain a satisfactory operating
temperature of the engine. This
thermostat
is designed for continu
ous use through both winter and
summer and need not be changed
seasonally . When replacement
is
necessary, Delco parts are recom
mended.
60
Tires
The factory installed tires on
your car
as shown on the following
Tire Usage chart are designed to
provide the best all around per
formance for normal vehicle op
eration. When inflated
as recom
mended on the tire pressure plac
ard, located on the left door of
your vehicle, they have the load
carrying capacity to operate satis
factorily at all normal highway
speeds.
Tire Care
Tires should be checked regu
larly for proper inflation pressure,
wear, and damage. The following
information will assist you in prop
erly caring for your tires:
Page 83 of 86
Downloaded from www.Manualslib.com manuals search engine Gasoline (See Also Fuel) Do Not Use For Cleaning ........... 46 Filler Cap Location. .. .. .. . . . .. .. ... 51 Gauge ............................. 25 Low-Lead .......................... 50 Recommendations. . . . . . . . . . . . . . . . .. 50 Gauge, Fuel.. . . . . . . . . . . . . . . . . . . . . . . .. 26 Gearshift Lever. . . . . . . . . . . . . . . . . . . . . .. 18 Generator Indicator Light ("AMP") .......................... 27 Glove Box. . . . . . . . . . . . . . . . . . . . . . . . . .. 25 Harness, Safety (See Seat Belts)
Hazard Warning Flasher. .............. 41 Headlamp
Flickering (Circuit Breaker). . . . . . . . .. 73 High Beam Dimmer Switch .......... 24 High Beam Indicator ........... ; . . .. 28 Light and Instrument Panel
Switch ........................... 28 Head Restraints . . . . . . . . . . . . . . . . . . . . .. 10 Heater Operation. . . . . . . . . . . . . . . . . . . .. 34 High Speed Operation
During Break-In.. .... .. .. .. .... .... 2
Tires .............................. 60 Hitches, Trailer... . . . . . . . . . . . . . . . . . . .. II
Hood Latch Maintenance
.................. 56 Release .............. Inside Back Cover
Horn ................................ 22 "HOT" Light (See Engine
Temperature Light)
Hub Caps, Replacing.. . . . . . . . . . . . . . . .. 43 Hydroplaning. . . . . . . . . . . . . . . . . . . . . . .. 65 Identification Numbers
Body ........................... : .. 71 Engine ............................ 71 Vehicle ............................ 71
Ignition Keys.................. ............ 3
Lock ..... ......................... 15 In Case Of Emergency. . . . . . . . . . . . . . . .. 41 Indicator Lights
Brake ................ ............. 27 Electrical Charging (Generator) ....... 27 Engine Temperature. . . . . . . . . . . . . . . .. 27 Fuel .............................. 26 Oil Pressure. . . . . . . . . . . . . . . . . . . . . . .. 26 Infant Restraining Methods. . . . . . . . . . .. 10 Infant Safety Carrier. . . . . . . . . . . . . . . . .. 10 Inflation Pressure, Tires. . . . . . . . . . . . . . .. 60 InIets, Ventilation System .............. 32 Inside Rearview Mirror. . . . . . . . . . . . . . . . 6
Instrument Panel. . . . . . . . . . . . . . . . . . . .. 25 Interior Appearance Care .............. 47 Jack
Operation .......................... 44 Storage .............. ............. , 44 Jump Starting With Booster Battery. . . .. 43 Key Buzzer System ....... , ............ 15 Keys................................ 3
Knocking Engine (See Fuel)
(Recommendations)
Lacquer, Acrylic Care .
................ 49 Lane Changer and Turn Signal. . . . . . . .. 20 Lap and Shoulder Belts... . . . . . . . . . . . . . 6
Latches
Door............. ................. 4
Folding Seat Back. . . . . . . . . . . . . . . . .. 4
Hood ................. ............ 56 Lighter, Cigarette ......... ............ 31 Lights ...................... , ........ 73 Backup ............................ 73 Brake Warning . . . . . . . . . . . . . . . . . . . .. 27 Bright Beam Indicator ............... 28
80
Bright Beam Switch .............. , .. 24 Bulb Chart. . . . . . . . . . . . . . . . . . . . . . . .. 73 Courtesy. . . . . . . . . . . . . . . . . . . . . . . . . .. 73 Engine Temperature Indicator. . . . . . .. 27 Generator Indicator. . . . . . . . . . . . . . . .. 27 Hazard Flasher. . . . . . . . . . . . . . . . . . . .. 41 Headlamp Circuit Breaker. . . . . . . . . .. 73 Headlamps. . . . . . . . . . . . . . . . . . . . . . . .. 28 Maintenance . . . . . . . . . . . . . . . . . . . . . .. 73 Oil Pressure Indicator. . . . . . . . . . . . . .. 26 Sidemarker. . . . . . . . . . . . . . . . . . . . . . .. 73 Switch ............................. 28 Tail and Brake. . . . . . . . . . . . . . . . . . . .. 73 Turn Signal Indicator. . . . . . . . . . . . . .. 20 Turn Signals. . . . . . . . . . . . . . . . . . . . . .. 20 Linings, Brake ..................... 24, 56 Liquid Tire Chain .................... 41 Load, Full Rated (See Tires)
Locks
Door......................... .. ... 4
Glove Box....... .................. 4
Ignition. . . . . . . . . . . . . . . . . . . . . . . . . .. 15 Steering Column .................... 15 Low-Lead Fuels ...................... 51 "Low" (L) Transmission Range ........ 18 Lubrication Oils ............................... 51 Recommendations. . . . . . . . . . . . . . . . .. 51 Luggage Compartment, Driving
While Open ........................ 15 Luggage Or Cargo Caution. . . . . . . . . . .. 15 Maintenance
Appearance Care. . . . . . . . . . . . . . . . . .. 46 Schedule. . . . . . . . . . . . . . . . . . . . . . . . . .. 50 Manual Transmission ................. 19 Master Cylinder, Brake. . . . . . . . . . . . . . .. 56 Metal Cleaners. . . . . . . . . . . . . . . . . . . . . .. 49 Methods Of Restraining Children ....... 10