headlamp CHEVROLET MONTE CARLO 1995 5.G Owners Manual
[x] Cancel search | Manufacturer: CHEVROLET, Model Year: 1995, Model line: MONTE CARLO, Model: CHEVROLET MONTE CARLO 1995 5.GPages: 324, PDF Size: 16.74 MB
Page 81 of 324
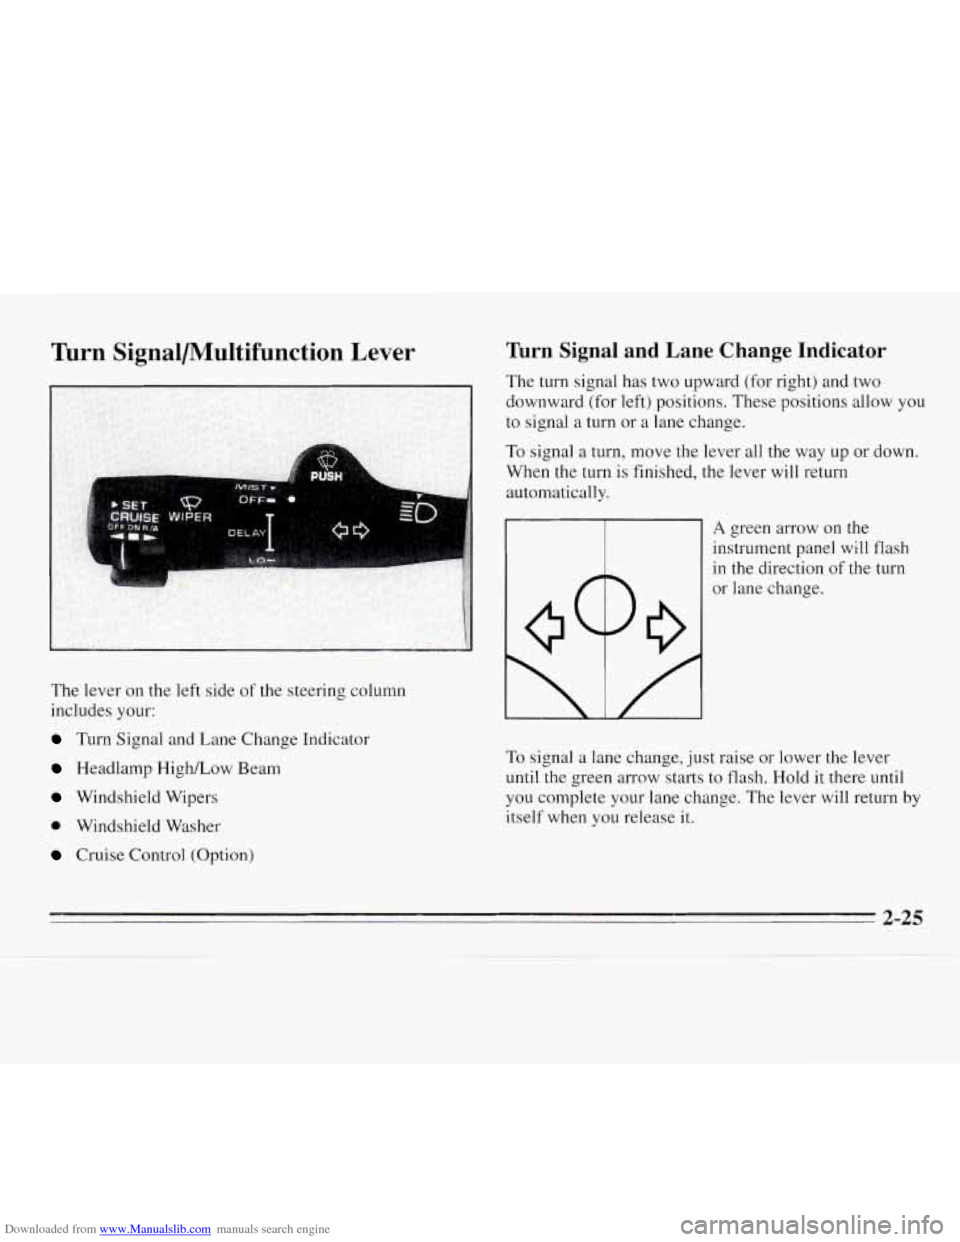
Downloaded from www.Manualslib.com manuals search engine Turn Signal/Multifunction Lever
The lever on the left side of the steering column
includes your:
Turn Signal anu Lane Lnange rndicator
Headlamp HighLow Beam
Windshield Wipers
0 Windshield Washer
Cruise Control (Option)
Turn Signal and Lane Change Indicator
The turn signal has two upward (for right) and two
downward
(for left) positions. These positions allow you
to signal a turn or a lane change.
To signal a turn, move the lever all the way
up or down.
When the turn is finished, the lever will return
automatically.
A green arrow on the
instrument panel will flash
in
or the
direction
lane change. of
the turn
To signal a lane change, just raise or lower the lever
until the green arrow starts to flash. Hold
it there until
you complete your lane change. The lever will return by
itself when you release it.
Page 82 of 324
Downloaded from www.Manualslib.com manuals search engine As you signal a turn or a lane change, if the arrow
flashes faster than normal, a signal bulb may be burned
out and other drivers won’t
see your turn signal.
If a bulb is burned out, replace it to help avoid an
accident. If the green arrows don’t
go on at all when you
signal a turn, check the fuse (see “Fuses and Circuit
Breakers’’ in the Index) and for burned-out bulbs.
A chime will sound if you leave your turn signal on for
more than
1/2 mile (0.8 km).
Headlamp High-Low Beam Windshield Wipers
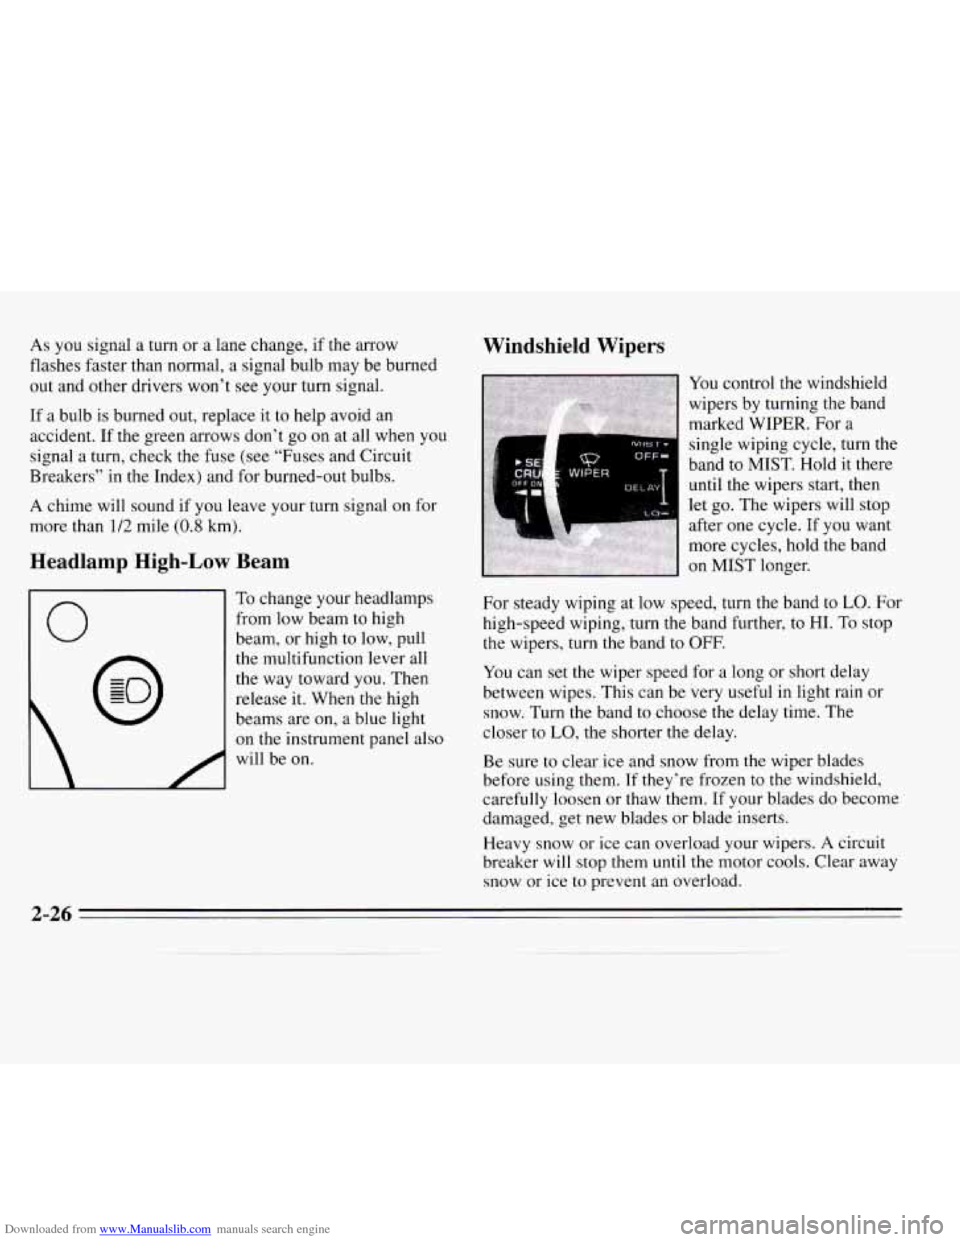
You control the windshield
wipers by turning the band
marked WIPER. For a
6s WIPER
single wiping cycle, turn the
band to
MIST. Hold it there
until the wipers start, then
let
EO. The wipers will stop
0
To change your headlamps
from low beam
to high
beam, or high to low, pull
the multifunction lever all
the way toward you. Then
release it. When
the high
beams are on, a blue light
on the instrument panel also
will be on.
For steady wiping at low speed, turn the band to LO. For
high-speed wiping, turn the band further, to
HI. To stop
the wipers, turn the band
to OFF.
You can set the wiper speed for a long or short delay
between wipes. This can be very useful in light rain or
snow.
Turn the band to choose the delay time. The
closer to
LO, the shorter the delay.
Be sure to clear ice and
snow from the wiper blades
before using them.
If they’re frozen to the windshield,
carefully loosen or thaw them, If your blades
do become
damaged, get new blades or blade inserts.
Heavy snow or ice can overload your wipers.
A circuit
breaker will stop them until the motor cools. Clear away
snow or ice to prevent an overload.
2-26
Page 87 of 324
Downloaded from www.Manualslib.com manuals search engine Lamps Sidemarker Lamps
Instrument Panel Lamps
Courtesy Lamps
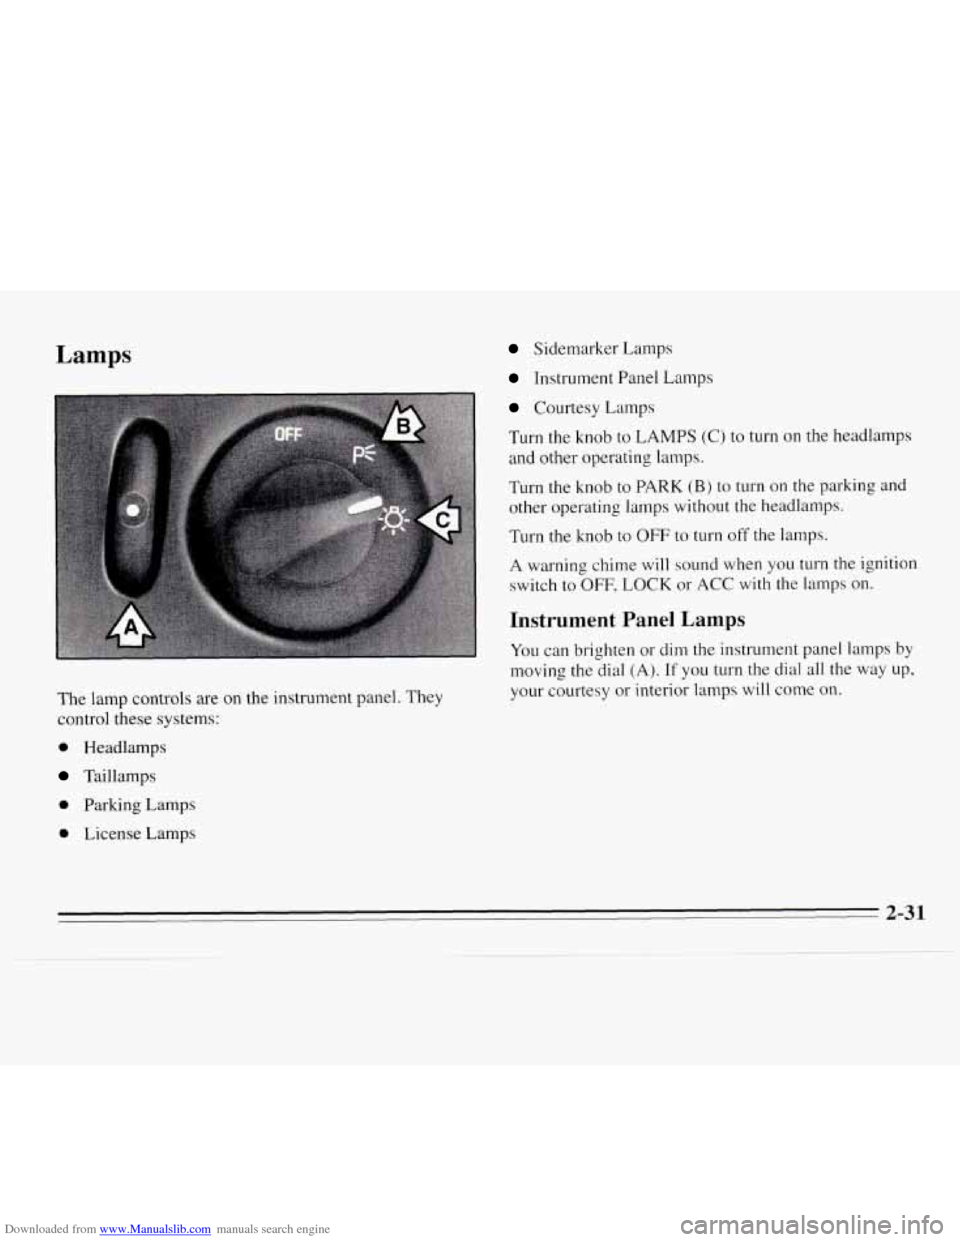
Turn the knob
to LAMPS (C) to turn on the headlamps
and other operating lamps.
Turn the knob to
PARK (B) to turn on the parkine and
other operating lamps without the headlamps.
Turn the knob to
OFF to turn off the lamps.
A warning chime will sound when you
turn the ignition
switch to
OFF, LOCK or ACC with the lamps on.
Instrument Panel Lamps
You can brighten or dim the instrument panel lamps by
moving the dial (A). If you turn the dial all the way up,
your courtesy
or interior lamps will come on.
The lamp controls are on the instrument panel. They
control these systems:
0 Headlamps
Taillamps
0 Parking Lamps
0 License Lamps
Page 88 of 324
Downloaded from www.Manualslib.com manuals search engine Daytime Running Lamps (Canada Only)
Daytime Running Lamps (DRL) make it easier to see
the front of your vehicle during the day. DRL can be
helpful when it’s raining and in the short periods after
dawn and before sunset. Several countries, including
Canada, require
DRL.
A light sensor on top of the instrument panel makes the
DRL work,
so be sure it isn’t covered.
The DRL system will make your low-beam headlamps
come on at reduced brightness in daylight when:
0 The ignition is on,
0 The headlamp switch is off, and
0 The parking brake is released.
When the
DRL are on, only your low-beam headlamps
will be on. The taillamps, sidemarker and other lamps
won’t be
on. Your instrument panel won’t be lit up
either.
When it’s dark enough outside, your low-beam
headlamps will change to full brightness. The other
lamps that come on with your headlamps will also come
on.
When it’s bright enough outside, the regular lamps will
go off, and your low-beam headlamps change to the
reduced brightness of DRL.
To idle your vehicle with the DRL
off, set the parking
brake while the ignition
is in OFF or LOCK. Then start
your vehicle. The DRL will stay off until you release the
parking brake.
As with any vehicle, you should turn on the regular
headlamp system any time you need it.
Interior Lamps
When any door is opened, several lamps come on. These
lamps are courtesy lamps. They make it easy for you
to
enter and leave your vehicle. You can also turn these
lamps on by moving the dial near the headlamp knob all
the way
up.
Some of the lamps have switches so you can turn them
on, even when the doors are closed. These lamps are
reading lamps. To avoid draining your battery, be sure to
turn off all reading lamps when leaving your vehicle.
2-32
Page 142 of 324
Downloaded from www.Manualslib.com manuals search engine Here are some tips on night driving.
0
0
0
0
0
0
0
Drive defensively.
Don’t drink and drive.
Adjust your inside rearview mirror to reduce the
glare from headlamps behind you.
Since
you can’t see as well, you may need to slow
down and keep more space between you and other
vehicles.
Slow down, especially on higher speed roads. Your
headlamps can light up only
so much road ahead.
In remote areas, watch for animals.
If you’re tired, pull off the road in a safe place and
rest.
Night Vision
No one can see as well at night as in the daytime. But as
we get older these differences increase. A 50-year-old
driver may require at least twice
as much light to see the
same thing at night
as a 20-year-old.
What you do in the daytime can also affect your night
vision. For example,
if you spend the day in bright
sunshine you are wise to wear sunglasses. Your eyes will have less trouble adjusting to night.
But if
you’re
driving, don’t wear sunglasses at night. They may cut
down on glare from headlamps, but they also make a lot
of things invisible.
You can be temporarily blinded by approaching
headlamps. It can take
a second or two, or even several
seconds, for your eyes to readjust to
the dark. When you
are faced
with severe glare (as from a driver who
doesn’t lower the high beams, or
a vehicle with
misaimed headlamps), slow down
a little. Avoid staring
directly into the approaching headlamps.
Keep your windshield and all the glass on your vehicle
clean
-- inside and out. Glare at night is made much
worse by dirt on the glass. Even the inside
of the glass
can build up
a film caused by dust. Dirty glass makes
lights dazzle and flash more than clean glass would,
making
the pupils of your eyes contract repeatedly.
Remember that your headlamps light up far less of a
roadway when you are in
a turn or curve. Keep your
eyes moving; that way, it’s easier
to pick out dimly
lighted objects. Just
as your headlamps should be
checked regularly for proper aim,
so should your eyes
be examined regularly. Some drivers suffer from night
blindness
-- the inability to see in dim light -- and
aren’t even aware of
it.
4-14
Page 144 of 324
Downloaded from www.Manualslib.com manuals search engine Driving too fast through large water puddles or even
going through some car washes can cause problems, too.
The water may affect your brakes. Try to avoid puddles.
But if
you can’t, try to slow down before YOU hit them.
Hydroplaning
Hydroplaning is dangerous. So much water can build up
under your tires that they can actually ride on the water.
This can happen
if the road is wet enough and you’re
going fast enough. When your vehicle is hydroplaning,
it has little or no contact with the road. Hydroplaning
doesn’t happen often. But it
can if your
tires haven’t much tread or if the pressure
in one or
more is low. It can happen
if a lot of water is standing on
the road. If
you can see reflections from trees, telephone
poles, or other vehicles, and raindrops “dimple” the
water’s surface, there could be hydroplaning.
Hydroplaning usually happens at higher speeds. There
just isn’t a hard and fast rule about hydroplaning. The
best advice is to slow down when
it is raining.
Some Other Rainy Weather Tips
Turn on your low-beam headlamps -- not just your
parking lamps
-- to help make you more visible to
others.
Besides slowing down, allow some extra following
distance. And be especially careful when you pass
another vehicle. Allow yourself more clear room
ahead, and be prepared to have your view restricted
by road spray.
Have good tires with proper tread depth. (See
“Tires”
in the Index.)
4-16
Page 153 of 324
Downloaded from www.Manualslib.com manuals search engine Run your engine only as long as you must. This saves
fuel. When you run the engine, make it go a little faster
than just idle. That is, push the accelerator slightly. This
uses less fuel for the heat that you get and
it keeps the
battery charged.
You will need a well-charged battery to
restart the vehicle, and possibly for signaling later on
with your headlamps. Let the heater run for awhile.
Then, shut the engine off and close the window almost
all the way
to preserve the heat. Start the engine again
and repeat this only when you feel really uncomfortable
from
the cold. But do it as little as possible. Preserve the
fuel as long as you can. To help keep warm, you can get
out of the vehicle and do some fairly vigorous exercises
every half hour or
so until help comes.
4-25
Page 223 of 324
Downloaded from www.Manualslib.com manuals search engine Headlamps
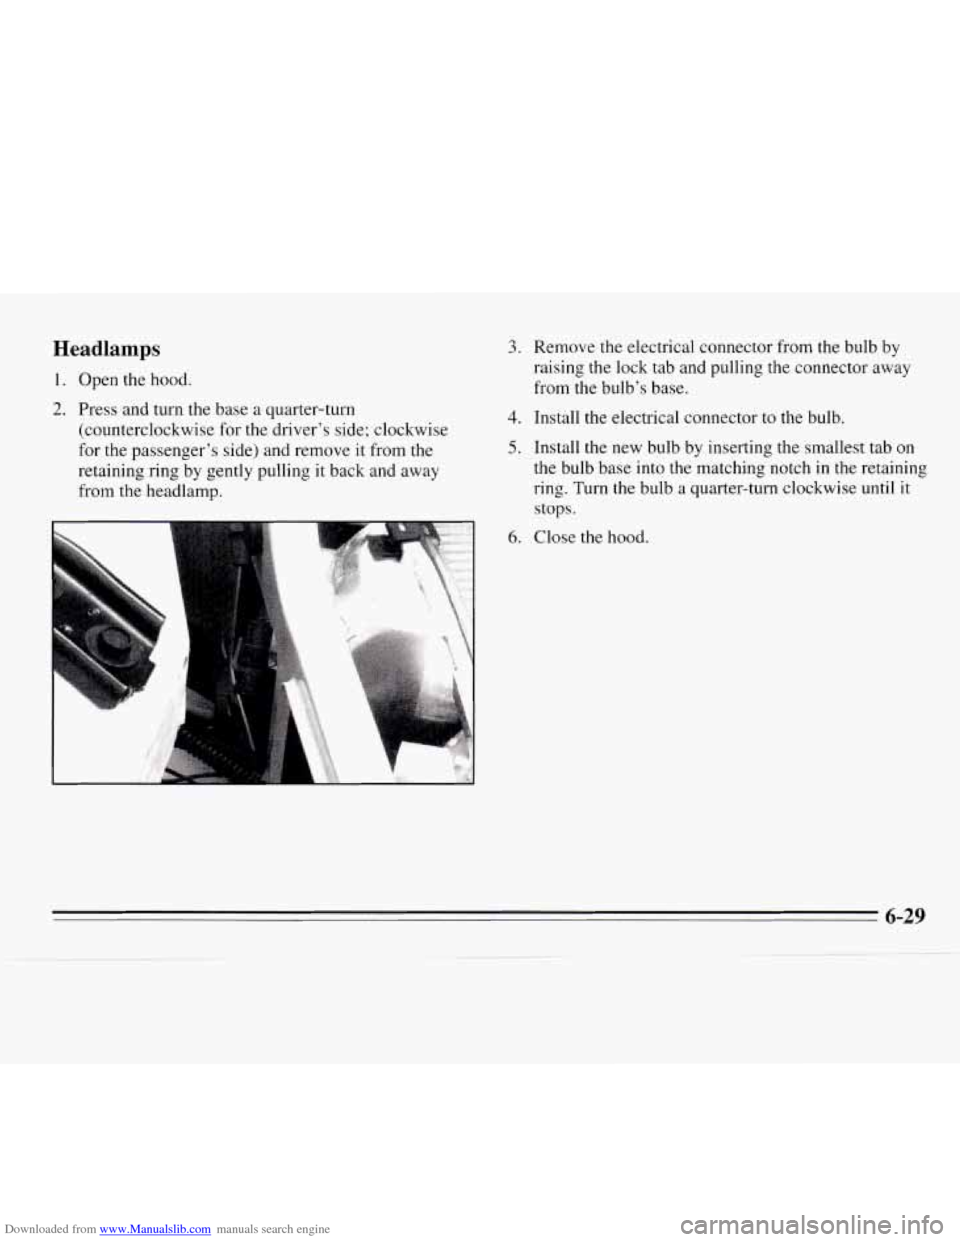
1. Open the hood.
2. Press and turn the base a quarter-turn
(counterclockwise for the driver’s side; clockwise
for the passenger’s side) and remove it from the
retaining ring by gently pulling it back and away
from the headlamp.
-
3. Remove the electrical connector from the bulb by
raising the lock tab and pulling the connector away
from the bulb’s base.
4. Install the electrical connector to the bulb.
5. Install the new bulb by inserting the smallest tab on
the bulb base
into the matching notch in the retaining
ring. Turn the bulb a quarter-turn clockwise until
it
stops.
6. Close the hood.
6-29
Page 225 of 324
Downloaded from www.Manualslib.com manuals search engine 1
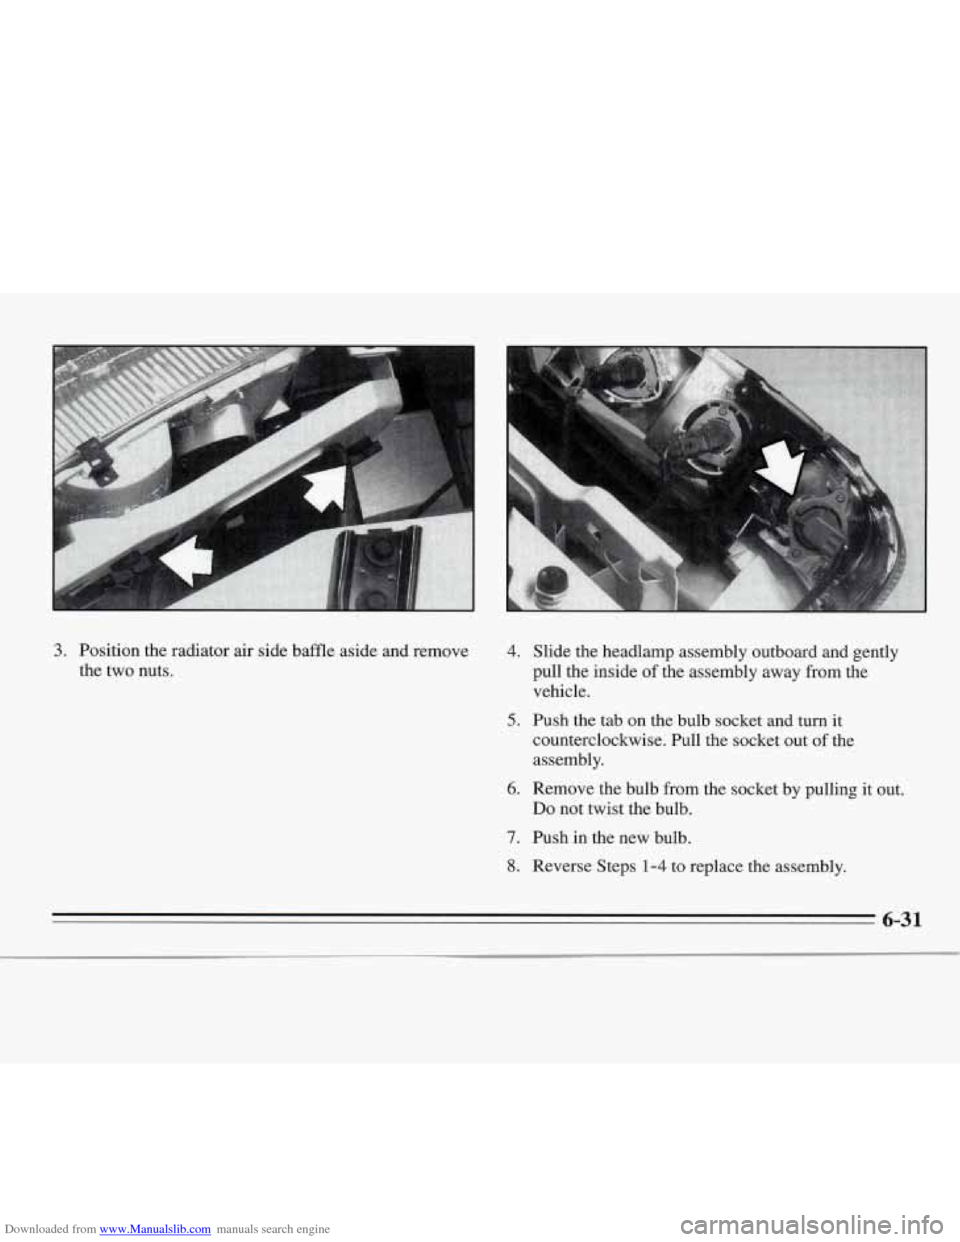
3. Position the radiator air side baffle aside and remove
the two nuts. 4. Slide the headlamp assembly outboard and gently
pull the inside of the assembly away from the
vehicle.
5. Push the tab on the bulb socket and turn it
counterclockwise. Pull the socket out of the
assembly.
Do not twist the bulb.
6. Remove the bulb from the socket by pulling it out.
7. Push in the new bulb.
8. Reverse Steps 1-4 to replace the assembly.
6-3 1
Page 237 of 324
Downloaded from www.Manualslib.com manuals search engine NOTICE:
The wrong wheel can also cause problems with
bearing life, brake cooling, speedometer/odometer
calibration, headlamp
aim, bumper height, vehicle
ground clearance, and
tire or tire chain clearance
to the body and chassis.
Used Replacement Wheels
Tire Chains
NOTICE:
If your Chevrolet has P215/60R16 or P225/60R16
size tires, don’t use tire chains; they can damage
your vehicle.
If you have other tires, use tire chains only where
legal and only when you must. Use only
SAE
Class “S” type chains that are the proper size for
your tires. Install them on the front tires and
tighten them
as tightly as possible with the ends
securely fastened. Drive slowly and follow the
chain manufacturer’s instructions.
If you can
hear the chains contacting your vehicle, stop and
retighten them. If the contact continues, slow
down until
it stops. Driving too fast or spinning
the wheels with chains on will damage your
vehicle.
6-43