spare tire CHEVROLET MONTE CARLO 1996 5.G Owners Manual
[x] Cancel search | Manufacturer: CHEVROLET, Model Year: 1996, Model line: MONTE CARLO, Model: CHEVROLET MONTE CARLO 1996 5.GPages: 340, PDF Size: 17.79 MB
Page 195 of 340
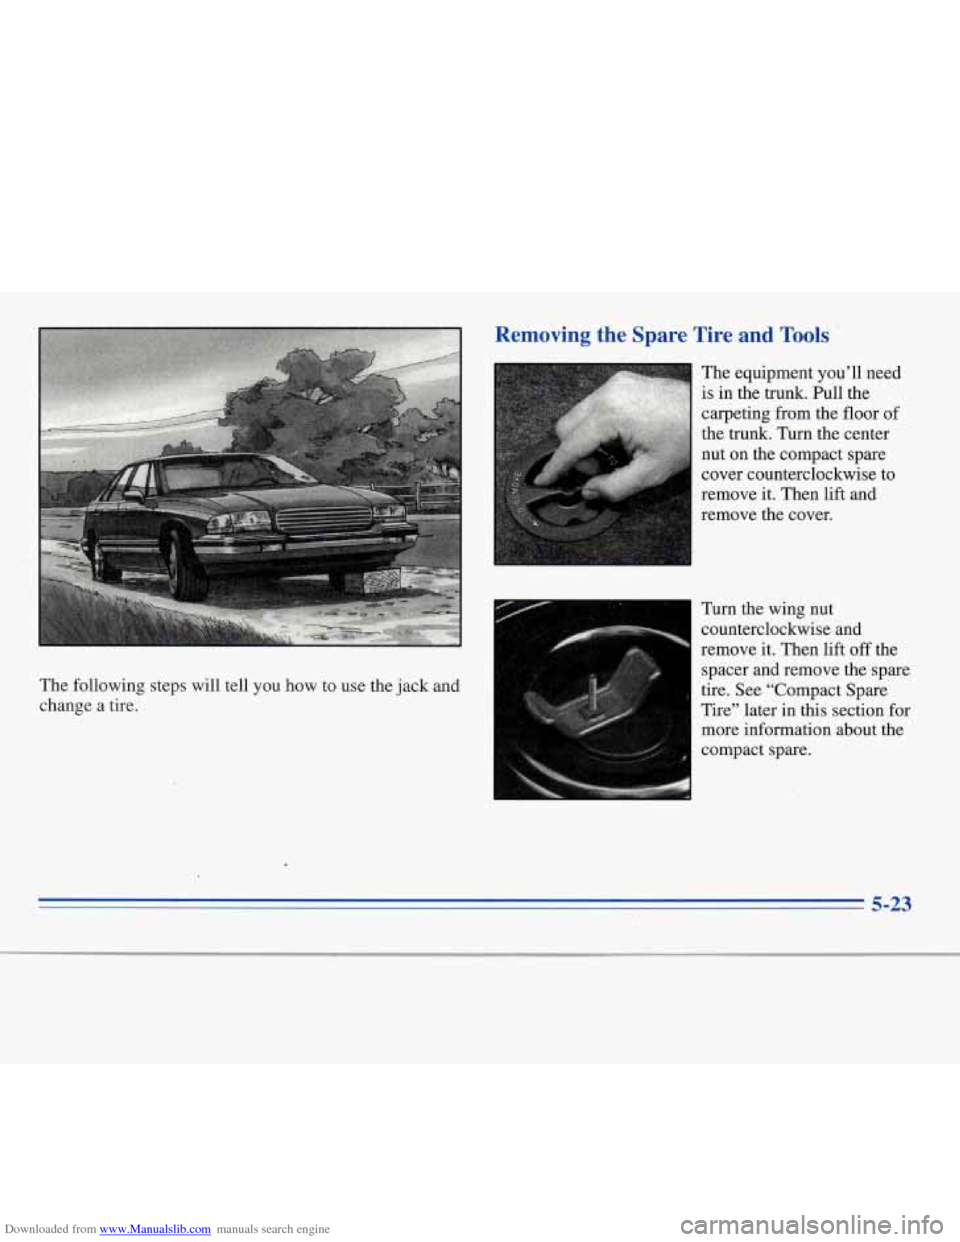
Downloaded from www.Manualslib.com manuals search engine The following steps will tell you how to use the jack and
change a tire. remove the
cover.
I
Turn the wing nut
counterclockwise and
remove it. Then lift
off the
spacer and remove the spare
tire. See “Compact Spare
Tire” later in
this section for
I more information about the
compact spare.
5-23
Page 198 of 340
Downloaded from www.Manualslib.com manuals search engine Removing the Flat Tire and Installing the
Spare
Tire
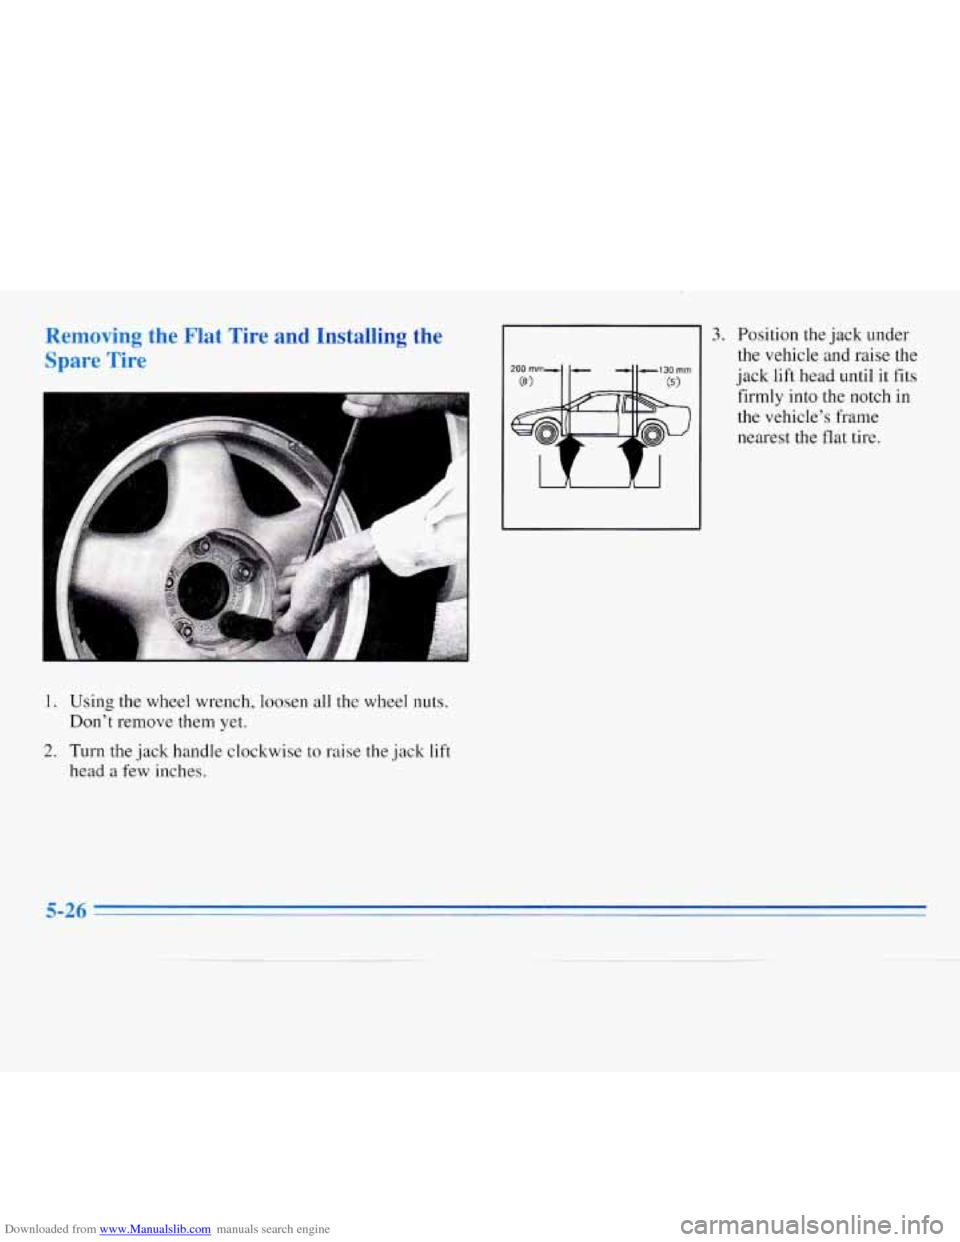
3. Position the jack under
the vehicle and raise the
jack lift head until it fits
firmly into the notch in
the vehicle’s frame
nearest the flat tire.
1. us1118 LIK WIIC;~ wrench, loosen all the wheel nuts.
Don’t remove them yet.
2. Turn the jack handle clockwise to raise the jack lift
head a few inches.
5-26
Page 199 of 340
Downloaded from www.Manualslib.com manuals search engine Getting under a vehicle when it is jacked up is
dangerous.
If the vehicle slips off the ,jack, you
could be badly injured
or killed. Never get under
a vehicle when it is supported only by a jack.
Put the compact spare tire near you.
NOTICE:
Raising your vehicle with the jack improperly
positioned will damage the vehicle or may allow
the vehicle to fall off the jack. Be sure to fit the
jack lift head into the proper location before
raising your vehicle.
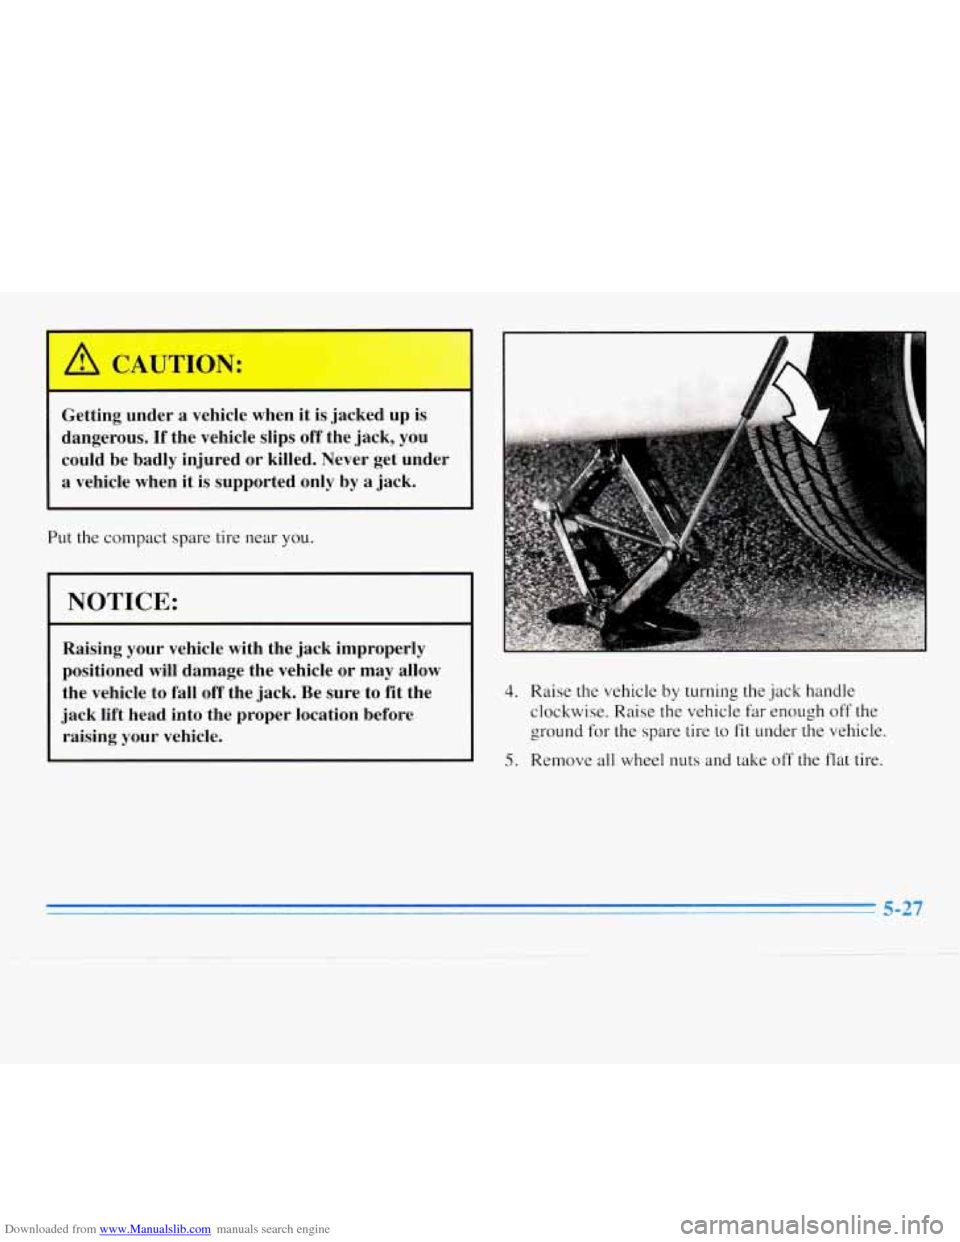
4. Raise the vehicle by turning the jack handle
clockwise. Raise the vehicle far enough off the
ground for the spare tire to
fit under the vehicle.
5. Remove all wheel nuts and take off the flat tire.
5-27
Page 202 of 340
Downloaded from www.Manualslib.com manuals search engine Storing the Flat Tire and Tools
NOTICE:
Improperly tightened wheel nuts can lead to
brake pulsation and rotor damage.
To avoid
expensive brake repairs, evenly tighten the wheel
nuts in the proper sequence and to the proper
torque specification.
10. Don't try to put a wheel cover on your compact spare
tire, It won't
fit. Store the wheel cover in the trunk
until you have the flat tire repaired or replaced.
I NOTICE:
Wheel covers won't fit on your compact spare. If
you try to put a wheel cover on your compact
spare, you could damage the cover or the spare.
I
' A CAUTI(
I
Storing a jack, a tire or other equipment in the
passenger compartment
of the vehicle could
cause injury. In
a sudden stop or collision, loose
equipment could strike someone. Store all these
in the proper place.
After you've put the compact spare tire on your vehicle
you'll need to store the flat tire in your trunk. Use the
following procedure to secure the flat tire in the trunk.
Put the flat tire in the trunk
so the side that faces out
when it is on the vehicle is facing down. The full-size
tire will not fit down into the well. Place
it so the front is
in the well and the rear is out of the well.
5-30
Page 203 of 340
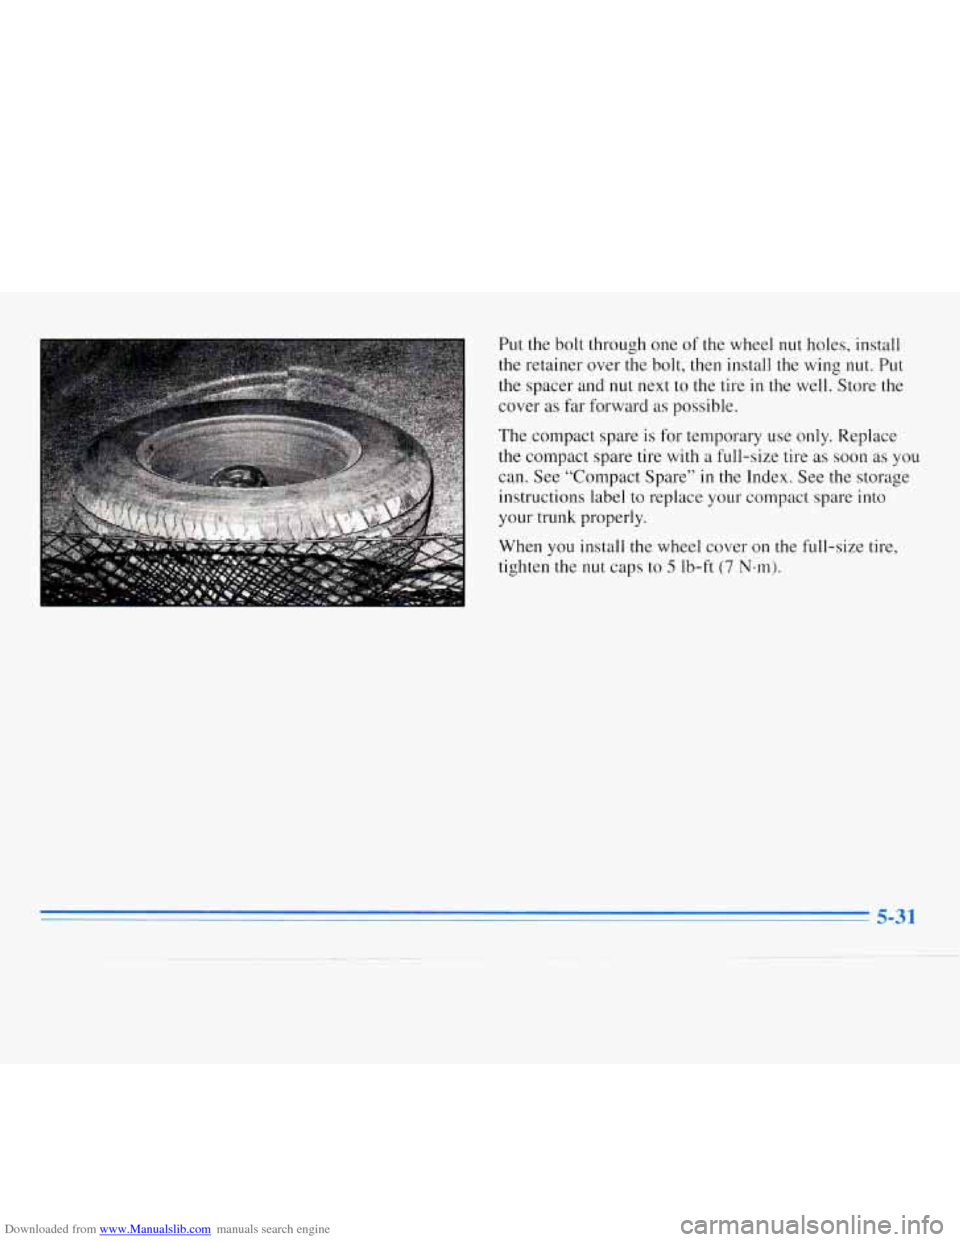
Downloaded from www.Manualslib.com manuals search engine Put the bolt through one of the wheel nut holes, install
the retainer over the bolt, then install
the wing nut. Put
the spacer and
nut next to the tire in the well. Store the
cover
as far forward as possible.
The compact spare
is for temporary use only. Replace
the compact spare tire with a full-size tire as soon as you
can. See “Compact Spare”
in the Index. See the storage
instructions label to replace your compact spare into
your trunk properly.
When you install
the wheel cover on the full-size tire,
tighten the
nut caps to 5 Ib-ft (7 Nsm).
Page 205 of 340
Downloaded from www.Manualslib.com manuals search engine qare
Although the compact spare tire was fully inflated when
your vehicle was new, it can lose air after a time. Check
the inflation pressure regularly. It should be
60 psi
(420 kPa).
After installing the compact spare on your vehicle, you
should stop as soon as possible and make sure your
spare tire is correctly inflated. The compact spare is
made to perform well at posted speed limits for
distances up to
3,000 miles (5 000 km), so you can
finish your trip and have your full-size tire repaired or
replaced where you want. Of course, it’s best to replace
your spare with a full-size tire as soon as you can. Your
spare will last longer and be in good shape in case you
need it again.
NOTICE:
When the compact spare is installed, don’t take
your vehicle through an automatic car wash with
guide rails. The compact spare can get caught on
the rails. That can damage the tire and wheel,
and maybe other parts
of your vehicle.
Don’t use your compact spare on other vehicles.
And don’t mix your compact spare tire or wheel with
other wheels or tires’. They won’t fit. Keep your spare
tire and its wheel together.
NOTICE:
Tire chains won’t fit your compact spare. Using
them can damage your vehicle and can damage
the chains too. Don’t use tire chains on your
compact spare.
Page 246 of 340
Downloaded from www.Manualslib.com manuals search engine When to Check
Check your tires once a month or more.
Don’t forget your compact spare tire. It should be at
60 psi (420 kPa).
How to Check
Use a good quality pocket-type gage to check tire
pressure. You can’t tell if your tires are properly inflated
simply by looking at them. Radial tires may look
properly ‘inflated
even when they’re underinflated.
Be sure to put the valve caps back
on the valve stems.
They help prevent leaks by keeping out dirt and moisture.
Tire Inspection and Rotation
Tires should be inspected every 6,000 to 8,000 miles
(10 000 to 13 000 km) for any signs of unusual wear.
If unusual wear is present, rotate your tires as soon as
possible and check wheel alignment. Also check for
damaged tires
or wheels. See “When It’s Time for New
Tires’’ and “Wheel Replacement” later in this section for
more information. The purpose
of regular rotation
is to achieve more
uniform wear for
all tires on the vehicle. The kt
rotation is tlle most important. See “Scheduled
Maintenance Services”
in the Index for scheduled
rotation intervals.
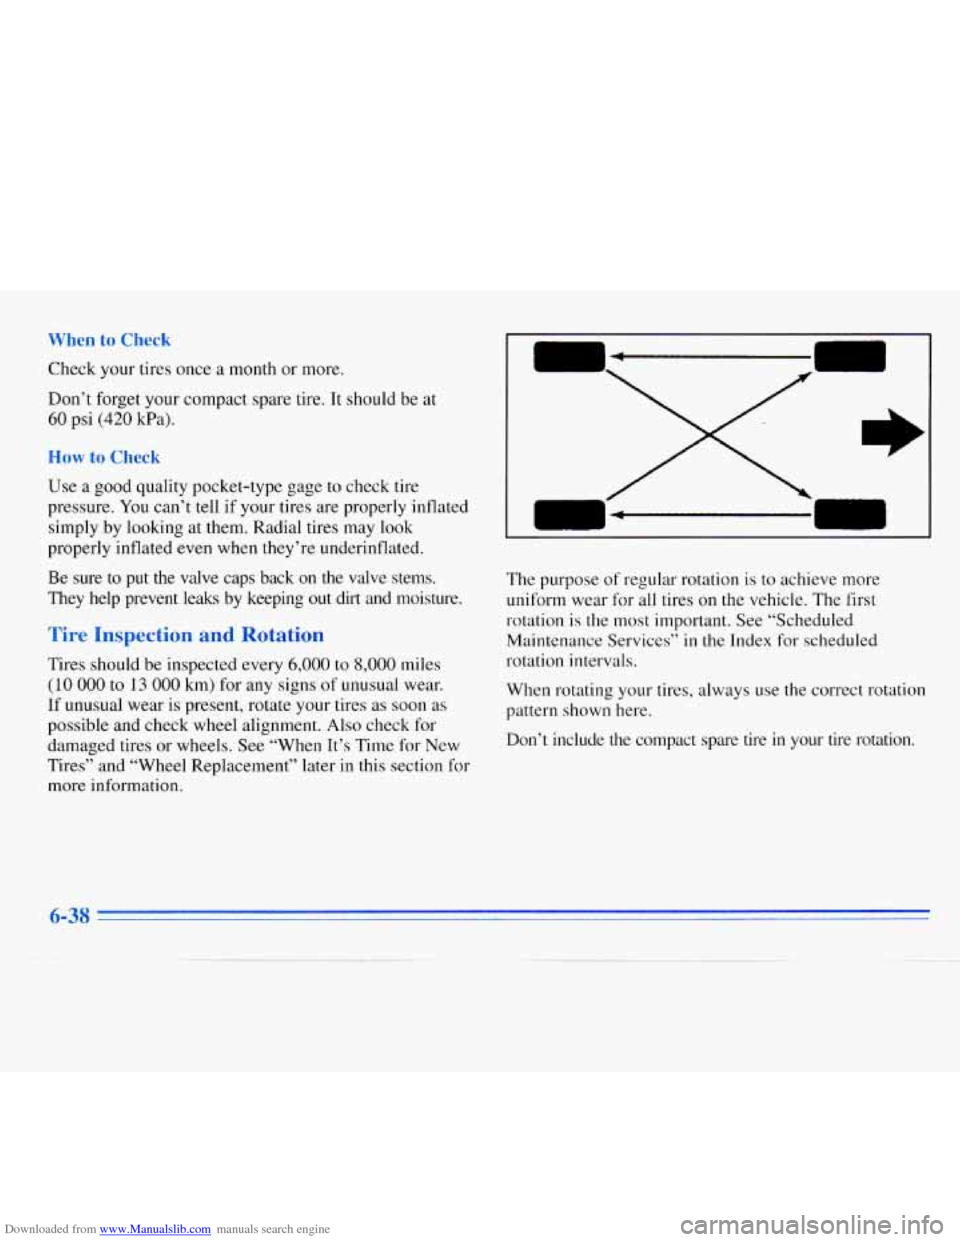
Whcn rotating your tires,
always use the correct rotation
pattern
shown here.
Don’t include the compact spare tire
in your tire rotation.
u-30
Page 248 of 340
Downloaded from www.Manualslib.com manuals search engine Buying New Tires
To find out what kind and size of tires you need, look at
the Tire-Loading Information label.
The tires installed on your vehicle when
it was new had
a Tire Performance Criteria Specification (TPC Spec)
number on each ti.re’s sidewall. When
you get new tires,
~~ - -I - ~ 4
load range, speed rating and construction type (bias,
bias-belted or radial) as your original tires.
get ones
with that same
TPC Spec number. That way
your vehicle will continue to have tires that are designed
to give proper endurance, handling, speed rating,
traction, ride and other things during normal service on
your vehicle.
If your tires have an all-season tread
design, the TPC number will be followed by an
“MS”
(for mud and snow).
If you ever replace your tires with those not having a
TPC SDec number. make sure thev are the same size, Mixing tires could cause
you to lose control while
driving.
If you mix tires of different sizes or types
(radial and bias-belted tires), the vehicle may not
handle properly, and you could have a crash.
Using tires of different sizes may also cause
damage to your vehicle. Be sure to use the
same size and type tires on all four wheels.
It’s all right to drive with your compact spare,
though. It was developed for use on your vehicle.
Uniform Tire Quality Grading
The following information relates to the system developed
by the United States National Highway Traffic Safety
Administration, which grades tires by treadwear, &action
and temperature performance.
(This applies only to
vehicles sold in the United States.) The grades are molded on the sidewas
of most passenger car tires. The Uniform
Tire Quality Grading system does not apply to deep tread, winter-type snow tires, space-saver or temporary use spare
tires, tires
with nominal rim diameters of 10 to 12 inches
(25 to 30 cm), or to some limited-production tires.
Page 260 of 340
Downloaded from www.Manualslib.com manuals search engine Vehicle Identification umber (VIN)
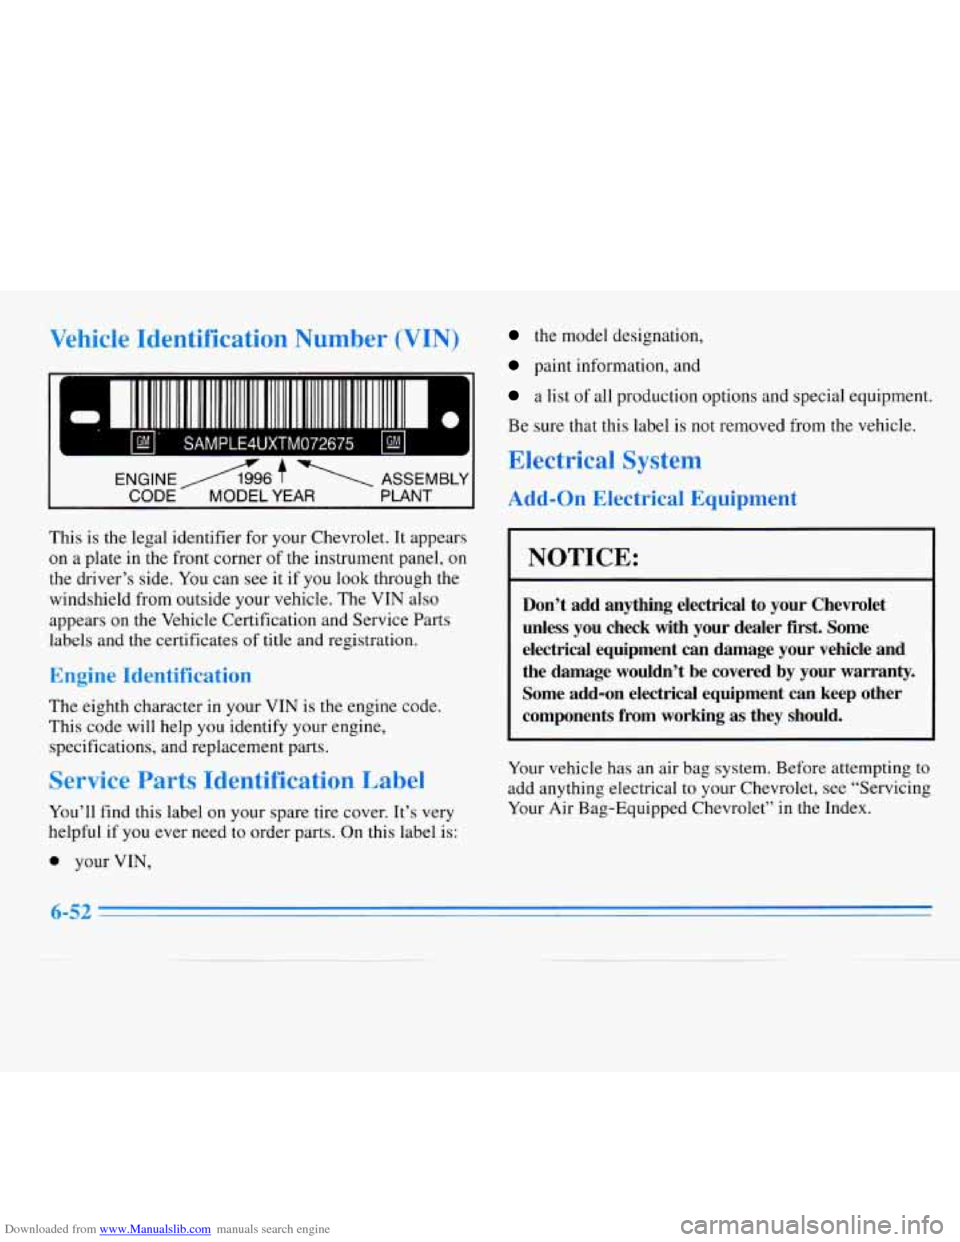
This is the legal identifier for your Chevrolet. It appears
on
a plate in the front corner of the instrument panel, on
the driver’s side. You can see it if you look through the
windshield from outside your vehicle. The
VIN also
appears on the Vehicle Certification and Service Parts
labels and
the certificates of title and registration.
Engine Identification
The eighth character in your VIN is the engine code.
This code will help you identify your engine,
specifications, and replacement parts.
Service Parts Identification Label
You’ll find this label on your spare tire cover. It’s very
helpful
if you ever need to order parts. On this label is:
the model designation,
paint information, and
a list of all production options and special equipment.
Be sure that this label
is not removed from the vehicle.
Electrical System
Add-on Electrical Equipment
I NOTICE:
Don’t add anything electrical to your Chevrolet
unless you check with your dealer first. Some
electrical equipment can damage your vehicle and
the damage wouldn’t be covered by your warranty.
Some add-on electrical equipment can keep other
components from working
as they should.
Your vehicle has an air bag system. Before attempting to
add anything electrical
to your Chevrolet, see “Servicing
Your Air Bag-Equipped Chevrolet” in the Index.
0 your VIN,
6-52
Page 323 of 340
Downloaded from www.Manualslib.com manuals search engine 0 FREE Locksmith/Key Service (when keys are lost
on the road or locked inside)
0 FREE Flat Tire Service (spare installed on the road)
FREE Jump Start (at home or on the road)
FREE Fuel Delivery ($5 of fuel delivered on
the road)
Chevrolet/Geo offers Courtesy Transportation
for customers needing warranty service. Courtesy
Transportation will be offered in conjunction
with the
coverage provided by
the BUMPER-TO-BUMPER
New Vehicle Limited Warranty to eligible purchasers
of
1996 ChevroletlGeo passenger car and light duty trucks.
(Please see your selling dealer for details.)
Note:
Courtesy Care is available to Retail and Retail Lease
Customers operating
1996 and newer Chevrolet/Geo
vehicles for a period of
36 months/36,000 miles,
whichever occurs first. All
Courtesy Care services must
be pre-arranged by Chevrolet Roadside or Dealer
Service Management.
Basic Cclre and Courtesy Care are not part of or
included
in the coverage provided by the New Vehicle
Limited Warranty. Chevrolet reserves the right to
modify or discontinue
Basic Cue and Courtesy Care
at any time. For
complete program details, see your Chevrolet/Geo
dealer
to obtain a Roadside Assistance Center brochure.
The Roadside Assistance Center uses companies that
will provide you
with quality and priority service. When
roadside services are required, our advisors will explain
any payment obligations that may be incurred for
utilizing outside services.
For prompt assistance
when calling, please have the
following available to give to the advisor:
Vehicle Identification Number
0 License plate number
0 Vehicle color
0 Vehicle location
0 Telephone number where you can be reached
Vehicle mileage
Description of problem
Please refer to the Roadside Assistance brochure inside
your owner information portfolio for
full program details.