ABS CHEVROLET MONTE CARLO 2003 6.G Owners Manual
[x] Cancel search | Manufacturer: CHEVROLET, Model Year: 2003, Model line: MONTE CARLO, Model: CHEVROLET MONTE CARLO 2003 6.GPages: 394, PDF Size: 2.73 MB
Page 145 of 394

Instrument Panel Cluster
Your instrument panel cluster is designed to let you know at a glance how your vehicle is running. You'll know how
fast you're going, about how much fuel is in your tank and many other things you need to drive safely and
economically.
Uplevel 3400 V6 Engine Cluster: United States version with ABS and Traction Control shown, Canada similar
3-31
Page 146 of 394

Uplevel 3800 V6 Engine Cluster: United States version with ABS and Traction Control shown, Canada similar
3-32
Page 151 of 394

Anti-Lock Brake System Warning
Light
If your vehicle has ABS,
the anti-lock brake system
warning light will come
on for a few seconds when
you turn the ignition key
to ON.
If the anti-lock brake system warning light stays on
longer than normal after you've started your engine, turn
the ignition off. Or, if the light comes on and stays on
when you're driving, stop as soon as possible and turn
the ignition off. Then start the engine again to reset
the system. If the light still stays on, or comes on again
while you're driving, the anti-lock brake system needs
service and you don't have anti-lock brakes.
The anti-lock brake system warning light will come on
brie¯y when you turn the ignition key to ON. This is
normal. If the light doesn't come on then, have it ®xed
so it will be ready to warn you if there is a problem.
Traction Control System (TCS)
Warning Light
If your vehicle has the
traction control system,
this warning light may
come on for the
following reasons:
·If you turn the system off by pressing the TRAC
OFF button located on the center console, a
chime will sound and the warning light will come on
and stay on. To turn the system back on, press
the button again. The warning light should go off.
See
Traction Control System (TCS) on page 4-8for
more information.
·If there's a brake system problem that is speci®cally
related to traction control, the traction control
system will turn off and the warning light will come
on. If your brakes begin to overheat, the traction
control system will turn off and the warning light will
come on until your brakes cool down.
If the traction control system warning light comes on
and stays on for an extended period of time when the
system is turned on, your vehicle needs service.
3-37
Page 169 of 394

Manual Compass Calibration
If the compass appears erratic and the calibration
symbol does not appear, you must manually put the
compass into the calibration mode.
Turn the ignition on and cycle the DIC to the
Compass/Temperature mode. Press the RESET button
for at least 10 seconds until the calibration symbol
appears and all segments of the compass display are
illuminated. A chime will sound to con®rm that the
calibration mode is active. Release the button and
complete two or three 360É turns in an area free from
large metal objects. The calibration symbol will turn
off and the compass reading will be displayed. A chime
will sound to verify that the calibration is complete.
Error Displays
·
An error of the speed sensor or fuel sender will
cause -E- to be displayed.
·In the absence of vehicle communications,
adash--isdisplayed.
If one of these error messages appear, see your dealer.
Trip Computer
There are ®ve trip computer displays which may be
stepped through by pushing the MODE button.
The information will appear in the following order:
AVG ECON (Average Fuel Economy):This shows the
average fuel economy since the last reset.
INST ECON (Instantaneous Fuel Economy):This
shows fuel economy for the most recent second
of driving.
RANGE (Trip Range):This shows the estimated
distance that can be traveled with the remaining fuel.
The fuel economy used to calculate range is based
on the last few hours of driving. When in a low
fuel condition, LO is displayed.
FUEL USED (Trip Fuel Used):This shows the
accumulated fuel used since the last reset.
AVG SPEED (Average Speed):This shows the
average speed since the last reset.
Resetting the Trip Computer
Press and hold the RESET button for at least three
seconds. The reset is acknowledged with all segments
of the display lit brie¯y and a chime. A reset can
only be done in AVG ECON, FUEL USED and AVG
SPEED displays. Each setting must be reset individually.
3-55
Page 214 of 394

Avoid needless heavy braking. Some people drive
in spurts Ð heavy acceleration followed by heavy
braking Ð rather than keeping pace with traffic. This is
a mistake. Your brakes may not have time to cool
between hard stops. Your brakes will wear out much
faster if you do a lot of heavy braking. If you keep pace
with the traffic and allow realistic following distances,
you will eliminate a lot of unnecessary braking.
That means better braking and longer brake life.
If your engine ever stops while you're driving, brake
normally but don't pump your brakes. If you do,
the pedal may get harder to push down. If your engine
stops, you will still have some power brake assist.
But you will use it when you brake. Once the power
assist is used up, it may take longer to stop and
the brake pedal will be harder to push.
Anti-lock Brake System (ABS)
Your vehicle may have anti-lock brakes. ABS is an
advanced electronic braking system that will help
prevent a braking skid.
If your vehicle has anti-lock
brakes, this warning light
on the instrument panel will
come on brie¯y when
you start your vehicle.When you start your engine, or when you begin to drive
away, your anti-lock brake system will check itself.
You may hear a momentary motor or clicking noise while
this test is going on, and you may even notice that
your brake pedal moves or pulses a little. This is normal.
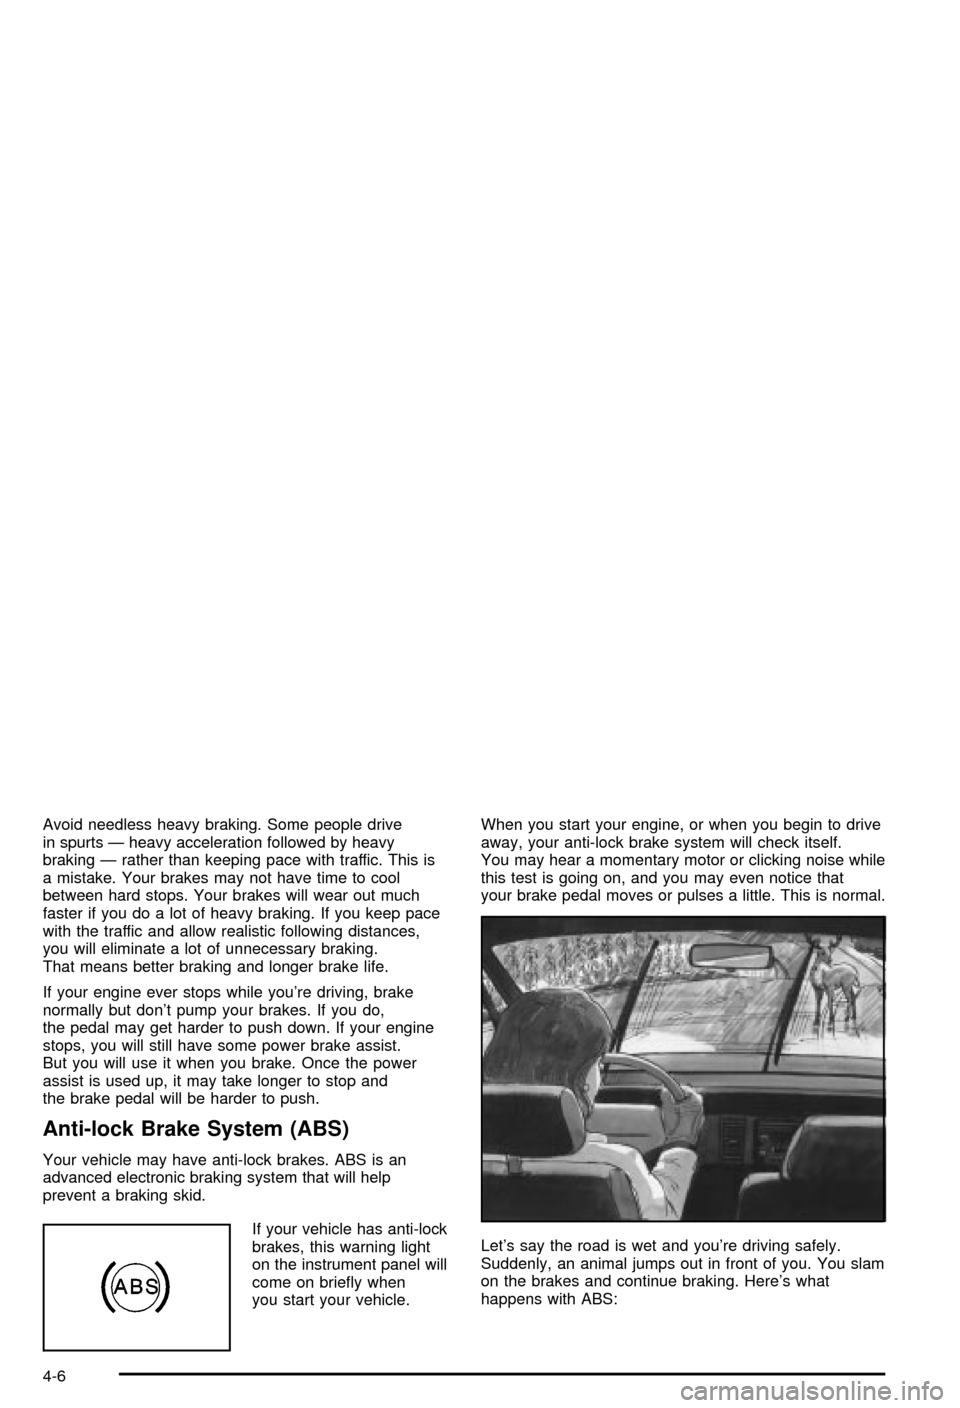
Let's say the road is wet and you're driving safely.
Suddenly, an animal jumps out in front of you. You slam
on the brakes and continue braking. Here's what
happens with ABS:
4-6
Page 247 of 394

Turn Signals When Towing a Trailer
When you tow a trailer, your vehicle may need additional
wiring. Check with your dealer. The arrows on your
instrument panel will ¯ash whenever you signal a turn or
lane change. Properly hooked up, the trailer lamps
will also ¯ash, telling other drivers you're about to turn,
change lanes or stop.
When towing a trailer, the arrows on your instrument
panel will ¯ash for turns even if the bulbs on the trailer
are burned out. Thus, you may think drivers behind
you are seeing your signal when they are not. It's
important to check occasionally to be sure the trailer
bulbs are still working.
Driving On Grades
Reduce speed and shift to a lower gearbeforeyou start
down a long or steep downgrade. If you don't shift
down, you might have to use your brakes so much that
they would get hot and no longer work well.
On a long uphill grade, shift down and reduce your
speed to around 45 mph (70 km/h) to reduce the
possibility of engine and transaxle overheating.
If you have overdrive, you may want to drive in
THIRD (3), instead of AUTOMATIC OVERDRIVE (
X).
Parking on Hills
{CAUTION:
You really should not park your vehicle, with a
trailer attached, on a hill. If something goes
wrong, your rig could start to move. People
can be injured, and both your vehicle and the
trailer can be damaged.
But if you ever have to park your rig on a hill, here's
how to do it:
1. Apply your regular brakes, but don't shift into
PARK (P) yet.
2. Have someone place chocks under the trailer
wheels.
3. When the wheel chocks are in place, release the
regular brakes until the chocks absorb the load.
4. Reapply the regular brakes. Then apply your
parking brake, and then shift to PARK (P).
5. Release the regular brakes.
4-39
Page 271 of 394

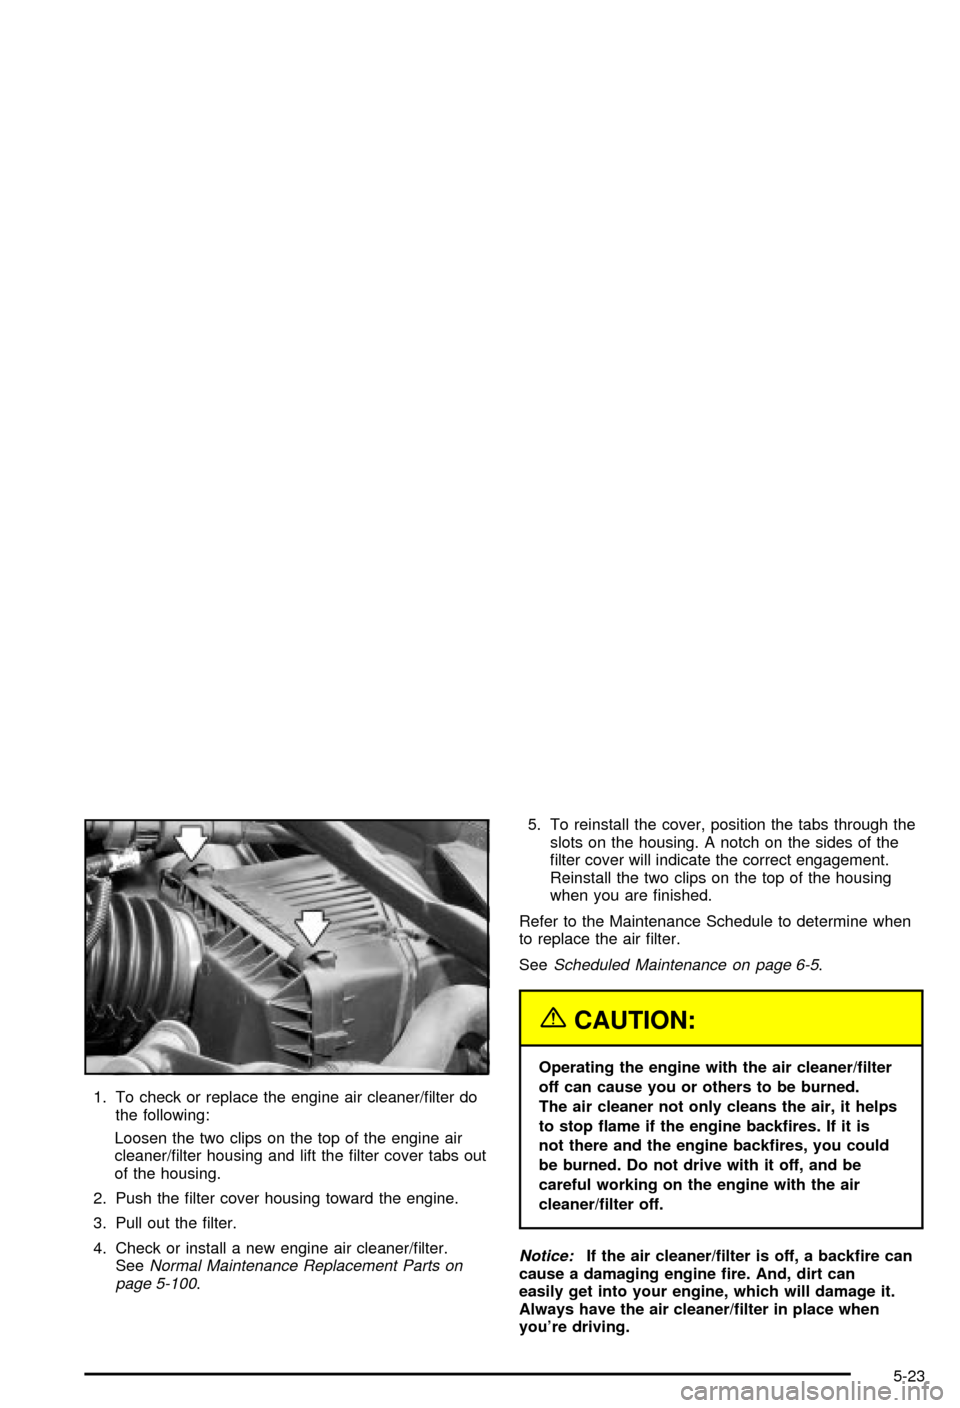
1. To check or replace the engine air cleaner/®lter do
the following:
Loosen the two clips on the top of the engine air
cleaner/®lter housing and lift the ®lter cover tabs out
of the housing.
2. Push the ®lter cover housing toward the engine.
3. Pull out the ®lter.
4. Check or install a new engine air cleaner/®lter.
See
Normal Maintenance Replacement Parts on
page 5-100.5. To reinstall the cover, position the tabs through the
slots on the housing. A notch on the sides of the
®lter cover will indicate the correct engagement.
Reinstall the two clips on the top of the housing
when you are ®nished.
Refer to the Maintenance Schedule to determine when
to replace the air ®lter.
See
Scheduled Maintenance on page 6-5.
{CAUTION:
Operating the engine with the air cleaner/®lter
off can cause you or others to be burned.
The air cleaner not only cleans the air, it helps
to stop ¯ame if the engine back®res. If it is
not there and the engine back®res, you could
be burned. Do not drive with it off, and be
careful working on the engine with the air
cleaner/®lter off.
Notice:If the air cleaner/®lter is off, a back®re can
cause a damaging engine ®re. And, dirt can
easily get into your engine, which will damage it.
Always have the air cleaner/®lter in place when
you're driving.
5-23
Page 341 of 394

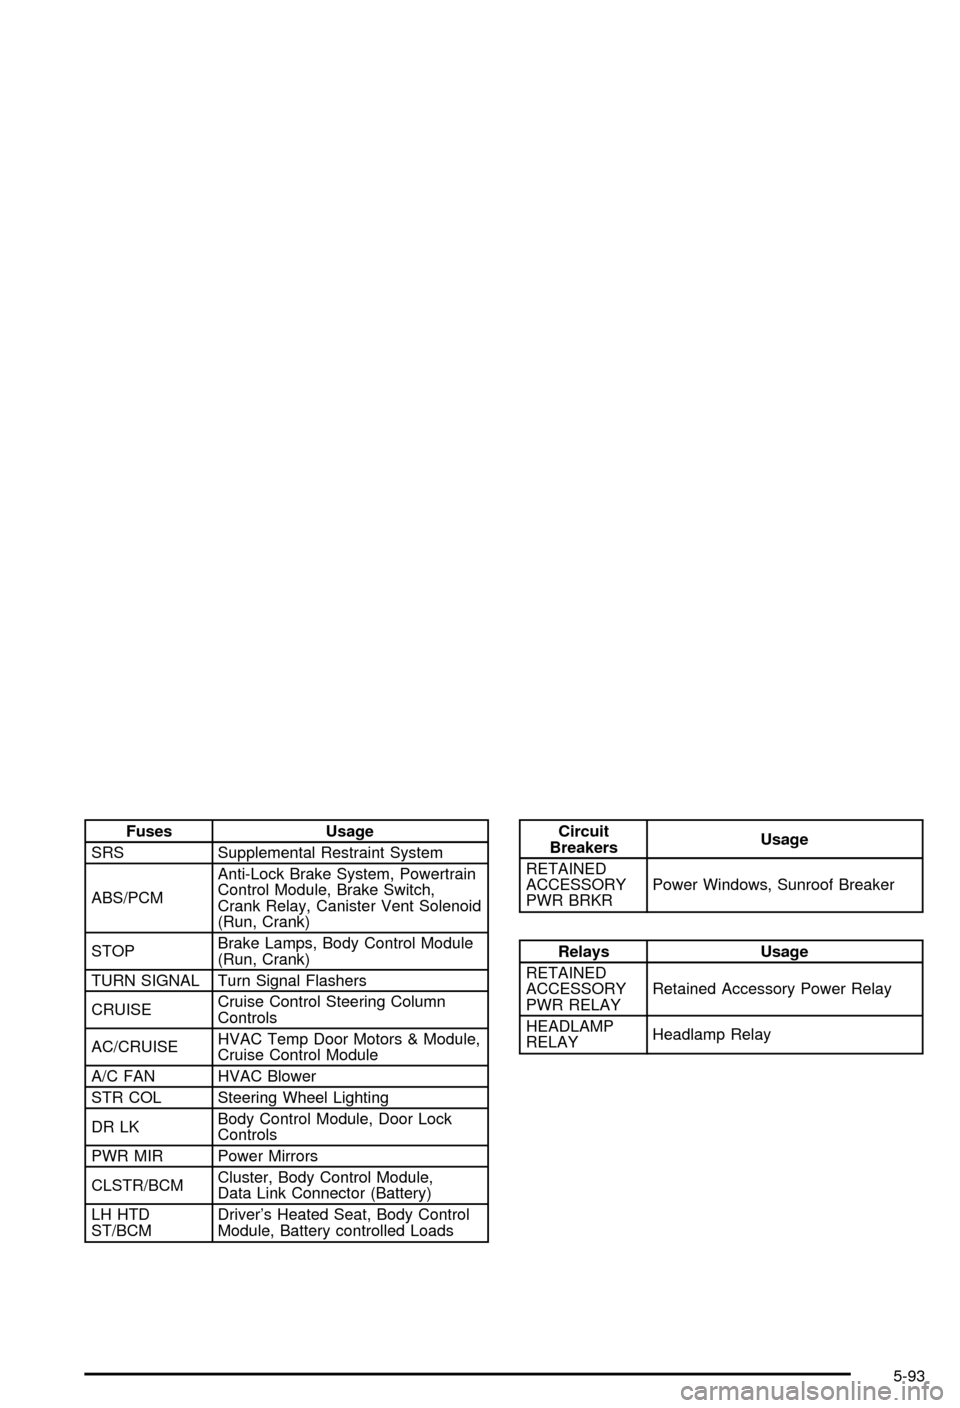
Fuses Usage
SRS Supplemental Restraint System
ABS/PCMAnti-Lock Brake System, Powertrain
Control Module, Brake Switch,
Crank Relay, Canister Vent Solenoid
(Run, Crank)
STOPBrake Lamps, Body Control Module
(Run, Crank)
TURN SIGNAL Turn Signal Flashers
CRUISECruise Control Steering Column
Controls
AC/CRUISEHVAC Temp Door Motors & Module,
Cruise Control Module
A/C FAN HVAC Blower
STR COL Steering Wheel Lighting
DR LKBody Control Module, Door Lock
Controls
PWR MIR Power Mirrors
CLSTR/BCMCluster, Body Control Module,
Data Link Connector (Battery)
LH HTD
ST/BCMDriver's Heated Seat, Body Control
Module, Battery controlled LoadsCircuit
BreakersUsage
RETAINED
ACCESSORY
PWR BRKRPower Windows, Sunroof Breaker
Relays Usage
RETAINED
ACCESSORY
PWR RELAYRetained Accessory Power Relay
HEADLAMP
RELAYHeadlamp Relay
5-93
Page 379 of 394

A
Accessory Power Outlets.................................3-20
Adding Washer Fluid.......................................5-43
Additional Program Information........................... 7-8
Additives, Fuel................................................. 5-6
Add-On Electrical Equipment............................5-90
Adjusting the Speakers
(Balance/Fade)............................3-60, 3-71, 3-80
Air Bag Systems.............................................1-48
How Does an Air Bag Restrain?....................1-54
Servicing Your Air Bag-Equipped Vehicle.........1-56
What Makes an Air Bag In¯ate?....................1-53
What Will You See After an Air Bag
In¯ates?..................................................1-54
When Should an Air Bag In¯ate?...................1-53
Where Are the Air Bags?..............................1-51
Air Bag .........................................................3-34
Readiness Light..........................................3-34
Air Cleaner/Filter, Engine.................................5-22
ALARM (Content Theft Operation).....................2-47
AM ...............................................................3-91
Antenna, Backglass.........................................3-93
Antenna, XMŸ Satellite Radio Antenna
System......................................................3-94
Anti-lock Brake System (ABS)............................ 4-6
Anti-Lock Brake, System Warning Light..............3-37Appearance Care............................................5-82
Care of Safety Belts....................................5-85
Chemical Paint Spotting...............................5-88
Cleaning the Inside of Your Vehicle................5-82
Cleaning the Outside of Your Vehicle..............5-85
Finish Damage............................................5-87
Sheet Metal Damage...................................5-87
Underbody Maintenance...............................5-88
Vehicle Care/Appearance Materials................5-89
Weatherstrips..............................................5-85
Arming with the Power Lock Switch...................2-15
Arming with the Remote Keyless Entry
Transmitter.................................................2-15
Ashtrays........................................................3-21
Audio System(s).............................................3-56
Audio Steering Wheel Controls......................3-90
Backglass Antenna......................................3-93
Care of Your Cassette Tape Player................3-91
Care of Your CD Player...............................3-92
Care of Your CDs........................................3-92
Chime Level Adjustment...............................3-94
Radio with Cassette and CD.........................3-78
Radio with Cassette.....................................3-57
Radio with CD............................................3-67
Setting the Time..........................................3-56
Theft-Deterrent Feature................................3-89
Understanding Radio Reception.....................3-91
Vehicle Customization Settings......................3-94
XMŸ Satellite Radio Antenna System............3-94
1