glove box CHEVROLET MONTE CARLO 2003 6.G Owners Manual
[x] Cancel search | Manufacturer: CHEVROLET, Model Year: 2003, Model line: MONTE CARLO, Model: CHEVROLET MONTE CARLO 2003 6.GPages: 394, PDF Size: 2.73 MB
Page 65 of 394

Keys...............................................................2-2
Remote Keyless Entry System.........................2-3
Remote Keyless Entry System Operation...........2-4
Doors and Locks.............................................2-8
Door Locks....................................................2-8
Power Door Locks..........................................2-9
Programmable Automatic Door Locks................2-9
Lockout Protection........................................2-10
Leaving Your Vehicle....................................2-10
Trunk..........................................................2-10
Windows........................................................2-12
Power Windows............................................2-13
Sun Visors...................................................2-14
Theft-Deterrent Systems..................................2-14
Content Theft-Deterrent.................................2-14
Passlock
ž....................................................2-16
Starting and Operating Your Vehicle................2-16
New Vehicle Break-In....................................2-16
Ignition Positions..........................................2-17
Starting Your Engine.....................................2-18
Engine Coolant Heater..................................2-20
Automatic Transaxle Operation.......................2-21
Parking Brake..............................................2-24
Shifting Into Park (P).....................................2-25
Shifting Out of Park (P).................................2-27Parking Over Things That Burn.......................2-27
Engine Exhaust............................................2-28
Running Your Engine While You
Are Parked...............................................2-28
Mirrors...........................................................2-29
Manual Rearview Mirror.................................2-29
Manual Rearview Mirror with OnStar
ž..............2-30
Automatic Dimming Rearview Mirror................2-31
Automatic Dimming Rearview Mirror with
OnStar
ž...................................................2-32
Outside Power Mirrors...................................2-33
Outside Convex Mirror...................................2-33
Outside Heated Mirrors..................................2-34
OnStar
žSystem.............................................2-34
HomeLinkžTransmitter...................................2-35
Programming the HomeLinkžTransmitter.........2-36
Storage Areas................................................2-39
Glove Box...................................................2-39
Center Console Storage Area.........................2-39
Rear Storage Area........................................2-39
Convenience Net..........................................2-40
Sunroof.........................................................2-40
Vehicle Personalization...................................2-41
Section 2 Features and Controls
2-1
Page 98 of 394

Outside Heated Mirrors
If your vehicle has this option, the surface of both
outside mirrors will heat when you activate the rear
window defogger. See ªRear Window Defoggerº under
Dual Climate Control System on page 3-22.
OnStaržSystem
OnStaržuses global positioning system (GPS) satellite
technology, wireless communications, and call centers
to provide you with a wide range of safety, security,
information and convenience services.
A complete OnStar
žuser's guide and the terms and
conditions of the OnStaržSubscription Service
Agreement are included in your vehicle's glove box
literature. For more information, visit www.onstar.com,
contact OnStar
žat 1-888-4-ONSTAR (1-888-466-7827),
or press the blue OnStaržbutton to speak to an
OnStaržadvisor 24 hours a day, 7 days a week.A completed Subscription Service Agreement is required
prior to delivery of OnStar
žservices and prepaid
calling minutes are also required for OnStaržPersonal
Calling and OnStaržVirtual Advisor use. Terms and
conditions of the Subscription Service Agreement can be
found at www.onstar.com.
OnStaržServices
One of the following plans is normally included for a
speci®c duration with each vehicle equipped with
OnStar
ž. You can upgrade or extend your OnStarž
service plan to meet your needs.
Safe and Sound Plan
·
Automatic Noti®cation of Air Bag Deployment
·Emergency Services
·Roadside Assistance
·Stolen Vehicle Assistance
·AccidentAssist
·Remote Door Unlock
·Remote Diagnostics
·Online Concierge
2-34
Page 99 of 394
Directions and Connections Plan
·
All Safe and Sound Plan services
·Route Support
·RideAssist
·Information and Convenience Services
Luxury and Leisure Plan
·
All Directions and Connections Plan services
·Personal Concierge
OnStaržPersonal Calling
With OnStaržPersonal Calling, you have a safer way to
stay connected while driving. It's a hands-free wireless
phone that's integrated into your vehicle. You can place
calls nationwide using voice-activated dialing with no
contracts and no additional roaming charges. To ®nd out
more about OnStar
žPersonal Calling, refer to the
OnStaržuser's guide in your vehicle's glove box, or call
OnStaržat 1-888-4-ONSTAR (1-888-466-7827).
OnStaržVirtual Advisor
With OnStaržVirtual Advisor you can listen to the news,
entertainment and informative topics, such as traffic
and weather reports. You are able to listen and reply to
your e-mail through your vehicle's speakers.
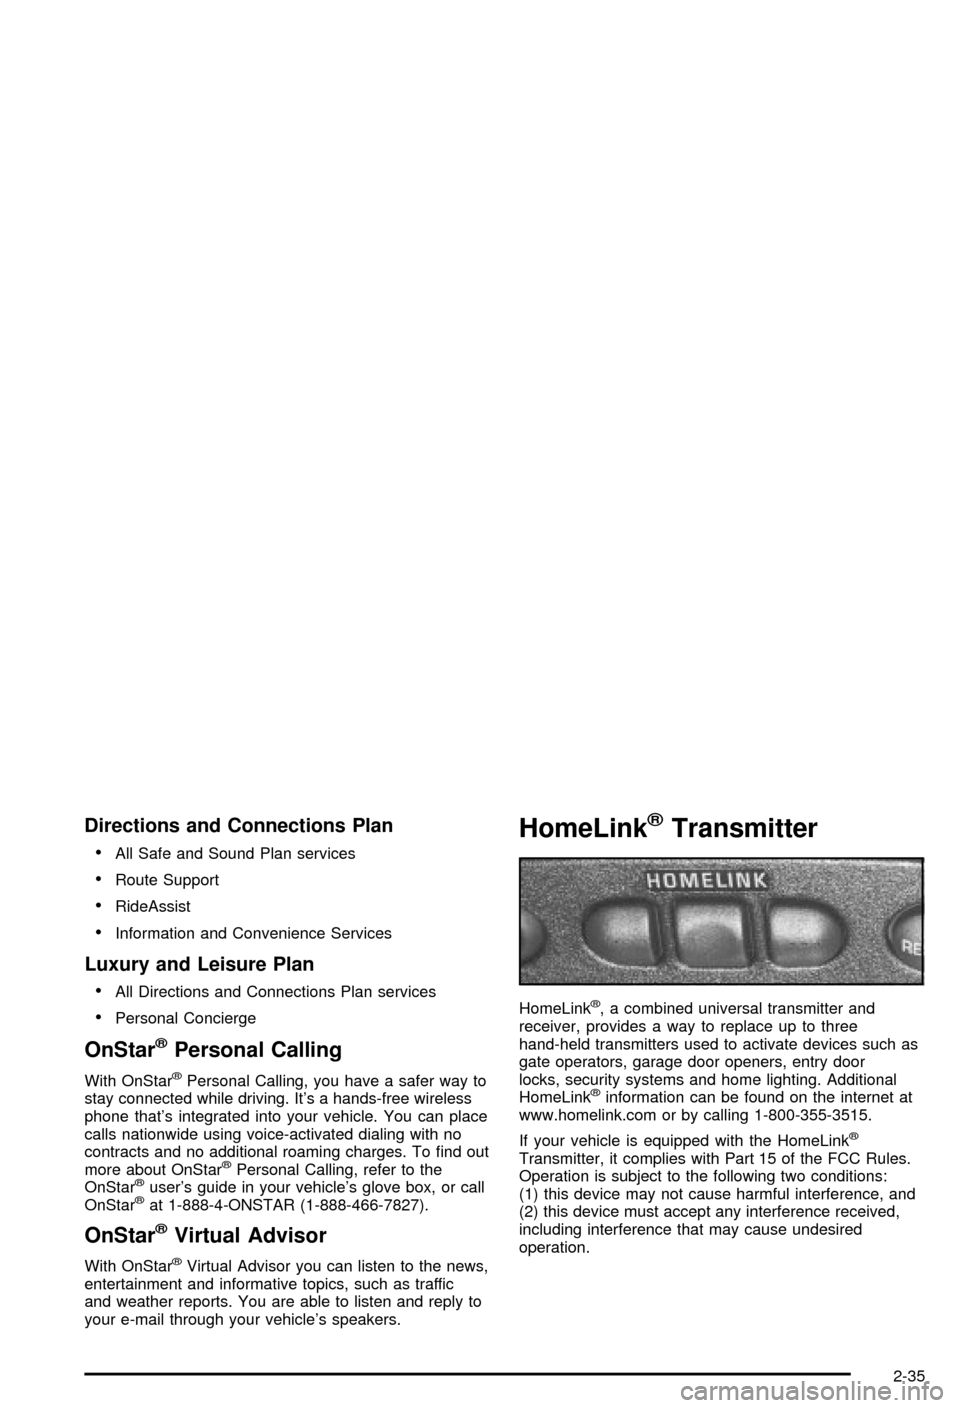
HomeLinkžTransmitter
HomeLinkž, a combined universal transmitter and
receiver, provides a way to replace up to three
hand-held transmitters used to activate devices such as
gate operators, garage door openers, entry door
locks, security systems and home lighting. Additional
HomeLink
žinformation can be found on the internet at
www.homelink.com or by calling 1-800-355-3515.
If your vehicle is equipped with the HomeLink
ž
Transmitter, it complies with Part 15 of the FCC Rules.
Operation is subject to the following two conditions:
(1) this device may not cause harmful interference, and
(2) this device must accept any interference received,
including interference that may cause undesired
operation.
2-35
Page 103 of 394
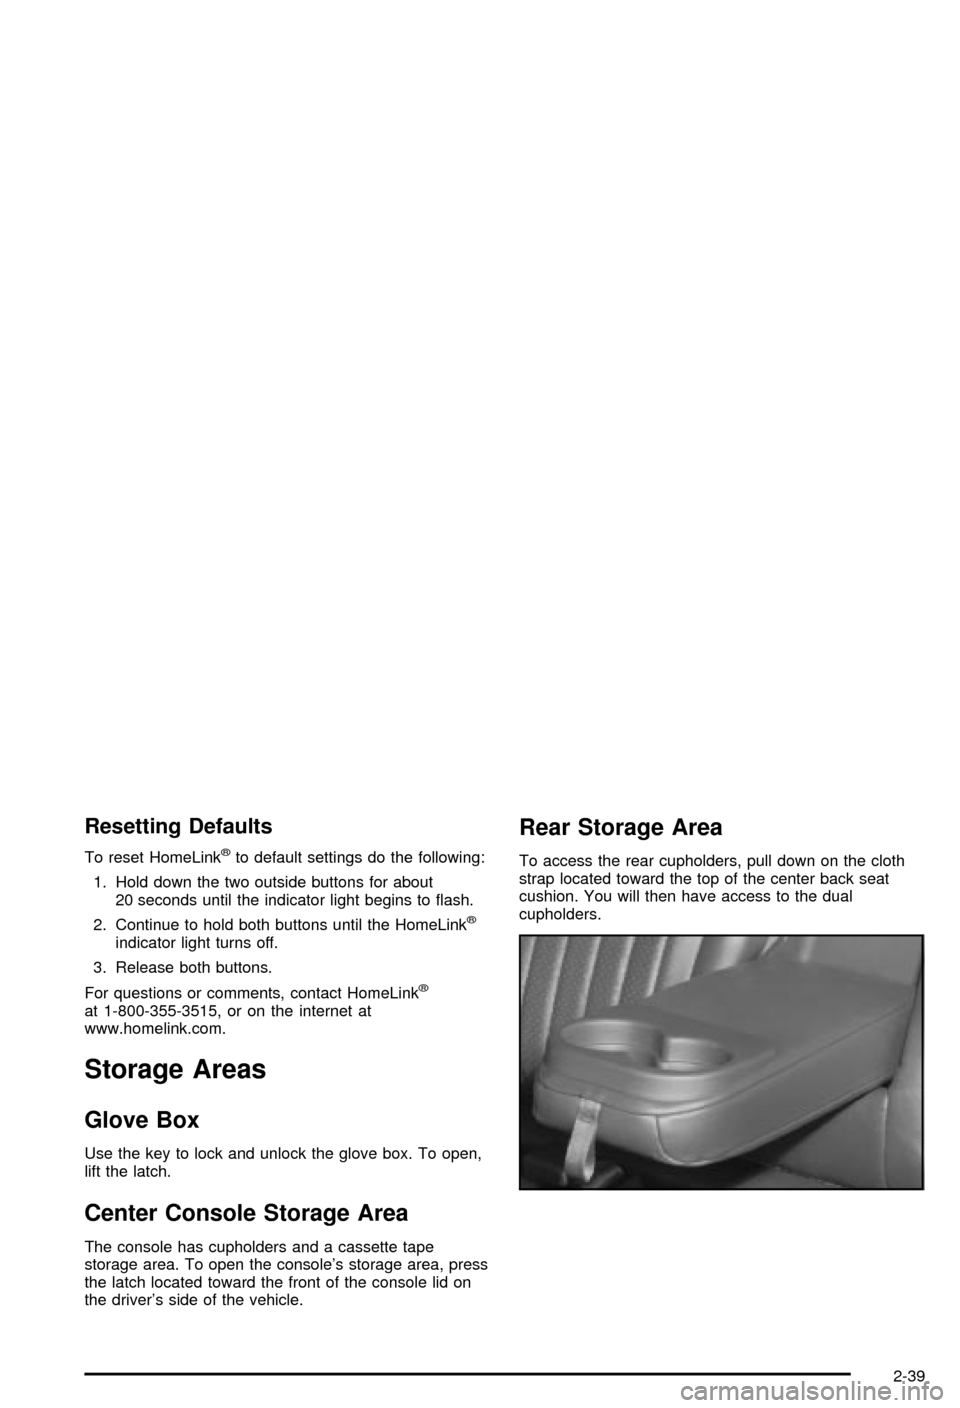
Resetting Defaults
To reset HomeLinkžto default settings do the following:
1. Hold down the two outside buttons for about
20 seconds until the indicator light begins to ¯ash.
2. Continue to hold both buttons until the HomeLink
ž
indicator light turns off.
3. Release both buttons.
For questions or comments, contact HomeLink
ž
at 1-800-355-3515, or on the internet at
www.homelink.com.
Storage Areas
Glove Box
Use the key to lock and unlock the glove box. To open,
lift the latch.
Center Console Storage Area
The console has cupholders and a cassette tape
storage area. To open the console's storage area, press
the latch located toward the front of the console lid on
the driver's side of the vehicle.
Rear Storage Area
To access the rear cupholders, pull down on the cloth
strap located toward the top of the center back seat
cushion. You will then have access to the dual
cupholders.
2-39
Page 119 of 394

The main components of your instrument panel are listed here:
A. Instrument Panel Fuse Block. See ªInstrument Panel
Fuse Blockº under
Fuses and Circuit Breakers on
page 5-91.
B. Turn Signal/Multifunction Lever (behind steering
wheel). See
Turn Signal/Multifunction Lever
on page 3-7.
C. Audio Steering Wheel Controls (If Equipped). See
Audio Steering Wheel Controls on page 3-90.
D. Instrument Panel Cluster. See
Instrument Panel
Cluster on page 3-31.
E. Hazard Warning Flasher Button. See
Hazard
Warning Flashers on page 3-6.
F. Audio System. See
Audio System(s) on page 3-56.
G. Air Outlet. See ªOutlet Adjustmentº under
Dual
Climate Control System on page 3-22.
H. Exterior Lamps Control. See
Exterior Lamps on
page 3-15.I. Remote Trunk Release. See ªRemote Trunk
Releaseº under
Trunk on page 2-10.
J. Tilt Steering Wheel Lever. See
Tilt Wheel on
page 3-7.
K. Hood Release. See
Hood Release on page 5-10.
L. Cruising Steering Wheel Controls (If Equipped). See
ªCruise Controlº under
Turn Signal/Multifunction
Lever on page 3-7.
M. Ignition Switch. See ªIgnition Positionsº under
New
Vehicle Break-In on page 2-16.
N. Automatic Transaxle Shift Lever. See
Automatic
Transaxle Operation on page 2-21.
O. Climate Controls. See
Dual Climate Control System
on page 3-22.
P. Glove Box. See
Glove Box on page 2-39.
3-5
Page 133 of 394

Parade Dimming
The instrument panel has an added feature called
parade dimming. This feature prohibits the dimming of
your instrument panel displays during the daylight
while the headlamps are on so that you'll still be able to
see the displays.
Reading Lamps
The reading lamps are located on the rearview mirror.
These lamps and the interior courtesy lamps come
on when any door is opened. Press the button to turn
them on and off while the doors are closed.
Dome Lamp
The dome lamp will come on when you open a door.
You can also turn this lamp on by turning the exterior
lamp control clockwise to DOME.
Battery Rundown Protection
Your vehicle has a feature to help prevent you from
draining the battery in case you accidentally leave on the
interior courtesy lamps, reading/map lamps, visor
vanity lamps, trunk lamp or glove box lamps. If you leave
any of these lamps on, they will automatically turn off
after 10 minutes, if the ignition is off. The lamps
won't come back on again until you do the following:
·Turn the ignition on or
·turn the exterior lamps control off, then on again.
If your vehicle has less than 15 miles (25 km) on
the odometer, the battery saver will turn off the lamps
after only three minutes.
Battery rundown protection will also work if the
headlamps are left on. After having been left on for
10 minutes, the headlamps and the parking lamps will
¯ash three times. They will remain on for one more
minute before turning off automatically.
3-19
Page 135 of 394

Auxiliary Power Connection
(Power Drop)
Your vehicle is equipped with an auxiliary power
connection. This feature provides power, ground and
accessory wires which can be accessed to add
aftermarket electrical equipment to your vehicle.
It is located on the
passenger's side of the
vehicle, under the
glove box, and is labeled
with a wire function
and fuse rating.
Notice:Adding some electrical equipment to your
vehicle can damage it or keep other things from
working as they should. This wouldn't be covered by
your warranty. Check with your dealer before
adding electrical equipment, and never use anything
that exceeds the amperage rating.For information on accessing the connection and
electrical hookup, please refer to your service manual.
To order a service manual, see
Service Publications
Ordering Information on page 7-9.
Ashtrays and Cigarette Lighter
Notice:Don't put papers or other ¯ammable items
into your ashtrays. Hot cigarettes or other smoking
materials could ignite them, causing a damaging ®re.
Your vehicle may have a cigarette lighter and ashtray
located on the console. The ashtray is removable
and has a cupholder and liner underneath. To remove
the ashtray, lift it up with the liner and pull it out.
The rear ashtray is located behind a small door at the
rear of the console. Push on the right side of the
door. The ashtray will then turn to the right for usage.
You can only access the ashtray by pushing on the
door's right side. To remove the ashtray, push down on
the snuffer located in the middle of the ashtray and
lift it out.
Notice:Don't hold a cigarette lighter in with your
hand while it is heating. If you do, it won't be able to
back away from the heating element when it's
ready. That can make it overheat, damaging the
lighter and the heating element.
To activate the cigarette lighter, push it into the heating
element. When the lighter is ready it will pop out.
3-21
Page 343 of 394
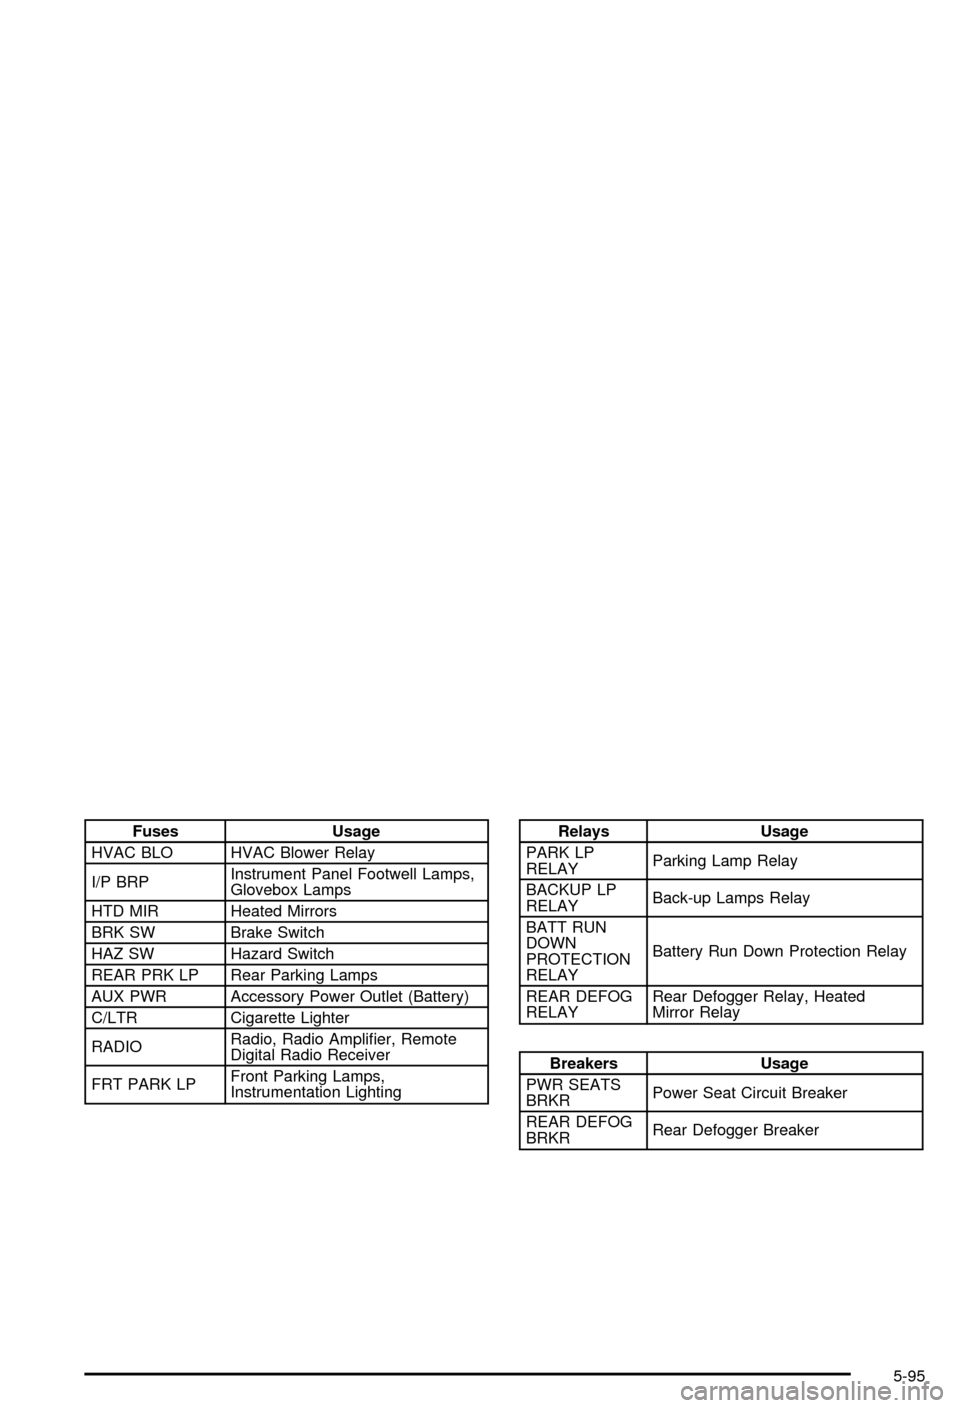
Fuses Usage
HVAC BLO HVAC Blower Relay
I/P BRPInstrument Panel Footwell Lamps,
Glovebox Lamps
HTD MIR Heated Mirrors
BRK SW Brake Switch
HAZ SW Hazard Switch
REAR PRK LP Rear Parking Lamps
AUX PWR Accessory Power Outlet (Battery)
C/LTR Cigarette Lighter
RADIORadio, Radio Ampli®er, Remote
Digital Radio Receiver
FRT PARK LPFront Parking Lamps,
Instrumentation LightingRelays Usage
PARK LP
RELAYParking Lamp Relay
BACKUP LP
RELAYBack-up Lamps Relay
BATT RUN
DOWN
PROTECTION
RELAYBattery Run Down Protection Relay
REAR DEFOG
RELAYRear Defogger Relay, Heated
Mirror Relay
Breakers Usage
PWR SEATS
BRKRPower Seat Circuit Breaker
REAR DEFOG
BRKRRear Defogger Breaker
5-95
Page 359 of 394

At Least Twice a Year
Restraint System Check
Make sure the safety belt reminder light and all your
belts, buckles, latch plates, retractors and anchorages
are working properly. Look for any other loose or
damaged safety belt system parts. If you see anything
that might keep a safety belt system from doing its
job, have it repaired. Have any torn or frayed safety belts
replaced.
Also look for any opened or broken air bag coverings,
and have them repaired or replaced. (The air bag
system does not need regular maintenance.)
Wiper Blade Check
Inspect wiper blades for wear or cracking. Replace
blade inserts that appear worn or damaged or that
streak or miss areas of the windshield. Also see
Cleaning the Outside of Your Vehicle on page 5-85.
Weatherstrip Lubrication
Silicone grease on weatherstrips will make them last
longer, seal better, and not stick or squeak. Apply
silicone grease with a clean cloth. During very cold,
damp weather more frequent application may be
required. See
Part D: Recommended Fluids and
Lubricants on page 6-16.
Automatic Transaxle Check
Check the transaxle ¯uid level; add if needed. SeeAutomatic Transaxle Fluid on page 5-24. A ¯uid loss
may indicate a problem. Check the system and repair if
needed.
At Least Once a Year
Key Lock Cylinders Service
Lubricate the key lock cylinders with the lubricant
speci®ed in Part D.
Body Lubrication Service
Lubricate all hinges and latches, including those for the
body doors, hood, secondary latch, pivots, spring
anchor, release pawl, rear compartment, glove box door,
console door and any folding seat hardware. Part D
tells you what to use. More frequent lubrication may be
required when exposed to a corrosive environment.
6-11
Page 384 of 394

F
Filter.............................................................5-22
Engine Air Cleaner......................................5-22
Finding a PTY Station
(RDS and XMŸ).........................3-60, 3-71, 3-81
Finding a Station............................3-58, 3-69, 3-79
Finish Care....................................................5-86
Finish Damage...............................................5-87
Flash-to-Pass Feature....................................... 3-9
Flat Tire, Changing.........................................5-70
Flat Tire........................................................5-69
Fluid.............................................................5-24
Automatic Transaxle.....................................5-24
Power Steering...........................................5-42
Windshield Washer......................................5-43
FM Stereo.....................................................3-91
FOB HORN (Remote Audible Veri®cation)...........2-46
FOB LIGHT (Remote Visual Veri®cation)............2-45
FOB PROG (Remote Keyless Entry Transmitter
Programming).............................................2-50
Fog Lamps....................................................3-17
Folding Rear Seat............................................ 1-8
Following Distance..........................................4-38
Fuel............................................................... 5-4
Additives...................................................... 5-6
California Fuel.............................................. 5-5
Filling a Portable Fuel Container..................... 5-9Fuel (cont.)
Filling Your Tank........................................... 5-7
Fuels in Foreign Countries.............................. 5-6
Gage.........................................................3-43
Gasoline Octane........................................... 5-4
Gasoline Speci®cations.................................. 5-5
Low Warning Message.................................3-50
System Inspection.......................................6-15
Fuses...........................................................5-91
Fuses and Circuit Breakers...........................5-91
Windshield Wiper.........................................5-91
G
Gage............................................................3-38
Engine Coolant Temperature.........................3-38
Fuel..........................................................3-43
Speedometer..............................................3-33
Tachometer.................................................3-33
Voltmeter Gage...........................................3-35
Garage Door Opener.......................................2-35
Gasoline......................................................... 5-4
Octane........................................................ 5-4
Speci®cations............................................... 5-5
Gate Operator and Canadian Programming........2-38
Glove Box.....................................................2-39
GM Mobility Program for Persons with
Disabilities.................................................... 7-5
6