checking oil CHEVROLET MONTE CARLO 2004 Owners Manual
[x] Cancel search | Manufacturer: CHEVROLET, Model Year: 2004, Model line: MONTE CARLO, Model: CHEVROLET MONTE CARLO 2004Pages: 416, PDF Size: 4.56 MB
Page 107 of 416
SETTINGS (Display Current Settings)
This displays all current settings.
OIL LIFE (GM Oil Life System Reset)
This feature allows you to reset the GM Oil Life System
Monitor after an oil change. SeeEngine Oil on
page 5-18. Be careful not to reset the OIL LIFE system
at any time other than when the oil has been changed.
To clear the CHANGE ENGINE OIL light from the
instrument panel cluster and reset the oil life system, do
the following:
1. Scroll, using the SEEK PSCAN up or down arrows,
until OIL LIFE appears on the display.
2. Press the 1 PREV or 2 NEXT button to enter the
submenu. RESET will then be displayed.
3. Press the TUNE DISP knob to reset. A chime will
be heard to verify the new setting and DONE will
be displayed for one second.
The CHANGE ENGINE OIL light is now reset. You can
either exit the programming mode by following the
instructions later in this section or program the next
feature available on your vehicle.
TIRE MON (Tire In�ation Monitor Reset)
This feature allows you to reset the tire pressure
monitor after checking all tire pressures. SeeTires on
page 5-65. To clear the LOW TIRE PRESSURE
light from the instrument panel cluster and reset the low
tire pressure monitor, do the following:
1. Scroll, using the SEEK PSCAN up or down arrows,
until TIRE MON appears on the display.
2. Press the 1 PREV or 2 NEXT button to enter the
submenu. RESET will be displayed.
3. Press the TUNE DISP button to reset. A chime will
be heard to verify the new setting and DONE will
be displayed for one second.
The low tire pressure monitor is now reset. You can
either exit the programming mode by following the
instructions later in this section or program the next
feature available on your vehicle.
2-43
Page 257 of 416
Service............................................................5-3
Doing Your Own Service Work.........................5-3
Adding Equipment to the Outside of Your
Vehicle......................................................5-4
Fuel................................................................5-4
Gasoline Octane............................................5-4
Gasoline Speci�cations....................................5-5
California Fuel...............................................5-5
Additives.......................................................5-6
Fuels in Foreign Countries...............................5-6
Filling Your Tank............................................5-7
Filling a Portable Fuel Container.......................5-9
Checking Things Under
the Hood....................................................5-10
Hood Release..............................................5-10
Engine Compartment Overview.......................5-12
Engine Oil...................................................5-18
Supercharger Oil..........................................5-24
Engine Air Cleaner/Filter................................5-26
Automatic Transaxle Fluid..............................5-28
Engine Coolant.............................................5-31
Radiator Pressure Cap..................................5-34
Engine Overheating.......................................5-34
Cooling System............................................5-37Power Steering Fluid.....................................5-47
Windshield Washer Fluid................................5-48
Brakes........................................................5-50
Battery........................................................5-53
Jump Starting...............................................5-54
Headlamp Aiming...........................................5-60
Bulb Replacement..........................................5-60
Halogen Bulbs..............................................5-60
Headlamps, Front Turn Signal, Sidemarker,
and Parking Lamps....................................5-60
Taillamps, Turn Signal, Stoplamps and
Sidemarker Lamps.....................................5-62
Back-Up Lamps............................................5-63
Replacement Bulbs.......................................5-63
Windshield Wiper Blade Replacement..............5-64
Tires..............................................................5-65
In�ation - Tire Pressure.................................5-72
Tire Pressure Monitor System.........................5-73
Tire Inspection and Rotation...........................5-75
When It Is Time for New Tires.......................5-76
Buying New Tires.........................................5-76
Uniform Tire Quality Grading..........................5-77
Wheel Alignment and Tire Balance..................5-79
Section 5 Service and Appearance Care
5-1
Page 266 of 416
Checking Things Under
the Hood
{CAUTION:
An electric fan under the hood can start up
and injure you even when the engine is not
running. Keep hands, clothing and tools away
from any underhood electric fan.
{CAUTION:
Things that burn can get on hot engine parts
and start a �re. These include liquids like fuel,
oil, coolant, brake �uid, windshield washer and
other �uids, and plastic or rubber. You or
others could be burned. Be careful not to drop
or spill things that will burn onto a hot engine.
Hood Release
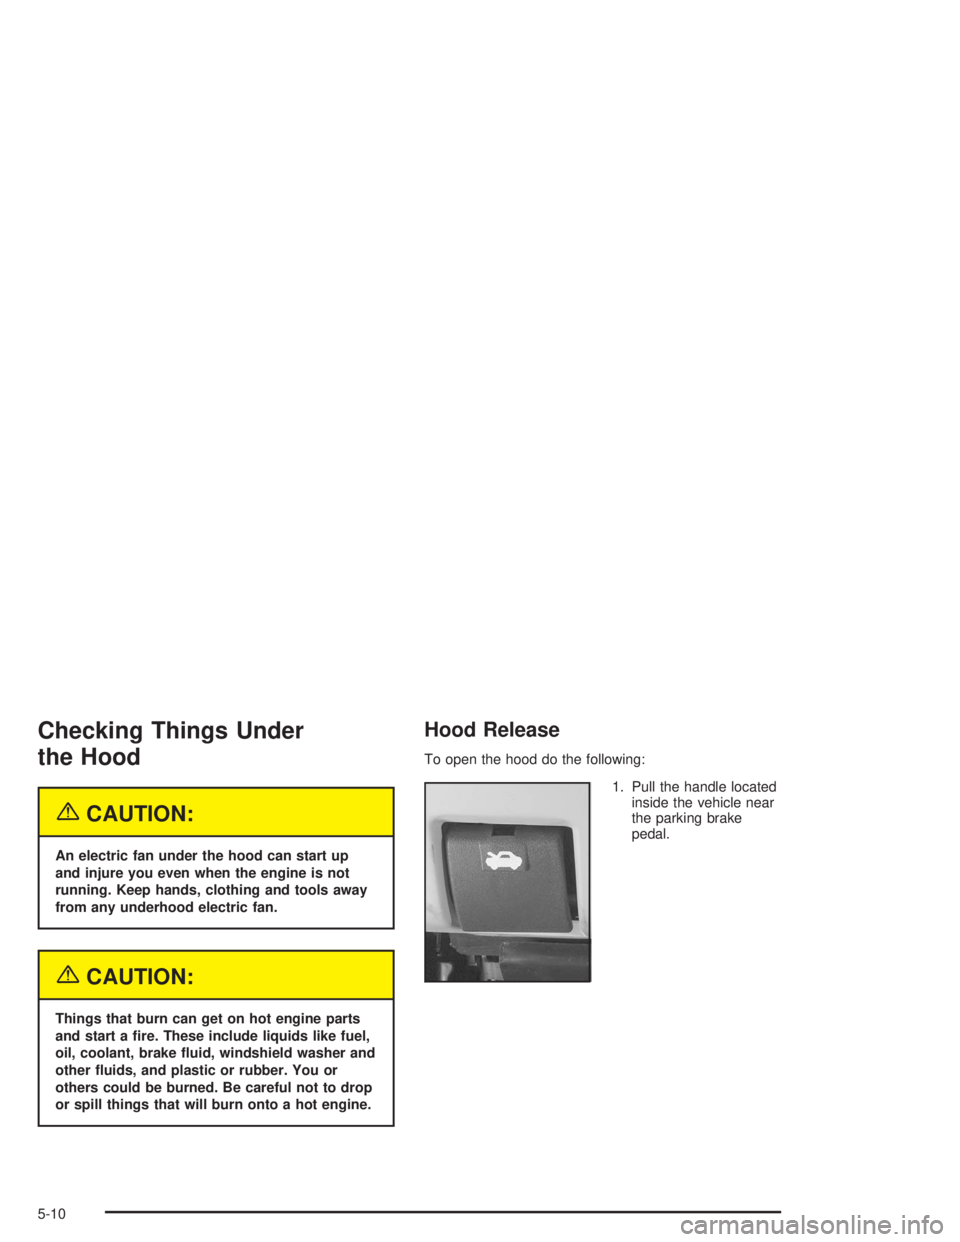
To open the hood do the following:
1. Pull the handle located
inside the vehicle near
the parking brake
pedal.
5-10
Page 269 of 416
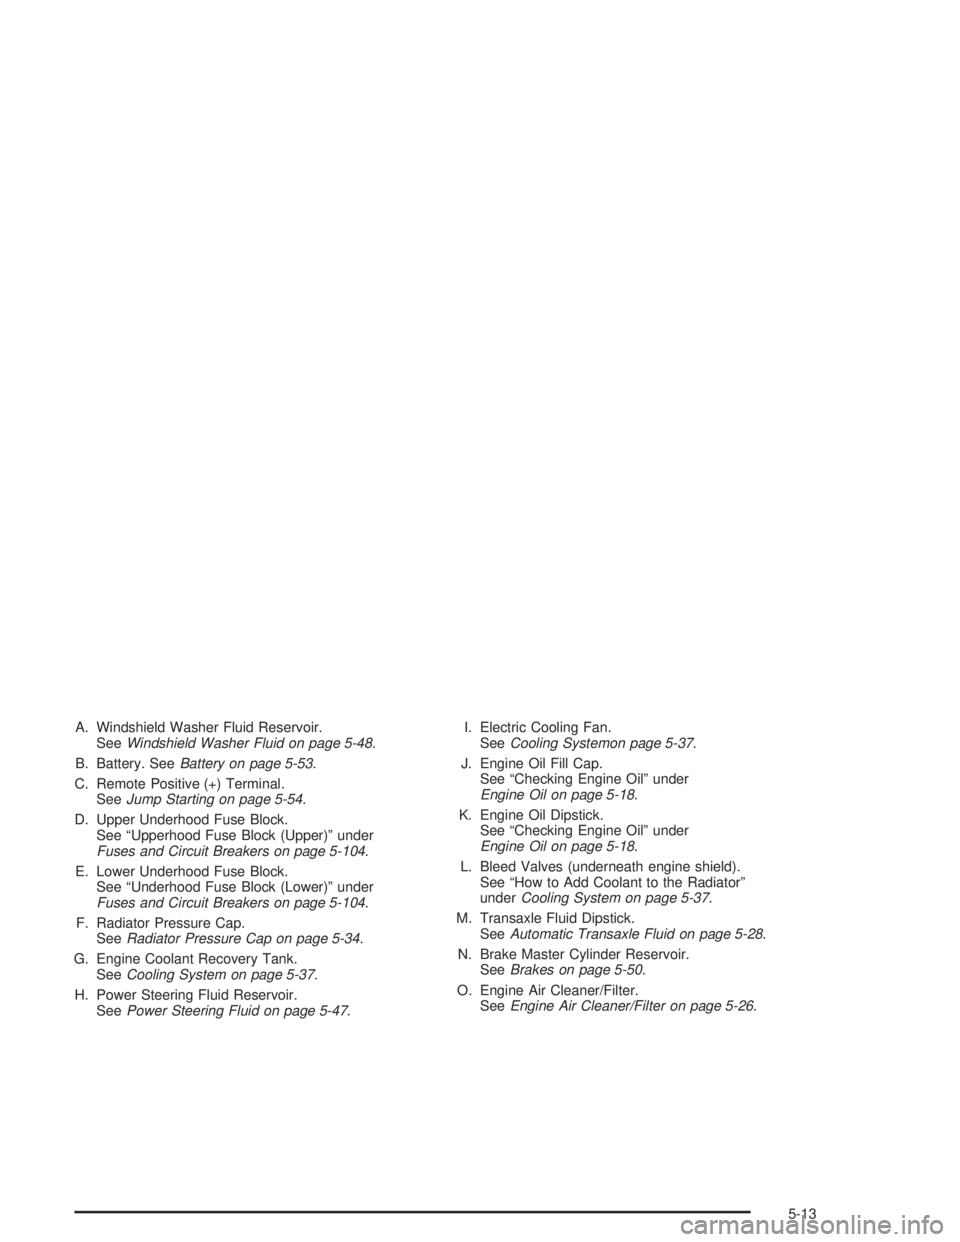
A. Windshield Washer Fluid Reservoir.
SeeWindshield Washer Fluid on page 5-48.
B. Battery. SeeBattery on page 5-53.
C. Remote Positive (+) Terminal.
SeeJump Starting on page 5-54.
D. Upper Underhood Fuse Block.
See “Upperhood Fuse Block (Upper)” under
Fuses and Circuit Breakers on page 5-104.
E. Lower Underhood Fuse Block.
See “Underhood Fuse Block (Lower)” under
Fuses and Circuit Breakers on page 5-104.
F. Radiator Pressure Cap.
SeeRadiator Pressure Cap on page 5-34.
G. Engine Coolant Recovery Tank.
SeeCooling System on page 5-37.
H. Power Steering Fluid Reservoir.
SeePower Steering Fluid on page 5-47.I. Electric Cooling Fan.
SeeCooling Systemon page 5-37.
J. Engine Oil Fill Cap.
See “Checking Engine Oil” under
Engine Oil on page 5-18.
K. Engine Oil Dipstick.
See “Checking Engine Oil” under
Engine Oil on page 5-18.
L. Bleed Valves (underneath engine shield).
See “How to Add Coolant to the Radiator”
underCooling System on page 5-37.
M. Transaxle Fluid Dipstick.
SeeAutomatic Transaxle Fluid on page 5-28.
N. Brake Master Cylinder Reservoir.
SeeBrakes on page 5-50.
O. Engine Air Cleaner/Filter.
SeeEngine Air Cleaner/Filter on page 5-26.
5-13
Page 271 of 416
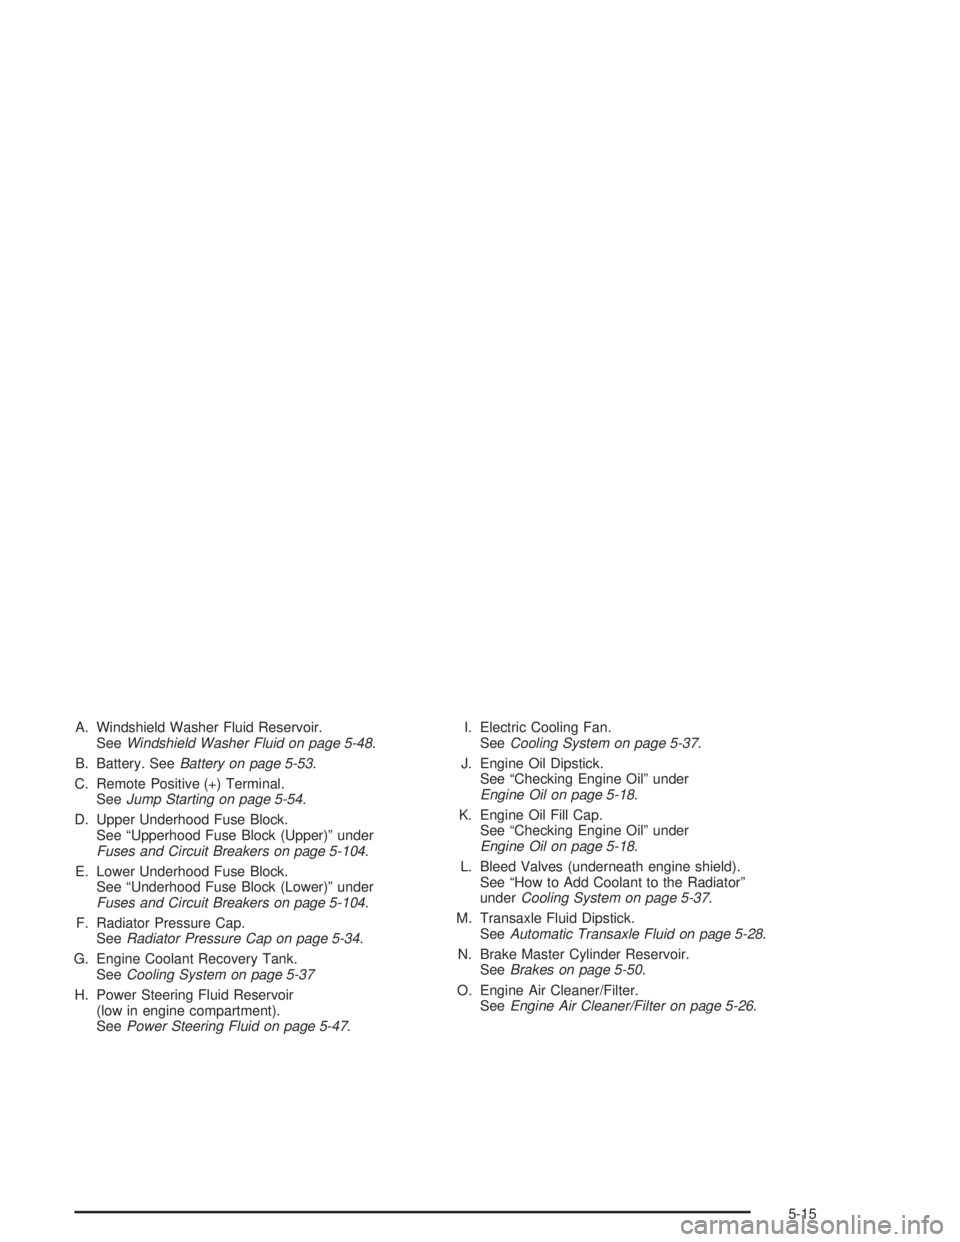
A. Windshield Washer Fluid Reservoir.
SeeWindshield Washer Fluid on page 5-48.
B. Battery. SeeBattery on page 5-53.
C. Remote Positive (+) Terminal.
SeeJump Starting on page 5-54.
D. Upper Underhood Fuse Block.
See “Upperhood Fuse Block (Upper)” under
Fuses and Circuit Breakers on page 5-104.
E. Lower Underhood Fuse Block.
See “Underhood Fuse Block (Lower)” under
Fuses and Circuit Breakers on page 5-104.
F. Radiator Pressure Cap.
SeeRadiator Pressure Cap on page 5-34.
G. Engine Coolant Recovery Tank.
SeeCooling System on page 5-37
H. Power Steering Fluid Reservoir
(low in engine compartment).
SeePower Steering Fluid on page 5-47.I. Electric Cooling Fan.
SeeCooling System on page 5-37.
J. Engine Oil Dipstick.
See “Checking Engine Oil” under
Engine Oil on page 5-18.
K. Engine Oil Fill Cap.
See “Checking Engine Oil” under
Engine Oil on page 5-18.
L. Bleed Valves (underneath engine shield).
See “How to Add Coolant to the Radiator”
underCooling System on page 5-37.
M. Transaxle Fluid Dipstick.
SeeAutomatic Transaxle Fluid on page 5-28.
N. Brake Master Cylinder Reservoir.
SeeBrakes on page 5-50.
O. Engine Air Cleaner/Filter.
SeeEngine Air Cleaner/Filter on page 5-26.
5-15
Page 274 of 416
Engine Oil
Checking Engine Oil
It is a good idea to check your engine oil every time you
get fuel. In order to get an accurate reading, the oil
must be warm and the vehicle must be on level ground.
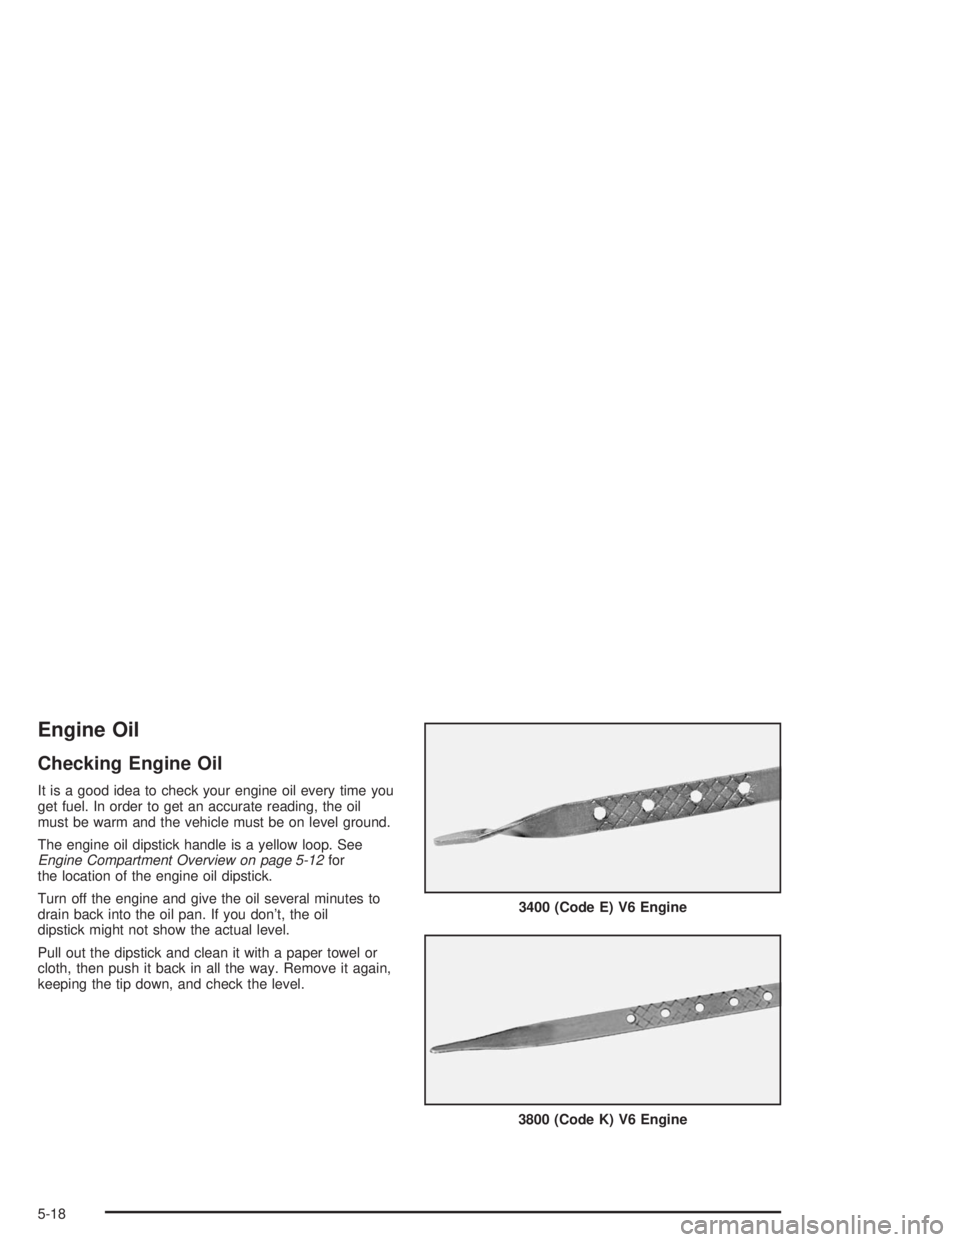
The engine oil dipstick handle is a yellow loop. See
Engine Compartment Overview on page 5-12for
the location of the engine oil dipstick.
Turn off the engine and give the oil several minutes to
drain back into the oil pan. If you don’t, the oil
dipstick might not show the actual level.
Pull out the dipstick and clean it with a paper towel or
cloth, then push it back in all the way. Remove it again,
keeping the tip down, and check the level.3400 (Code E) V6 Engine
3800 (Code K) V6 Engine
5-18
Page 284 of 416
Automatic Transaxle Fluid
When to Check and Change
A good time to check your automatic transaxle �uid
level is when the engine oil is changed.
Change both the �uid and �lter every 50,000 miles
(83 000 km) if the vehicle is mainly driven under one
or more of these conditions:
In heavy city traffic where the outside temperature
regularly reaches 90°F (32°C) or higher.
In hilly or mountainous terrain.
When doing frequent trailer towing.
Uses such as found in taxi, police or
delivery service.
If you do not use your vehicle under any of
these conditions, change the �uid and �lter at
100,000 miles (166 000 km).
SeeScheduled Maintenance on page 6-4.
How to Check
Because this operation can be a little difficult, you may
choose to have this done at the dealership service
department.
If you do it yourself, be sure to follow all the instructions
here, or you could get a false reading on the dipstick.
Notice:Too much or too little �uid can damage the
transaxle. Too much can mean that some of the �uid
could come out and fall on hot engine or exhaust
system parts, starting a �re. Too little �uid could
cause the transaxle to overheat. Be sure to get an
accurate reading if you check the transaxle �uid.
Wait at least 30 minutes before checking the transaxle
�uid level if you have been driving:
When outside temperatures are above 90°F (32°C).
At high speed for quite a while.
In heavy traffic – especially in hot weather.
While pulling a trailer.
To get the right reading, the �uid should be at normal
operating temperature, which is 180°F to 200°F
(82°C to 93°C).
5-28
Page 403 of 416
Chains, Tires..................................................5-80
Change Engine Oil Message............................3-47
Check
Engine Light...............................................3-39
Check Engine Light.........................................3-39
Checking Coolant............................................5-33
Checking Engine Oil........................................5-18
Checking Things Under the Hood......................5-10
Checking Your Restraint Systems......................1-57
Chemical Paint Spotting.................................5-100
Child Restraints
Child Restraint Systems...............................1-35
Infants and Young Children...........................1-31
Lower Anchorages and Top Tethers for
Children (LATCH System)..........................1-40
Older Children.............................................1-29
Securing a Child Restraint Designed for the
LATCH System........................................1-42
Securing a Child Restraint in a Rear Seat
Position..................................................1-43
Securing a Child Restraint in the Right Front
Seat Position...........................................1-45
Top Strap...................................................1-38
Top Strap Anchor Location............................1-40
Where to Put the Restraint...........................1-38
Chime Level Adjustment..................................3-96
CHIRP (Horn Chirp Timer)...............................2-48
Cigarette Lighter.............................................3-20Cleaning
Inside of Your Vehicle..................................5-94
Outside of Your Vehicle................................5-97
Underbody Maintenance.............................5-100
Weatherstrips..............................................5-97
Cleaning Aluminum Wheels..............................5-99
Cleaning Exterior Lamps/Lenses.......................5-98
Cleaning Fabric/Carpet....................................5-94
Cleaning Glass Surfaces..................................5-96
Cleaning Interior Plastic Components.................5-96
Cleaning Leather............................................5-96
Cleaning the Top of the Instrument Panel...........5-96
Cleaning Tires................................................5-99
Cleaning Vinyl................................................5-96
Cleaning Windshield and Wiper Blades..............5-98
Climate Control System
Air Filter, Passenger Compartment.................3-27
Dual..........................................................3-21
Compact Spare Tire........................................5-93
Compass Variance..........................................3-53
Content Theft-Deferrent....................................2-15
Control of a Vehicle.......................................... 4-6
Convenience Net............................................2-40
Coolant
Engine Temperature Gage............................3-38
Heater, Engine............................................2-20
Hot Temperature Warning Message................3-45
Cooling.........................................................3-23
3
Page 407 of 416
H
Hazard Warning Flashers................................... 3-6
Head Restraints............................................... 1-6
Headlamp
Aiming.......................................................5-60
Headlamp High/Low-Beam Changer.................... 3-8
Headlamp Wiring...........................................5-103
Headlamps
Bulb Replacement.......................................5-60
Halogen Bulbs............................................5-60
Headlamps, Front Turn Signal, Sidemarker,
and Parking Lamps..................................5-60
Heated Outside Mirrors....................................2-33
Heated Seats................................................... 1-4
Heating.........................................................3-23
Highbeam Out Warning Message......................3-51
Highway Hypnosis...........................................4-24
Hill and Mountain Roads..................................4-24
Hitches..........................................................4-41
HomeLink
®Transmitter....................................2-36
HomeLink®Transmitter, Programming................2-36
Hood
Checking Things Under................................5-10
Release.....................................................5-10
Horn............................................................... 3-7
Hot Coolant Temperature Warning Message........3-45
How to Add Coolant to the Coolant
Recovery Tank............................................5-39How to Add Coolant to the Radiator..................5-42
How to Add Fluid............................................5-30
How to Check........................................5-28, 5-73
How to Check and Add Oil...............................5-25
How to Check Power Steering Fluid..................5-48
How to Inspect the Engine Air Cleaner/Filter.......5-26
How to Use This Manual...................................... ii
How to Wear Safety Belts Properly...................1-15
Hydroplaning..................................................4-20
I
If No Steam Is Coming From Your Engine..........5-36
If Steam Is Coming From Your Engine...............5-35
If the Light Is Flashing.....................................3-40
If the Light Is on Steady..................................3-40
If You Are Caught in a Blizzard.........................4-28
If You Are Stuck in Sand, Mud, Ice or Snow.......4-30
If You Do Decide To Pull A Trailer.....................4-39
Ignition Positions.............................................2-17
Illumination on Remote Activation........................ 2-6
Infants and Young Children, Restraints...............1-31
In�ation - Tire Pressure...................................5-72
Instrument Panel
Cluster.......................................................3-29
Overview..................................................... 3-4
Instrument Panel Brightness.............................3-16
7