brake CHEVROLET OPTRA 5 2007 1.G User Guide
[x] Cancel search | Manufacturer: CHEVROLET, Model Year: 2007, Model line: OPTRA 5, Model: CHEVROLET OPTRA 5 2007 1.GPages: 422, PDF Size: 2.39 MB
Page 118 of 422

Torque Lock (Automatic Transaxle)
If you are parking on a hill and you do not shift
your transaxle into PARK (P) properly, the
weight of the vehicle may put too much force on
the parking pawl in the transaxle. You may
find it difficult to pull the shift lever out of PARK (P).
This is called “torque lock.” To prevent torque
lock, set the parking brake and then shift
into PARK (P) properly before you leave the
driver’s seat. To find out how, seeShifting Into
Park (P) (Automatic Transaxle) on page 117.
When you are ready to drive, move the shift
lever out of PARK (P)beforeyou release the
parking brake.
If torque lock does occur, you may need to have
another vehicle push yours a little uphill to
take some of the pressure from the parking pawl
in the transaxle, so you can pull the shift lever
out of PARK (P).
Shifting Out of Park (P)
(Automatic Transaxle)
An automatic transaxle vehicle has an automatic
transaxle shift lock control system which locks
the shift lever in PARK (P) when the ignition is in
LOCK. You have to fully apply your regular
brakes before you can shift from PARK (P) when
the ignition is turned to ON. SeeAutomatic
Transaxle Operation on page 110.
If you cannot shift out of PARK (P) while holding
the brake pedal down, try this:
1. Set the parking brake.
2. Turn the ignition off and remove the key.
3. Pry off the cover over the shift-lock release
slot using a small, flat object. The shift-lock
release slot is located at the top of the
shift lever.
118
Page 119 of 422

4. Insert the key into
the shift-lock release
slot and press
and hold the key.
5. Shift to NEUTRAL (N).
6. Remove the key from the shift-lock release
slot, insert the key into the ignition and start
the engine.
7. Replace the shift-lock release slot cover.
8. Apply and hold the regular brake fully
and release the parking brake.
9. Shift to the gear you want.
10. Have the system fixed as soon as you can.Parking Your Vehicle
(Manual Transaxle)
Before leaving your vehicle, do the following:
1. Hold the brake pedal down and firmly apply
the parking brake.
2. Fully press in the clutch pedal and place
the shift lever into the gear position as
stated below:
•When parking on level ground, place the
shift lever into NEUTRAL.
•When parking downhill, place the shift lever
in REVERSE (R).
•When parking uphill, place the shift lever in
FIRST (1).
3. After shifting, turn the ignition to LOCK,
remove the key and release the clutch.
119
Page 122 of 422

Running the Engine While Parked
It is better not to park with the engine running. But if
you ever have to, here are some things to know.
{CAUTION:
Idling the engine with the climate control
system off could allow dangerous exhaust
into your vehicle. See the earlier caution
underEngine Exhaust on page 121.
Also, idling in a closed-in place can let
deadly carbon monoxide (CO) into your
vehicle even if the climate control fan is at
the highest setting. One place this can
happen is a garage. Exhaust — with
CO — can come in easily. NEVER park in
a garage with the engine running.
Another closed-in place can be a blizzard.
SeeWinter Driving on page 231.
{CAUTION:
It can be dangerous to get out of your
vehicle if the automatic transaxle shift
lever is not fully in PARK (P) with the
parking brake rmly set. Your vehicle can
roll. Do not leave your vehicle when the
engine is running unless you have to.
If you have left the engine running, the
vehicle can move suddenly. You or others
could be injured. To be sure your vehicle
will not move, even when it is on fairly
level ground, always set the parking brake
and move the automatic transaxle shift
lever to PARK (P), or the manual transaxle
shift lever to NEUTRAL.
Follow the proper steps to be sure your vehicle
will not move. If you have an automatic transaxle,
seeShifting Into Park (P) (Automatic Transaxle)
on page 117.
122
Page 133 of 422
Instrument Panel Overview........................ 136
Hazard Warning Flashers.......................... 140
Other Warning Devices............................. 140
Horn.......................................................... 140
Tilt Wheel.................................................. 141
Turn Signal/Multifunction Lever.................. 141
Turn and Lane-Change Signals................. 142
Headlamp High/Low-Beam Changer.......... 142
Flash-to-Pass............................................ 143
Windshield Wipers..................................... 143
Windshield Washer.................................... 144
Rear Window Wiper/Washer
(Hatchback and Wagon Only)................ 145
Cruise Control........................................... 145
Exterior Lamps.......................................... 148
Headlamps on Reminder........................... 149
Daytime Running Lamps (DRL)................. 149
Fog Lamps................................................ 150
Instrument Panel Brightness...................... 150
Dome Lamp.............................................. 151
Map Lamps............................................... 151
Inadvertent Power Battery Saver............... 152Accessory Power Outlet(s)........................ 152
Ashtray(s) and Cigarette Lighter................ 153
Clock......................................................... 154
Climate Controls......................................... 155
Climate Control System............................. 155
Outlet Adjustment...................................... 159
Passenger Compartment Air Filter............. 159
Warning Lights, Gages, and Indicators........ 161
Instrument Panel Cluster........................... 161
Speedometer and Odometer...................... 163
Trip Odometer........................................... 163
Tachometer............................................... 163
Safety Belt Reminder Light........................ 164
Safety Belt Reminder Tone....................... 164
Airbag Readiness Light............................. 164
Passenger Airbag Status Indicator............. 165
Charging System Light.............................. 167
Brake System Warning Light..................... 168
Anti-Lock Brake System Warning Light........ 169
Speed Sensitive Power Steering (SSPS)
Warning Light......................................... 170
Section 3 Instrument Panel
133
Page 146 of 422
Setting Cruise Control
{CAUTION:
If you leave your cruise control on when
you are not using cruise, you might hit a
button and go into cruise when you do not
want to. You could be startled and even
lose control. Keep the cruise control switch
off until you want to use cruise control.
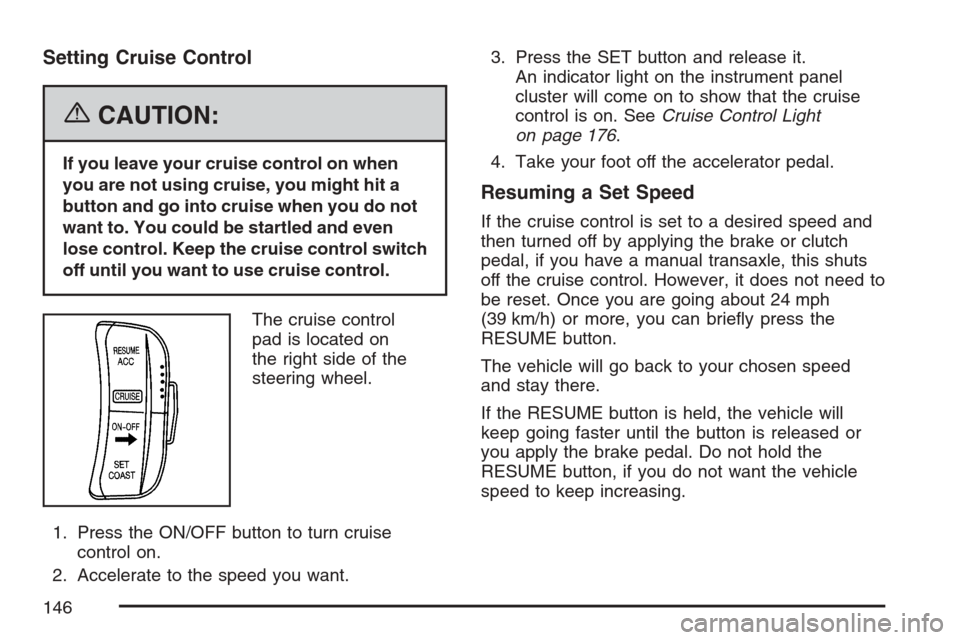
The cruise control
pad is located on
the right side of the
steering wheel.
1. Press the ON/OFF button to turn cruise
control on.
2. Accelerate to the speed you want.3. Press the SET button and release it.
An indicator light on the instrument panel
cluster will come on to show that the cruise
control is on. SeeCruise Control Light
on page 176.
4. Take your foot off the accelerator pedal.
Resuming a Set Speed
If the cruise control is set to a desired speed and
then turned off by applying the brake or clutch
pedal, if you have a manual transaxle, this shuts
off the cruise control. However, it does not need to
be reset. Once you are going about 24 mph
(39 km/h) or more, you can briefly press the
RESUME button.
The vehicle will go back to your chosen speed
and stay there.
If the RESUME button is held, the vehicle will
keep going faster until the button is released or
you apply the brake pedal. Do not hold the
RESUME button, if you do not want the vehicle
speed to keep increasing.
146
Page 148 of 422
Using Cruise Control on Hills
How well your cruise control will work on hills
depends upon your speed, load and the steepness
of the hills. When going up steep hills, you may
have to step on the accelerator pedal to maintain
your speed. When going downhill, you may
have to brake or shift to a lower gear to keep your
speed down. Applying the brake pedal will turn
off the cruise control. Many drivers find this to be
too much trouble and do not use cruise control
on steep hills.
Ending Cruise Control
There are two ways to turn off the cruise control:
•Step lightly on the brake pedal, or press
the clutch pedal, if you have a manual
transaxle.
•Press the ON/OFF button on the cruise
control pad.
Erasing Speed Memory
The cruise control set speed memory can be
erased by turning off the cruise control or
the ignition.
Exterior Lamps
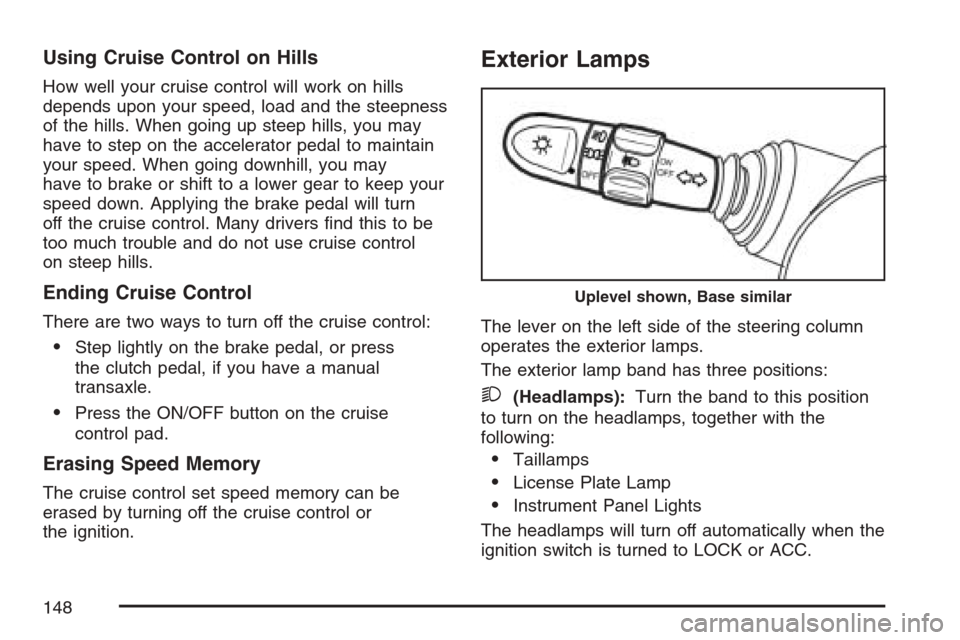
The lever on the left side of the steering column
operates the exterior lamps.
The exterior lamp band has three positions:
2(Headlamps):Turn the band to this position
to turn on the headlamps, together with the
following:
•Taillamps
•License Plate Lamp
•Instrument Panel Lights
The headlamps will turn off automatically when the
ignition switch is turned to LOCK or ACC.
Uplevel shown, Base similar
148
Page 149 of 422
;(Parking Lamps):Turn the band to this
position to turn on the parking lamps, together
instrument panel lights, taillamps, and license
plate lamp.
OFF:Turn the band to this position to turn
all lamps off except the Daytime Running
Lamps (DRL).
Headlamps on Reminder
If you open the driver’s door with the ignition
turned to LOCK or ACC while leaving the lamps
on, you will hear a warning chime.
Daytime Running Lamps (DRL)
Daytime Running Lamps (DRL) can make it easier
for others to see the front of your vehicle during the
day. DRL can be helpful in many different driving
conditions, but they can be especially helpful in the
short periods after dawn and before sunset.The DRL system will make your low-beam
headlamps come on in daylight when the following
conditions are met:
•The ignition is on.
•The exterior lamp band is in OFF or in the
parking lamp position.
•The parking brake is released.
An indicator light will come on when the DRL are
on. SeeDaytime Running Lamps (DRL)
Indicator Light on page 176.
When the DRL system is on, the taillamps,
sidemarker lamps, parking lamps and instrument
panel lights will not be illuminated unless you
have turned the exterior lamps control to
the parking lamp or headlamp position.
The DRL system will turn off when one of the
following conditions are met:
•The ignition is off.
•The parking brakes are on.
•The high-beam headlamps are on.
•The low-beam headlamps are on.
•The flash-to-pass feature is used.
As with any vehicle, you should turn on the
regular headlamp system when you need it.
149
Page 168 of 422
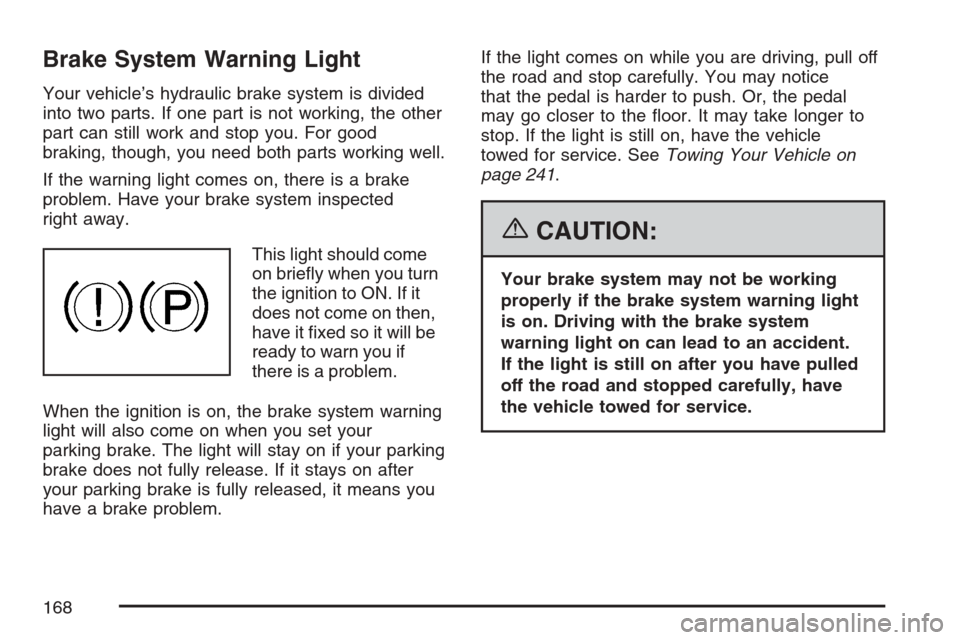
Brake System Warning Light
Your vehicle’s hydraulic brake system is divided
into two parts. If one part is not working, the other
part can still work and stop you. For good
braking, though, you need both parts working well.
If the warning light comes on, there is a brake
problem. Have your brake system inspected
right away.
This light should come
on briefly when you turn
the ignition to ON. If it
does not come on then,
have it fixed so it will be
ready to warn you if
there is a problem.
When the ignition is on, the brake system warning
light will also come on when you set your
parking brake. The light will stay on if your parking
brake does not fully release. If it stays on after
your parking brake is fully released, it means you
have a brake problem.If the light comes on while you are driving, pull off
the road and stop carefully. You may notice
that the pedal is harder to push. Or, the pedal
may go closer to the floor. It may take longer to
stop. If the light is still on, have the vehicle
towed for service. SeeTowing Your Vehicle on
page 241.
{CAUTION:
Your brake system may not be working
properly if the brake system warning light
is on. Driving with the brake system
warning light on can lead to an accident.
If the light is still on after you have pulled
off the road and stopped carefully, have
the vehicle towed for service.
168
Page 169 of 422
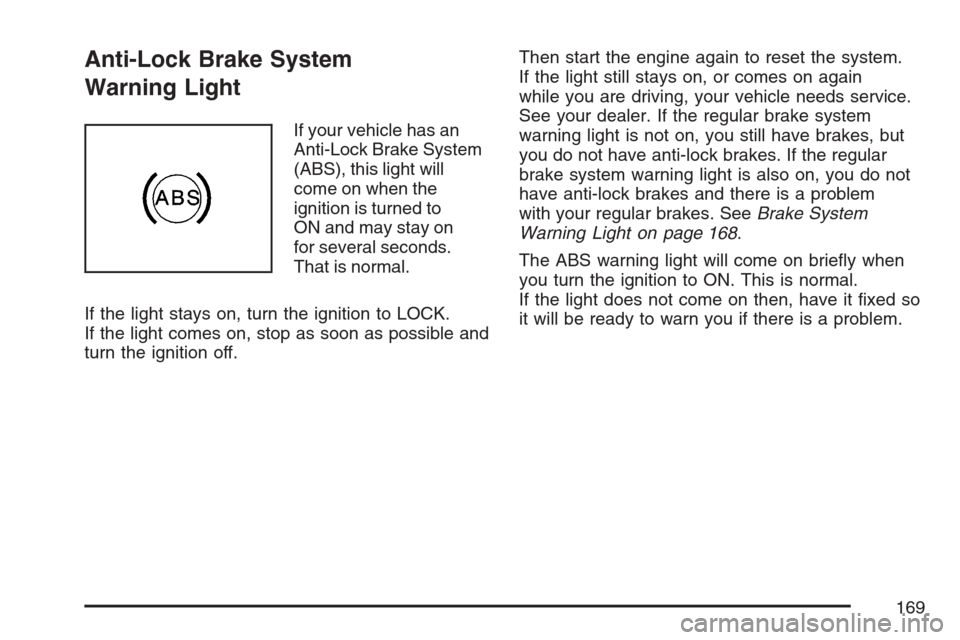
Anti-Lock Brake System
Warning Light
If your vehicle has an
Anti-Lock Brake System
(ABS), this light will
come on when the
ignition is turned to
ON and may stay on
for several seconds.
That is normal.
If the light stays on, turn the ignition to LOCK.
If the light comes on, stop as soon as possible and
turn the ignition off.Then start the engine again to reset the system.
If the light still stays on, or comes on again
while you are driving, your vehicle needs service.
See your dealer. If the regular brake system
warning light is not on, you still have brakes, but
you do not have anti-lock brakes. If the regular
brake system warning light is also on, you do not
have anti-lock brakes and there is a problem
with your regular brakes. SeeBrake System
Warning Light on page 168.
The ABS warning light will come on briefly when
you turn the ignition to ON. This is normal.
If the light does not come on then, have it fixed so
it will be ready to warn you if there is a problem.
169
Page 205 of 422
Your Driving, the Road, and
Your Vehicle............................................ 206
Defensive Driving...................................... 206
Drunken Driving........................................ 207
Control of a Vehicle.................................. 210
Braking...................................................... 210
Anti-Lock Brake System (ABS).................. 211
Braking in Emergencies............................. 213
Steering.................................................... 214
Off-Road Recovery.................................... 216
Passing..................................................... 217
Loss of Control.......................................... 219
Driving at Night......................................... 220
Driving in Rain and on Wet Roads............ 222City Driving............................................... 225
Freeway Driving........................................ 226
Before Leaving on a Long Trip.................. 227
Highway Hypnosis..................................... 228
Hill and Mountain Roads........................... 229
Winter Driving........................................... 231
If Your Vehicle is Stuck in Sand, Mud,
Ice, or Snow.......................................... 235
Rocking Your Vehicle to Get It Out........... 236
Loading Your Vehicle................................ 236
Towing........................................................ 241
Towing Your Vehicle ................................. 241
Recreational Vehicle Towing...................... 242
Towing a Trailer........................................ 243
Section 4 Driving Your Vehicle
205