warning lights CHEVROLET OPTRA 5 2007 1.G Owners Manual
[x] Cancel search | Manufacturer: CHEVROLET, Model Year: 2007, Model line: OPTRA 5, Model: CHEVROLET OPTRA 5 2007 1.GPages: 422, PDF Size: 2.39 MB
Page 1 of 422
Seats and Restraint Systems
....................... 7
Front Seats
.............................................. 9
Rear Seats
............................................. 16
Safety Belts
............................................ 18
Child Restraints
...................................... 38
Airbag System
........................................ 66
Restraint System Check
......................... 84
Features and Controls
................................ 87
Keys
....................................................... 89
Doors and Locks
.................................... 95
Windows
............................................... 100
Theft-Deterrent Systems
....................... 103
Starting and Operating Your Vehicle
....... 105Mirrors
.................................................. 123
Storage Areas
...................................... 126
Sunroof
................................................ 131
Instrument Panel
....................................... 133
Instrument Panel Overview
................... 136
Climate Controls
................................... 155
Warning Lights, Gages, and
Indicators
.......................................... 161
Audio System(s)
................................... 178
Driving Your Vehicle
................................. 205
Your Driving, the Road, and
Your Vehicle
..................................... 206
Towing
................................................. 241
2007 Chevrolet Optra Owner ManualM
1
Page 5 of 422
Vehicle Damage Warnings
Also, in this manual you will find these notices:
Notice:These mean there is something
that could damage your vehicle.
A notice tells about something that can damage
the vehicle. Many times, this damage would not be
covered by your vehicle’s warranty, and it could
be costly. But the notice will tell what to do to help
avoid the damage.
When you read other manuals, you might see
CAUTION and NOTICE warnings in different colors
or in different words.
There are also warning labels on the vehicle.
They use the same words, CAUTION or NOTICE.
Vehicle Symbols
The vehicle has components and labels that use
symbols instead of text. Symbols are shown along
with the text describing the operation or information
relating to a specific component, control, message,
gage, or indicator.
If you need help figuring out a specific name of a
component, gage, or indicator, reference the
following topics:
•Seats and Restraint Systems in Section 1
•Features and Controls in Section 2
•Instrument Panel Overview in Section 3
•Climate Controls in Section 3
•Warning Lights, Gages, and Indicators in
Section 3
•Audio System(s) in Section 3
•Engine Compartment Overview in Section 5
5
Page 107 of 422
LOCK:This position locks the steering wheel,
ignition, shift lever and transaxle. This is the only
position in which you can insert or remove the
key. If the steering wheel is locked, move it from
right to left and turn the key to ACC (Accessory).
ACC (Accessory):This position operates
some of the electrical accessories, such as the
radio, but not the climate control system.
ON:This is the position the switch returns after you
start the engine and release the key. The switch
stays in ON when the engine is running. But even
when the engine is not running, you can use ON to
operate the electrical accessories, and to display
some instrument panel warning lights.
START:This position starts the engine. When
the engine starts, release the key. The switch
returns to ON for normal driving. Do not turn
the key to START if the engine is running.
Even if the engine is not running, ACC and ON
allow you to operate electrical accessories,
such as the radio.Starting the Engine
Automatic Transaxle
Move the shift lever to PARK (P) or NEUTRAL (N).
Your engine does not start in any other
position — that is a safety feature. To restart
when the vehicle is already moving, use
NEUTRAL (N) only.
Notice:Shifting into PARK (P) with the vehicle
moving could damage the transaxle. Shift
into PARK (P) only when your vehicle is
stopped.
Manual Transaxle
The gear selector should be in NEUTRAL and the
parking brake engaged. Hold the clutch pedal
to the floor and start the engine. Your vehicle will
not start if the clutch pedal is not all the way
down — that is a safety feature.
107
Page 133 of 422
Instrument Panel Overview........................ 136
Hazard Warning Flashers.......................... 140
Other Warning Devices............................. 140
Horn.......................................................... 140
Tilt Wheel.................................................. 141
Turn Signal/Multifunction Lever.................. 141
Turn and Lane-Change Signals................. 142
Headlamp High/Low-Beam Changer.......... 142
Flash-to-Pass............................................ 143
Windshield Wipers..................................... 143
Windshield Washer.................................... 144
Rear Window Wiper/Washer
(Hatchback and Wagon Only)................ 145
Cruise Control........................................... 145
Exterior Lamps.......................................... 148
Headlamps on Reminder........................... 149
Daytime Running Lamps (DRL)................. 149
Fog Lamps................................................ 150
Instrument Panel Brightness...................... 150
Dome Lamp.............................................. 151
Map Lamps............................................... 151
Inadvertent Power Battery Saver............... 152Accessory Power Outlet(s)........................ 152
Ashtray(s) and Cigarette Lighter................ 153
Clock......................................................... 154
Climate Controls......................................... 155
Climate Control System............................. 155
Outlet Adjustment...................................... 159
Passenger Compartment Air Filter............. 159
Warning Lights, Gages, and Indicators........ 161
Instrument Panel Cluster........................... 161
Speedometer and Odometer...................... 163
Trip Odometer........................................... 163
Tachometer............................................... 163
Safety Belt Reminder Light........................ 164
Safety Belt Reminder Tone....................... 164
Airbag Readiness Light............................. 164
Passenger Airbag Status Indicator............. 165
Charging System Light.............................. 167
Brake System Warning Light..................... 168
Anti-Lock Brake System Warning Light........ 169
Speed Sensitive Power Steering (SSPS)
Warning Light......................................... 170
Section 3 Instrument Panel
133
Page 149 of 422
;(Parking Lamps):Turn the band to this
position to turn on the parking lamps, together
instrument panel lights, taillamps, and license
plate lamp.
OFF:Turn the band to this position to turn
all lamps off except the Daytime Running
Lamps (DRL).
Headlamps on Reminder
If you open the driver’s door with the ignition
turned to LOCK or ACC while leaving the lamps
on, you will hear a warning chime.
Daytime Running Lamps (DRL)
Daytime Running Lamps (DRL) can make it easier
for others to see the front of your vehicle during the
day. DRL can be helpful in many different driving
conditions, but they can be especially helpful in the
short periods after dawn and before sunset.The DRL system will make your low-beam
headlamps come on in daylight when the following
conditions are met:
•The ignition is on.
•The exterior lamp band is in OFF or in the
parking lamp position.
•The parking brake is released.
An indicator light will come on when the DRL are
on. SeeDaytime Running Lamps (DRL)
Indicator Light on page 176.
When the DRL system is on, the taillamps,
sidemarker lamps, parking lamps and instrument
panel lights will not be illuminated unless you
have turned the exterior lamps control to
the parking lamp or headlamp position.
The DRL system will turn off when one of the
following conditions are met:
•The ignition is off.
•The parking brakes are on.
•The high-beam headlamps are on.
•The low-beam headlamps are on.
•The flash-to-pass feature is used.
As with any vehicle, you should turn on the
regular headlamp system when you need it.
149
Page 161 of 422
Warning Lights, Gages, and
Indicators
This part describes the warning lights and gages
that may be on your vehicle. The pictures will
help you locate them.
Warning lights and gages can signal that
something is wrong before it becomes serious
enough to cause an expensive repair or
replacement. Paying attention to your warning
lights and gages could also save you or others
from injury.
Warning lights come on when there may be or
is a problem with one of your vehicle’s functions.
As you will see in the details on the next few
pages, some warning lights come on briefly when
you start the engine just to let you know they
are working. If you are familiar with this section,
you should not be alarmed when this happens.Gages can indicate when there may be or is a
problem with one of your vehicle’s functions.
Often gages and warning lights work together to
let you know when there is a problem with
your vehicle.
When one of the warning lights comes on and
stays on as you are driving, or when one of
the gages shows there may be a problem, check
the section that tells you what to do about it.
Please follow this manual’s advice. Waiting to do
repairs can be costly and even dangerous. So
please get to know your warning lights and gages.
They are a big help.
Instrument Panel Cluster
Your instrument panel cluster is designed to let
you know at a glance how your vehicle is running.
You will know how fast you are going, how
much fuel you are using, and many other things
you will need to drive safely and economically.
161
Page 162 of 422
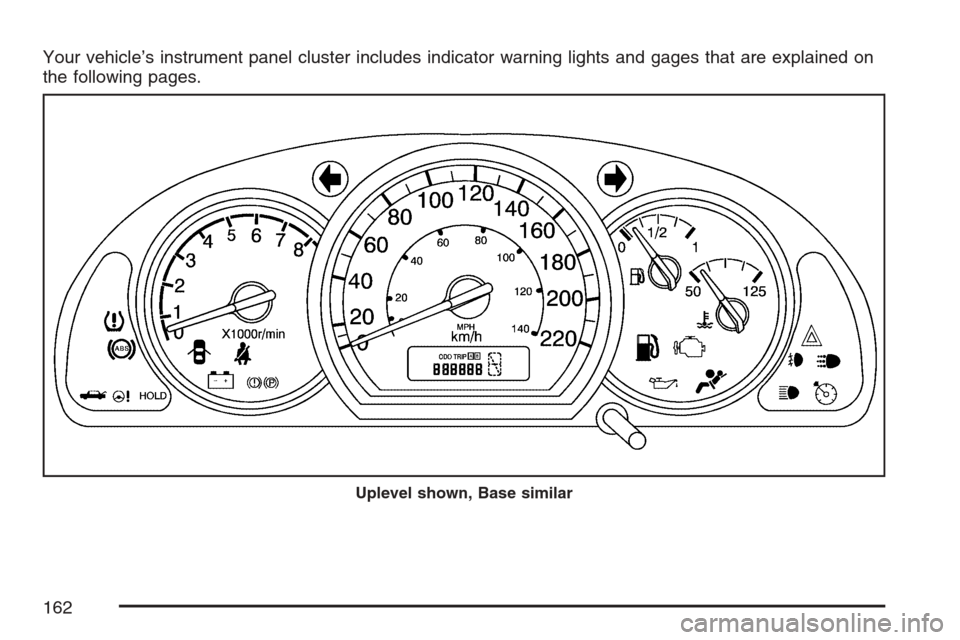
Your vehicle’s instrument panel cluster includes indicator warning lights and gages that are explained on
the following pages.
Uplevel shown, Base similar
162
Page 268 of 422
Engine Coolant
The cooling system in your vehicle is filled with
DEX-COOL®engine coolant. This coolant is
designed to remain in your vehicle for five years
or 150,000 miles (240 000 km), whichever
occurs first, if you add only DEX-COOL
®extended
life coolant.
The following explains your cooling system and
how to add coolant when it is low. If you have
a problem with engine overheating, seeEngine
Overheating on page 271.
A 50/50 mixture of clean, drinkable water and
DEX-COOL
®coolant will:
•Give freezing protection down to
−34°F (−37°C).
•Give boiling protection up to 265°F (129°C).
•Protect against rust and corrosion.
•Help keep the proper engine temperature.
•Let the warning lights and gages work as
they should.Notice:Using coolant other than DEX-COOL
®
may cause premature engine, heater core,
or radiator corrosion. In addition, the engine
coolant may require changing sooner, at
the �rst maintenance service after each
30,000 miles (50 000 km) or 24 months,
whichever occurs �rst. Any repairs would not
be covered by your warranty. Always use
DEX-COOL
®(silicate-free) coolant in your
vehicle.
What to Use
Use a mixture of one-half clean, drinkable water
and one-half DEX-COOL®coolant which will
not damage aluminum parts. If you use this coolant
mixture, you do not need to add anything else.
268
Page 422 of 422
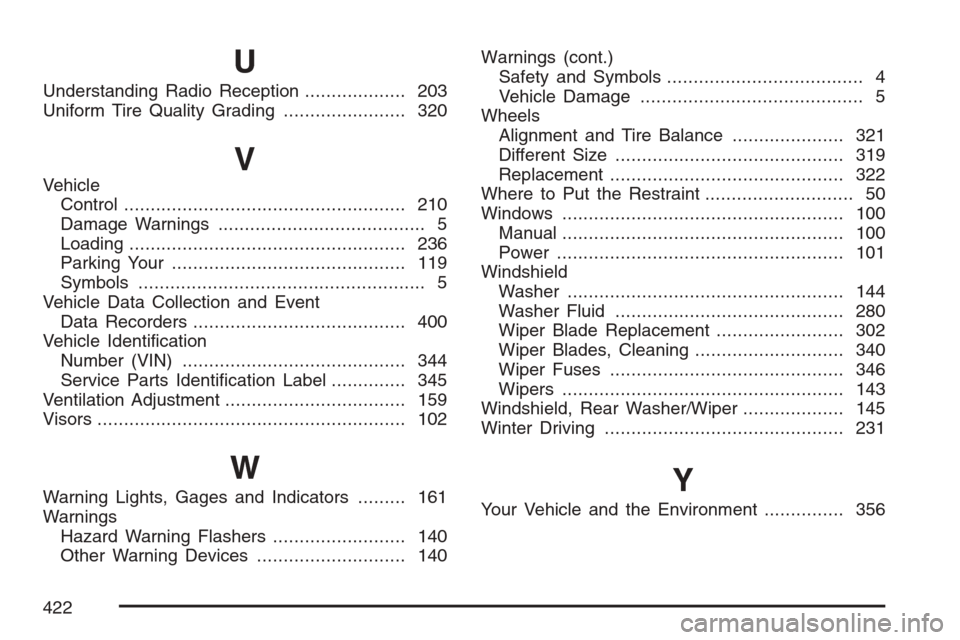
U
Understanding Radio Reception................... 203
Uniform Tire Quality Grading....................... 320
V
Vehicle
Control..................................................... 210
Damage Warnings....................................... 5
Loading.................................................... 236
Parking Your............................................ 119
Symbols...................................................... 5
Vehicle Data Collection and Event
Data Recorders........................................ 400
Vehicle Identification
Number (VIN).......................................... 344
Service Parts Identification Label.............. 345
Ventilation Adjustment.................................. 159
Visors.......................................................... 102
W
Warning Lights, Gages and Indicators......... 161
Warnings
Hazard Warning Flashers......................... 140
Other Warning Devices............................ 140Warnings (cont.)
Safety and Symbols..................................... 4
Vehicle Damage.......................................... 5
Wheels
Alignment and Tire Balance..................... 321
Different Size........................................... 319
Replacement............................................ 322
Where to Put the Restraint............................ 50
Windows..................................................... 100
Manual..................................................... 100
Power...................................................... 101
Windshield
Washer.................................................... 144
Washer Fluid........................................... 280
Wiper Blade Replacement........................ 302
Wiper Blades, Cleaning............................ 340
Wiper Fuses............................................ 346
Wipers..................................................... 143
Windshield, Rear Washer/Wiper................... 145
Winter Driving............................................. 231Y
Your Vehicle and the Environment............... 356
422